- 7 - 03/2021
Copyright © 2021, Fast ČR, a.s.
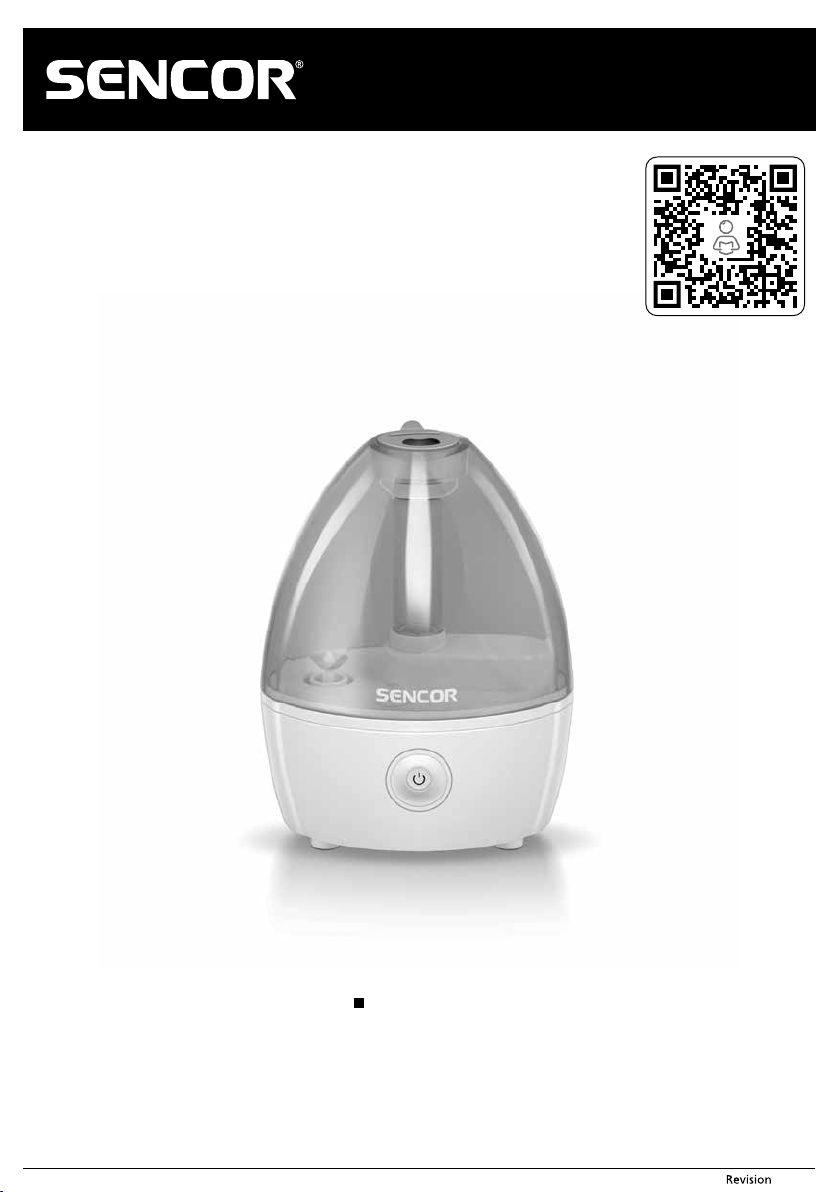
EN Humidifier
User'smanual
■ Prior to using this appliance, please read the user'smanual thoroughly, even in cases,
when one has already familiarised themselves with previous use of similar types of
appliances. Only use the appliance in the manner described in this user’smanual.
Keep this user'smanual in asafe place where it can be easily retrieved for future use.
■ We recommend saving the original cardboard box, packaging material, purchase
receipt and responsibility statement of the vendor or warranty card for at least the
duration of the legal liability for unsatisfactory performance or quality. In the event
of transportation, we recommend that you pack the appliance in the original box
from the manufacturer.
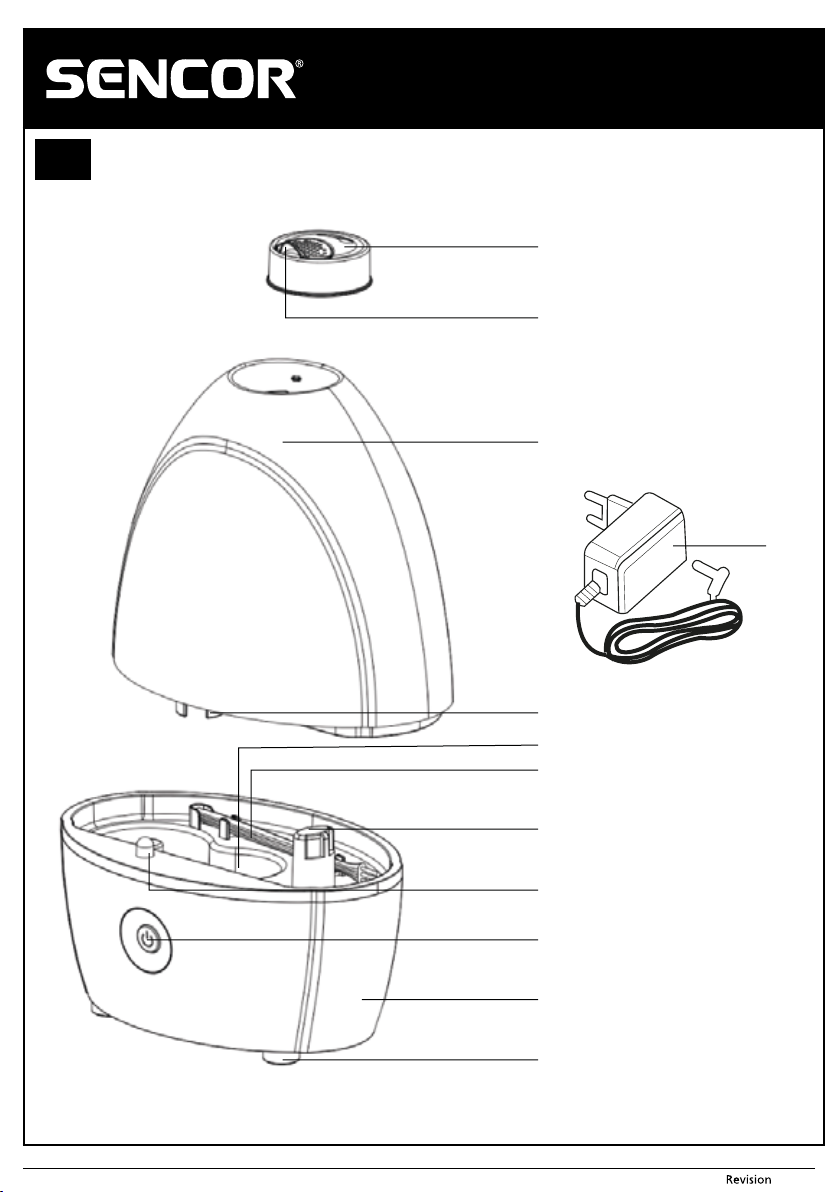
DESCRIPTION OF THE APPLIANCE
A1 Steam outlet nozzle
A2 Pillow for applying drops of
aromatic oil
A3 Water tank
A4 Filling opening cap on the water
tank
A5 Ultrasound disc
A6 Brush
A7 Air outlet
A8 Water tank illumination
A9 Button for On / Off / Operating
mode selection / Low water level in
tank indicator
A10 Base unit
A11 Anti-slip feet
A12 Power adapter
BEFORE FIRST USE
■ Before first use, take the appliance and its accessories out of the packaging material
and remove all promotional labels and stickers. Check that neither the appliance nor
any of its parts is damaged.
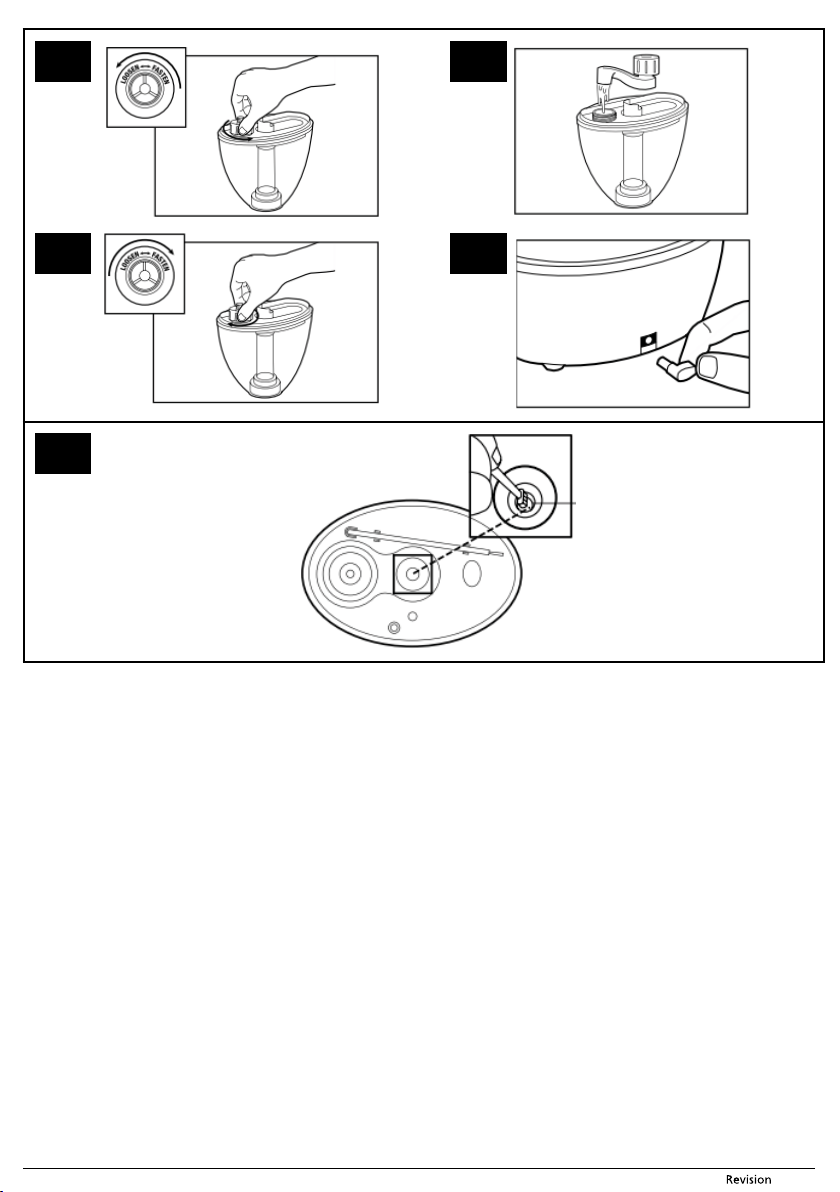
Filling the water tank
1. Check that the power adapter A12 is disconnected.
2. Carefully take the water tank A3 off the base unit A10.
3. Turn the water tank A3 upside down and screw out the cap A4 – see figure B1.
4. Pour clean cold water into the water tank A3 – see figure B2.
5. Screw on the cap A4 – see figure B3. Check that it is tightened firmly to prevent
water from leaking. Turn the water tank over A3 so that the cap A4 is pointing
downwards. If no water is leaking from the water tank A3, then the cap A4 is
properly tightened.
6. Put it back on the base A10.
Connecting the power adapter
1. Insert the connector of the power adapter A12 into the socket located at the rear of
the base unit A10 – see figure B4.
2. Then insert the power adapter plug into aproperly grounded power socket. The
humidifier is now ready for use.
Turning on the humidifier
1. Position the humidifier on adry, even and water-resistant surface approx. 15 cm
away from walls and other objects. Ensure that there is sufficient free space around
the appliance. Do not place the humidifier on carpets, towels, blankets or other
absorptive materials.
2. Press button A9 to start the humidifier.The humidifier will automatically start at low
speed and the illumination A8 will be turned off.
Selecting an operating mode
■ Repeatedly press button A9 to select one of the following operating modes.
Operating mode
Number of times
button A9 is
pressed
Setting Water tank
illumination
Mode 1 Once Low speed Off
Mode 2 Twice Low speed On
Mode 3 Three times High speed On
Mode 4 Four times High speed Off
■ If button A9 is pressed five times, the humidifier will turn off.
Note:
The water tank illumination colour changes automatically when the
illumination is turned on.
Low water level indicator
■ When the water level falls below the set level, the backlight of button A9 will change
from blue to red and the humidifier will turn off automatically.
■ Add water if necessary. Prior to adding water, check that the humidifier is turned
off and that the power adapter A12 is disconnected from the power socket. Then
you may continue according to the instructions in section "Filling the water tank".
Warning:
Never remove the water tank A3 from the base unit A10 while
the humidifier is running. This would automatically turn off the
humidifier and creates a risk of its irreversible damage, risk of
adangerous situation arising and risk of injury.
Setting the direction of outflowing steam
■ The direction of the outflowing steam can be adjusted within an angle of 360 ° by
turning the steam outlet nozzle A1.
Aromatic oil
■ This humidifier has been designed to enable the use of aromatic oil in it. Next to the
steam outlet there is aspecial pillow A2, on to which drops of aromatic oil can be
applied. ALWAYS USE ONLY 3 DROPS OF AROMATIC OIL.
Warning:
Under no condition pour aromatic oil into the water tank A3 or
into the base unit A10. This risks damaging the inner parts of the
humidifier.
CLEANING AND MAINTENANCE
■ Disconnect the adapter power plug from the power socket and allow the appliance
to cool down before cleaning it.
■ Adhere to the following instructions relating to the cleaning and maintenance of the
humidifier. Otherwise its performance may be negatively affected and undesirable
microorganisms may multiply inside.
Warning:
To prevent the risk of injury by electrical shock, do not submerge
the appliance, the adapter or its power cord in water or any
another liquid.
Clean after every use
1. Turn off the humidifier and disconnect the power adapter A12 from the power
socket.
2. Take the water tank A3 off the base unit A10 and also remove the nozzle A1.
3. Screw off the cap A4 and pour any remaining water out into the sink or down the
drain.
4. Rinse out the water tank using clean water and remove any dirt or deposits out of it.
5. Wipe it with adry wiping cloth.
6. To clean the base unit A10 and the nozzle A1, use aclean soft wiping cloth lightly
dampened in warm water. Wipe dry using aclean wiping cloth.
Note:
For cleaning, do not use cleaning products with an abrasive effect,
solvents, etc. that could damage the appliance. No part of this appliance
is intended for washing in adishwasher.
Warning:
Do not leave water inside the water tank A3 for an extended
period of time.
Removing limescale deposits
■ Depending on the hardness of the water that is used and the frequency of use,
we recommend regularly removing water scale deposits, at least once per week.
Limescale deposits can negatively affect the operation of the humidifier and its
lifetime.
■ In the event that your water is too hard, we recommend using distilled water.
1. Turn off the humidifier and disconnect the power adapter A12 from the power
socket.
2. Take the water tank A3 off the base unit A10 and also remove the nozzle A1.
3. Screw off the cap A4 and pour any remaining water out into the sink or down the
drain.
4. Fill the water tank A3 with one cup of white vinegar and allow it to act for 15
minutes. Using a cleaning brush with soft bristles, you can remove limescale
deposits that have accumulated inside the water tank A3.
5. Pour out the contents of the water tank A3 into asink or down the drain and rinse
out the water tank A3 using clean cold water.
6. Wipe it with adry wiping cloth.
Cleaning the ultrasound disc
1. Turn off the humidifier and disconnect the power adapter A12 from the power
socket.
2. Take the water tank A3 off the base unit A10.
3. For cleaning the ultrasound disc A5, use only the supplied cleaning brush A6.
4. Carefully wipe the disc A5 with the cleaning brush A6 to remove any dust and dirt
that is on it – see figure C.
Warning:
Do not push on the cleaning brush A6 so that you do not scratch
or damage the disc A5.