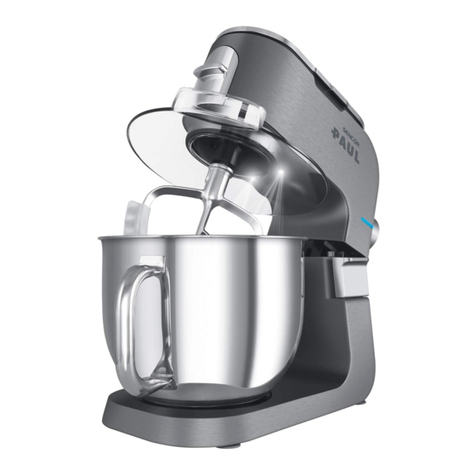
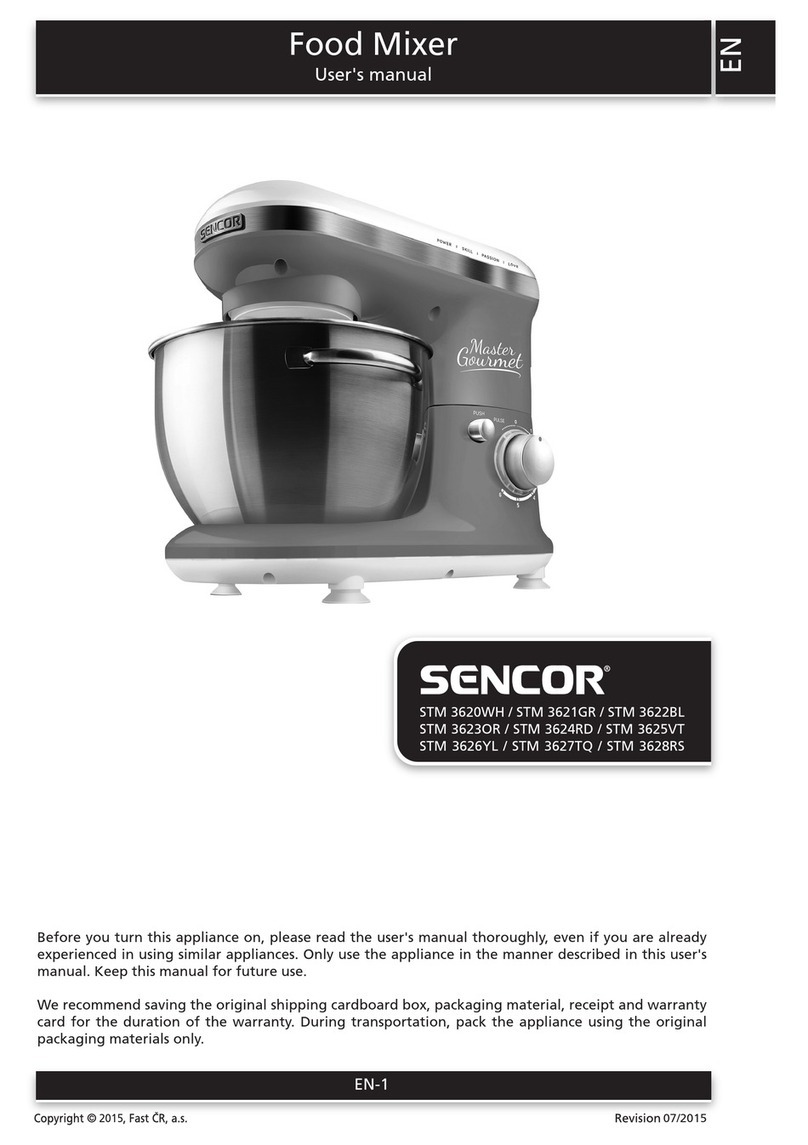
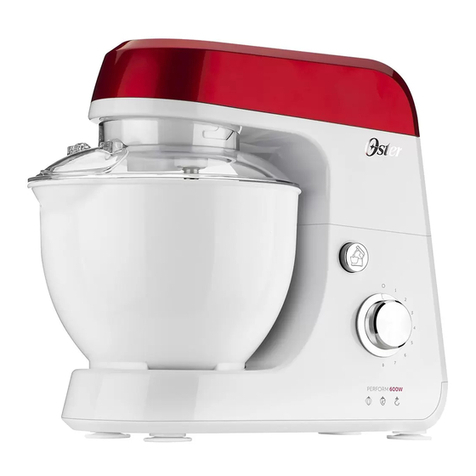
Sencor STM 3620WH-NAA1 User manual

Table Mixer
User's manual
EN
EN-1
Before you turn this appliance on, please read the user's manual thoroughly, even if you are already
experienced in using similar appliances. Only use the appliance in the manner described in this user's
manual. Keep this manual for future use.
2015
07/2015
STM 3620WH-NAA1 / STM 3621GR-NAA1
STM 3622BL-NAA1 / STM 3623OR-NAA1
STM 3624RD-NAA1 / STM 3625VT-NAA1
STM 3626YL-NAA1 / STM 3627TQ-NAA1
STM 3628RS-NAA1 / STM 362XXX-NAA1

EN-2
EN
Table Mixer
STM 3620WH-NAA1 / STM 3621GR-NAA1 / STM 3622BL-NAA1 / STM 3623OR-NAA1 / STM 3624RD-NAA1
STM 3625VT-NAA1 / STM 3626YL-NAA1 / STM 3627TQ-NAA1 / STM 3628RS-NAA1 / STM 362XXX-NAA1
2015
07/2015
CONTENTS
IMPORTANT SAFEGUARDS .............................................................. 3
SPECIAL SAFETY INSTRUCTIONS FOR THIS MACHINE ........................................ 3
DESCRIPTION OF THE APPLIANCE ........................................................ 4
PLANETARY MIXING SYSTEM ........................................................... 5
BEFORE FIRST USE .................................................................... 5
SELECTING ATTACHMENT TYPES ......................................................... 5
ASSEMBLING AND DISASSEMBLING THE APPLIANCE ........................................ 5
OPERATING THE APPLIANCE ............................................................ 6
QUICK GUIDE TO MIXING .............................................................. 7
CLEANING AND MAINTENANCE ......................................................... 7
STORAGE ............................................................................ 7
TECHNICAL SPECIFICATIONS ............................................................ 8

Table Mixer
STM 3620WH-NAA1 / STM 3621GR-NAA1 / STM 3622BL-NAA1 / STM 3623OR-NAA1 / STM 3624RD-NAA1
STM 3625VT-NAA1 / STM 3626YL-NAA1 / STM 3627TQ-NAA1 / STM 3628RS-NAA1 / STM 362XXX-NAA1
EN
EN-3
2015
07/2015
IMPORTANT SAFEGUARDS
Read the operating instructions carefully before putting the appliance into operation and keep the
instructions including the warranty, the receipt and, if possible, the box with the internal packaging. If
you give this device to other people, please also pass on the operating instructions.
a) Read all instructions.
b) To protect against risk of electrical shock, do not put in water or other liquid.
c) Close supervision is necessary when any appliance is used by or near children.
d) Unplug from the outlet when not in use, before putting on or taking off parts, and before cleaning.
e) Avoid contact with moving parts. Keep hands, hair, clothing, as well as spatulas and other utensils
away from beaters during operation to reduce the risk of injury to persons, and/or damage to the
mixer.
f) Do not operate any appliance with a damaged cord or plug or after the appliance malfunctions, or
is dropped or damaged in any manner. Return appliance to the nearest authorized service facility
for examination, repair or electrical or mechanical adjustment.
g) The use of attachments not recommended or sold by the manufacturer may cause fi re, electric
shock or other injury.
h) Do not use outdoors.
i) Do not let the cord hang over the edge of table or counter.
j) Remove beaters from mixer the before washing.
k) Household use only
l) This appliance has a polarized plug (one blade is wider than the other). To reduce the risk of electric
shock, this plug will fi t in a polarized outlet only one way. If the plug does not fi t fully into the
outlet, reverse the plug. If it still does not fi t, contact a qualifi ed electrician. Do not modify the
plug in any way.
SAVE THESE INSTRUCTIONS
Children and Frail Individuals
• In order to ensure your children‘s safety, please keep all packaging (plastic bags, boxes, polystyrene
etc.) out of their reach.
Caution!
Do not allow small children to play with the plastic bag as there is a danger of suffocation!
• In order to protect children or frail individuals from the hazards of electrical equipment, please
ensure that this device is used only under supervision. This device is not a toy. Do not allow small
children to play with it.
SPECIAL SAFETY INSTRUCTIONS FOR THIS MACHINE
• Only operate this machine under supervision.
• Do not interfere with any safety switches.
• Do not insert anything into the rotating hooks while the machine is working.
• Place the machine on a smooth, fl at and stable working surface.
• Do not insert the mains plug of the machine into the power socket without having installed all the
necessary accessories.

EN-4
EN
Table Mixer
STM 3620WH-NAA1 / STM 3621GR-NAA1 / STM 3622BL-NAA1 / STM 3623OR-NAA1 / STM 3624RD-NAA1
STM 3625VT-NAA1 / STM 3626YL-NAA1 / STM 3627TQ-NAA1 / STM 3628RS-NAA1 / STM 362XXX-NAA1
2015
07/2015
DESCRIPTION OF THE APPLIANCE
A
6
9
qa
7
8
1
2
3
4
5
0
qs
1 Dough hook
2 Balloon whisk
3 A-shaped beater
4 4-litre stainless steel bowl
5 Base unit
6 Pouring shield
7 Mixing head with shaft for connecting attachments A1, A2 or A3
8 Tilt-out arm with open position lock
9 PUSH button for releasing the arm
0 Speed control knob with light
PULSE (pulse mode for short operation at the maximum speed level)
– 0 (turned off to stand-by mode) – speed level setting 1, 2, 3, 4, 5, 6
qa Anti-slip feet with suction cups
qs Storage space for winding up the power cord

Table Mixer
STM 3620WH-NAA1 / STM 3621GR-NAA1 / STM 3622BL-NAA1 / STM 3623OR-NAA1 / STM 3624RD-NAA1
STM 3625VT-NAA1 / STM 3626YL-NAA1 / STM 3627TQ-NAA1 / STM 3628RS-NAA1 / STM 362XXX-NAA1
EN
EN-5
2015
07/2015
PLANETARY MIXING SYSTEM
• The planetary mixing system is based on the principle of dual rotation of the attachment. The
attachment rotates anticlockwise along the inner perimeter of the bowl while rotating around
its own axis in the opposite direction. This ensures that ingredients inside the bowl are processed
thoroughly and evenly.
BEFORE FIRST USE
1. Take the appliance and its accessories out of the packaging materials.
2. Thoroughly wash all parts that are intended to come into contact with food (dough hook A1,
whisk A2, beater A3, the stainless steel mixing bowl A4 and pouring shield A6 using warm
water and a neutral kitchen detergent. Then rinse them with clean water and dry thoroughly with
a fine wiping cloth.
SELECTING ATTACHMENT TYPES
ATTACHMENT TYPE PURPOSE OF USE
Dough hook A1It is used for kneading and preparing heavy and thick doughs containing
yeast, e.g. bread dough.
Beater A3It is used for mixing medium heavy and lighter doughs not containing yeast,
for mixing sauces, creams, fillings, etc.
Whisk A2It is used for whisking whole eggs or egg whites, whipped cream, light
doughs, foamy creams, etc. Do not use it for mixing heavy and thick doughs.
ASSEMBLING AND DISASSEMBLING THE APPLIANCE
• Before you start assembling or disassembling the food mixer, check that it is turned off and
disconnected from the el. power socket.
1. Inserting the mixing bowl
1.1 Place the food mixer on an even, dry surface, for example on a kitchen workbench.
1.2 Release the arm A8 by pressing the PUSH button A9 and tilt it upwards. The arm A8 is locked in
the open position when the PUSH button A9 slides out together with an audible click.
1.3 Place the stainless steel bowl A4 into the hole in the base unit A5 and secure it in place by turning
it clockwise. When the bowl A4 is properly attached, it is not possible to lift it off the base unit
A5.
2. Attaching an attachment (dough hook, beater or whisk)
2.1 If you decide to use the pouring shield A6, then it is necessary to attach it prior to mounting an
attachment. Carefully seat the pouring shield A6 on to the tilt-out arm and secure it in the locked
position by turning it anticlockwise.
2.2 When attaching an attachment, the arm A8 must be secured in the open position, see point 1.2
in chapter Inserting the mixing bowl. Attach one of the attachments to the T-shaped shaft of
the mixing head A7 so that the shaft fits into the hole on the attachment. Push the attachment
towards the mixing head A7 turn it anticlockwise to secure it to the shaft.
2.3 With one hand, hold the attachment and gently pull it downwards. If it is properly secured to the
shaft, it will not come off.

EN-6
EN
Table Mixer
STM 3620WH-NAA1 / STM 3621GR-NAA1 / STM 3622BL-NAA1 / STM 3623OR-NAA1 / STM 3624RD-NAA1
STM 3625VT-NAA1 / STM 3626YL-NAA1 / STM 3627TQ-NAA1 / STM 3628RS-NAA1 / STM 362XXX-NAA1
2015
07/2015
2.4 If you will not be immediately placing ingredients into the mixing bowl A4, press the PUSH button
A9 and tilt the arm A8 to the horizontal position. When the arm A8 is tilted to the horizontal
position, the PUSH button A9 will slide out accompanied by an audible click.
3. Removing the attachment and mixing bowl
3.1 Release the arm A8 by pressing the PUSH button A9 and tilt it upwards. The arm A8 is locked in
the open position when the PUSH button A9 slides out together with an audible click.
3.2 Hold the attachment and gently push it towards the mixing head A7. Then rotate it clockwise until
it is released from the motor shaft and take it off. Turn the mixing bowl A4 anticlockwise and take
it off the base unit A5. Move the arm A8 back to the horizontal position.
OPERATING THE APPLIANCE
1. Unwind the necessary length of power cord from the compartment Aqs.
2. Release the arm A8 by pressing the PUSH button A9 and tilt it out.
3. Into the bowl A4 that is seated in the base unit A5, place the ingredients.
Attention:
The maximum weight of the ingredients that can be processed in a single batch is 1.2kg. When
preparing bread dough, do not process more than 600 g of flour at once. When preparing dough
for sweet pastries (fruit cakes, etc.) it is possible to process no more than 450 g of flour at once.
The maximum number of egg whites that can be whisked at once is 8.
4. Press the PUSH button A9 and tilt the arm A8 together with the attached attachment to the
horizontal position.
5. Make sure that the food mixer is correctly assembled and that the speed control knob A0 is set
to position 0 (stand-by mode). Connect the power cord to the el. power socket. Connection to
a working power socket is indicated by the speed control knob A0 being lit.
6. Use the speed control knob A0 to set the required speed level from 1 to 6. First, set a lower speed
to prevent ingredients from being sprayed around. As soon as they are mixed together, increase the
speed to the required level. The speed can be adjusted at any time as required.
The pulse mode is used for increasing the speed to maximum for a short time. To activate the
pulse mode, turn the speed control knob A0 to the PULSE position and to ensure continuous
operation hold it down in this position. As soon as you release the speed control knob A0, it will
automatically return to position 0 (off).
Attention:
If it is necessary to wipe ingredients off the inside of the mixing bowl A4 and the attachment,
first turn off the food mixer by setting the speed control knob A0 to position 0 (stand-by mode)
and then disconnect it from the power socket. Then wipe away the ingredients using a plastic
spatula.
The maximum operating time is 6 minutes. Do not leave the appliance in continuous operation
for longer than indicated above. This is especially true under a heavy load (e.g. when processing
heave, thick doughs). If the appliance is in operation under heavy load, allow it to cool down for
at least 10 minutes before turning it on again. At lower loads, a cooling time of 3 to 5 minutes
is usually sufficient.
7. After you have finished using the appliance, set the speed control knob A0 to position 0 (stand-by
mode) and disconnect the power cord from the power socket.
8. Disassemble the food mixer according to the instructions included in chapter Assembling and
disassembling the appliance. Use a soft plastic spatula to remove mixes from the mixing bowl A4
and the attachment.
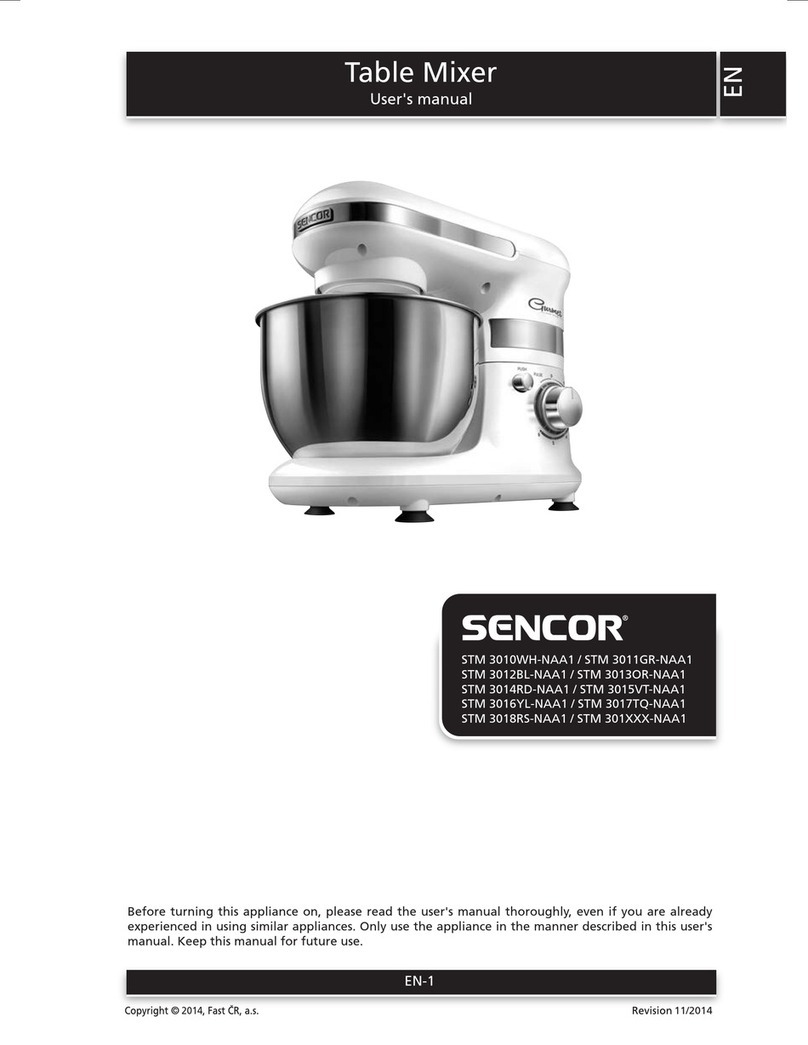
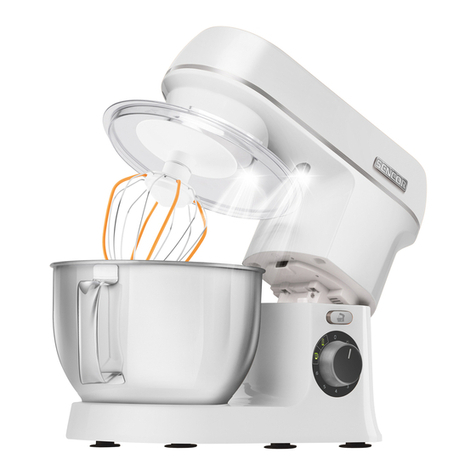
Table Mixer
STM 3620WH-NAA1 / STM 3621GR-NAA1 / STM 3622BL-NAA1 / STM 3623OR-NAA1 / STM 3624RD-NAA1
STM 3625VT-NAA1 / STM 3626YL-NAA1 / STM 3627TQ-NAA1 / STM 3628RS-NAA1 / STM 362XXX-NAA1
EN
EN-7
2015
07/2015
9. Clean out the food mixer after each use according to the instructions in chapter Cleaning and
maintenance
QUICK GUIDE TO MIXING
Attachment type Ingredients Amount Processing time Selecting a speed
Whisk A2Egg whites max. 8 pcs 4 minutes Level 6
Whisk A2Cream 500ml 4–5 minutes Level 6
Whisk A2Mayonnaise 3 egg yolks 1 minute Level 2–4
Beater A3Cake dough approx. 800g 6 minutes Level 2–6
Dough hook A1Bread dough max. 600g of flour 4 minutes Level 2
Note:
The above processing times are only a reference. To prevent ingredients from splattering out of
the bowl, select an initial speed level of 1 or 2. Later set a higher speed based on requirements.
Note:
Beater and dough hook function is max power for 300W.
CLEANING AND MAINTENANCE
• Before cleaning the food mixer, always turn it off by setting the speed control knob A0 to position
0 and disconnect it from the power socket.
• It is necessary to thoroughly clean the attachment after every use in hot water and neutral kitchen
detergent. Then rinse it under clean running water and thoroughly wipe dry with a fine wiping
cloth.
• Wash the stainless steel mixing bowl A4 using hot water and neutral kitchen detergent. Then rinse
it under clean running water and wipe dry with a fine wiping cloth.
Tip:
If you whisked egg whites, first rinse the whisk A2 and the mixing bowl A4 under cold water.
If you were to use hot water, the egg white remains would harden and their removal would be
more difficult.
• To clean the base unit A5 and the arm A8, use a cloth dipped in a weak detergent solution. Then
wipe everything dry.
• Never submerge the appliance or its power cord in water or any other liquids. For cleaning do not
use thinners or solvents, or cleaning agents causing abrasion. Otherwise the surface treatment of
the appliance could be damaged.
STORAGE
• If you will not be using the food mixer, store it in a dry place out of children's reach. Make sure that
the arm A8 is tilted into the horizontal position.

EN-8
EN
Table Mixer
STM 3620WH-NAA1 / STM 3621GR-NAA1 / STM 3622BL-NAA1 / STM 3623OR-NAA1 / STM 3624RD-NAA1
STM 3625VT-NAA1 / STM 3626YL-NAA1 / STM 3627TQ-NAA1 / STM 3628RS-NAA1 / STM 362XXX-NAA1
2015
07/2015
TECHNICAL SPECIFICATIONS
Rated voltage range ............................................................................................................................... 120V
Rated frequency ...................................................................................................................................... 60Hz
Rated power input .........................................................................................................................300W Max
Changes to the text and technical parameters are reserved.

Mezcladora de mesa
Manual del usuario
ES
ES-1
Antes de encender este aparato, por favor lea el manual del usuario minuciosamente, incluso si ya tiene
experiencia usando aparatos similares. Sólo use el aparato en la manera descrita en este manual del
usuario. Conserve este manual para uso futuro.
2015
07/2015
STM 3620WH-NAA1 / STM 3621GR-NAA1
STM 3622BL-NAA1 / STM 3623OR-NAA1
STM 3624RD-NAA1 / STM 3625VT-NAA1
STM 3626YL-NAA1 / STM 3627TQ-NAA1
STM 3628RS-NAA1 / STM 362XXX-NAA1

ES-2
ES
Mezcladora de mesa
STM 3620WH-NAA1 / STM 3621GR-NAA1 / STM 3622BL-NAA1 / STM 3623OR-NAA1 / STM 3624RD-NAA1
STM 3625VT-NAA1 / STM 3626YL-NAA1 / STM 3627TQ-NAA1 / STM 3628RS-NAA1 / STM 362XXX-NAA1
2015
07/2015
CONTENIDO
PROTECCIONES IMPORTANTES .......................................................... 3
INSTRUCCIONES DE SEGURIDAD ESPECIALES PARA ESTA MÁQUINA ............................ 3
DESCRIPCIÓN DEL APARATO ............................................................ 4
SISTEMA DE MEZCLADO PLANETARIO .................................................... 5
ANTES DEL PRIMER USO ............................................................... 5
SELECCIÓN DE TIPOS DE ACCESORIO ..................................................... 5
ENSAMBLE Y DESENSAMBLE DEL APARATO ............................................... 5
OPERACIÓN DEL APARATO ............................................................. 6
GUÍA RÁPIDA PARA MEZCLAR .......................................................... 7
LIMPIEZA Y MANTENIMIENTO .......................................................... 7
ALMACENAMIENTO ................................................................... 8
ESPECIFICACIONES TÉCNICAS ........................................................... 8

Mezcladora de mesa
STM 3620WH-NAA1 / STM 3621GR-NAA1 / STM 3622BL-NAA1 / STM 3623OR-NAA1 / STM 3624RD-NAA1
STM 3625VT-NAA1 / STM 3626YL-NAA1 / STM 3627TQ-NAA1 / STM 3628RS-NAA1 / STM 362XXX-NAA1
ES
ES-3
2015
07/2015
PROTECCIONES IMPORTANTES
Lea las instrucciones de operación cuidadosamente antes de poner el aparato en operación y conserve
las instrucciones incluyendo la garantía, el recibo y, si es posible, la caja con el empaque interno. Si da
este aparato a otras personas, por favor además entregue las instrucciones de operación.
a) Lea todas las instrucciones.
b) Para proteger contra riesgo de descarga eléctrica, no lo coloque en agua u otros líquidos.
c) Se necesita supervisión cercana cuando el aparato sea usado por o cerca de niños.
d) Desconecte del tomacorriente cuando no esté en uso, antes de poner o retirar partes, y antes de la
limpieza.
e) Evite el contacto con las partes móviles. Mantenga las manos, cabello, ropa, así como espátulas
y otros utensilios lejos de los batidores durante la operación para reducir el riesgo de lesiones
a personas, y/o daño a la mezcladora.
f) No opere ningún aparato con un cable o enchufe dañado o después que falle el aparato, o se deje
caer o se dañe en cualquier manera. Regrese el aparato a la instalación de servicio autorizada más
cercana para inspección, reparación, o ajuste eléctrico o mecánico.
g) El uso de accesorios no recomendados o vendidos por el fabricante puede causar incendios,
descarga eléctrica u otras lesiones.
h) No lo use en exteriores.
i) No deje que el cable cuelgue sobre el borde de la mesa o mostrador.
j) Retire los batidores de la mezcladora abres de lavarlos.
k) Uso doméstico únicamente
l) Este aparato tiene un enchufe polarizado (una clavija es más ancha que la otra). Para reducir
el riesgo de descarga eléctrica, este enchufe se adaptará a un tomacorriente polarizado sólo de
una manera. Si el enchufe no se adapta completamente al tomacorriente, invierta el enchufe. Si
todavía no se adapta, póngase en contacto con un electricista calificado. No modifique el enchufe
de ninguna manera.
CONSERVE ESTAS INSTRUCCIONES
Niños y personas frágiles
• Para garantizar la seguridad de sus niños, por favor mantenga todo el empaque (bolsas de plástico,
cajas, poliestireno, etc.) fuera de su alcance.
¡Precaución!
¡No permita que niños pequeños jueguen con la bolsa de plástico ya que existe el peligro de
sofocación!
• Para proteger a los niños o personas frágiles contra los peligros del equipo eléctrico, por favor
asegúrese que este dispositivo sólo se use bajo supervisión. Este dispositivo no es un juguete. No
permita que niños pequeños jueguen con él.
INSTRUCCIONES DE SEGURIDAD ESPECIALES PARA ESTA MÁQUINA
• Sólo opere esta máquina bajo supervisión.
• No interfiera con ningún interruptor de seguridad.
• No inserte nada en los ganchos giratorios mientras la máquina esté en operación.
• Coloque la máquina sobre una superficie de trabajo lisa, plana y estable.
• No inserte el enchufe de la red eléctrica de la máquina en el tomacorriente sin haber instalado
todos los accesorios necesarios.

ES-4
ES
Mezcladora de mesa
STM 3620WH-NAA1 / STM 3621GR-NAA1 / STM 3622BL-NAA1 / STM 3623OR-NAA1 / STM 3624RD-NAA1
STM 3625VT-NAA1 / STM 3626YL-NAA1 / STM 3627TQ-NAA1 / STM 3628RS-NAA1 / STM 362XXX-NAA1
2015
07/2015
DESCRIPCIÓN DEL APARATO
A
6
9
qa
7
8
1
2
3
4
5
0
qs
1 Gancho para amasar
2 Batidor de globo
3 Agitador en forma de A
4 Tazón de acero inoxidable de 4 litros
5 Unidad base
6 Protección para verter
7 Cabeza de mezclado con eje para conexión de accesorios A1, A2 o A3
8 Brazo inclinable con bloqueo de posición abierta
9 Botón PUSH para liberar el brazo
0 Perilla de control de velocidad con luz
PULSE (modo de pulso para operación breve en nivel de velocidad máxima)
– 0 (apagado en modo de espera) – ajuste de nivel de velocidad 1, 2, 3, 4, 5, 6
qa Patas anti-deslizamiento con copas de succión
qs Espacio de almacenamiento para enredar el cable eléctrico

Mezcladora de mesa
STM 3620WH-NAA1 / STM 3621GR-NAA1 / STM 3622BL-NAA1 / STM 3623OR-NAA1 / STM 3624RD-NAA1
STM 3625VT-NAA1 / STM 3626YL-NAA1 / STM 3627TQ-NAA1 / STM 3628RS-NAA1 / STM 362XXX-NAA1
ES
ES-5
2015
07/2015
SISTEMA DE MEZCLADO PLANETARIO
• El sistema de mezclado planetario se basa en el principio de una rotación dual del accesorio.
El accesorio gira en sentido contrario a las manecillas del reloj a lo largo del perímetro interno
del tazón mientras gira alrededor de su propio eje en la dirección opuesta. Esto asegura que los
ingredientes dentro del tazón se procesen minuciosa y uniformemente.
ANTES DEL PRIMER USO
1. Retire el aparato y sus accesorios de los materiales de empaque.
2. Lave minuciosamente todas las partes que se pretenda que entren en contacto con los alimentos
(gancho para masa A1, agitador A2, batidor A3, tazón de mezcla de acero inoxidable A4
y protección para verter A6 con agua tibia y detergente de cocina neutro. Después enjuáguelos
con agua limpia y séquelos minuciosamente con una tela para secar fina.
SELECCIÓN DE TIPOS DE ACCESORIO
TIPO DE ACCESORIO PROPÓSITO DE USO
Gancho de amasar
A1
Se usa para amasar y preparar masas pesadas y espesas que contienen
levadura, por ejemplo masa para pan.
Batidor A3Se usa para mezclar masas medias y más ligeras que no contienen levadura,
para mezclar salsas, cremas, rellenos, etc.
Agitador A2Se usa para batir huevos completos o claras de huevo, crema batida, masas
ligeras, cremas espumosas, etc. No lo use para mezclar masas pesadas
y espesas.
ENSAMBLE Y DESENSAMBLE DEL APARATO
• Antes que comience a ensamblar o desensamblar la mezcladora de alimentos, revise que esté
apagada y desconectada del tomacorriente.
1. Inserción de tazón de mezclado
1.1 Coloque la mezcladora de alimentos sobre una superficie uniforme y seca, por ejemplo sobre un
mostrador de cocina.
1.2 Libere el brazo A8 presionando el botón PUSH A9 e inclínelo hacia arriba. El brazo A8 está bloqueado
en posición abierta cuando el botón PUSH A9 se desliza hacia afuera junto con un clic audible.
1.3 Coloque el tazón de acero inoxidable A4 en el orificio en la unidad de la base A5 y asegúrelo
en su lugar girándolo en sentido de las manecillas del reloj. Cuando el tazón A4 esté conectado
adecuadamente, no es posible levantarlo de la unidad de la base A5.
2. Conexión de un accesorio (gancho de amasar, agitador o batidor)
2.1 Si decide usar la protección para verter A6, entonces es necesario sujetarla antes de instalar un
accesorio. Asiente cuidadosamente la protección para verter A6 sobre el brazo inclinable en
posición bloqueada girándolo en sentido contrario a las manecillas del reloj.
2.2 Cuando conecte un accesorio, el brazo A8 se debe asegurar en la posición abierta, vea el punto 1.2
en el capítulo Inserción de tazón de mezclado. Conecte uno de los accesorios en el eje en forma de
T de la cabeza de mezclado A7 de forma que el eje se ajuste en el orificio del accesorio. Empuje
el accesorio hacia la cabeza de mezclado A7 y gírelo en sentido contrario a las manecillas del reloj
para asegurarlo al eje.

ES-6
ES
Mezcladora de mesa
STM 3620WH-NAA1 / STM 3621GR-NAA1 / STM 3622BL-NAA1 / STM 3623OR-NAA1 / STM 3624RD-NAA1
STM 3625VT-NAA1 / STM 3626YL-NAA1 / STM 3627TQ-NAA1 / STM 3628RS-NAA1 / STM 362XXX-NAA1
2015
07/2015
2.3 Con una mano, sostenga el accesorio y jálelo suavemente hacia abajo. Si está asegurado
adecuadamente al eje, no se saldrá.
2.4 Si no va a colocar ingredientes de inmediato en el tazón de mezclado A4, presione el botón PUSH
A9 e incline el brazo A8 a la posición horizontal. Cuando el brazo A8 está inclinado en posición
horizontal, el botón PUSH A9 se deslizará hacia afuera junto con un clic audible.
3. Retiro de accesorio y tazón de mezclado
3.1 Libere el brazo A8 presionando el botón PUSH A9 e inclínelo hacia arriba. El brazo A8 está bloqueado
en posición abierta cuando el botón PUSH A9 se desliza hacia afuera junto con un clic audible.
3.2 Sostenga el accesorio y empújelo ligeramente hacia la cabeza de mezclado A7. Después gírelo en
sentido de las manecillas del reloj hasta que se libere del eje del motor y retírelo. Gire el tazón de
mezclado A4 en sentido contrario alas manecillas del reloj y retírelo de la unidad de base A5.
Mueva el brazo A8 hacia atrás a la posición horizontal.
OPERACIÓN DEL APARATO
1. Desenrede la longitud necesaria del cable eléctrico del compartimiento Aqs.
2. Libere el brazo A8 presionando el botón PUSH A9 e inclínelo hacia afuera.
3. Dentro del tazón A4 que está asentado en la unidad de la base A5, coloque los ingredientes.
Atención:
El peso máximo de los ingredientes que se puede procesar en un solo lote es de 1.2kg. Cuando
prepare la masa para pan, no procese más de 600 g de harina al mismo tiempo. Cuando prepare
masa para pastas dulces (pasteles de fruta, etc.) es posible procesar no más de 450 g de harina
a la vez. El número máximo de claras de huevo que se pueden batir a la vez es de 8.
4. Presione el botón PUSH A9 e incline el brazo A8 junto con el accesorio conectado en posición
horizontal.
5. Asegúrese que la mezcladora de alimentos esté ensamblada correctamente y que la perilla de
control de velocidad A0 esté ajustada en la posición 0 (modo de espera). Conecte el cable eléctrico
a un tomacorriente. La conexión a un tomacorriente en operación se indica por la perilla de control
de velocidad A0 que se ilumina.
6. Use la perilla de control de velocidad A0 para ajustar el nivel de velocidad requerido desde 1 a 6.
Primero, ajuste la menor velocidad para evitar que los ingredientes salpiquen. Tan pronto como
se mezclen, incremente la velocidad al nivel requerido. La velocidad se puede ajustar en cualquier
momento conforme se requiera.
El modo de pulso se usa para incrementar la velocidad al máximo por un periodo breve. Para activar
el modo de pulso, gire la perilla de control de velocidad A0 a la posición PULSE y para asegurar
la operación continua sosténgala en esta posición. Tan pronto como libere la perilla de control de
velocidad A0, regresará automáticamente a la posición 0 (apagado).
Atención:
Si es necesario limpiar los ingredientes del interior del tazón de mezclado A4 y el accesorio,
primero apague la mezcladora de alimentos ajustando la perilla de control de velocidad A0
a la posición 0 (modo de espera) y después desconéctela del tomacorriente. Después limpie los
ingredientes con una espátula de plástico.
El tiempo de operación máximo es de 6 minutos. No deje el aparato en operación continua
durante más del tiempo indicado anteriormente. Esto es especialmente verdadero bajo carga
pesada (por ejemplo, cuando se procesen masas pesadas y espesas). Si el aparato está en
operación bajo carga pesada, permita que se enfríe durante por lo menos 10 minutos antes
de volverlo a encender. En menores cargas, un tiempo de enfriamiento de 3 a 5 minutos por lo
general es suficiente.

Mezcladora de mesa
STM 3620WH-NAA1 / STM 3621GR-NAA1 / STM 3622BL-NAA1 / STM 3623OR-NAA1 / STM 3624RD-NAA1
STM 3625VT-NAA1 / STM 3626YL-NAA1 / STM 3627TQ-NAA1 / STM 3628RS-NAA1 / STM 362XXX-NAA1
ES
ES-7
2015
07/2015
7. Después de haber terminado de usar el aparato, ajuste la perilla de control de velocidad A0 a la
posición 0 (modo de espera) y desconecte el cable eléctrico del tomacorriente.
8. Desensamble la mezcladora de alimentos de acuerdo con las instrucciones incluidas en el capítulo
Ensamble y desensamble del aparato. Use una espátula de plástico suave para retirar las mezclas
del tazón de mezclado A4 y el accesorio.
9. Limpie la mezcladora de alimentos después de cada uso de acuerdo con las instrucciones del
capítulo Limpieza y mantenimiento.
GUÍA RÁPIDA PARA MEZCLAR
Tipo de accesorio Ingredientes Cantidad Tiempo de
procesamiento
Selección de
velocidad
Agitador A2Claras de huevo máx. 8 pzas 4 minutos Nivel 6
Agitador A2Crema 500ml 4–5 minutos Nivel 6
Agitador A2Mayonesa 3 yemas de huevo 1 minuto Nivel 2-4
Batidor A3Masa de pastel aprox. 800g 6 minutos Nivel 2-6
Gancho de amasar A1Masa de pan máx. 600g de
harina 4 minutos Nivel 2
Nota:
Los tiempos de procesamiento anteriores sólo son para referencia. Para evitar que los
ingredientes salpiquen del tazón, seleccione un nivel de velocidad especial de 1 o 2. Más tarde
ajuste una velocidad mayor en base a los requerimientos.
Nota:
La función de batidor y gancho de amasar tiene potencia máx. para 300W.
LIMPIEZA Y MANTENIMIENTO
• Antes de limpiar la mezcladora de alimentos, siempre apáguela ajustando la perilla de control de
velocidad A0 en la posición 0 y desconéctela del tomacorriente.
• Es necesario limpiar minuciosamente el accesorio después de cada uso en agua caliente y detergente
para cocina neutro. Después enjuáguelo con agua de la llave limpia y séquelo minuciosamente con
una tela para secar fina.
• Lave el tazón de mezclado de acero inoxidable A4 con agua caliente y detergente de cocina
neutro. Después enjuáguelo con agua de la llave limpia y séquelo con una tela para secar fina.
Consejo:
Si batió claras de huevo, primero enjuague el batidor A2 y el tazón de mezclado A4 bajo agua
fría. Si usa agua caliente, los restos de clara de huevo se endurecen y su eliminación sería más
difícil.
• Para limpiar la unidad de base A5 y el brazo A8, use una tela humedecida en una solución de
detergente suave. Después seque todo.
• Nunca sumerja el aparato o su cable eléctrico en agua o cualquier otro líquido. No use adelgazadores
o solventes o agentes de limpieza que causen abrasión para la limpieza. De otra manera se podría
dañar el tratamiento de la superficie del aparato.

ES-8
ES
Mezcladora de mesa
STM 3620WH-NAA1 / STM 3621GR-NAA1 / STM 3622BL-NAA1 / STM 3623OR-NAA1 / STM 3624RD-NAA1
STM 3625VT-NAA1 / STM 3626YL-NAA1 / STM 3627TQ-NAA1 / STM 3628RS-NAA1 / STM 362XXX-NAA1
2015
07/2015
ALMACENAMIENTO
• Si no va a usar la mezcladora de alimentos, guárdela en un lugar seco fuera del alcance de los niños.
Asegúrese que el brazo A8 esté inclinado en posición horizontal.
ESPECIFICACIONES TÉCNICAS
Rango de voltaje nominal ...................................................................................................................... 120V
Frecuencia nominal ................................................................................................................................. 60Hz
Entrada de energía nominal .........................................................................................................300W Máx.
Nos reservamos los cambios al texto y los parámetros técnicos.

Mélangeur de table
Manuel d'utilisation
FR
FR-1
Avant de mettre en marche cet appareil, veuillez lire entièrement le manuel d'utilisation, même si vous
êtes déjà familiers à l'utilisation d'appareils similaires. Utilisez l'appareil uniquement de la manière
décrite dans le présent manuel d'utilisation. Rangez ce manuel pour une utilisation future.
2015
07/2015
STM 3620WH-NAA1 / STM 3621GR-NAA1
STM 3622BL-NAA1 / STM 3623OR-NAA1
STM 3624RD-NAA1 / STM 3625VT-NAA1
STM 3626YL-NAA1 / STM 3627TQ-NAA1
STM 3628RS-NAA1 / STM 362XXX-NAA1

FR-2
FR
Mélangeur de table
STM 3620WH-NAA1 / STM 3621GR-NAA1 / STM 3622BL-NAA1 / STM 3623OR-NAA1 / STM 3624RD-NAA1
STM 3625VT-NAA1 / STM 3626YL-NAA1 / STM 3627TQ-NAA1 / STM 3628RS-NAA1 / STM 362XXX-NAA1
2015
07/2015
TABLE DES MATIÈRES
MESURES DE PROTECTION IMPORTANTES ................................................. 3
CONSIGNES DE SÉCURITÉ PARTICULIÈRES POUR CETTE MACHINE .............................. 3
DESCRIPTION DE L'APPAREIL ............................................................ 4
SYSTÈME DE MÉLANGE PLANÉTAIRE ..................................................... 5
AVANT LA PREMIÈRE UTILISATION ....................................................... 5
SÉLECTION DES TYPES D'ACCESSOIRES .................................................... 5
MONTAGE ET DÉMONTAGE DU HACHOIR À VIANDE ........................................ 5
UTILISATION DE L'APPAREIL ............................................................ 6
GUIDE RAPIDE POUR LE MÉLANGE ...................................................... 7
NETTOYAGE ET ENTRETIEN ............................................................. 7
RANGEMENT ......................................................................... 8
CARACTÉRISTIQUES TECHNIQUES ........................................................ 8

Mélangeur de table
STM 3620WH-NAA1 / STM 3621GR-NAA1 / STM 3622BL-NAA1 / STM 3623OR-NAA1 / STM 3624RD-NAA1
STM 3625VT-NAA1 / STM 3626YL-NAA1 / STM 3627TQ-NAA1 / STM 3628RS-NAA1 / STM 362XXX-NAA1
FR
FR-3
2015
07/2015
MESURES DE PROTECTION IMPORTANTES
Lisez attentivement les instructions relatives au fonctionnement de cet appareil avant de le mettre en
fonctionnement et conservez celles-ci, et même la garantie, le reçu et, si possible, le carton d'emballage
et tous les matériaux d'emballage internes. Si
vous cédez cet appareil à un tiers, donnez-le-lui avec le manuel d'instructions relatives à son
fonctionnement.
Lisez toutes les instructions
b) Pour éviter tout risque d'électrocution, ne le trempez ni dans de l'eau, ni dans un autre liquide.
c) Les enfants qui utilisent cet appareil doivent bénéficier d'une étroite surveillance.
d) Lorsque vous n'utilisez pas cet appareil, au moment d'en retirer des pièces ou de le nettoyez,
débranchez-le de la prise.
e) Évitez de rentrer en contact avec les composants mobiles. Tenez les mains, les vêtements, ainsi
que les spatules et les autres ustensiles loin du batteur/mélangeur lorsque celles-ci sont en
fonctionnement afin d'éviter tout risque de blessures corporelles, ou d'endommager l'appareil.
f) N'utilisez pas l'appareil lorsque son cordon d'alimentation ou sa fiche sont endommagés, lorsqu'il
a présenté un dysfonctionnement, lorsqu'il a subi une chute ou qu'il présente quelque autre
dommage. Retournez l'appareil au centre d'entretien agréé le plus proche pour inspection,
réparation ou réglage.
• L'utilisation d'accessoires non recommandés ou vendus par le fabricant pourrait causer un incendie,
une électrocution ou des blessures.
h) Ne l'utilisez pas à l'extérieur.
i) Ne laissez pas le cordon d'alimentation de l'appareil pendre sur le bord de la table ou du comptoir.
j) Retirez les batteurs du mélangeur avant de le laver.
k) Usage domestique exclusivement
l) Cet appareil est équipé d'une fiche polarisée (une broche est plus grande que l'autre). Afin de
réduire les risques d'électrocution, cette fiche ne se branche sur une prise polarisée que d'une seule
façon. SI la fiche ne rentre pas dans la prise, inversez-la. Si elle ne rentre toujours pas,; contactez un
technicien qualifié. Ne modifiez en aucun cas la fiche.
CONSERVEZ CES INSTRUCTIONS
À propos des enfants et des personnes fragiles
• Tenez tous les matériaux d'emballage (sacs en plastique, cartons, polystyrène, etc.) hors de portée
pour vos enfants afin de garantir leur sécurité.
Attention !
Ne laissez pas les jeunes enfants jouer avec les sacs en plastique, en raison du risque pour eux
de s'étouffer !
• Les enfants ou les personnes fragiles ne doivent utiliser cet appareil que sous étroite surveillance,
afin de s'assurer qu'ils sont protégés contre les risques liés à l'utilisation d'appareils électriques. Cet
appareil n'est pas un jouet. Ne laissez pas les jeunes enfants jouer avec lui.
CONSIGNES DE SÉCURITÉ PARTICULIÈRES POUR CETTE MACHINE
• Cette machine doit être surveillée lorsqu'elle est en fonctionnement.
• Éviter de rentrer en contact avec aucun commutateur de sécurité.
• N'insérez rien dans les crochets rotatifs lorsque la machine est en fonctionnement.
• Placez la machine sur une surface de travail régulière, plane et stable.
• N'insérez pas la fiche de la machine dans la prise électrique sans avoir installé tous ses accessoires
nécessaires.

FR-4
FR
Mélangeur de table
STM 3620WH-NAA1 / STM 3621GR-NAA1 / STM 3622BL-NAA1 / STM 3623OR-NAA1 / STM 3624RD-NAA1
STM 3625VT-NAA1 / STM 3626YL-NAA1 / STM 3627TQ-NAA1 / STM 3628RS-NAA1 / STM 362XXX-NAA1
2015
07/2015
DESCRIPTION DE L'APPAREIL
A
6
9
qa
7
8
1
2
3
4
5
0
qs
1 Crochet pétrisseur
2 Fouet ballon
3 Batteur en forme de A
4 Bol en acier inoxydable d'une capacité de 4 litres
5 Socle
6 Couvercle verseur
7 Tête de mélange avec arbre pour le raccord des accessoires A1, A2 or A3
8 Inclinez le bras en le verrouillant à la position ouvert
9 Le bouton-poussoir relâche le bras
0 Bouton de réglage de vitesse avec voyant
PULSE (mode Pulse pour fonctionnement bref à vitesse élevée)
– 0 (passage en mode veille) – réglage de vitesse 1, 2, 3, 4, 5, 6
qa Pieds antidérapants avec ventouses
qs Espace de rangement pour le cordon d'alimentation enroulé
This manual suits for next models
9
Table of contents
Languages:
Other Sencor Mixer manuals

Sencor
Sencor STM 3760WH Repair manual

Sencor
Sencor STM 7900 Repair manual

Sencor
Sencor STM 3750WH Repair manual

Sencor
Sencor SBL 4370 User manual

Sencor
Sencor STM 3620WH User manual

Sencor
Sencor STM 3010WH-NAA1 User manual

Sencor
Sencor SHM 5330 User manual

Sencor
Sencor SBL 5370WH User manual

Sencor
Sencor STM 7900 Repair manual
Popular Mixer manuals by other brands

Altec Lansing
Altec Lansing 1700C SIGNAL PROCESSING Specifications

MULTIQUIP
MULTIQUIP Essick Series Operation and parts manual

Waring
Waring Lund7 WSM7L manual

Tescoma
Tescoma Handy 643690 quick start guide

NUK
NUK Baby Menu operating instructions

Hamilton Beach
Hamilton Beach 64698 - 6 Speed Stand Mixer Use & care guide