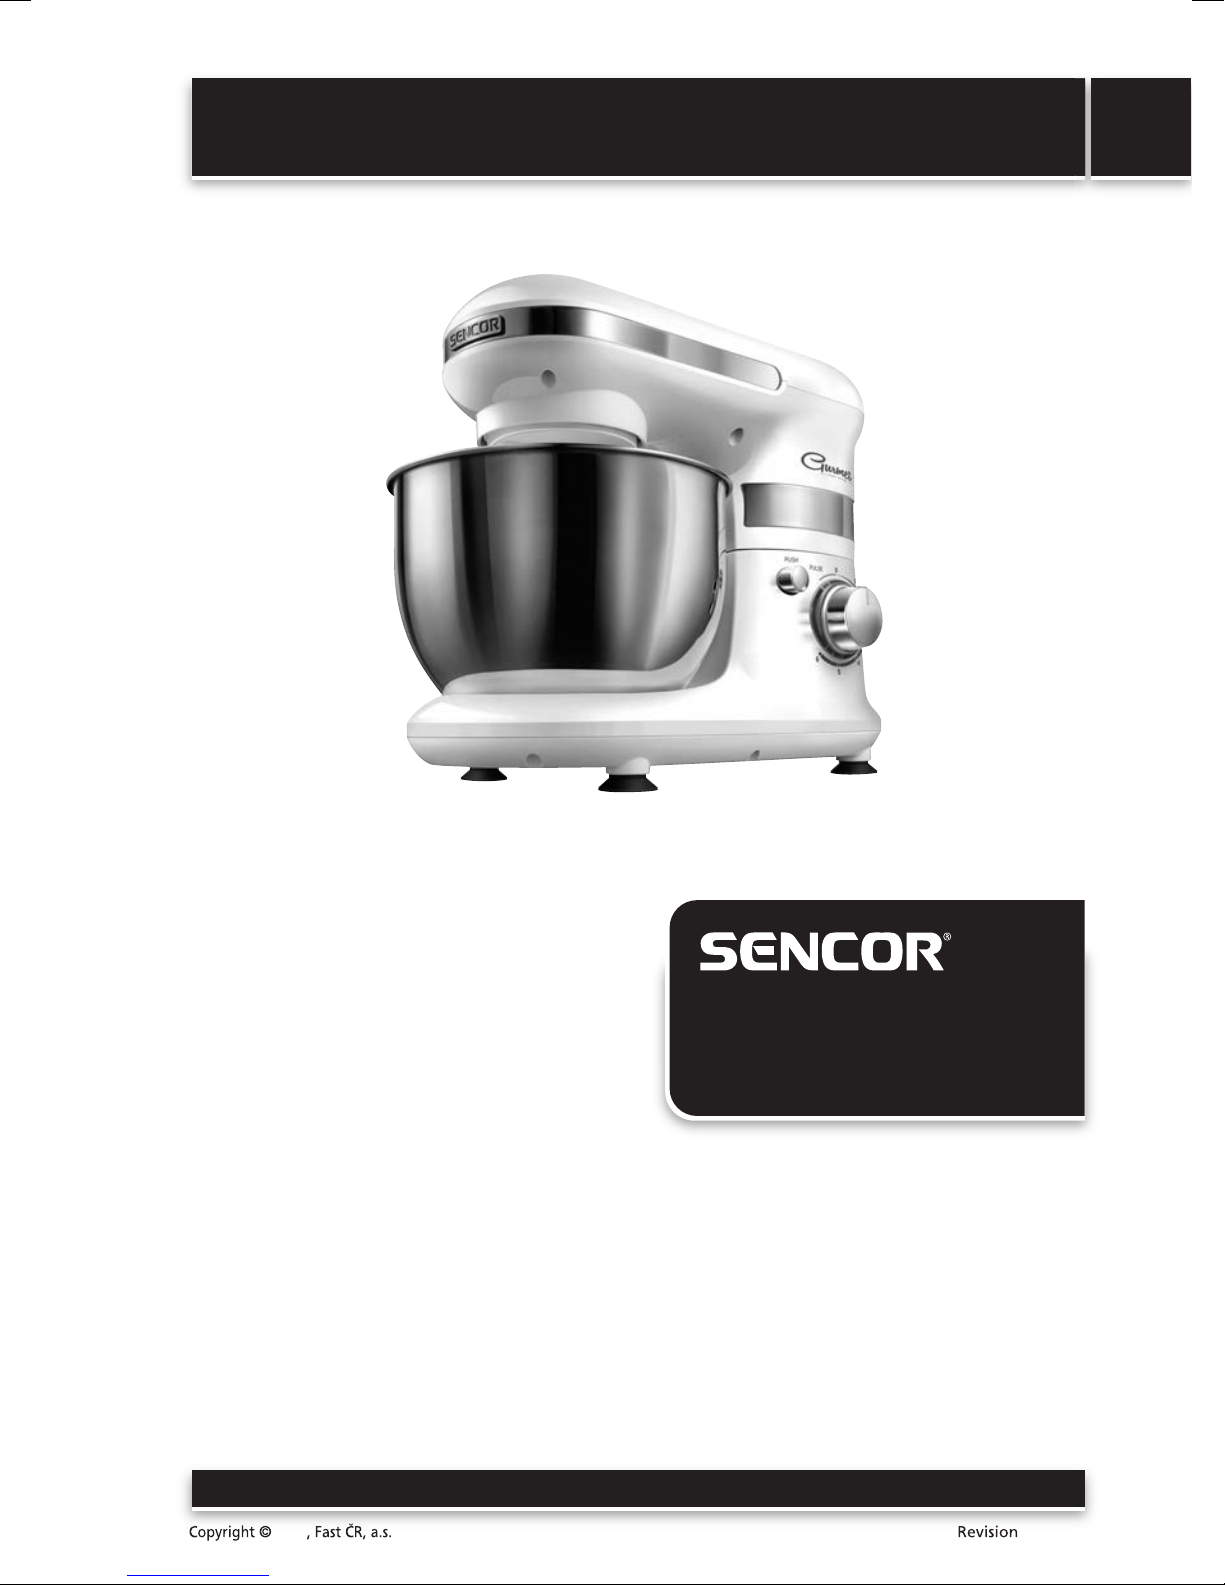
Sencor STM 3010WH-NAA1 User manual

Table Mixer
User's manual
EN
EN-1
Before turning this appliance on, please read the user's manual thoroughly, even if you are already
experienced in using similar appliances. Only use the appliance in the manner described in this user's
manual. Keep this manual for future use.
2014
11/2014
STM 3010WH-NAA1 / STM 3011GR-NAA1
STM 3012BL-NAA1 / STM 3013OR-NAA1
STM 3014RD-NAA1 / STM 3015VT-NAA1
STM 3016YL-NAA1 / STM 3017TQ-NAA1
STM 3018RS-NAA1 / STM 301XXX-NAA1

EN-2
EN
Table Mixer
STM 3010WH-NAA1 / STM 3011GR-NAA1 / STM 3012BL-NAA1 / STM 3013OR-NAA1 / STM 3014RD-NAA1
STM 3015VT-NAA1 / STM 3016YL-NAA1 / STM 3017TQ-NAA1 / STM 3018RS-NAA1 / STM 301XXX-NAA1
2014
11/2014
CONTENTS
IMPORTANT SAFEGUARDS. . . . . . . . . . . . . . . . . . . . . . . . . . . . . . . . . . . . . . . . . . . . . . . . . . . . . . . . . . . . . . 3
SPECIAL SAFETY INSTRUCTIONS FOR THIS MACHINE . . . . . . . . . . . . . . . . . . . . . . . . . . . . . . . . . . . . . . . . 3
DESCRIPTION OF THE APPLIANCE . . . . . . . . . . . . . . . . . . . . . . . . . . . . . . . . . . . . . . . . . . . . . . . . . . . . . . . . 4
PLANETARY MIXING SYSTEM . . . . . . . . . . . . . . . . . . . . . . . . . . . . . . . . . . . . . . . . . . . . . . . . . . . . . . . . . . . 5
BEFORE FIRST USE . . . . . . . . . . . . . . . . . . . . . . . . . . . . . . . . . . . . . . . . . . . . . . . . . . . . . . . . . . . . . . . . . . . . 5
SELECTING ATTACHMENT TYPES. . . . . . . . . . . . . . . . . . . . . . . . . . . . . . . . . . . . . . . . . . . . . . . . . . . . . . . . . 5
APPLIANCE ASSEMBLY AND DISASSEMBLY . . . . . . . . . . . . . . . . . . . . . . . . . . . . . . . . . . . . . . . . . . . . . . . . 5
OPERATING THE APPLIANCE . . . . . . . . . . . . . . . . . . . . . . . . . . . . . . . . . . . . . . . . . . . . . . . . . . . . . . . . . . . . 6
QUICK GUIDE TO MIXING . . . . . . . . . . . . . . . . . . . . . . . . . . . . . . . . . . . . . . . . . . . . . . . . . . . . . . . . . . . . . . 7
CLEANING AND MAINTENANCE . . . . . . . . . . . . . . . . . . . . . . . . . . . . . . . . . . . . . . . . . . . . . . . . . . . . . . . . . 7
STORAGE. . . . . . . . . . . . . . . . . . . . . . . . . . . . . . . . . . . . . . . . . . . . . . . . . . . . . . . . . . . . . . . . . . . . . . . . . . . . 7
TECHNICAL SPECIFICATIONS . . . . . . . . . . . . . . . . . . . . . . . . . . . . . . . . . . . . . . . . . . . . . . . . . . . . . . . . . . . . 8

Table Mixer
STM 3010WH-NAA1 / STM 3011GR-NAA1 / STM 3012BL-NAA1 / STM 3013OR-NAA1 / STM 3014RD-NAA1
STM 3015VT-NAA1 / STM 3016YL-NAA1 / STM 3017TQ-NAA1 / STM 3018RS-NAA1 / STM 301XXX-NAA1
EN
EN-3
2014
11/2014
IMPORTANT SAFEGUARDS
Read the operating instructions carefully before putting the appliance into operation and keep the
instructions including the warranty, the receipt and, if possible, the box with the internal packaging. If
you give this device to other people, please also pass on the operating instructions.
a) Read all instructions.
b) To protect against risk of electrical shock, do not put in water or other liquid.
c) Close supervision is necessary when any appliance is used by or near children.
d) Unplug from the outlet when not in use, before putting on or taking off parts, and before cleaning.
e) Avoid contact with moving parts. Keep hands, hair, clothing, as well as spatulas and other utensils
away from beaters during operation to reduce the risk of injury to persons, and/or damage to the
mixer.
f) Do not operate any appliance with a damaged cord or plug or after the appliance malfunctions, or
is dropped or damaged in any manner. Return appliance to the nearest authorized service facility
for examination, repair or electrical or mechanical adjustment.
g) The use of attachments not recommended or sold by the manufacturer may cause fire, electric
shock or other injury.
h) Do not use outdoors.
i) Do not let the cord hang over the edge of table or counter.
j) Remove beaters from mixer the before washing.
k) Household use only
l) This appliance has a polarized plug (one blade is wider than the other). To reduce the risk of electric
shock, this plug will fit in a polarized outlet only one way. If the plug does not fit fully into the
outlet, reverse the plug. If it still does not fit, contact a qualified electrician. Do not modify the plug
in any way.
SAVE THESE INSTRUCTIONS
Children and Frail Individuals
• In order to ensure your children‘s safety, please keep all packaging (plastic bags, boxes, polystyrene
etc.) out of their reach.
Caution! Do not allow small children to play with the plastic bag as there is a danger of
suffocation!
• In order to protect children or frail individuals from the hazards of electrical equipment, please
ensure that this device is used only under supervision. This device is not a toy. Do not allow small
children to play with it.
SPECIAL SAFETY INSTRUCTIONS FOR THIS MACHINE
• Only operate this machine under supervision.
• Do not interfere with any safety switches.
• Do not insert anything into the rotating hooks while the machine is working.
• Place the machine on a smooth, flat and stable working surface.
• Do not insert the mains plug of the machine into the power socket without having installed all the
necessary accessories.

EN-4
EN
Table Mixer
STM 3010WH-NAA1 / STM 3011GR-NAA1 / STM 3012BL-NAA1 / STM 3013OR-NAA1 / STM 3014RD-NAA1
STM 3015VT-NAA1 / STM 3016YL-NAA1 / STM 3017TQ-NAA1 / STM 3018RS-NAA1 / STM 301XXX-NAA1
2014
11/2014
DESCRIPTION OF THE APPLIANCE
A
6
8
0
7
1
2
3
4
5
9
qa
1Dough hook
2Balloon whisk
3A-shaped beater
4 4-liter stainless steel bowl
5Base unit
6Mixing head with shaft for connecting attachments A1, A2or A3
7Tilt-out arm with open position lock
8PUSH button for releasing the arm
9Speed control knob with light
PULSE (pulse mode for short operation at the maximum speed level)
– 0 (turned off to stand-by mode) – speed level setting 1, 2, 3, 4, 5, 6
0Anti-slip feet with suction cups
qa Storage space for winding up the power cord

Table Mixer
STM 3010WH-NAA1 / STM 3011GR-NAA1 / STM 3012BL-NAA1 / STM 3013OR-NAA1 / STM 3014RD-NAA1
STM 3015VT-NAA1 / STM 3016YL-NAA1 / STM 3017TQ-NAA1 / STM 3018RS-NAA1 / STM 301XXX-NAA1
EN
EN-5
2014
11/2014
PLANETARY MIXING SYSTEM
• The planetary mixing system is based on the principle of dual rotation of the attachment. The
attachment rotates counterclockwise along the inner perimeter of the bowl while rotating around
its own axis in the opposite direction. This ensures that ingredients inside the bowl are processed
thoroughly and evenly.
BEFORE FIRST USE
1. Take the appliance and its accessories out of the packaging materials.
2. Thoroughly wash all parts that are intended to come into contact with food (dough hook A1,
whisk A2, beater A3and the stainless steel mixing bowl A4) using warm water and a neutral
kitchen detergent. Then rinse them with clean water and dry thoroughly with a fine towel.
SELECTING ATTACHMENT TYPES
ATTACHMENT TYPE PURPOSE OF USE
Dough hook A1This is used for kneading and preparing heavy and thick doughs containing
yeast, e.g. bread dough.
Beater A3This is used for mixing medium-heavy and lighter doughs not containing
yeast, for mixing sauces, creams, fillings, etc.
Whisk A2This is used for whisking whole eggs or egg whites, whipped cream, light
doughs, foamy creams, etc. Do not use it for mixing heavy and thick doughs.
APPLIANCE ASSEMBLY AND DISASSEMBLY
• Before you start assembling or disassembling the food mixer, check that it is turned off and
disconnected from the el. power socket.
1. Inserting the mixing bowl
1.1 Place the food mixer on an even, dry surface, e.g. on a kitchen counter.
1.2 Release the arm A7by pressing the PUSH button A8and tilt it upwards. The arm A7is locked in
the open position when the PUSH button A8slides out together with an audible click.
1.3 Place the stainless steel bowl A4into the hole in the base unit A5and secure it in place by turning
it clockwise. When the bowl A4is properly attached, it is not possible to lift it off the base unit
A5.
2. Attaching an attachment (dough hook, beater or whisk)
2.1 When attaching an attachment, the arm A7must be secured in the open position - see point
1.2 in chapter Inserting the mixing bowl. Attach one of the attachments to the T-shaped shaft of
the mixing head A6so that the shaft fits into the hole on the attachment. Push the attachment
towards the mixing head A6and turn it counterclockwise to secure it to the shaft.
2.2 With one hand, hold the attachment and gently pull it downwards. If it is properly secured to the
shaft, it will not come off.
2.3 If you will not be immediately placing ingredients into the mixing bowl A4, press the PUSH button
A8and tilt the arm A7to the horizontal position. When the arm A7is tilted to the horizontal
position, the PUSH button A8will slide out accompanied by an audible click.

EN-6
EN
Table Mixer
STM 3010WH-NAA1 / STM 3011GR-NAA1 / STM 3012BL-NAA1 / STM 3013OR-NAA1 / STM 3014RD-NAA1
STM 3015VT-NAA1 / STM 3016YL-NAA1 / STM 3017TQ-NAA1 / STM 3018RS-NAA1 / STM 301XXX-NAA1
2014
11/2014
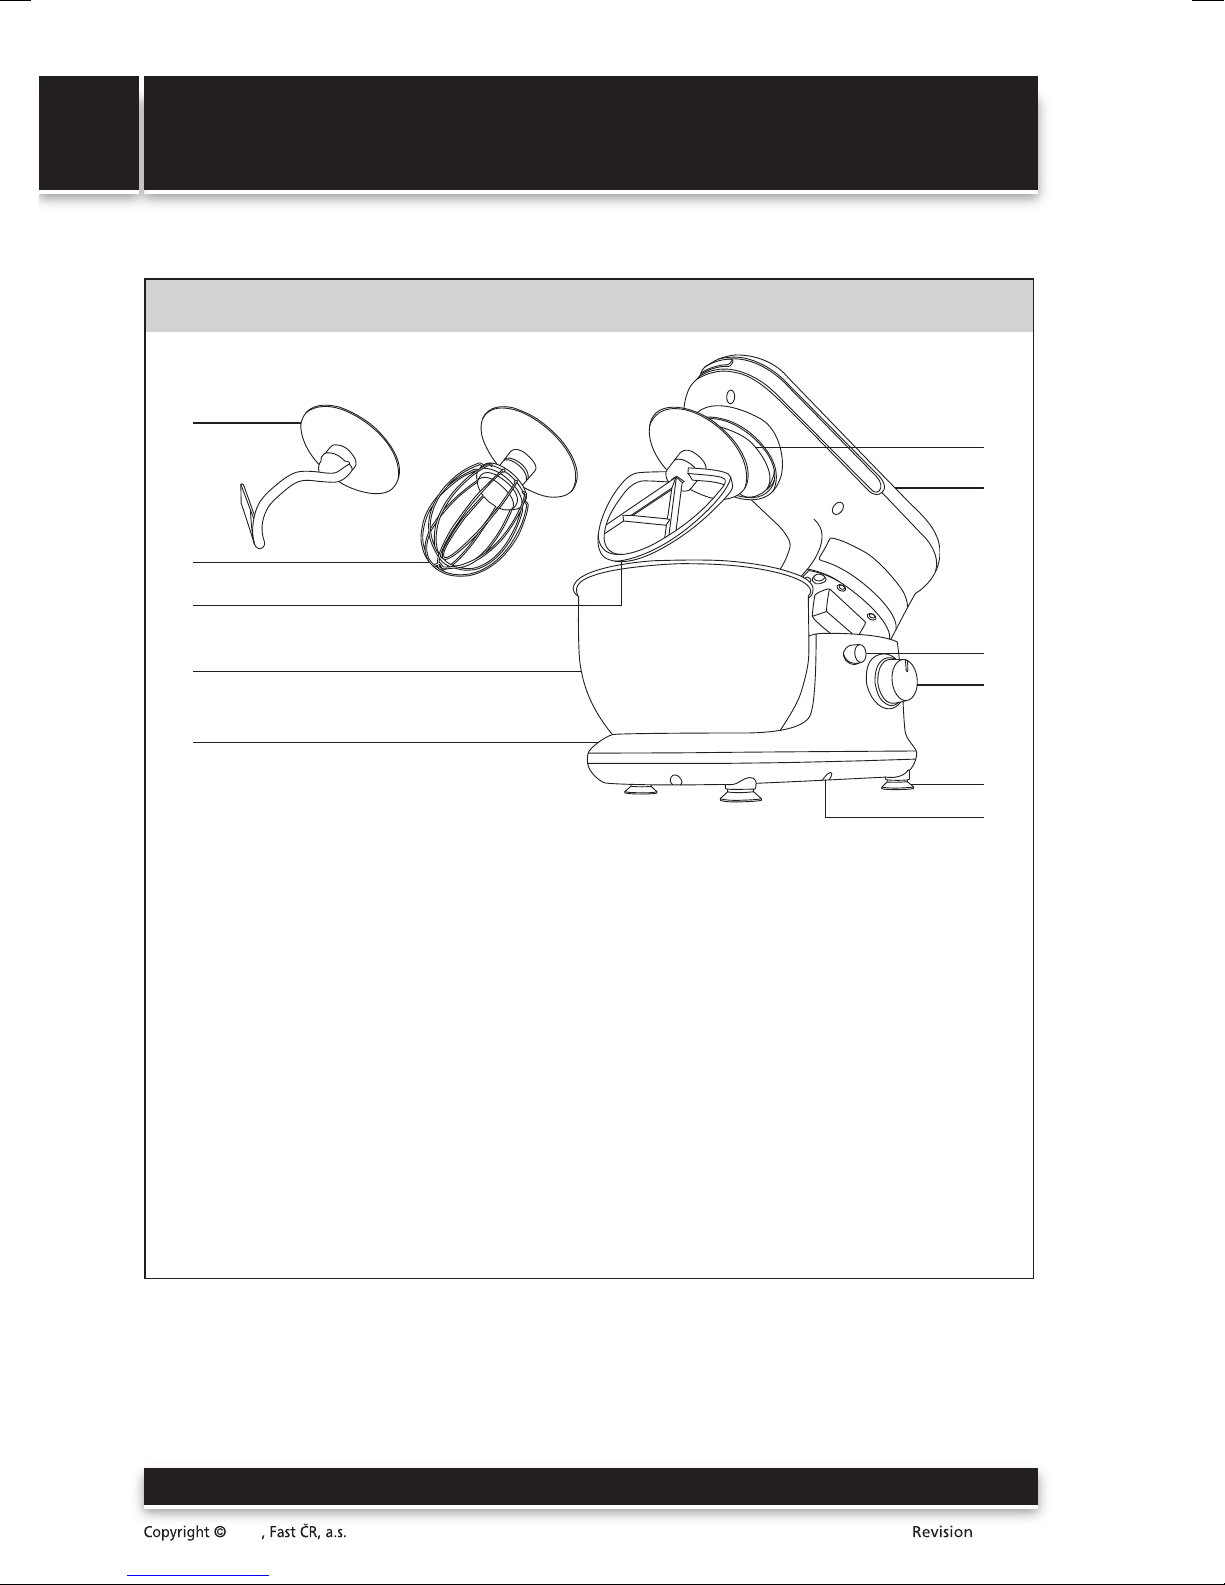
3. Removing the attachment and mixing bowl
3.1 Release the arm A7by pressing the PUSH button A8and tilt it upwards. The arm A7is locked in
the open position when the PUSH button A8slides out together with an audible click.
3.2 Hold the attachment and gently push it towards the mixing head A6. Then rotate it clockwise until
it is released from the motor shaft and remove it. Turn the mixing bowl A4counterclockwise and
take it off the base unit A5. Move the arm A7back to the horizontal position.
OPERATING THE APPLIANCE
1. Unwind the necessary length of power cord from the compartment Aqa.
2. Release the arm A7by pressing the PUSH button A8and tilt it out.
3. Place the ingredients into the bowl A4that is seated in the base unit A5.
Attention:
The maximum weight of the ingredients that can be processed in a single batch is 1.2 kg. When
preparing bread dough, do not process more than 600 g of flour at once. When preparing dough
for sweet pastries (fruit cakes, etc.) it is possible to process no more than 450 g of flour at once.
The maximum number of egg whites that can be whisked at once is 8.
4. Press the PUSH button A8and tilt the arm A7together with the attached attachment to the
horizontal position.
5. Make sure that the food mixer is correctly assembled and that the speed control knob A9is set
to position 0 (stand-by mode). Connect the power cord to the el. power socket. Connection to
a working power socket is indicated by the speed control knob A9being lit.
6. Use the speed control knob A9to set the required speed level from 1 to 6. First, set a lower speed
to prevent ingredients from being sprayed around. As soon as they are mixed together, increase the
speed to the required level. The speed can be adjusted at any time as required.
The pulse mode is used for increasing the speed to maximum for a short time. To activate the
pulse mode, turn the speed control knob A9to the PULSE position, and to ensure continuous
operation, hold it down in this position. As soon as you release the speed control knob A9, it will
automatically return to position 0 (off).
Attention:
If it is necessary to wipe ingredients off the inside of the mixing bowl A4and the attachment,
first turn off the food mixer by setting the speed control knob A9to position 0 (stand-by mode)
and then unplug it from the power socket. Then wipe away the ingredients using a plastic
spatula.
The maximum operating time is 6 minutes. Do not leave the appliance in continuous operation
for longer than indicated above. This is especially true under a heavy load (e.g. when processing
heavy, thick doughs). If the appliance is in operation under a heavy load, allow it to cool
down for at least 10 minutes before turning it on again. At lower loads, a cooling time of 3 to
5 minutes is usually sufficient.
7. After you have finished using the appliance, set the speed control knob A9to position 0 (stand-by
mode) and disconnect the power cord from the power socket.
8. Disassemble the food mixer according to the instructions included in the chapter Assembling and
disassembling the appliance. Use a soft plastic spatula to remove mixes from the mixing bowl A4
and the attachment.
9. Clean out the food mixer after each use according to the instructions in the chapter Cleaning and
maintenance

Table Mixer
STM 3010WH-NAA1 / STM 3011GR-NAA1 / STM 3012BL-NAA1 / STM 3013OR-NAA1 / STM 3014RD-NAA1
STM 3015VT-NAA1 / STM 3016YL-NAA1 / STM 3017TQ-NAA1 / STM 3018RS-NAA1 / STM 301XXX-NAA1
EN
EN-7
2014
11/2014
QUICK GUIDE TO MIXING
Attachment type Ingredients Amount Processing time Selecting a speed
Whisk A2Egg whites max. 8 eggs 4 minutes Level 6
Whisk A2Cream 500 ml 4–5 minutes Level 6
Whisk A2Mayonnaise 3 egg yolks 1 minute Level 2–4
Beater A3Cake dough approx. 800 g 6 minutes Level 2-6
Dough hook A1Bread dough max. 600 g of flour 4 minutes Level 2
Note:
The above processing times are only a reference. To prevent ingredients from splattering out of
the bowl, select an initial speed level of 1 or 2. Set a higher speed later based on requirements.
Note:
Beater and dough hook function is max power for 300W.
CLEANING AND MAINTENANCE
• Before cleaning the food mixer, always turn it off by setting the speed control knob A9to position
0 and unplug it from the power socket.
• It is necessary to thoroughly clean the attachment after every use in hot water using a neutral
kitchen detergent. Then rinse it under clean running water and thoroughly wipe dry with a fine
towel.
• Wash the stainless steel mixing bowl A4using hot water and a neutral kitchen detergent. Then
rinse it under clean running water and wipe dry with a fine towel.
Tip:
If you whisked egg whites, first rinse the whisk A2and the mixing bowl A4under cold water.
Using hot water makes the egg white remains harden, making their removal more difficult.
• To clean the base unit A5and the arm A7, use a cloth dipped in a weak detergent solution. Then
wipe everything dry.
• Never submerge the appliance or its power cord in water or any other liquids. For cleaning, do
not use thinners or solvents, or abrasive cleaning agents. Otherwise, the surface treatment of the
appliance could be damaged.
STORAGE
• If you will not be using the food mixer, store it in a dry place out of children's reach. Make sure that
the arm A7is tilted into the horizontal position.

EN-8
EN
Table Mixer
STM 3010WH-NAA1 / STM 3011GR-NAA1 / STM 3012BL-NAA1 / STM 3013OR-NAA1 / STM 3014RD-NAA1
STM 3015VT-NAA1 / STM 3016YL-NAA1 / STM 3017TQ-NAA1 / STM 3018RS-NAA1 / STM 301XXX-NAA1
2014
11/2014
TECHNICAL SPECIFICATIONS
Rated voltage range ............................................................................................................................... 120V
Rated frequency...................................................................................................................................... 60Hz
Rated power input.........................................................................................................................300W Max
Changes to the text and technical parameters are reserved.

Mixeur de table
Manuel d’utilisation
FR
FR-1
Avant d’allumer cet appareil, merci de lire le manuel utilisateur complètement, même si vous avez déjà
utilisé des appareils similaires. N’utilisez l’appareil que de la façon décrite dans ce manuel utilisateur.
Conservez ce manuel pour pouvoir vous y référer dans le futur.
2014
11/2014
STM 3010WH-NAA1 / STM 3011GR-NAA1
STM 3012BL-NAA1 / STM 3013OR-NAA1
STM 3014RD-NAA1 / STM 3015VT-NAA1
STM 3016YL-NAA1 / STM 3017TQ-NAA1
STM 3018RS-NAA1 / STM 301XXX-NAA1

FR-2
FR
Mixeur de table
STM 3010WH-NAA1 / STM 3011GR-NAA1 / STM 3012BL-NAA1 / STM 3013OR-NAA1 / STM 3014RD-NAA1
STM 3015VT-NAA1 / STM 3016YL-NAA1 / STM 3017TQ-NAA1 / STM 3018RS-NAA1 / STM 301XXX-NAA1
2014
11/2014
TABLE DES MATIÈRES
MESURES DE SÉCURITÉ IMPORTANTES . . . . . . . . . . . . . . . . . . . . . . . . . . . . . . . . . . . . . . . . . . . . . . . . . . . . 3
CONSIGNES DE SÉCURITÉ SPÉCIFIQUES POUR CETTE MACHINE . . . . . . . . . . . . . . . . . . . . . . . . . . . . . . . . 3
DESCRIPTION DE L’APPAREIL . . . . . . . . . . . . . . . . . . . . . . . . . . . . . . . . . . . . . . . . . . . . . . . . . . . . . . . . . . . . 4
MÉCANISME MÉLANGEUR PLANÉTAIRE . . . . . . . . . . . . . . . . . . . . . . . . . . . . . . . . . . . . . . . . . . . . . . . . . . . 5
AVANT LA PREMIÈRE UTILISATION . . . . . . . . . . . . . . . . . . . . . . . . . . . . . . . . . . . . . . . . . . . . . . . . . . . . . . . 5
SÉLECTION DU TYPE D’ACCESSOIRE . . . . . . . . . . . . . . . . . . . . . . . . . . . . . . . . . . . . . . . . . . . . . . . . . . . . . . 5
MONTAGE ET DÉMONTAGE DE L’APPAREIL . . . . . . . . . . . . . . . . . . . . . . . . . . . . . . . . . . . . . . . . . . . . . . . . 5
UTILISATION DE L’APPAREIL. . . . . . . . . . . . . . . . . . . . . . . . . . . . . . . . . . . . . . . . . . . . . . . . . . . . . . . . . . . . . 6
GUIDE RAPIDE DE MIXAGE . . . . . . . . . . . . . . . . . . . . . . . . . . . . . . . . . . . . . . . . . . . . . . . . . . . . . . . . . . . . . 7
NETTOYAGE ET ENTRETIEN . . . . . . . . . . . . . . . . . . . . . . . . . . . . . . . . . . . . . . . . . . . . . . . . . . . . . . . . . . . . . 7
STOCKAGE . . . . . . . . . . . . . . . . . . . . . . . . . . . . . . . . . . . . . . . . . . . . . . . . . . . . . . . . . . . . . . . . . . . . . . . . . . 7
SPECIFICATIONS TECHNIQUES . . . . . . . . . . . . . . . . . . . . . . . . . . . . . . . . . . . . . . . . . . . . . . . . . . . . . . . . . . . 8

Mixeur de table
STM 3010WH-NAA1 / STM 3011GR-NAA1 / STM 3012BL-NAA1 / STM 3013OR-NAA1 / STM 3014RD-NAA1
STM 3015VT-NAA1 / STM 3016YL-NAA1 / STM 3017TQ-NAA1 / STM 3018RS-NAA1 / STM 301XXX-NAA1
FR
FR-3
2014
11/2014
MESURES DE SÉCURITÉ IMPORTANTES
Lisez consciencieusement les instructions d’utilisation avant de mettre l’appareil en marche et conservez
ces instructions avec la garantie, la preuve d’achat et, si possible, le carton et l’emballage intérieur.
Si vous cédez cet appareil à d’autres personnes, veuillez également leur fournir ces instructions
d’utilisation.
a) Lisez toutes les instructions.
b) Pour éviter les risques de choc électrique, ne placez pas l’appareil dans l’eau ou dans d’autres
liquides.
c) Une surveillance accrue est nécessaire lorsque l’appareil est utilisé par ou près des enfants.
d) Débranchez l’appareil de la prise murale lorsqu’il n’est pas utilisé, avant d’ajouter ou de retirer des
accessoires et avant son nettoyage.
e) Évitez tout contact avec les pièces mobiles. Maintenez vos mains, cheveux, vêtements ainsi que les
spatules et autres accessoires éloignés des fouets pendant le fonctionnement, afin de réduire le
risque de blessures et/ou l’endommagement du batteur.
f) N’utilisez jamais aucun appareil dont le cordon ou la prise sont endommagés ou après un
dysfonctionnement ou si l’appareil a chuté ou a été endommagé de quelque manière que ce soit.
Rapportez l’appareil dans le centre de réparation agréé le plus proche pour le faire contrôler,
réparer ou pour faire effectuer les réglages mécaniques ou électriques.
g) L’utilisation des accessoires non recommandés ou non vendus par le fabricant peut provoquer un
incendie, un choc électrique ou d’autres blessures.
h) N’utilisez pas l’appareil à l’extérieur.
i) Ne laissez pas le cordon pendre du bord d’une table ou d’un comptoir.
j) Retirez les fouets du batteur avant le nettoyage.
k) Pour un usage domestique uniquement
l) Cet appareil dispose d’une prise polarisée (une fiche est plus large que l’autre). Afin de réduire
le risque de choc électrique, cette prise ne peut entrer que dans un sens dans une prise murale
polarisée. Si la prise n’entre pas complètement dans la prise murale, retournez-la. Si elle n’entre
toujours pas complètement, contactez un électricien qualifié. En aucune façon vous ne devez
modifier la prise.
CONSERVEZ CES INSTRUCTIONS
Enfants et personnes en perte d’autonomie
• Afin de garantir la sécurité de vos enfants, veuillez conserver tous les emballages (sacs en plastique,
cartons, polystyrène, etc...) hors de leur portée.
Attention ! Ne laissez pas les jeunes enfants jouer avec le sac plastique à cause du risque
d'étouffement !
• Afin de protéger les enfants ou les personnes en perte d’autonomie des risques liés à l’équipement
électrique, surveillez-les pendant l’utilisation de cet appareil. Cet appareil n’est pas un jouet. Ne
laissez pas les enfants jouer avec.
CONSIGNES DE SÉCURITÉ SPÉCIFIQUES POUR CETTE MACHINE
• Ne faites pas fonctionner cette machine sans surveillance.
• N’interférez pas dans le fonctionnement des interrupteurs de sécurité.
• N’insérez rien dans les crochets rotatifs si la machine est en marche.
• Placez la machine sur une surface homogène, plane et stable.
• Ne branchez pas la prise électrique de la machine dans une prise de courant sans avoir avant
installer tous les accessoires nécessaires.

FR-4
FR
Mixeur de table
STM 3010WH-NAA1 / STM 3011GR-NAA1 / STM 3012BL-NAA1 / STM 3013OR-NAA1 / STM 3014RD-NAA1
STM 3015VT-NAA1 / STM 3016YL-NAA1 / STM 3017TQ-NAA1 / STM 3018RS-NAA1 / STM 301XXX-NAA1
2014
11/2014
DESCRIPTION DE L’APPAREIL
A
6
8
0
7
1
2
3
4
5
9
qa
1Crochet de pétrissage
2Fouet ballon
3Batteur en A
4Bol mélangeur en acier inoxydable de 4 litres
5Base principale de l’appareil
6Tête porte-accessoire avec arbre de connexion pour éléments A1, A2ou A3
7Bras mobile avec verrou de position
8Bouton PUSH de déverrouillage du bras
9Variateur de vitesse avec témoin lumineux
PULSE (mode impulsion pour fonctionnement court à la vitesse maximale)
– 0 (position d’arrêt en mode stand-by) – positions de réglages de vitesse 1, 2, 3, 4, 5, 6
0Pieds antidérapants avec ventouses
qa Espace de stockage pour le câble d’alimentation, rangement par enroulement

Mixeur de table
STM 3010WH-NAA1 / STM 3011GR-NAA1 / STM 3012BL-NAA1 / STM 3013OR-NAA1 / STM 3014RD-NAA1
STM 3015VT-NAA1 / STM 3016YL-NAA1 / STM 3017TQ-NAA1 / STM 3018RS-NAA1 / STM 301XXX-NAA1
FR
FR-5
2014
11/2014
MÉCANISME MÉLANGEUR PLANÉTAIRE
• Le système planétaire de mélange repose sur une double rotation simultanée de l’accessoire.
Animé d’une rotation antihoraire le long du périmètre du bol mélangeur, l’accessoire effectue
simultanément une rotation sur lui-même autour de son axe dans le sens oppose. Ce mouvement
combiné permet d’assurer un brassage complet et égal du volume d’ingrédients contenu dans le
bol.
AVANT LA PREMIÈRE UTILISATION
1. Sortez l’appareil et ses accessoires hors de leurs emballages de transport.
2. Nettoyez soigneusement l’ensemble des éléments susceptibles de rentrer en contact avec les
ingrédients (crochet A1, fouet A2, batteur A3ainsi que le bol mélangeur A4en acier inox)
à l’aide d’eau et d’un détergent ménager neutre. Rincez abondamment à l’eau clair et séchez les
éléments à l’aide d’un chiffon doux non pelucheux.
SÉLECTION DU TYPE D’ACCESSOIRE
ACCESSOIRE UTILISATION RECOMMANDÉE
Crochet pétrissage A1Utilisé préférentiellement pour préparer et pétrir les pâtes lourdes et
denses contenant de la levure (par exemple, les pâtes à pain).
Batteur A3Utilisé pour mélanger les préparations de densités moyenne et légère, sans
levure ; pour lier les sauces, crèmes et appareils de garniture, etc.
Fouet A2Utilisé pour monter les blancs en neige, la crème fouettée, les pâtes
légères, les mousses. Ne pas utiliser pour les préparations denses.
MONTAGE ET DÉMONTAGE DE L’APPAREIL
• Avant de monter ou démonter un élément, vérifiez que l’appareil est hors tension et débranché de
toute source de courant.
1. Positionnement du bol mélangeur
1.1 Installez le mixeur sur une surface sèche et plane comme le plan de travail de la cuisine.
1.2 Déverrouillez le bras A7à l’aide du bouton PUSH A8et amenez-le en position haute. Le bras A7
est bloqué en position ouverte lorsque le bouton PUSH A8ressort en émettant un clic sonore.
1.3 Positionnez le bol A4dans le logement prévu de la base de l’appareil A5puis verrouillez-le en
place en le faisant tourner dans le sens des aiguilles d’une montre. Si le bol A4est correctement
installé, il est solidaire de la base A5et impossible à soulever seul.
2. Insérer un accessoire (crochet, batteur ou fouet)
2.1 Préalablement à la connexion, le bras A7doit être verrouillé en position haute, voir point 1.2 du
chapitre Positionnement du bol mélangeur. Connectez l’accessoire voulu à l’arbre en T de la tête
A6de sorte que la base de l’accessoire couvre l’axe. Poussez à fond sur l’accessoire vers la tête A6
puis faites-le tourner dans le sens inverse des aiguilles d’une montre pour le solidariser.
2.2 D’une main, exercez une traction sur l’accessoire. S’il est correctement positionné, il doit rester en
place.
2.3 Si vous ne souhaitez pas immédiatement verser des ingrédients dans le bol A4, pressez le bouton
PUSH A8et manœuvrez le bras A7vers l’horizontal. Une fois le bras A7amené à sa position
horizontale, le bouton PUSH A8ressort de son logement et émet un clic sonore pour indiquer la
fermeture.

FR-6
FR
Mixeur de table
STM 3010WH-NAA1 / STM 3011GR-NAA1 / STM 3012BL-NAA1 / STM 3013OR-NAA1 / STM 3014RD-NAA1
STM 3015VT-NAA1 / STM 3016YL-NAA1 / STM 3017TQ-NAA1 / STM 3018RS-NAA1 / STM 301XXX-NAA1
2014
11/2014
3. Retirer un accessoire et le bol mélangeur
3.1 Déverrouillez le bras A7en actionnant le bouton PUSH A8et amenez-le en position haute. Le
bras A7est bloqué en position ouverte lorsque le bouton PUSH A8ressort en émettant un clic
sonore.
3.2 En maintenant l’accessoire, exercez une légère pression en direction de la tête A6. Faites tourner
l’accessoire dans le sens des aiguilles d’une montre jusqu’à le désengager de l’arbre puis retirez-le.
Tournez le bol mélangeur A4dans le sens des aiguilles d’une montre et retirez-le de la base A5.
Abaissez le bras A7jusqu’à sa position horizontale.
UTILISATION DE L’APPAREIL
1. Déroulez la longueur nécessaire de câble du logement Aqa.
2. Débloquez le bras A7ben actionnant le bouton PUSH A8et manœuvrez-le vers le haut.
3. Placez les ingrédients dans le bol A4positionné dans la base A5.
Attention:
La masse maximale totale d’ingrédients à travailler simultanément est de 1,2 kg. Lors de la
préparation de pâte à pain, veillez à ne pas travailler plus de 600g de farine à la fois. En usage
pâtissier (cakes aux fruits, etc.), la limite est de 450g de farine au total. Le nombre maximal de
blancs d’œufs pouvant être battus simultanément est de 8.
4. Actionnez le bouton PUSH A8et abaissez le bras A7avec son accessoire jusqu’à la position
horizontale.
5. Assurez-vous que les éléments du mixeur sont correctement assembles et que le variateur de vitesse
A9est en position 0 (mode stand-by). Branchez le câble d’alimentation dans une prise électrique.
Le raccordement à une prise opérationnelle est matérialisé par la présence d’un témoin lumineux
au niveau du variateur de vitesse A9.
6. Réglez la vitesse souhaitée entre 1 et 6 à l’aide du variateur de vitesse A9. Commencez par une
vitesse moindre pour éviter les projections de matière. Dès que l’homogénéisation commence,
augmentez la vitesse jusqu’au niveau désiré. La vitesse peut être ajustée en continu selon les
besoins. Le mode impulsion sert à atteindre instantanément la vitesse maximale pour une courte
durée. Pour ce faire, déplacez le variateur de vitesse A9en position PULSE ; la mise en route est
automatique dès que vous maintenez le variateur enfoncé vers le bas. Dès que vous relâchez le
variateur de vitesse A9, celui-ci retourne automatiquement à la position 0 (arrêt).
Attention:
S’il devient nécessaire de nettoyer l’accessoire ou de racler le bol A4, veillez à arrêter
le mixeur en positionnant le variateur de vitesse A9en position 0 (mode stand-by) puis
à le débrancher de la prise de courant. Vous pouvez alors procéder au nettoyage des éléments
à l’aide d’une spatule en plastique.
La durée maximale de travail continue est de 6 minutes. Merci de ne pas dépasser la durée
maximale d’opération indiquée Cette recommandation est particulièrement nécessaire dans
le cadre d’une charge mécanique élevée (comme pour les pâtes à pain très denses). Dans ces
conditions particulières, merci d’observer un temps de refroidissement de 10 minutes minimum
avant de remettre l’appareil en fonction. Pour les préparations moins denses, une pause de
3 à 5 minutes entre chaque cycle de travail est généralement suffisante.
7. Après usage de l’appareil, manœuvrez le variateur de vitesse A9en position 0 (mode stand-by)
et débranchez le câble d’alimentation de sa source de courant.
8. Démontez les différents éléments de l’appareil selon les instructions du chapitre Montage
et Démontage de l’appareil. À l’aide d’une spatule en plastique souple, retirez la préparation
obtenue du bol mélangeur A4et de l’accessoire.
9. Nettoyez l’appareil après chaque utilisation selon les instructions du chapitre Nettoyage et Entretien.

Mixeur de table
STM 3010WH-NAA1 / STM 3011GR-NAA1 / STM 3012BL-NAA1 / STM 3013OR-NAA1 / STM 3014RD-NAA1
STM 3015VT-NAA1 / STM 3016YL-NAA1 / STM 3017TQ-NAA1 / STM 3018RS-NAA1 / STM 301XXX-NAA1
FR
FR-7
2014
11/2014
GUIDE RAPIDE DE MIXAGE
Accessoire Préparation Quantité Durée Vitesse
Fouet A2Blancs d’œufs max. 8 4 minutes Position 6
Fouet A2Crème 500 ml 4–5 minutes Position 6
Fouet A2Mayonnaise 3 jaunes d’œufs 1 minute Position 2–4
Batteur A3Pâte à gâteaux approx. 800g 6 minutes Position 2–6
Crochet A1Pâte à pain max. 600g de farine 4 minutes Position 2
Note:
Les durées de travail indiquées ci-dessus sont données à titre indicatif. Pour éviter que les
ingrédients ne soient éjectés hors du bol, commencez les opérations avec une vitesse initiale de
1 ou 2. Augmentez progressivement la vitesse suivant vos besoins.
Note:
La puissance maximum de la fonction batteur et crochet de pétrissage est de 300 W.
NETTOYAGE ET ENTRETIEN
• Avant toute opération de nettoyage, veillez à arrêter le mixeur en positionnant le variateur de
vitesse A9à 0 et à débrancher le câble d’alimentation électrique.
• Il est indispensable de nettoyer soigneusement l’accessoire employé après chaque utilisation
à l’aide d’eau chaude et d’un détergent ménager neutre. Rincez abondamment à l’eau claire et
séchez à l’aide d’un chiffon doux non pelucheux.
Note:
Les accessoires sont conçus pour un contact alimentaire (liquides inclus) limité dans le temps,
à savoir maximum 4 heures.
• Nettoyez le bol mélangeur A4en acier inoxydable à l’eau chaude et au détergent ménager neutre.
Rincez abondamment à l’eau claire et séchez à l’aide d’un chiffon doux non pelucheux.
Astuce:
Si vous avez battu des blancs d’œufs, commencez par rincer le fouet A2et le bol A4à l’eau
froide. L’eau chaude ferait coaguler le blanc d’œuf restant et rendrait le nettoyage plus difficile.
• Pour nettoyer le corps de l’appareil A5et le bras A7, utilisez un chiffon humide imprégné d’un
savon doux. Séchez soigneusement la surface.
• N’immergez jamais l’appareil ou son câble d’alimentation électrique, que ce soit dans l’eau ou dans
tout autre liquide. N’utilisez aucun diluant de surface, solvant ou agent de nettoyage abrasif. La
finition extérieure de l’appareil pourrait être endommagée par ces produits.
STOCKAGE
• En dehors des périodes d’utilisation, rangez le mixeur dans un lieu sec, hors de portée des enfants.
Assurez-vous que le bras A7est verrouillé en position horizontale.

FR-8
FR
Mixeur de table
STM 3010WH-NAA1 / STM 3011GR-NAA1 / STM 3012BL-NAA1 / STM 3013OR-NAA1 / STM 3014RD-NAA1
STM 3015VT-NAA1 / STM 3016YL-NAA1 / STM 3017TQ-NAA1 / STM 3018RS-NAA1 / STM 301XXX-NAA1
2014
11/2014
SPECIFICATIONS TECHNIQUES
Voltage nominal...................................................................................................................................... 120V
Fréquence nominale .............................................................................................................................. 60 Hz
Puissance absorbée ....................................................................................................................... 300W Max
Nous nous réservons le droit de modifier le texte ou les paramètres techniques.

Batidora de sobremesa
Manual de usuario
ES
ES-1
Antes de encender el aparato, lea el manual de usuario por completo aunque esté familiarizado con
otros aparatos similares. Utilice el aparato solo como se explica en este manual del usuario. Guarde el
manual como referencia para el futuro.
2014
11/2014
STM 3010WH-NAA1 / STM 3011GR-NAA1
STM 3012BL-NAA1 / STM 3013OR-NAA1
STM 3014RD-NAA1 / STM 3015VT-NAA1
STM 3016YL-NAA1 / STM 3017TQ-NAA1
STM 3018RS-NAA1 / STM 301XXX-NAA1

ES-2
ES
Batidora de sobremesa
STM 3010WH-NAA1 / STM 3011GR-NAA1 / STM 3012BL-NAA1 / STM 3013OR-NAA1 / STM 3014RD-NAA1
STM 3015VT-NAA1 / STM 3016YL-NAA1 / STM 3017TQ-NAA1 / STM 3018RS-NAA1 / STM 301XXX-NAA1
2014
11/2014
ÍNDICE
SALVAGUARDAS IMPORTANTES . . . . . . . . . . . . . . . . . . . . . . . . . . . . . . . . . . . . . . . . . . . . . . . . . . . . . . . . . 3
INSTRUCCIONES DE SEGURIDAD ESPECIALES PARA LA MÁQUINA. . . . . . . . . . . . . . . . . . . . . . . . . . . . . . 3
DESCRIPCIÓN DEL APARATO . . . . . . . . . . . . . . . . . . . . . . . . . . . . . . . . . . . . . . . . . . . . . . . . . . . . . . . . . . . . 4
SISTEMA DE MEZCLA PLANETARIO . . . . . . . . . . . . . . . . . . . . . . . . . . . . . . . . . . . . . . . . . . . . . . . . . . . . . . . 5
ANTES DEL PRIMER USO . . . . . . . . . . . . . . . . . . . . . . . . . . . . . . . . . . . . . . . . . . . . . . . . . . . . . . . . . . . . . . . 5
SELECCIÓN DE ACCESORIOS . . . . . . . . . . . . . . . . . . . . . . . . . . . . . . . . . . . . . . . . . . . . . . . . . . . . . . . . . . . . 5
MONTAJE Y DESMONTAJE DEL APARATO . . . . . . . . . . . . . . . . . . . . . . . . . . . . . . . . . . . . . . . . . . . . . . . . . 5
USO DEL APARATO. . . . . . . . . . . . . . . . . . . . . . . . . . . . . . . . . . . . . . . . . . . . . . . . . . . . . . . . . . . . . . . . . . . . 6
GUÍA RÁPIDA DE MEZCLADO . . . . . . . . . . . . . . . . . . . . . . . . . . . . . . . . . . . . . . . . . . . . . . . . . . . . . . . . . . . 7
LIMPIEZA Y MANTENIMIENTO . . . . . . . . . . . . . . . . . . . . . . . . . . . . . . . . . . . . . . . . . . . . . . . . . . . . . . . . . . 7
ALMACENAMIENTO. . . . . . . . . . . . . . . . . . . . . . . . . . . . . . . . . . . . . . . . . . . . . . . . . . . . . . . . . . . . . . . . . . . 7
ESPECIFICACIONES TÉCNICAS . . . . . . . . . . . . . . . . . . . . . . . . . . . . . . . . . . . . . . . . . . . . . . . . . . . . . . . . . . . 8

Batidora de sobremesa
STM 3010WH-NAA1 / STM 3011GR-NAA1 / STM 3012BL-NAA1 / STM 3013OR-NAA1 / STM 3014RD-NAA1
STM 3015VT-NAA1 / STM 3016YL-NAA1 / STM 3017TQ-NAA1 / STM 3018RS-NAA1 / STM 301XXX-NAA1
ES
ES-3
2014
11/2014
SALVAGUARDAS IMPORTANTES
Lea el manual de instrucciones detenidamente antes de usar el dispositivo y mantenga las instrucciones
y la garantía, el recibo y, si fuera posible, la caja y el empaquetado interno. Si le regala el dispositivo
a otras personas, por favor, páseles también el manual de instrucciones.
a) Lea todas las instrucciones.
b) Para protegerse del riesgo de descarga eléctrica, no lo sumerja en agua u otro líquido.
c) Será necesaria una supervisión exhaustiva cuando se utilice el dispositivo cerca de niños o por niños.
d) Desenchufar de la toma eléctrica cuando no esté en uso, antes de poner o quitar piezas o antes de
limpiar el dispositivo.
e) Evite el contacto con las piezas móviles. Mantenga las manos, el pelo, la ropa así como espátulas u
otros utensilios alejados de las cuchillas durante el funcionamiento para reducir el riesgo de daños
a personas, y / o daños a la batidora.
f) No manejar ningún dispositivo con el cable o enchufe dañados o después de un mal funcionamiento
del dispositivo, o si se cae o sufre algún tipo de daño. Lleve el dispositivo al servicio técnico más
cercano para su examen, reparación o ajuste eléctrico o mecánico.
g) El uso de accesorios no recomendados o vendidos por el fabricante podría causar un incendio,
descarga eléctrica u otros daños.
h) No utilizar en exteriores.
i) No deje que el cable cuelgue por el filo de una mesa o encimera.
j) Quite las cuchillas de la batidora antes de su lavado.
k) Solo para el uso privado
l) El dispositivo tiene un enchufe polarizado (una pala es más ancha que la otra). Para reducir
el riesgo de descarga eléctrica, este enchufe sólo encajará en una toma polarizada en un sentido.
Si el enchufe no encaja por completo en la toma, dele la vuelta al enchufe. Si aún así no encaja,
póngase en contacto con un electricista cualificado. No modifique el enchufe.
GUARDE ESTAS INSTRUCCIONES
Niños y personas delicadas
• Para asegurar la seguridad de sus hijos, por favor mantenga todo el empaquetado (bolsas de
plástico, cajas, polietileno, etc.) fuera de su alcance.
¡Precaución! No permita que los niños jueguen con las bolsas de plástico, ¡existe riesgo de ahogo!
• Para proteger a los niños y a las personas delicadas de los riesgos del equipo eléctrico, por favor
asegúrese de que este dispositivo se utiliza bajo supervisión exclusivamente. Este dispositivo no es
un juguete. No permita que los niños pequeños utilicen el aparato para jugar.
INSTRUCCIONES DE SEGURIDAD ESPECIALES PARA LA MÁQUINA
• Utilizar la máquina bajo supervisión, exclusivamente.
• No interferir con los interruptores de seguridad.
• No insertar nada en los ganchos giratorios mientras la máquina esté en funcionamiento.
• Deposite la máquina en una superficie de trabajo estable, plana y seca.
• No introduzca el enchufe de la máquina en la toma eléctrica sin haber instalado todos los accesorios
necesarios.

ES-4
ES
Batidora de sobremesa
STM 3010WH-NAA1 / STM 3011GR-NAA1 / STM 3012BL-NAA1 / STM 3013OR-NAA1 / STM 3014RD-NAA1
STM 3015VT-NAA1 / STM 3016YL-NAA1 / STM 3017TQ-NAA1 / STM 3018RS-NAA1 / STM 301XXX-NAA1
2014
11/2014
DESCRIPCIÓN DEL APARATO
A
6
8
0
7
1
2
3
4
5
9
qa
1Gancho para amasar
2Batidor de varillas
3Palas mezcladoras
4 Cuenco de acero inoxidable de 4 litros
5Unidad base
6 Cabezal mezclador con eje para conexión de accesorios A1, A2o A3
7Brazo basculante con bloqueo en posición elevada
8 Botón PUSH para liberar el brazo
9 Perilla de control de velocidad con luz
PULSE (modo de pulsación para aumentar la velocidad al máximo durante un momento)
– 0 (apagado para modo de espera)
– ajuste del nivel de velocidad 1, 2, 3, 4, 5, 6
0Patas antideslizantes con ventosas
qa Espacio de almacenamiento para enrollar el cable eléctrico
This manual suits for next models
9
Table of contents
Languages:
Other Sencor Mixer manuals

Sencor
Sencor STM 3620WH User manual

Sencor
Sencor SBL 4370 User manual

Sencor
Sencor SHM 5330 User manual

Sencor
Sencor STM 3760WH Repair manual

Sencor
Sencor STM 3750WH Repair manual

Sencor
Sencor STM 7900 Repair manual

Sencor
Sencor SBL 5370WH User manual

Sencor
Sencor STM 3620WH-NAA1 User manual

Sencor
Sencor STM 7900 Repair manual