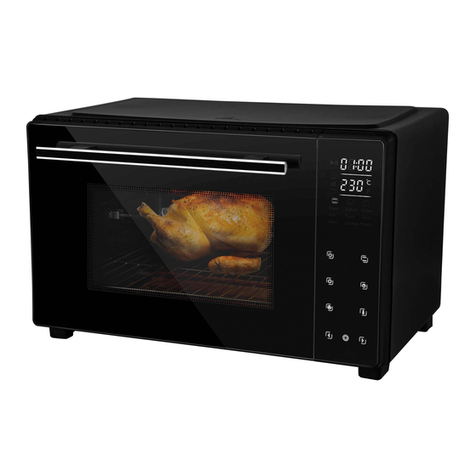
Sencor SEO 2000BK Repair manual

03/2021
- 1 -
Copyright © 2021, Fast ČR, a.s.
EN Electric oven
Translation of the original manual
SEO 2000BK

03/2021
- 2 -
Copyright © 2021, Fast ČR, a.s.
EN Electric oven
Important safety instructions
READ CAREFULLY AND STORE FOR FUTURE USE.
General warnings
■This appliance may be used by children 8 years of age and
older and by persons with physical or mental impairments or
by inexperienced persons, if they are properly supervised or
have been informed about how to use the appliance in asafe
manner and understand the potential dangers.
■Children must not play with the appliance. Cleaning and
maintenance performed by the user must not be performed
by unsupervised children.
■Children younger than 8 years of age must be kept away from
the appliance and its power cord.
■In the event that the power cord is damaged, have it repaired
at aprofessional service centre to prevent causing adangerous
situation. It is forbidden to use the appliance if it has adamaged
power cord.
Electrical safety
■ Before connecting this appliance to apower socket, make sure that the voltage stated on its rating label corresponds to the voltage in your power socket.
■ Connect the appliance only to aproperly grounded socket. Do not use an extension cord.
■ Ensure that the power plug contacts do not come into contact with water or any other liquid. If precisely this happens, carefully dry the power plug before
using it again.
■ Do not place heavy items on the power cord. Make sure the power cord does not hang over the edge of atable and that it is not touching ahot surface or
sharp objects.
■ Do not fasten the power cord between the oven door and the frame and do not lead it along hot surfaces. The insulation on the power cord could melt and
subsequent short circuiting will lead to afire.
■ The electrical circuit to which the appliance is connected must be equipped with acircuit breaker rated for the draw of electrical current of this appliance. Do
not start any other appliance at the same time that could result in the overloading of the electrical circuit and trigger the circuit breaker.
■ Do not disconnect the appliance from the power socket by pulling on the power cord. This could damage the power cord or the power socket. Disconnect the
power cord from the power socket by pulling on the plug.
■ Do not connect and disconnect the power cord to and from the power socket with wet hands.
■ To avoid the danger of injury by electrical shock, do not repair the appliance yourself or make any adjustments to it. The appliance does not contain any
components repairable by the user. Have all repairs or adjustments of the appliance performed at an authorised service centre. Tampering with the appliance
during the warranty period may void the warranty.
■ To prevent the risk of injury by electrical shock, never submerge the appliance and its power cord in water or any other liquid, or wash these parts under
running water.
■ In the event that the appliance falls into water, under no condition reach for it, rather, immediately disconnect the power cord from the power socket. Never
use an appliance that has been submerged in water. Hand it over to an authorised service centre for inspection.
■ Always turn off the appliance and disconnect it from the power socket when you have finished using it.
Safety during use
■ This appliance is designed only for household use and constructed solely for heating astandard amount of food in the household. Do not use this appliance
for commercial, industrial or laboratory purposes. Also, do not use it for heating the room it is in, for drying laundry, etc.
■ This appliance is not designed to be built-in. It is intended for use in open areas. The appliance must be located on akitchen countertop or atable so that its
rear side faces the wall.
■ This appliance is not intended to be operated using an external timer switch or aremote control system that would enable this appliance to be turned on
automatically.
■ Use the appliance and its accessories in accordance with the instructions contained in this user'smanual.

03/2021
- 3 -
Copyright © 2021, Fast ČR, a.s.
■ Only use the appliance with the original accessories that came with it.
■ Before every use, check the selected accessory for damage. Never use the appliance with adamaged accessory.
■ Do not place the appliance or its accessories on an electric or gas stove or in its vicinity, on the edge of atable or on an unstable surface. Only place the
appliance on an even, dry and stable surface.
■ Do not expose the appliance and its accessories to the outdoor environment, extreme temperatures, direct sunlight, excessive humidity or excessively dusty
environments.
■ Do not place the appliance and its accessories near heaters, open fires or other sources of heat.
■ Do not place any items on to the appliance and do not step or sit on it.
■ Protect the appliance against being dropped on the floor or table, even from low heights and against items falling on it.
■ If the appliance is used in the vicinity of children, be especially careful and select an operating location that is out of their reach.
■ The temperature of adjacent surfaces may be higher when the appliance is in operation. The appliance may only be located on asurface that is resistant to
higher temperatures. Never place aluminium foil underneath the appliance to protect the surface on which it is located. Do not place aluminium foil between
the heating elements and do not allow it to touch the walls inside the appliance, otherwise the appliance may overheat.
■ Do not use the appliance if it has fallen on the floor, if it was submerged in water, if it is not functioning correctly or if it is damaged in any other way.
■ Do not cover or otherwise block the vents of the appliance. Take care to prevent liquids or foreign objects from entering into them.
Attention:
Hot surface! When the appliance is in operation, the door and the exterior surface of the appliance is hot.
■ The appliance heats up significantly during operation. Never touch the hot surfaces or heating elements in the baking chamber of the oven. Prevent children
or pets from accessing the appliance while it is in operation. Always slide hot accessories and cooking or baking containers in and out of the backing chamber
using the supplied handles and kitchen gloves.
■ Do not use the top surface of the appliance as ashelf for placing food or other items. Do not use the inside of the appliance for storing food.
■ Make sure that the heated surface of the glass door does not come into contact with cold water as this could result in it cracking.
■ In the event that you notice smoke, immediately turn off the oven and disconnect the power plug from the socket. Leave the oven door closed to prevent
potential fire from spreading.
■ Due to residual heat, the accessible surfaces of the appliance remain hot after it is turned off. Do not touch the hot surface. This could cause skin burns. Use
the handle to open and close the oven door. When handling the appliance and its accessories (trays, racks, etc.) proceed carefully after use as they may be hot!
■ When handling hot cookware, which contains hot food or liquids, be especially careful so as not to burn or scald yourself. Put hot accessories and cookware
aside only on to stable heat resistant surfaces.
■ Do not perform any maintenance on the appliance other than cleaning the individual components as described in chapter Cleaning and maintenance.
■ Always turn off the appliance and disconnect it from the power socket if you will not be using it and if you will be leaving it without supervision, before
assembly, disassembly, cleaning or moving it.
■ Keep the accessories (trays, racks, etc.) clean because they come into contact with food.
■ The surfaces of the appliance or its accessories that come into contact with food must always be cleaned according to the instructions in this user'smanual.
■ Store the appliance in adry environment.
■ Do not place any paper or plastic items inside the appliance. Do not store anything inside the appliance.

03/2021
- 4 -
Copyright © 2021, Fast ČR, a.s.
SEO 2000BK
A
9
2
3
4
5
7
12
13
14
6
8
15
10
11
1

03/2021
- 5 -
Copyright © 2021, Fast ČR, a.s.
2
3
1
B
2
3
4
1
C
2
3
1
D

- 6 - 03/2021
Copyright © 2021, Fast ČR, a.s.
EN Electric oven
User'smanual
■ Prior to using this appliance, please read the user'smanual thoroughly, even in cases,
when one has already familiarised themselves with previous use of similar types of
appliances. Only use the appliance in the manner described in this user’smanual.
Keep this user'smanual in asafe place where it can be easily retrieved for future use.
In the event that you hand this appliance over to somebody else, make sure to also
include this user'smanual.
■ We recommend saving the original cardboard box, packaging material, purchase
receipt and responsibility statement of the vendor or warranty card for at least the
duration of the legal liability for unsatisfactory performance or quality. In the event
of transportation, we recommend that you pack the appliance in the original box
from the manufacturer.
■ Carefully unpack the appliance and take care not to throw away any part of the
packaging before you find all the parts of the appliance.
DESCRIPTION OF THE APPLIANCE AND ACCESSORIES
A1 Body of the oven
A2 Side tabs creating grooves for
insertion of a baking tray or rack
into the baking chamber of the
oven
The tabs form a total of three
grooves above each other, which
enable the placement of the baking
tray or rack at various heights
A3 Double-glazed window
A4 Door
A5 Handle
A6 Side panels with vents
A7 Operation indicator
A8 Control elements
A9 Light
A10 Fan
A11 Heating elements
A12 Baking tray
A13 Grilling rack
A14 Drip tray
A15 Holder for removing the rack or
baking tray
B1 Temperature control knob
B2 Baking mode knob
B3 Time control knob
C1 Top heat
Suitable for toasting and grilling
C2 Bottom heat
Suitable for heating ready meals
C3 Top and bottom heat
Suitable for baking
C4 Convection baking with running fan
PURPOSE OF USE AND APPLIANCE FEATURES
■ This electric oven is intended to be used as a stand-alone appliance and is an
equivalent replacement for a standard built-in oven that requires more space.
Its significant advantage, apart from its compact dimensions, is also its power
efficiency compared to standard ovens.
■ The electric oven is intended for baking astandard amount of food in the household.
It can be used for baking, grilling, crispening and many other tasks that are used in
the household for preparing meals.
BEFORE FIRST USE
■ Before using it, wash all removable parts that come into contact with food in hot
water using asmall amount of kitchen detergent, then rinse with clean water and
wipe dry.
■ Wipe the outer surface of the oven using asoft sponge dipped in warm water with
asmall amount of kitchen detergent and wipe it dry.
■ Also clean out the baking chamber of the oven using alightly dampened wiping
cloth and then wipe everything dry. When cleaning, take care not to wet the heating
elements or the fan. Never submerge the oven in water or any other liquid.
■ In order for the oven to remove any odours from the manufacturing process, locate
it in aposition according to the chapter OPERATING LOCATION OF THE OVEN, start
it empty for 15 minutes in the top and bottom heat combination mode C3 with the
temperature knob B3 set to the highest temperature. Before turning it on, make
sure that no packaging materials remain in the baking chamber of the oven.
■ Allow the oven to cool down after it is turned off.
Note:
When this oven is turned on for the first time, fumes may be emitted for
the first 5 to 15 minutes.This is the result of the protective coatings on the
heating elements being burned off.This is normal and does not negatively
impact the performance of the oven and the fumes will disperse with use.
OPERATION
OPERATING LOCATION OF THE OVEN
■ Locate the oven in awell-ventilated, warm and dry room with minimal dustiness. To
ensure proper air circulation, there must be aclearance of at least 12 cm along the
sides and 30 cm above the oven.
■ The surface on which the oven is placed must be stable, heat resistant and
sufficiently far from other sources of heat. The load bearing capacity of the selected
surface must correspond to the combined weight of the oven and its contents.
■ Also select alocation respecting the fact that it is not appropriate to move the oven
while it is running and that fumes are released from the food.
USING THE ACCESSORIES
■ Baking tray A12: Suitable for baked goods, cakes, confectionery, frozen food, large
roasts, foods with ahigh liquid content, etc.
■ Grilling rack A13: Suitable for grilling or roasting meals, baking in cookware,
toasting, for cake pans, soufflés or deep-frozen meals, etc.
■ Drip tray A14: Serves to catch crumbs, fat drippings and other juices released
during grilling or roasting. It protects the heating elements and the baking chamber
against soiling.
■ Holder A15: Enables the safe handling of the hot baking tray or grill rack.
INSERTING AND REMOVING ACCESSORIES
■ The baking chamber of the oven has three levels for inserting accessories. Each level
comprises of two guide grooves (see fig. D), which enable the tray or rack to be
inserted or removed.
Position 1: Top position. It is used for grilling the majority of meats. Remember
to leave sufficient amount of free space above the food since the food
may increase in volume when heated.
Position 2: Middle position. Ideal for the majority of baking and cooking,
including baking of pizza, warming up and standard cooking and
baking with hot air. Suitable for grilling certain taller meals.
Position 3: Bottom position. Provides sufficient height for baking taller meals. Use
this position for baking, re-heating or heating, etc.
■ Always insert the accessories between the guiding grooves at the same level and
also always insert them fully into the baking chamber so that they are not touching
the oven door.
■ Place the drip tray on the very bottom of the baking chamber.
■ To slide hot accessories in or out for the purpose of checking the food during
operation or for removing the accessories completely, one can use the supplied
holder A15. Nevertheless, always also use kitchen gloves.
Attention:
If you wish to slide an accessory out only partially during
operation, pull it out by no more than one half of its length,
otherwise it could tilt out.
■ Accessories that are not used during operation must be taken out of the oven.
USING THE CONVECTION BAKING MODE WITH FAN
■ Using the fan during baking is suitable namely for baking doughs and meats, it is
also appropriate for grilling meat, fish and vegetables. The fan is also used to speed
up the defrosting of meat products or vegetables from the freezer.
■ The fan quickly and evenly distributes hot air inside the oven. Thanks to this, the
food is exposed to the effects of evenly distributed heat from all sides.
■ Activate the fan by turning the knob to position C4.
Note:
When using the fan for baking, it may speed up the meal preparation time
by up to 30%. Therefore, check the food being prepared more frequently
and sooner than usual to avoid burning it.
The time required for defrosting food depends on its weight, therefore,
the defrosting process needs to be regularly monitored.
BAKING TIPS
Attention:
Do not place excessively large food pieces into the oven. The food
must not touch the sides of the baking chamber or the heating
elements, otherwise, there is adanger of fire or injury by electrical
shock.
Do not heat liquids and meals in enclosed tin cans or canning jars
or in plastic containers. Always only use cookware that is suitable
for electric ovens.
■ Take care that the heating elements are not soiled while baking/grilling, for example
by juices or fat from food, and for this reason always use the supplied drip tray.
■ Regularly inspect the food while baking it and adjust the baking time as necessary.
When preparing ready-made meals, follow the instructions on the packaging of the
food. After 3/4 of the recommended baking time has elapsed, check the meal and if
necessary, adjust the time and temperature.
■ If you will be baking various types of food after each other (e.g. meat, fish, fruit),
we recommend that you clean the remains from the baking tray/rack between the
individual courses. Do not slice the food while it is on the baking tray or rack.
■ The recommended baking times for foods recommended in most recipes or
cookbooks assume that meat has the temperature as when taken from the
refrigerator. Baking frozen meat may take significantly longer. Therefore, we
recommend using afood thermometer.The baking time may be adjusted according
to your habits and experience. The longer that you cook the food, the more well-
done and crispier it will be.
GRILLING TIPS
■ Cut the food you wish to grill into small thin slices.Trim away any excess fat from the
meat and attempt to remove excess moisture from the food before grilling.
■ You may marinade, season, coat with sauce or oil in advance or also use aluminium
foil. Prevent any soiling of the bottom of the oven by dripping juices by inserting the
drip tray or the baking tray. If you pour some water into the tray in advance, you will
create atasty gravy juice.

- 7 - 03/2021
Copyright © 2021, Fast ČR, a.s.
■ For stewing and for smaller food pieces, place the rack into position 2 (fig. ).
■ Before grilling vegetables, fish or lean meat, we recommend that you grease the
baking tray or rack with vegetable oil or spray it with aspecial spray that prevents
foods from sticking.
■ When you have finished grilling and before grilling again, it is recommended to
remove any fat and grease from the drip tray. Hot fat may smoke.
Attention:
Do not touch the front side of the door while baking or grilling
since the glass may become very hot. Pay special care to ensure
that children do not touch the door!
Note:
When the oven is used, occasionally cracking sounds will be made due to
material expanding and contracting. This event is completely normal and
it is not areason for complaint.
TURNING ON AND STARTING BAKING
■ Place the oven in asuitable location according to chapter OPERATING LOCATION
OF THE OVEN
■ Insert the baking tray or the rack with the prepared food into the oven according
to the chapter INSERTING AND REMOVING ACCESSORIES and properly close the
oven door.
■ Connect the power cord plug to a power socket. The operating indicator A7 will
be lit.
■ Use the temperature control knob B1 to set the desired temperature in the range
70-230°C.
■ Use knob B2 to select one of the baking modes.
■ Use knob B3 to set the desired baking time. This will start the oven.
Note:
Setting the time control knob to the ON position, will leave the oven
turned on permanently until the knob is set to the OFF position.
FINISHING BAKING
■ At the end of the set time the oven will beep.
■ Open the door and using kitchen gloves and the supplied holders, take the baking
tray or rack or cookware with the food out of the oven.
ENDING OPERATION
■ When you have finished using the oven, always set the baking mode knob B2 and
the temperature control knob B3 to the OFF position.
■ Disconnect the power cord from the power socket.
■ Allow the oven to cool down and then clean it according to the instructions in
chapter CLEANING AND MAINTENANCE.
Attention:
When removing meals from the oven, be especially careful – the
baking chamber of the oven and accessories will be very hot and
there is a risk of serious burns.
CLEANING AND MAINTENANCE
Attention:
Prior to any cleaning or maintenance, always disconnect the oven
from the power supply and allow the surfaces of the oven to cool
down completely.
■ Wipe the outer surface of the oven using asoft sponge dipped in warm water with
asmall amount of kitchen detergent and wipe it dry.
■ Also clean out the baking chamber of the oven using alightly dampened wiping
cloth and then wipe everything dry. When cleaning, take care not to wet the heating
elements or the fan. Never submerge the oven in water or any other liquid.
■ Clean away food remains from any of the accessories that were used and then wash
them in hot water using asmall amount of kitchen detergent, then rinse with clean
water and wipe dry.
Attention:
The oven and its power cord are not intended for washing in
adishwasher, in akitchen sink, in abathtub or in other containers.
Do not spray these parts with water or any other liquid or
submerge them in water or any another liquid.
Never use chemicals, dishwashing wool, steel wool or cleaning
agents with an abrasive component since these may seriously
damage the surface of the oven.
■ The vents of the oven must be unconditionally clean and enable air to pass through
them. In the event that avent becomes dirty or clogged with dust, clean it using
abrush or vacuum out the dirt with avacuum cleaner.
REPLACING THE LIGHT BULB
Warning:
Prior to replacing the light bulb in the baking chamber, the oven
must be completely cooled down and disconnected from the
power supply.
■ The light in the baking chamber is found in the top right corner. To replace the light
bulb, first screw out its glass cover and then screw out the light bulb itself.
■ Screw in anew light bulb having the same parameters and reinstall the glass cover.
STORAGE
■ Before storing it, the appliance must be completely cool, turned off and
disconnected from the power supply and cleaned. The individual accessories must
be clean.
■ Store the appliance and its accessories in aclean, dry place out of children'sreach.
Keep the stored appliance and its accessories away from extreme temperatures,
direct sunlight and excessive humidity and do not store it in an overly dusty
environment.
■ If storage space permits, we recommend storing the oven with the door ajar in order
to prevent undesirable odours forming inside.
TECHNICAL SPECIFICATIONS
Rated voltage range .................................................................................................... 220−240 VAC
Rated frequency........................................................................................................................50/60 Hz
Power output................................................................................................................. 1,350-1,650 W
Temperature range................................................................................................................ 70-230 °C
Time range...............................................................................................................................0-120 min
Capacity of the baking chamber .................................................................................................. 20 l
Dimensions........................................................................................................ 446 × 385 × 266 mm
Weight............................................................................................................................................... 7.5 kg
Electrical shock protection class......................................................................................................... I
Noise level ................................................................................................................................<60 dB(A)
The declared noise emission level is lower than <60 dB(A), which represents alevel Aof
sound power with respect to areference sound power of 1 pW.
Explanation of technical terminology
Safety class for electrical shock protection:
Class I– Electrical shock protection is provided by basic insulation.
Changes to text and technical parameters are reserved.
INSTRUCTIONS AND INFORMATION REGARDING THE
DISPOSAL OF USED PACKAGING MATERIALS
Dispose of used packaging material at asite designated for waste in your municipality.
DISPOSAL OF USED ELECTRICAL AND ELECTRONIC
EQUIPMENT
This symbol on products or original documents means that used
electric or electronic products must not be added to ordinary
municipal waste. For proper disposal, renewal and recycling, hand
these products over to determined collection points. Alternatively, in
some European Union states or other European countries you may
return your appliances to the local retailer when buying an equivalent
new appliance.
Correct disposal of this product helps save valuable natural resources
and prevents potential negative effects on the environment and human health, which
could result from improper waste disposal. Ask your local authorities or collection
facility for more details.
In accordance with national regulations penalties may be imposed for the incorrect
disposal of this type of waste.
For business entities in European Union states
If you want to dispose of electric or electronic equipment, ask your retailer or supplier
for the necessary information.
Disposal in other countries outside the European Union.
This symbol is valid in the European Union. If you wish to dispose of this product,
request the necessary information about the correct disposal method from the local
council or from your retailer.
This product meets all the basic requirements of EU directives related to
it.
Table of contents
Other Sencor Oven manuals
Popular Oven manuals by other brands

Indesit
Indesit DIM 732J K.A IX operating instructions

Hotpoint Ariston
Hotpoint Ariston FK 103E 0 X/HA operating instructions

KitchenAid
KitchenAid KOSE500ESS Control guide

Whirlpool
Whirlpool AMW 901 Instructions for use

GE
GE ZEK734GP Use and care guide

Siemens
Siemens HB 79G Series User manual and installation instructions