SENSECAP T1000-A User manual

User Guide
Seeed Technology Co., Ltd. All rights reserved. www.seeedstudio.com
1/ 56
SenseCAP Tracker T1000-A/B
User Guide
Version: V1.0

User Guide
Seeed Technology Co., Ltd. All rights reserved. www.seeedstudio.com
2/ 56
Contents
1. Introduction................................................................................................................................4
2. Features.....................................................................................................................................5
2.1 Hardware Specifications ..................................................................................................5
2.2 Architecture......................................................................................................................6
2.2.1 Get the GNSS/Wi-Fi/Bluetooth Location ................................................................7
2.2.2 LoRaWAN Network................................................................................................8
2.2.3 Application.............................................................................................................9
2.3 Main Function..................................................................................................................9
2.3.1 Work Mode ............................................................................................................9
2.3.2 Sensor Description.................................................................................................9
2.3.3 Data Cache..........................................................................................................10
3. How to Operate the Button.......................................................................................................11
4. How to Configure via Bluetooth................................................................................................13
4.1 Download SenseCAP Mate App.....................................................................................13
4.2 Quick Start with SenseCAP Server................................................................................13
4.3 Setting the Tracker Parameters through the App............................................................14
4.3.1 Bluetooth Pairing .................................................................................................14
4.3.2 Test the Sensor....................................................................................................15
4.3.3 Set the LoRa Parameters ....................................................................................16
4.3.4 Explanation of Frequency Plan and EUI...............................................................17
4.3.5 Setting the Work Mode ........................................................................................19
4.3.6 Configuring Geolocation Settings.........................................................................22
4.3.7 Sending and Exiting Bluetooth Pairing.................................................................23
5. Binding the Device and Checking the Data..............................................................................24
5.1 Check Data via App .......................................................................................................24
5.2 Check Data via SenseCAP Portal..................................................................................24
5.2.1 Create Account and Query Data ..........................................................................25
5.2.2 API Instruction .....................................................................................................26
6. Payload Decoder .....................................................................................................................27
6.1 Decoder Code................................................................................................................27
6.2 Uplink Packet Parsing....................................................................................................27
6.2.1 Device Status Packet -Event Mode 0x01.............................................................28
6.2.2 Device Status Packet -Periodic Mode 0x02 .........................................................32
6.2.3 Heartbeat Packet -0x05.......................................................................................33
6.2.4 GNSS Location and Sensor Packet-0x06 ............................................................34
6.2.5 Wi-Fi Location and Sensor Packet-0x07..............................................................36
6.2.6 Bluetooth Location and Sensor Packet-0x08 .......................................................38
6.2.7 GNSS Location Only Packet-0x09.......................................................................40
6.2.8 Wi-Fi Location Only Packet-0x0A.........................................................................42
6.2.9 Bluetooth Location Only Packet-0x0B..................................................................44
6.2.10 Positioning Timeout and Error Code Packet-0x0D...............................................46
6.3 Downlink Packet, FPort=5..............................................................................................46

User Guide
Seeed Technology Co., Ltd. All rights reserved. www.seeedstudio.com
3/ 56
6.3.1 Setting the SOS Mode -0x80 ...............................................................................47
6.3.2 Setting the Uplink Interval -0x81 ..........................................................................47
6.3.3 Open the buzzer -0x82 ........................................................................................47
6.3.4 Setting the Work Mode -0x83...............................................................................48
6.3.5 Setting the Work Mode -0x84...............................................................................48
6.3.6 Request Location -0x85.......................................................................................51
6.3.7 Setting Positioning strategy -0x86........................................................................51
6.3.8 Request Event Parameters -0x87........................................................................51
6.3.9 Request Device Status Packet -0x88...................................................................52
6.3.10 Reboot Device -0x89 ...........................................................................................52
6.3.11 Enable Temperature and Light Sensor -0x8C.......................................................52
6.3.12 Enable SOS Alarm -0x8D.....................................................................................52
7. FAQ .........................................................................................................................................54
7.1 Location Issues..............................................................................................................54
7.1.2 Why is Wi-Fi or Bluetooth location not displayed on theApp map?....................54
7.2 Battery Issues................................................................................................................54
8. Document Version....................................................................................................................56

User Guide
Seeed Technology Co., Ltd. All rights reserved. www.seeedstudio.com
4/ 56
1.Introduction
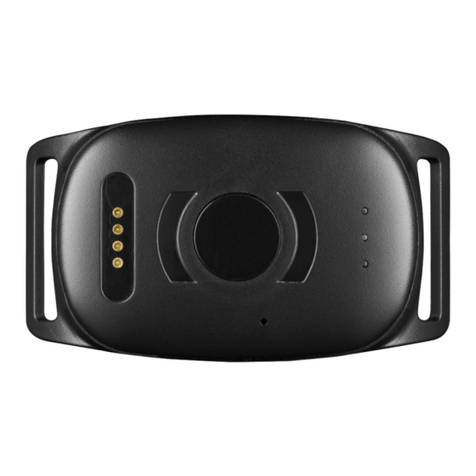
SenseCAP T1000 is a credit card-sized tracker designed for asset and personal tracking. It utilizes
GNSS/Wi-Fi/Bluetooth to provide high accuracy positioning in both outdoor and indoor scenarios.
Dimension:

User Guide
Seeed Technology Co., Ltd. All rights reserved. www.seeedstudio.com
5/ 56
2.Features
2.1 Hardware Specifications
General Parameters
Product Model
T1000-A/T1000-B/T1000-C/T1000-D
Backhaul
LoRaWAN® (v1.0.4 Class A)
Bluetooth
Bluetooth v5.1, setting via App
LoRaWAN Channel Plan
IN865/EU868/US915/AU915/AS923/KR920/RU864
Temperature
Range: -20 to 60℃;
Accuracy: ±1℃(min ±0.5℃, max ±1℃)
Resolution: 0.1℃
Light
0 to 100% (0% is dark, 100% is brightest)
3-Axis Accelerometer
3-Axis Accelerometer to detect movement
LED and Buzzer
1xLED and 1x buzzer to indicate status
Button
1xButton to operate and trigger events (SOS)
Antenna
Internal (GNSS/LoRa/Wi-Fi/BLE)
Communication Distance
2 to 5km (depending on gateway antenna, installation, and
environments)
IP Rating
IP65
Dimensions
85 x 55 x 6.5 mm
Device Weight
32g
Operating Temperature
-20℃to +60℃
Operating Humidity
5% - 95% (No condensation)
Certification
CE /FCC /TELEC /RoHS /REACH
Location
GNSS Constellation
T1000-A/B: GPS/GLONASS/Galileo/BeiDou/QZSS
T1000-C/D: GPS/ BeiDou
GNSS Sensitivity
-145dBm cold start / -160 dBm Tracking
GNSS Location Accuracy
~1m CEP, GPS, -130dBm
Wi-Fi Positioning
Passive scanning, uploads the scanned 4 MAC addresses
Bluetooth Positioning
uploads the scanned 3 best signal MAC addresses of Beacon
Data Cache
Cache 1000 data when there is no LoRaWAN network
Battery
Battey Capacity
Rechargeable lithium battery, 700mAh
*Battery Life Estimates
4 months on a single charge (uplink every 1 hour, only GNSS
data)
Battery Life Monitoring
Periodic uplink battery level
Charge Cable (Adapter not
included)
USB magnetic charging cable, 1 meter

User Guide
Seeed Technology Co., Ltd. All rights reserved. www.seeedstudio.com
6/ 56
Power Input Voltage
4.7 to 5.5V DC
Charging Temperature Limit
0 to +45℃(Beyond the temperature range, the charge will be
limited, and the LED will blink quickly)
*Battery life depends on temperature, installation, location interval, network coverage and sensor settings.
2.2 Architecture
We offer two different solutions:
1) T1000-A/T1000-B: GNSS data without special encryption.
2) T1000-C/T1000-D: GNSS data encrypted via Semetech LoRa Edge, GNSS data needs to be
decrypted through LoRa Cloud.
The main chip used in the T1000 is based on Semetech LR1110, LR1110 has built-in GNSS function
to obtain encrypted satellite data, which is finally uploaded to the Cloud and parsed by LoRa Cloud.

User Guide
Seeed Technology Co., Ltd. All rights reserved. www.seeedstudio.com
7/ 56
As depicted in the above figure, the entire network comprises multiple components ranging from
hardware to software.
2.2.1 Get the GNSS/Wi-Fi/Bluetooth Location
1. GNSS
Location is obtained outdoors via satellite, such as GPS.
2. Wi-Fi
Use the passive Wi-Fi AP MAC address scanner to obtain the MAC address and RSSI of nearby
Wi-Fi and upload it through LoRaWAN. The application server resolves the location according to the
global Wi-Fi location service (such as Google Geolocation API) to obtain the final location.

User Guide
Seeed Technology Co., Ltd. All rights reserved. www.seeedstudio.com
8/ 56
3. Bluetooth
The Tracker T1000 scans the MAC address and RSSI of nearby Bluetooth beacons and uploads
them through LoRa. The application server needs to calculate the real geographical location based
on the MAC address and signal strength (RSSI) of the Bluetooth beacons.
2.2.2 LoRaWAN Network
There are already many large LoRaWAN network providers around the world whose base stations
already fully cover many cities and regions, so the tracker can run on these large LoRaWAN
networks.
Such as Helium, The Things Network, Actility, Loriot, Senet, Everynet, KPN etc.
(Helium Network)
If you want to deploy your own private network, you can also purchase a gateway. SenseCAP offers
cost-effective indoor and outdoor gateways.
⚫SenseCAP Outdoor Gateway
⚫SenseCAP Indoor Gateway

User Guide
Seeed Technology Co., Ltd. All rights reserved. www.seeedstudio.com
9/ 56
2.2.3 Application
SenseCAP provides the SenseCAP Mate App and SenseCAP Portal, which are mainly used as
device settings and basic functions for users to quickly experience the basic functions of the Tracker.
We also provide App and platform customization services. Please refer to the last chapter and
contact our team.
2.3 Main Function
2.3.1 Work Mode
The Tracker can run different modes in different scenarios.
Work Mode
Description
Scene
Standby Mode
Only heartbeat packets are
uploaded, just includes battery info.
The location can be obtained using
the LoRa downlink command.
If you needto locate the device for a
long time and the device can run for a
long time before beingcharged, the
cloud platform can issue a location
request command to locate the device.
Periodic Mode
Set aninterval at which the device
periodically uploads location and
sensor data.
This mode is recommended for most
scenarios.
Event Mode
Adjust the upload interval according
to the temperature, light and
acceleration sensor of the tracker,
including temperature event, light
event, motion event, motionless
timeout, and shock event.
It can be used in complex scenarios,
such as monitoring the transportation of
important items. But the power
consumption increases a lot.
2.3.2 Sensor Description
You can choose whether to use these sensors:
1) Turn off all sensors, but you can also choose a version without sensor to reduce costs.
2) Only the temperature and light sensors are enabled to monitor data periodically with low power
consumption.
3) When temperature, illumination and accelerometer are used as trigger conditions, the sensor
will always be powered, and the device consumes a lot of power.

User Guide
Seeed Technology Co., Ltd. All rights reserved. www.seeedstudio.com
10 / 56
Sensor
Description
Temperature
This is an onboard independent temperature sensor with an accuracy of ±0.5~1℃.
It should be noted that there may be some temperature measurement delay here,
because it is separated from theshell.
Light
The light sensor is not the actual lumen value monitored, but a percentageof the
light from dark to amount. Mainly can be used for anti-demolitionmonitoring and
some light sensitive monitoring.
3-Axis
Accelerometer
By setting the value of acceleration, motion event and shock event are triggered.
2.3.3 Data Cache
The device can cache data, which can be enabled through Bluetooth configuration by opening
"GNSS Data Cache". The device uploads confirmation packets. When the LoRaWAN signal
coverage is weak or there is no network coverage, the device cannot receive an ack when
uploading data. In this case, the data will be saved and entered the next cycle. When the device
successfully uploads data at some point, it will send offline data. The maximum number of data that
can be cached is 1000.

User Guide
Seeed Technology Co., Ltd. All rights reserved. www.seeedstudio.com
11 / 56
3.How to Operate the Button
Actions
Description
LED Status
Buzzer
Press button and
hold for 3 seconds
If the tracker is powered off, press
and hold the button for 3 seconds to
turn it on. The Bluetooth pairing will
be activated automatically, and the
user can use the appto scan and
connect.
The LED flashes
once a second.
Melody of rise
If the device is powered on, press
and hold the button for 3 seconds to
activate Bluetooth pairing.
The LED flashes
once a second.
None
Press button and
hold for 9 seconds
Power off.
None
Melody of descent
Join LoRa network
After exiting the Bluetooth settings,
try to join the LoRaWAN network.
The breathing light
flashes when trying
to access the
network, and flashes
quickly if the network
is successfully joined
A quick and
cheerful melody
when the network
is successfully
joined
Press once
Get location/sensor data, upload
data, and trigger the "Press once"
event immediately.
The LED is bright for
2 seconds
A sound will beep
when the data is
uploaded
successfully.
If Bluetooth pairing is turned on,
press once can be turned off
Bluetooth.
The LED will off
None
Press twice
continuously
If the SOS is set to single-shot
mode, double-clicking the button will
activate the single-shot SOS mode
and upload the location/sensor data
and SOS events once.
Twinkle with the
sound
3 seconds of
alarm sound
If the SOS is set to continuous
mode, double-click the button to
activate the continuous SOS mode.
The location, sensor data, and SOS
events will be uploaded once every
minute, and the mode will
automatically end after 30 times.
Twinkle with the
sound
A constant alarm
sound

User Guide
Seeed Technology Co., Ltd. All rights reserved. www.seeedstudio.com
12 / 56
Double-click twice to exit SOS
mode
None
None
Note:
1. Power off is recommended when not deployed.
2. When first turned on, it isrecommended to go to outdoors, and the GPS needs to update
the time via satellite.
2. If the frequency band does not matchthe gateway frequency, thetracker cannotjoin the
network.

User Guide
Seeed Technology Co., Ltd. All rights reserved. www.seeedstudio.com
13 / 56
4.How to Configure via Bluetooth
4.1 Download SenseCAP Mate App
As a tool, SenseCAP Mate App is used to config LoRa parameters,interval, bind devices to your account
and check device basic information. You can download App from
https://install.appcenter.ms/orgs/seeed/apps/sensecap-mate/distribution_groups/public
1) For iOS, please search for “SenseCAP Mate” in the App Store and download it.
2) For Android, please search for “SenseCAP Mate” in the Google Store and download it.
4.2 Quick Start with SenseCAP Server
1) Add Device via scanning QR code.

User Guide
Seeed Technology Co., Ltd. All rights reserved. www.seeedstudio.com
14 / 56
2) Press the tracker’s button for 3 seconds, and select device by SN. For quick start, you can
select quick config the basic parameters, if you want to set more parameters, please select
“Advanced Configuration”.
3) Select the frequency, it is same to your gateway. Set the Uplink interval, work mode default is
“Periodic Mode”, you can set other mode via “Device Bluetooth Configuration” on “User” page.
4) Tracker will try to join LoRaWAN network, the breathing light flashes when trying to join the network,
and flashes quickly if the network is successfully joined with a quick and cheerful melody.
4.3 Setting the Tracker Parameters through the App
4.3.1 Bluetooth Pairing
1) Press button and hold for 3 seconds to turn it on, then turn on the Bluetooth pairing automatically,
user can use the appto scan and connect.
2) Open the App and click the “Tracker T1000”. Select the “Setup” to config the tracker.
3) Select the device by S/N (S/N is on the label of the device). Then, the basic information of the sensor
will be displayed after entering.

User Guide
Seeed Technology Co., Ltd. All rights reserved. www.seeedstudio.com
15 / 56
4.3.2 Test the Sensor
Click the “Measure”, it will read the sensor value:
Temperature
Range: -20 to 60℃; Accuracy: ±1℃(min 0.5℃, max 1℃);
Resolution: 0.1℃
Light
0 to 100%, (0% is dark, 100% is brightest)

User Guide
Seeed Technology Co., Ltd. All rights reserved. www.seeedstudio.com
16 / 56
4.3.3 Set the LoRa Parameters
Trackers are manufactured to support universal frequency plan from 863MHz ~928MHz in one SKU.
Every single device can support 7 frequency plans.
Parameters
Description
Platform
SenseCAP for The Things Network
Default platform.
It must be used with SenseCAP
Gateway. SenseCAP builds a
proprietary TTN server that enables
sensors to be used out of the box
when paired with an SenseCAP
gateway.
⚫SenseCAP Outdoor Gateway
⚫SenseCAP Indoor Gateway
SenseCAP for Helium
When there is the Helium network
coverage, data can upload via
Helium. Devices run on a private
Helium console of SenseCAP.
Users do not need to create devices
on Helium console, out of the box
with SenseCAP Mate App and
Portal.
Helium coverage:
https://explorer.helium.com/
Helium
Connect device to your public
Helium console.
The Things Network
Connect device to your TTN(TTS)
server.
Other Platform
Other LoRaWAN Network Server.
Frequency Plan
EU868 / US915 / AU915 / KR920 / IN865
/ AS923-1 / AS923-2 / AS923-3 / AS923-4
Default EU868
Packet Policy
1C
LoRaWAN use confirm packet.
LoRaWAN ADR
Default open.
LoRaWAN parameters, default open
is recommended.
Restore LoRa
Configuration
When “Platform” switches back to
SenseCAP from another platform, LoRa
parameters (EUI/App EUI/ App Key etc.)
You can use this function when you
need to restore LoRa parametersto
factory defaults.

User Guide
Seeed Technology Co., Ltd. All rights reserved. www.seeedstudio.com
17 / 56
need to be restored.
4.3.4 Explanation of Frequency Plan and EUI
The sensor supports two network accessmodes, OTAA by default.
Parameter
Description
OTAA (default)
Over The Air Activation, it joins the network through Device EUI,
App EUI, and AppKey.
ABP
Activation By Personalization, it joins the network through
DevAddr, NwkSkey, and AppSkey.
The device uses OTAA to join the LoRaWAN network by default. So, it can set the device EUI, App EUI
and App Key.
Parameter
Type
Device EUI
16, hexadecimal from 0 ~ F
App EUI
16, hexadecimal from 0 ~ F
App Key
32, hexadecimal from 0 ~ F

User Guide
Seeed Technology Co., Ltd. All rights reserved. www.seeedstudio.com
18 / 56
Frequency
Common
Name
Sub-band
EU863-870
EU868
--------
US902-928
US915
Sub band from 1to 8(default sub-band 2)
AU915-928
AU915
Sub band from 1to 8(default sub-band 2)
KR920-923
KR920
--------
IN865-867
IN865
--------
AS923
AS923-1
Frequency plan for Helium
AS923-2
AS923-3
AS923-4
RU864-867
RU864
--------
Note1:
Different countries and LoRaWAN network servers use different frequencyplans.
For Helium network, please refer to:
https://docs.helium.com/lorawan-on-helium/frequency-plans
For The Things Network, please refer to:
https://www.thethingsnetwork.org/docs/lorawan/frequency-plans/
Note2:
1) When using the SenseCAP platform, the EUI, APPEUI and APP Key are fixed and are
the same as the sensor label.
2) When the sensor is selected to be used with a public platform such as Helium or TTN, the
EUI will not change, andthe sensor will generate a new fixed App EUI and App Key for
network access.
3) To obtain EUI information in batches, please contact our sales team.

User Guide
Seeed Technology Co., Ltd. All rights reserved. www.seeedstudio.com
19 / 56
4.3.5 Setting the Work Mode
Parameters
Description
Heartbeat Interval
If the tracker does not upload any data for
a certain period of time, the heartbeat
packet will be triggered.
Default 720 minutes.
Enable
Temp&Light
If this switch is turned on, temperature
and light will be collected and uploaded,
but it will increase power consumption.
Off by default.
SOS Report Mode
Single
If SOS is set to single mode, double-
clicking the button will enable the
single-shot SOS mode and upload
the location/sensor data and SOS
events once
Continuous
Default use continuous.
If SOS is set to continuous mode,
double-click the button to open the
continuous mode of SOS, and
upload location, sensor data and
SOS events once in 1 minute, and
automatically end after 30 times
Work Mode
Standby Mode
The device goes to sleep and
uploads heartbeat according to
heartbeat interval.
Periodic Mode
Location and sensor data are
uploaded according to the upload
interval.
Event Mode
Set threshold trigger conditions
according to measured values such
as temperature, light, and
movement, and adjust the upload
interval after trigger.
Uplink Interval
(min) –Periodic
Mode
Periodically locate and upload data.
Default 60 minutes.
The higher the frequency, the higher
the power consumption.
Restore All
Settings
Restore all configuration parameters to
factory Settings, includes LoRa, Work
Mode and Geolocation.

User Guide
Seeed Technology Co., Ltd. All rights reserved. www.seeedstudio.com
20 / 56
Event Mode
Description
Uplink Interval –
Non-event (min)
This is the upload interval when no events
are triggered.
Default 60 minutes.
Range: 1~10080 min.
Shock Event
When the shock event is enabled, the
shock of the tracker will trigger a data
report, including the vibration event,
location, and sensor data.
Off by default.
This manual suits for next models
1
Table of contents

