Sentimental Me Memorabilia Storage Box User manual

Assembly Instructions For Sentimental Me, Inc. Memorabilia Storage Box
Video Assembly Instructions: For a video which demonstrates how to assemble the storage box, please go to the sentimentalmeboxes.com website and click on the Video Box Assembly link at the bottom of the website’s Home Page. We highly recommend
that you watch the assembly instructions video before and while you are assembling the storage box. The written assembly instructions below are very detailed and might vary with the assembly instructions video in certain respects because there is more than
one way to assemble some of the box parts. The purpose of the assembly instructions video is to give our customers additional assistance in assembling the storage box.
Written Assembly Instructions: Separate the identical box parts in piles on a flat working surface and make sure you have the correct number of parts. Included are the following: one (1) Box Bottom; one (1) Box Top; one (1) Box Liner; one (1) Large Open
Slip Case; one (1) Small Open Slip Case; two (2) Large Interior Boxes; four (4) Medium Interior Boxes; five (5) Small Interior Boxes; and one (1) Tray having one (1) Tray Body, (1) Long Tray Divider and two (2) Small Tray Dividers. Before assembling each
part of the box, please notice that there are creases in each part except the Box Bottom. Please slightly and partially fold each part very carefully along the crease lines to make assembly easier. There might be some noticeable perforated “excess”
cardboard pieces in certain parts that will not be used and must be punched out by hand. Also, certain parts might be slightly attached together by cardboard (especially the Tray parts), and must be pulled apart by hand. Please follow the directions listed below
with each part illustration. In the unlikely event any part of the box becomes unglued, please apply a generous amount of Gorilla Super Glue to the affected area to repair. You might also apply Gorilla Super Glue in appropriate areas to the Box
Bottom, Box Top and Box Liner to further strengthen such parts’ connections.
Box Bottom Box Top
Place the Box Bottom upright as shown on a working surface. Push the sides inward and the Box Bottom will lock into
place. With the Box Bottom locked into place, roll over the top panels on all sides of the Box Bottom into the Box Bottom
as far as they will go, with the panels on the sides above the handle openings being rolled first. If they don’t lock into
place, don’t worry because the Box Liner when inserted in the Box Bottom will keep such top panels securely against the
sides of the Box Bottom.
Fold over the flanges on the short sides of the part until they meet the Box Top’s main body. Then, roll the panels on the long
sides of the Box Top over the flanges and lock them into place. After the panels on the long sides of the Box Top are locked
into place, roll over the panels on the short sides of the Box Top to complete the set up. The diagonal cuts on the corners will
lock the Box Top’s side panels into place.
Box Liner Large and Small Open Slip Cases
Fold the panels of the Box Liner until the outer panels meet. Please make sure that the bottom piece attached to the long
side of the Box Liner stays above the bottom pieces attached to the short sides of the Box Liner having handle openings.
Insert the Box Liner as shown above into the Box Bottom.
Lay the parts flat as shown. Make sure the four (4) flanges attached to the part’s sides are bent and loosened up. While keeping
the bottom of the part sitting on the flat surface you are working on, slowly lift upward the side panels of the part. The two (2)
smaller flanges should sit on top of the part’s bottom and the two (2) larger flanges should sit on top of the two (2) smaller
flanges and the pieces when closed together should form a rectangular shape with only the two (2) tabs extending beyond the
sides of the part. Now, lock both tabs into the openings on the part’s sides. While the part is sitting in an upright position, roll
over the top flaps on the short ends of the part into the box. Please notice there are notches cut into the flaps on the short ends
of the part and tabs extending from the flaps on the long sides of the part. Now, roll over the top flaps on the long sides of the
part and lock their tabs into the notches cut into the flaps on the short ends of the part. Insert both Open Slip Cases into the Box
Bottom, one on each side.

Large, Medium and Small Interior Boxes
For
the
Large and Medium Bo
xe
s:
Lay the part flat folding the side panels upward as shown above. Fold the side panels (the “Main
Side Panels”) that have two (2) flanges and two (2) extended tabs attached upward until the flanges meet together. Push the cover side
panel with 1 or 2 holes in it (the “Cover Side Panel”) upward making sure its two (2) flanges go over the flanges attached to the Main
Side Panels and are folded inside the Main Side Panels. Insert the tabs attached to the Main Side Panels into the slot openings on the
Cover Side Panel locking all sides into place. Tuck the end of the Cover Side Panel inside the box opening to close. Tuck the end of the
Cover Side Panel inside the box opening to close. Insert the two (2) Large Boxes (with the holes in the boxes pointing upwards) into the
Box Bottom between the two (2) Open Slip Cases. Insert the four (4) Medium Boxes (with the holes in the boxes pointing upwards) into
the Box Bottom between the two (2) Open Slip Cases and on top of the two (2) Large Boxes.
For the Small Box
es
:
Lay the part flat folding the side panels upward. Please note there are two (2) part pieces that
each have two (2) 1 5/8” square flanges attached. Lift such two (2) part pieces upwards until the ends of the flanges
meet together forming a rectangle. Fold the side panels with attached extended tabs over the flanges and insert the
tabs into the slot openings locking the side panels into place. Tuck the end of the remaining panel inside the box
opening to close.
Tray
Please note the following before beginning to assemble: there are two (2) flanges attached to each long side panel of the Tray Body; the
short side panel of the Tray Body closest to the slot openings in the bottom of the Tray Body (the “Tray Body Slot Openings”) will be
hereafter called the “Tray Compartment Side Panel”; the short side panel opposite the Tray Compartment Side Panel will be hereafter
called the “Open Compartment Side Panel”; the Tray Compartment Side Panel and the Long Tray Divider each has three (3) flaps that
will be used to lock the two (2) Short Tray Dividers into place; and both Short Tray Dividers and the Long Tray Divider have two (2)
flanges on each end of the dividers. Fold the side panels of the Tray Body upward as shown above and make sure the flanges attached to
the long sides of the Tray Body are pointed inward. The short and long side panels of the Tray Body have top flaps that will eventually
lock certain Tray components into place. No matter in which order it is done, the important thing to note is that (a) the flaps on the Long
Tray Divider and the Tray Compartment Side Panel will lock the two (2) Short Tray Dividers in place and (b) the top flaps of the Tray
Compartment Side Panel and the Open Compartment Side Panel are rolled over the flanges on the long sides of the Tray Body and locked
into the Tray Body. Take the Long Tray Divider and the two (2) Short Tray Dividers and fold them open as shown above. Insert the
flanges attached to the two (2) Short Tray Dividers into the side slots of the flaps of the Long Tray Divider and lock them into place by
folding the flaps on the Long Tray Divider over the flanges of both Short Tray Dividers and carefully insert the tabs extending from the
Long Tray Divider into the Tray Body Slot Openings.
Also, insert the flanges attached to the opposite end of both Short Tray Dividers into the side slots of the flaps of the
Tray Compartment Side Panel and lock them into place by folding the flaps of the Tray Compartment Side Panel
over the flanges on such Short Tray Dividers and locking such flaps into the Tray Body. Roll the flaps attached to the
Tray Compartment Side Panel over (1) the flanges attached to each long side panel of the Tray Body and (2) the
flanges attached to the end of both Short Tray Dividers and lock them into place in the Tray Body. Roll the flaps
attached to both long side panels of the Tray Body over the flanges attached on each end of the Long Tray Divider
locking the Long Tray Divider into place. Finally, roll the flap attached to the Open Compartment Side Panel over
the flanges attached to each long side panel of the Tray Body and lock them into place in the Tray Body. The
finished tray should resemble the illustration above. Insert the five (5) Small Boxes into the Tray’s largest open
compartment so they back up against the Tray’s three (3) smallest compartments. Insert the assembled Tray into the
Box Bottom between the sides of the Box Liner so it rests on top of the Open Slip Cases and Medium Boxes. Now,
carefully insert the Box Top on top of the Box Bottom. It might be a tight fit initially, but eventually the Box Top
will loosen up and fit more easily on the Box Bottom.
Any inquiries should be directed to customerservice@sentimentalmeboxes.com if you cannot find the answer you are looking for on the sentimentalmeboxes.com website.
Popular Indoor Furnishing manuals by other brands
Hailey Home
Hailey Home AT1458 Assembly instructions
Blumfeldt
Blumfeldt 10031441 manual
Eureka Ergonomic
Eureka Ergonomic ERK-FCV-46W Assembly instruction
Southern Enterprises
Southern Enterprises Andress HO0163A0TX Assembly instructions
Coaster
Coaster 105522 Assembly instructions

Habitat
Habitat Sarka 824951 manual
Better Homes and Gardens
Better Homes and Gardens Oaklee BHS336158813026 manual
ET2
ET2 E42014-90 quick start guide

LAZBOY
LAZBOY Sears Scarlett Ottoman Use and care guide
Forest AV
Forest AV FOR08-23R instruction manual
Baxton Studio
Baxton Studio 2200-1 Assembly instructions
Bob's Discount Furniture
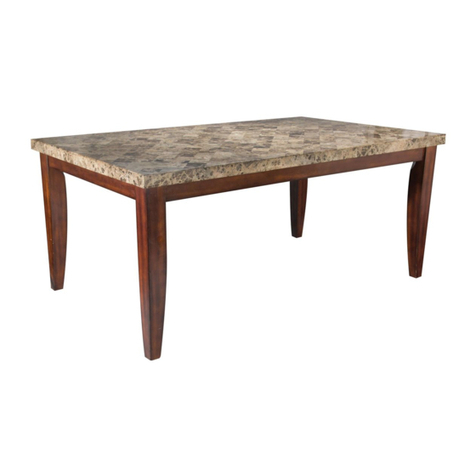
Bob's Discount Furniture Montibello Marble Table Top Assembly instructions

