P11
P18
P14
P12
P7
H3
H5 H7
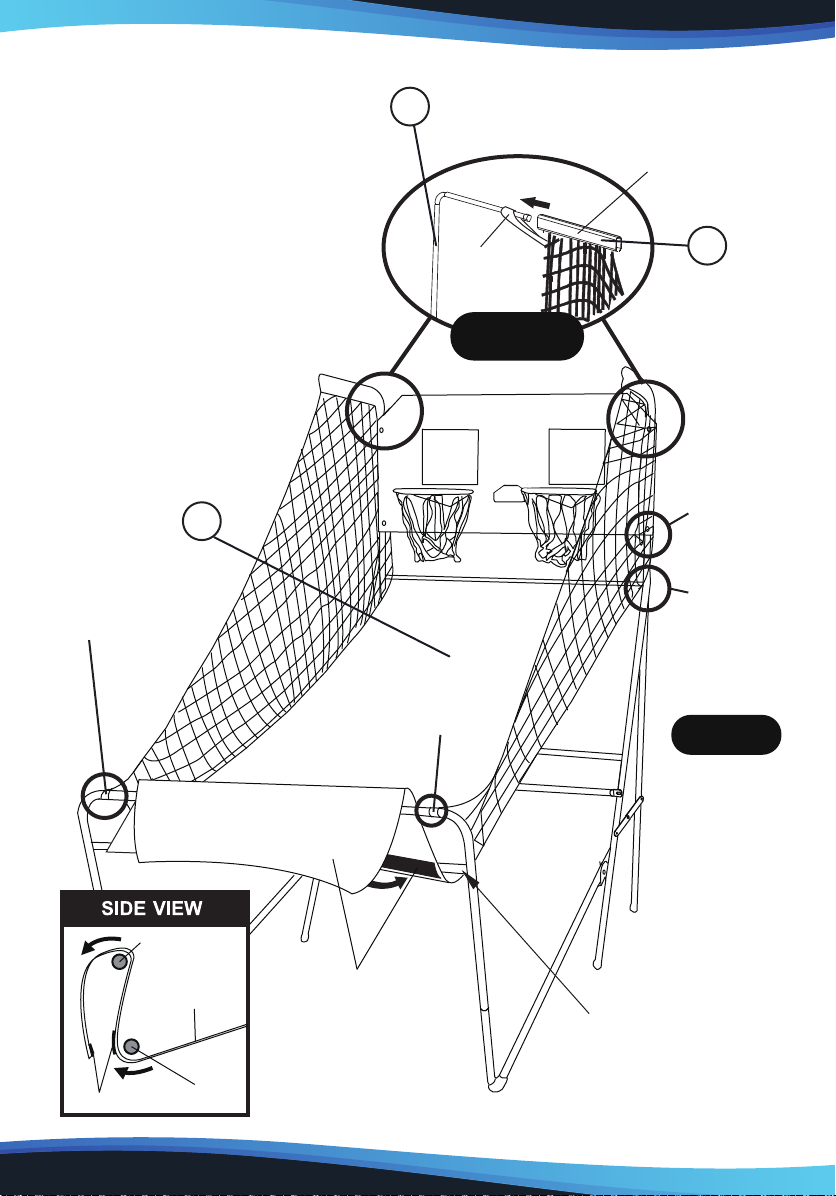
FIGURE 6
NOTE: P11 Mechanical Scoring Arm
sensor plug must pass through
P7 Backboard and P18 Mechanical
Scoring Arm Support Plate.
www.SereneLifeHome.com8
P9
P7
P13
P10
NOTE:
Remove Protective
Coating before
assembly.
FIGURE 7
Note: This is a special rim net
designed to avoid entanglement
with the mechanical scoring arm.
Net does have a top and bottom,
The long loops go to the top.
STEP 6
Attach P12 Rim and P14 Rim Support Plate to the P7 Backboard using H3 Bolts,
H7 Lock Washers and H5 Wing Nuts as shown in FIGURE 6.
Attach P11 Mechanical Scoring Arms and P18 Mechanical Scoring Arm
Support Plates to the P7 Backboard using H3 Bolts H7
Lock washers and H5 Wing nuts as
shown in FIGURE 6.
Use T1 Phillips Allen Wrench
and Plyers (not provided)
to tighten all Bolts.
STEP 7
Attach P9 Electronic Scorer and P10
Electronic Scorer Face Plate to P7
Backboard as shown in FIGURE 7.
NOTE: Place P10 Electronic Scorer
Face Plate into P7 Backboard rst,
then carefully “press” P9 Electronic
Scorer onto the four tabs on P10.
You should hear the four tabs
“snap” into place.
Loop the P13 Rim Net through the
ram horns on the P12 Rims as shown
in FIGURE 7.
A B C