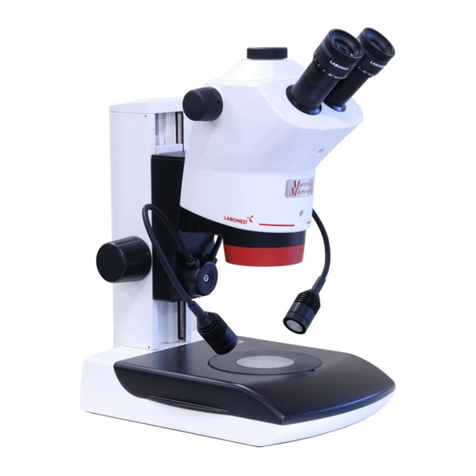
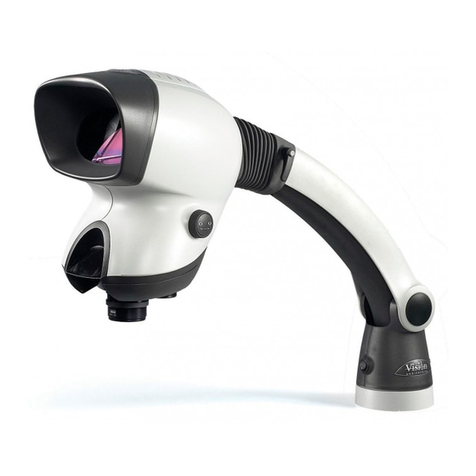
SERVO VISION BLM-340M User manual

BestScope
BestScope International
International
Il Limited
Limited
Limited
Limited
1
Digital
Digital
Digital
Digital LCD
LCD
LCD
LCD Stereo
Stereo
Stereo
Stereo Measuring
Measuring
Measuring
Measuring M
M
M
Microscope
icroscope
icroscope
icroscope
BLM-340M
BLM-340M
BLM-340M
BLM-340M
User
User
User
User
’
’
’
’
s
s
s
s Manual
Manual
Manual
Manual
This manual is written for Industrial LCD Microscope BLM-340M. For safety and for exerting the best
performance, making you familiar with the instrument entirely, it is strongly recommended that you read this
manual carefully before using the microscope.

BestScope
BestScope
BestScope
BestScope International
International
International
International Limited
Limited
Limited
Limited
2
Contents
Contents
Contents
Contents
Use
Use
Use
Use Notices
Notices
Notices
Notices
1.
1.
1.
1. Name
Name
Name
Name of
of
of
of Components
Components
Components
Components ………………………………………………………………4
4
4
4
2.
2.
2.
2. Adjust&Operation
Adjust&Operation
Adjust&Operation
Adjust&Operation ………………………………………………………………5
5
5
5
2.1
2.1
2.1
2.1 Installation
Installation
Installation
Installation ………………………………………………………………5
5
5
5
3.
3.
3.
3. Installation
Installation
Installation
Installation and
and
and
and Operation
Operation
Operation
Operation of
of
of
of Image
Image
Image
Image Tester
Tester
Tester
Tester …………………………………17
17
17
17
4.
4.
4.
4. Maintenance
Maintenance
Maintenance
Maintenance ………………………………………………………………22
22
22
22
4.1
4.1
4.1
4.1 Maintenance
Maintenance
Maintenance
Maintenance of
of
of
of LCD
LCD
LCD
LCD microscope
microscope
microscope
microscope …………………………………………………22
22
22
22

BestScope
BestScope
BestScope
BestScope International
International
International
International Limited
Limited
Limited
Limited
3
Use
Use
Use
Use Notices
Notices
Notices
Notices
BLM-340M LCD microscope has renovated the traditional way of microscopic observation and
adopted a modern way of electronic imaging. Options for accurate 10x-75x magnification
range.This patented microscope makes the observation more comfortable and thoroughly resolves
the fatigue caused by using a traditional microscope at work for a long time. It features high
resolution of LCD display to preview genuine imagings .This unit integrates magnification, imaging,
display and built-in LED illumination functions. It can be conveniently applied to testing and
inspecting in product assembly, research and teaching fields.
I.
I.
I.
I. S
S
S
Safety
afety
afety
afety note
note
note
note
1.
1.
1.
1. C
C
C
Carefully
arefully
arefully
arefully open
open
open
open the
the
the
the box,
box,
box,
box, avoid
avoid
avoid
avoid the
the
the
the accessories,
accessories,
accessories,
accessories, dropping
dropping
dropping
dropping to
to
to
to ground
ground
ground
ground and
and
and
and being
being
being
being damaged.
damaged.
damaged.
damaged.
2.
2.
2.
2. Do
Do
Do
Do keep
keep
keep
keep the
the
the
the instrument
instrument
instrument
instrument out
out
out
out of
of
of
of direct
direct
direct
direct sunlight,
sunlight,
sunlight,
sunlight, high
high
high
high temperature
temperature
temperature
temperature or
or
or
or humidity,
humidity,
humidity,
humidity, dusty
dusty
dusty
dusty and
and
and
and easy
easy
easy
easy
shaking
shaking
shaking
shaking environment
environment
environment
environment.
.
.
. Make
Make
Make
Make sure
sure
sure
sure the
the
the
the stage
stage
stage
stage is
is
is
is smooth,
smooth,
smooth,
smooth, horizon
horizon
horizon
horizontal
tal
tal
tal and
and
and
and firm
firm
firm
firm enough.
enough.
enough.
enough.
3.
3.
3.
3. W
W
W
When
hen
hen
hen moving
moving
moving
moving the
the
the
the instrument,
instrument,
instrument,
instrument, please
please
please
please use
use
use
use two
two
two
two hands
hands
hands
hands to
to
to
to grip
grip
grip
grip with
with
with
with the
the
the
the two
two
two
two sides
sides
sides
sides of
of
of
of the
the
the
the microscope
microscope
microscope
microscope
body.
body.
body.
body.
4.
4.
4.
4. Make
Make
Make
Make sure
sure
sure
sure the
the
the
the instrument
instrument
instrument
instrument is
is
is
is earthed
earthed
earthed
earthed,
,
,
, to
to
to
to avoid
avoid
avoid
avoid lighting
lighting
lighting
lighting strike.
strike.
strike.
strike.
5.
5.
5.
5. C
C
C
Check
heck
heck
heck the
the
the
the input
input
input
input voltage:
voltage:
voltage:
voltage: be
be
be
be sure
sure
sure
sure the
the
the
the input
input
input
input voltage
voltage
voltage
voltage which
which
which
which signed
signed
signed
signed in
in
in
in the
the
the
the below
below
below
below of
of
of
of the
the
the
the microscope
microscope
microscope
microscope is
is
is
is
consistent
consistent
consistent
consistent with
with
with
with the
the
the
the power
power
power
power supply
supply
supply
supply voltage,
voltage,
voltage,
voltage, or
or
or
or it
it
it
it will
will
will
will bring
bring
bring
bring a
a
a
a serious
serious
serious
serious damage
damage
damage
damage to
to
to
to the
the
the
the instrument.
instrument.
instrument.
instrument.

BestScope
BestScope
BestScope
BestScope International
International
International
International Limited
Limited
Limited
Limited
4
1.Name
1.Name
1.Name
1.Name of
of
of
of Components
Components
Components
Components
1.Components
1.Components
1.Components
1.Components
3
3
3
3
2
2
2
2
1
1
1
1
1.
1.
1.
1. Base
Base
Base
Base
2.
2.
2.
2. Focus
Focus
Focus
Focus adjusting
adjusting
adjusting
adjusting hand
hand
hand
hand wheel
wheel
wheel
wheel
3.
3.
3.
3. Continual
Continual
Continual
Continual zooming
zooming
zooming
zooming
4.
4.
4.
4. LED
LED
LED
LED Ring
Ring
Ring
Ring lamp
lamp
lamp
lamp
5.
5.
5.
5. Operation
Operation
Operation
Operation button
button
button
button layout
layout
layout
layout
6.
6.
6.
6. LCD
LCD
LCD
LCD Screen
Screen
Screen
Screen
7.
7.
7.
7. Measuring
Measuring
Measuring
Measuring stage
stage
stage
stage
Based on the model you have purchased, some of the features shown above may change.
4
4
4
4
5
5
5
5
6
6
6
6
7
7
7
7

BestScope
BestScope
BestScope
BestScope International
International
International
International Limited
Limited
Limited
Limited
5
2.
2.
2.
2. Adjustment&
Adjustment&
Adjustment&
Adjustment& Operation
Operation
Operation
Operation
2.1
2.1
2.1
2.1 Operation
Operation
Operation
Operation buttons
buttons
buttons
buttons and
and
and
and function
function
function
function
2.1.1
2.1.1
2.1.1
2.1.1 Operation
Operation
Operation
Operation buttons
buttons
buttons
buttons and
and
and
and functions
functions
functions
functions
1、Crosshair & Coordinate 6、Confirm Button
2、Color: White、Black、Red、Purple、Green 7、Snapshot & Video Playback View
3、Direction key 8、Snapshot & Video Switch
4、Menu: Setting & Exit 9、Snapshot & Video
5、Display button:Only display image and remove kinds of characters, symbols
2.1.2
2.1.2
2.1.2
2.1.2 Power
Power
Power
Power on
on
on
on
1 2 3 4 5 6 7 8 9

BestScope
BestScope
BestScope
BestScope International
International
International
International Limited
Limited
Limited
6
A.
A.
A.
A. Before power on, please take out the SD card from the card reader firstly. Insert SD card into SD slot in the
right of the microscope head completely until it is locked. Push softly the inserted SD card, it will eject out, then
take it out (When the card is under reading or writing, do not pull it out. Better power off first before pulling out
the SD card).
B.
B.
B.
B. Connect the DC plug of the power adapter to the “DC” jack on the the microscope. Press the power switch
on microscope base, “WELCOME” should appear on the LCD screen. After 3 seconds, the microscope system
will be in the preview in the real time automatically when you can snap.
C.
C.
C.
C. Adjust microscope
’
s definition: according to its imaging focal length, make images sharp from LCD display
screen, and then the adjustment is done.
2.1.3
2.1.3
2.1.3
2.1.3 Introduction
Introduction
Introduction
Introduction of
of
of
of display
display
display
display on
on
on
on the
the
the
the LCD
LCD
LCD
LCD screen
screen
screen
screen
Icons of upper left corner of Fig.1 and Fig.2
( & ) indicate snap(photo) mode and video
mode.
On
On
On
On the
the
the
the snap
snap
snap
snap mode
mode
mode
mode:
Shown on the below left corner is the Nos of photos
that can be taken or the video recording time(“766”
means in the current setup mode, it still can shoot
766pcs photos )Fig.1. (“00 :00 :00” means in
current setup mode it still can record 00min 00sec
)
Fig.2.
When you insert SD card, the below right corner
will show this mark .
Fig.1
Fig.2

BestScope
BestScope
BestScope
BestScope International
International
International
International Limited
Limited
Limited
Limited
7
2
2
2
2.1
1
1
1.4
4
4
4 Function
Function
Function
Function menu
menu
menu
menu control
control
control
control
With
With
With
With the
the
the
the help
help
help
help of
of
of
of the
the
the
the button,
button,
button,
button, it
it
it
it is
is
is
is able
able
able
able to
to
to
to carry
carry
carry
carry out
out
out
out the
the
the
the setting
setting
setting
setting of
of
of
of the
the
the
the whole
whole
whole
whole system.
system.
system.
system. The
The
The
The direction
direction
direction
direction key
key
key
key
allows
allows
allows
allows you
you
you
you to
to
to
to choose
choose
choose
choose the
the
the
the following
following
following
following functions:
functions:
functions:
functions:
A
A
A
A.Photo
Photo
Photo
Photo Resolution
Resolution
Resolution
Resolution
On
On
On
On the
the
the
the snap
snap
snap
snap model,press
model,press
model,press
model,press menu
menu
menu
menu button
button
button
button to
to
to
to enter
enter
enter
enter menu
menu
menu
menu interface.
interface.
interface.
interface. Use
Use
Use
Use direction
direction
direction
direction key
key
key
key to
to
to
to
select
select
select
select a
a
a
a setting
setting
setting
setting from
from
from
from the
the
the
the above
above
above
above 3
3
3
3 items.
items.
items.
items.
A
A
A
A:Resolution
Resolution
Resolution
Resolution /
/
/
/ B
B
B
B:Camera
Camera
Camera
Camera function
function
function
function setting
setting
setting
setting /
/
/
/ C
C
C
C:Display
Display
Display
Display setting/
setting/
setting/
setting/
Fig.3
Fig.4

BestScope
BestScope
BestScope
BestScope International
International
International
International Limited
Limited
Limited
Limited
8
A.
A.
A.
A. Video
Video
Video
Video Resolution
Resolution
Resolution
Resolution
Select
Select
Select
Select photo
photo
photo
photo resolution
resolution
resolution
resolution
On snap model, press MENU
MENU
MENU
MENU button as shown the “Resolution:12M”(12M means the pixels has
selected now), then press the OK
OK
OK
OK key to select the pixels for photo taken base on 2M/3M/5M/
12M use by up & down keys (Fig.11
Fig.11
Fig.11
Fig.11). Press OK
OK
OK
OK button to save your selection, the model
comes back to Fig.10
Fig.10
Fig.10
Fig.10.then you press MENU
MENU
MENU
MENU button again, the model comes back to snap model.
Fig.5 Fig.6
Select
Select
Select
Select video
video
video
video resolution
resolution
resolution
resolution
On video model, press MENU
MENU
MENU
MENU button as shown the “Resolution:1080P30”(1080P30 means the
pixels has selected now), then press the OK
OK
OK
OK key to select the pixels for video taken base on
1080P30/1080P30-2/720P30/ WVGAP60/WVGA P30 use by up & down keys (Fig.6
Fig.6
Fig.6
Fig.6). Press OK
OK
OK
OK
button to save your selection, the model comes back to Fig.5
Fig.5
Fig.5
Fig.5.then you press MENU
MENU
MENU
MENU button
again, the model comes back to video model.

BestScope
BestScope
BestScope
BestScope International
International
International
International Limited
Limited
Limited
Limited
9
B
B
B
B.Camera
Camera
Camera
Camera function
function
function
function setting
setting
setting
setting
C
C
C
C.Display
Display
Display
Display setting
setting
setting
setting
Fig.7 Fig.8 Fig.9
Camera
Camera
Camera
Camera function
function
function
function setting
setting
setting
setting:
:
:
: Setting
Setting
Setting
Setting up
up
up
up each
each
each
each item.
item.
item.
item.
On snap model, press MENU
MENU
MENU
MENU button as show the “Resolution”, then press the left & right key to enter
the “Camera Function Setting” (Fig7)
(Fig7)
(Fig7)
(Fig7).Then press up&down key to select as Scene/ WB/ DE/ Contrast/
Sharpness/ AE Meter/ AE ISO/ AE Bias. (Fig.7&8).
(Fig.7&8).
(Fig.7&8).
(Fig.7&8).For example: Fig.7
Fig.7
Fig.7
Fig.7
You
can press the OK
OK
OK
OK key to
enter the Scene setting and choose by up & down keys (Fig.9)
(Fig.9)
(Fig.9)
(Fig.9). Press OK
OK
OK
OK botton again to save your
selection or exit by MENU
MENU
MENU
MENU button. Once confirmed, the model comes back to Fig7
Fig7
Fig7
Fig7, press MENU
MENU
MENU
MENU
again, you can come back to snap model .
On video model, the operation is same.

BestScope
BestScope
BestScope
BestScope International
International
International
International Limited
Limited
Limited
Limited
10
2
2
2
2.1
1
1
1.5
5
5
5 Camera
Camera
Camera
Camera function
function
function
function setting
setting
setting
setting details
details
details
details
A
A
A
A Scene
Scene
Scene
Scene
Fig.10 Fig.11 Fig.12
Display
Display
Display
Display Setting
Setting
Setting
Setting:
:
:
: Setting
Setting
Setting
Setting up
up
up
up each
each
each
each item.
item.
item.
item.
On snap model, press MENU
MENU
MENU
MENU button as show the “Resolution”, then press the left & right key to enter
the “Display Setting” (Fig10)
(Fig10)
(Fig10)
(Fig10).Then press up&down key to select as Date/Time、Display、Format、Default
settings、Auto power off、Langue、Beep、USB、Version. (Fig.10&11).
(Fig.10&11).
(Fig.10&11).
(Fig.10&11).For example: Fig.17
Fig.17
Fig.17
Fig.17
You
can press the
OK
OK
OK
OK key to enter the Date/Time setting and change by direction keys (Fig.12)
(Fig.12)
(Fig.12)
(Fig.12).
.
.
.Press OK
OK
OK
OK botton
again to save your selection or exit by MENU
MENU
MENU
MENU button. Once confirmed, the model comes back to Fig10
Fig10
Fig10
Fig10,
press MENU
MENU
MENU
MENU again, you can come back to snap model.
On video model, the operation is same.

BestScope
BestScope
BestScope
BestScope International
International
International
International Limited
Limited
Limited
Limited
11
You
can choose different Scene by MENU
MENU
MENU
MENU button according to the objects observed so that help you to get perfect
performance.
B.
B.
B.
B. WB
WB
WB
WB (White
(White
(White
(White Balance)
Balance)
Balance)
Balance)
WB will help you to obtain superb color when observing.
C
C
C
C DE
DE
DE
DE (Color
(Color
(Color
(Color effects)
effects)
effects)
effects)
D.
D.
D.
D. Sharpness
Sharpness
Sharpness
Sharpness
E.
E.
E.
E. AE
AE
AE
AE Meter
Meter
Meter
Meter

BestScope
BestScope
BestScope
BestScope International
International
International
International Limited
Limited
Limited
Limited
12
F.
F.
F.
F.
AE
AE
AE
AE ISO
ISO
ISO
ISO
G.
G.
G.
G. AE
AE
AE
AE Bias
Bias
Bias
Bias
2
2
2
2.1
1
1
1.6
6
6
6 Display
Display
Display
Display setting
setting
setting
setting details
details
details
details
A.
A.
A.
A. Date/Time
Date/Time
Date/Time
Date/Time

BestScope
BestScope
BestScope
BestScope International
International
International
International Limited
Limited
Limited
Limited
13
You
can use left and right keys of direction button to change the time. After fixed,you can save the time.
B.
B.
B.
B. Display
Display
Display
Display
Date and time information can be stored together with photo taken in SD card. File names also contain date and
time information. Before using this camera, please set the date and time properly.
You
can choose what display you
want. If you want to display “Date”, you can choose the second option.
C
C
C
C.
.
.
. Format
Format
Format
Format
Select
Select
Select
Select “
“
“
“
Yes
Yes
Yes
Yes
”
”
”
” can
can
can
can format
format
format
format all
all
all
all the
the
the
the SD
SD
SD
SD card
card
card
card inserted
inserted
inserted
inserted;(Attention
(Attention
(Attention
(Attention:Even
Even
Even
Even the
the
the
the protected
protected
protected
protected content
content
content
content will
will
will
will be
be
be
be deleted
deleted
deleted
deleted

BestScope
BestScope
BestScope
BestScope International
International
International
International Limited
Limited
Limited
Limited
14
when
when
when
when formatting,
formatting,
formatting,
formatting, can
can
can
can not
not
not
not be
be
be
be resumed
resumed
resumed
resumed again.)
again.)
again.)
again.) Select
Select
Select
Select “
“
“
“No
No
No
No”
”
”
” and
and
and
and press
press
press
press menu
menu
menu
menu botton
botton
botton
botton ,
,
,
, the
the
the
the model
model
model
model comes
comes
comes
comes back
back
back
back to
to
to
to
the
the
the
the snap
snap
snap
snap modlel.
modlel.
modlel.
modlel.
D.
D.
D.
D. Reset
Reset
Reset
Reset system
system
system
system settings
settings
settings
settings to
to
to
to default
default
default
default values
values
values
values ?
?
?
?
E.
E.
E.
E. Auto
Auto
Auto
Auto power
power
power
power off
off
off
off
F.
F.
F.
F.
Langue
Langue
Langue
Langue
We developed 9 languages according to your demand.

BestScope
BestScope
BestScope International
International Limited
Limited
Limited
15
G.
G.
G.
G. Beep
Beep
Beep
Beep
H.
H.
H.
H. USB
USB
USB
USB Selection
Selection
Selection
Selection
2
2
2
2.1
1
1
1.7
7
7
7 Snapshot
Snapshot
Snapshot
Snapshot &
&
&
& Record
Record
Record
Record
A.
A.
A.
A. Snapshot
Snapshot
Snapshot
Snapshot On the snap model, press button to snapshot pictures and meantime icon of upper left
of LCD screen will show. The pictures automatically stored in SD card. When the card is full,the LCD screen will
show “Card full”
B.
B.
B.
B. Record
Record
Record
Record On the snap model, you can enter video model by pressing button. Meantime the image will
show full screen and you can press button to start recording and will show on the LCD screen.
Press button again,the video is over and automatically stored in SD card . When the card is full,the LCD
screen will show “Card full”
C.
C.
C.
C. Playback
Playback
Playback
Playback Press button to select playback model.
Press up & down keys to browse every photo and video which is taken and stored in the SD card.

BestScope
BestScope
BestScope
BestScope International
International
International
International Limited
Limited
Limited
Limited
16
Press left key, the screen will display multi photos and videos. Index display helps to find target photo or video
quickly in many pictures and videos.
On the snap model, you can review pictures but can’t review videos.
On the video model, you can review videos but can’t review pictures.

BestScope
BestScope
BestScope
BestScope International
International
International
International Limited
Limited
Limited
Limited
17
3. Installation and Operation of Image Tester
A.
A.
A.
A. Installation
Installation
Installation
Installation of
of
of
of image
image
image
image tester:
tester:
tester:
tester:
1
1
1
1.
.
.
.Installation
Installation
Installation
Installation method
method
method
method and
and
and
and steps
steps
steps
steps of
of
of
of the
the
the
the micrometer:
micrometer:
micrometer:
micrometer:
★Plug ②support rod of micrometer into ①
movable platform clamp spring first, with the LCD
screen facing upward, and noting that the support
rod of micrometer should be plugged to location.
Then, use M3 inner hexangular spanner to tight
uniformly the fastening screw for the rod of
micrometer to the extent of not shedding off and
rotating the micrometer.
★Install another micrometer in the same way and
steps to the movable platform clamp spring. Tighten the
fastening screw to clamp the support rod of micrometer
to the extent of not shedding off and not rotating. Put it
into the black/white workbench or single sided frosted
glass workbench (note that the smooth surface should
be facing upward). The final installation structure is as
shown in the diagram.
2.
2.
2.
2. The
The
The
The instructions
instructions
instructions
instructions for
for
for
for installation
installation
installation
installation method
method
method
method and
and
and
and application
application
application
application of
of
of
of the
the
the
the system
system
system
system are
are
are
are referred
referred
referred
referred to
to
to
to DMS100
DMS100
DMS100
DMS100 user
user
user
user
manual.
manual.
manual.
manual.
B.
B.
B.
B. The
The
The
The connection
connection
connection
connection and
and
and
and application
application
application
application of
of
of
of bed
bed
bed
bed light
light
light
light source:
source:
source:
source:
★The connection of bed light source: Connect one
end of the connection line with the both ends having
spring and normal DC specification to the DC
socket marked with "DC OUT", with another
terminal inserting into the DC socket of the frame

BestScope
BestScope
BestScope
BestScope International
International
International
International Limited
Limited
Limited
Limited
18
Image
Image
Image
Image Tester
Tester
Tester
Tester
★Adjust the black knob at the right side of column
for the brightness of bed light source, attaining the
sharp image outline. The arrowhead direction is the
rotating direction for increasing brightness. The
reverse direction is for brightness attenuating and
turning off the bed light source power.
C.
C.
C.
C. Operating
Operating
Operating
Operating instructions
instructions
instructions
instructions for
for
for
for the
the
the
the measurement
measurement
measurement
measurement application
application
application
application of
of
of
of image
image
image
image tester:
tester:
tester:
tester:
★The
The
The
The measurement
measurement
measurement
measurement of
of
of
of length:
length:
length:
length:
1.
1.
1.
1. Place
Place
Place
Place the
the
the
the system
system
system
system levelly
levelly
levelly
levelly on
on
on
on a
a
a
a desktop.
desktop.
desktop.
desktop. Firstly,
Firstly,
Firstly,
Firstly, install
install
install
install and
and
and
and fasten
fasten
fasten
fasten the
the
the
the micrometer
micrometer
micrometer
micrometer and
and
and
and the
the
the
the movable
movable
movable
movable
platform,
platform,
platform,
platform, wipe
wipe
wipe
wipe clean
clean
clean
clean the
the
the
the workbench
workbench
workbench
workbench surface,
surface,
surface,
surface, connect
connect
connect
connect properly
properly
properly
properly the
the
the
the DC
DC
DC
DC connection
connection
connection
connection line
line
line
line of
of
of
of bed
bed
bed
bed light
light
light
light source,
source,
source,
source,
and
and
and
and connect
connect
connect
connect the
the
the
the main
main
main
main system
system
system
system power
power
power
power supply.
supply.
supply.
supply.
2.
2.
2.
2. Press
Press
Press
Press lightly
lightly
lightly
lightly the
the
the
the main
main
main
main system
system
system
system power
power
power
power switch,
switch,
switch,
switch, start
start
start
start the
the
the
the instrument
instrument
instrument
instrument and
and
and
and rotate
rotate
rotate
rotate the
the
the
the rapid
rapid
rapid
rapid driving
driving
driving
driving device
device
device
device of
of
of
of
micrometer
micrometer
micrometer
micrometer so
so
so
so that
that
that
that the
the
the
the screw
screw
screw
screw rod
rod
rod
rod of
of
of
of the
the
the
the micrometer
micrometer
micrometer
micrometer stretches
stretches
stretches
stretches out
out
out
out about
about
about
about half
half
half
half of
of
of
of length
length
length
length (12.5mm).
(12.5mm).
(12.5mm).
(12.5mm). Place
Place
Place
Place the
the
the
the
substance
substance
substance
substance to
to
to
to be
be
be
be measured
measured
measured
measured lightly
lightly
lightly
lightly on
on
on
on the
the
the
the center
center
center
center of
of
of
of workbench
workbench
workbench
workbench surface,
surface,
surface,
surface, with
with
with
with the
the
the
the bed
bed
bed
bed light
light
light
light source
source
source
source available
available
available
available to
to
to
to
shine
shine
shine
shine thoroughly
thoroughly
thoroughly
thoroughly for
for
for
for the
the
the
the best.
best.
best.
best.
3.
3.
3.
3. Adjust
Adjust
Adjust
Adjust the
the
the
the focal
focal
focal
focal length,
length,
length,
length, magnification
magnification
magnification
magnification and
and
and
and the
the
the
the brightness
brightness
brightness
brightness of
of
of
of the
the
the
the upper
upper
upper
upper light
light
light
light source
source
source
source and
and
and
and the
the
the
the bed
bed
bed
bed light
light
light
light
source,
source,
source,
source, making
making
making
making the
the
the
the substance
substance
substance
substance to
to
to
to be
be
be
be measured
measured
measured
measured having
having
having
having a
a
a
a very
very
very
very sharp
sharp
sharp
sharp image.
image.
image.
image.
4.
4.
4.
4. Self
Self
Self
Self define
define
define
define the
the
the
the linear
linear
linear
linear graphic,
graphic,
graphic,
graphic, rotate
rotate
rotate
rotate the
the
the
the rotary
rotary
rotary
rotary disc
disc
disc
disc of
of
of
of the
the
the
the rotation
rotation
rotation
rotation movable
movable
movable
movable platform,
platform,
platform,
platform, so
so
so
so that
that
that
that one
one
one
one side
side
side
side of
of
of
of
the
the
the
the substance
substance
substance
substance tested
tested
tested
tested runs
runs
runs
runs parallel
parallel
parallel
parallel with
with
with
with the
the
the
the cross
cross
cross
cross line.
line.
line.
line. Rotate
Rotate
Rotate
Rotate again
again
again
again the
the
the
the rapid
rapid
rapid
rapid driving
driving
driving
driving device
device
device
device of
of
of
of micrometer
micrometer
micrometer
micrometer to
to
to
to
align
align
align
align closely
closely
closely
closely one
one
one
one side
side
side
side of
of
of
of the
the
the
the substance
substance
substance
substance tested
tested
tested
tested with
with
with
with the
the
the
the cross
cross
cross
cross line.
line.
line.
line. Reset
Reset
Reset
Reset the
the
the
the micrometer.
micrometer.
micrometer.
micrometer. Rotate
Rotate
Rotate
Rotate the
the
the
the rapid
rapid
rapid
rapid
driving
driving
driving
driving device
device
device
device to
to
to
to align
align
align
align closely
closely
closely
closely the
the
the
the position
position
position
position to
to
to
to be
be
be
be measured
measured
measured
measured with
with
with
with cross
cross
cross
cross line
line
line
line of
of
of
of one
one
one
one side
side
side
side of
of
of
of the
the
the
the aligned
aligned
aligned
aligned substance.
substance.
substance.
substance.
The
The
The
The value
value
value
value of
of
of
of the
the
the
the micrometer
micrometer
micrometer
micrometer is
is
is
is the
the
the
the value
value
value
value of
of
of
of the
the
the
the substance
substance
substance
substance value
value
value
value measured.
measured.
measured.
measured.
Remarks:
Remarks:
Remarks:
Remarks: The
The
The
The detail
detail
detail
detail application
application
application
application of
of
of
of the
the
the
the micrometer
micrometer
micrometer
micrometer is
is
is
is referred
referred
referred
referred to
to
to
to the
the
the
the operation
operation
operation
operation manual
manual
manual
manual of
of
of
of the
the
the
the electronic
electronic
electronic
electronic
micrometer
micrometer
micrometer
micrometer
Operation
Operation
Operation
Operation Manual
Manual
Manual
Manual of
of
of
of Electronic
Electronic
Electronic
Electronic Micrometer
Micrometer
Micrometer
Micrometer
1.
1.
1.
1. S
S
S
Sketch
ketch
ketch
ketch diagram
diagram
diagram
diagram of
of
of
of structure:
structure:
structure:
structure:

BestScope
BestScope
BestScope
BestScope International
International
International
International Limited
Limited
Limited
Limited
19
Image
Image
Image
Image Tester
Tester
Tester
Tester
2.
2.
2.
2. LCD
LCD
LCD
LCD screen:
screen:
screen:
screen:
IN: The prompt sign for indication of
English system measurement mode
Set: The prompt sign for indication of initial
value setting
INC: The prompt sign for indication of
relative measurement mode
: The prompt sign for under voltage
alarm indication of battery
ABS: The prompt sign for indication of
absolute measurement mode
: The prompt sign for indication of
data output status
3.
3.
3.
3. The
The
The
The function
function
function
function and
and
and
and operation
operation
operation
operation of
of
of
of the
the
the
the key:
key:
key:
key:
There
There
There
There are
are
are
are two
two
two
two kinds
kinds
kinds
kinds of
of
of
of key
key
key
key operation:
operation:
operation:
operation:
(1)
(1)
(1)
(1) Short
Short
Short
Short press
press
press
press (time
(time
(time
(time <
<
<
< 2
2
2
2 seconds)
seconds)
seconds)
seconds)
(2)
(2)
(2)
(2) Long
Long
Long
Long press
press
press
press (time
(time
(time
(time ≥
≥
≥
≥ 2
2
2
2 seconds)
seconds)
seconds)
seconds)
3.
3.
3.
3. 1.
1.
1.
1. ON/OFF
ON/OFF
ON/OFF
ON/OFF …
…
…
… SET:
SET:
SET:
SET: The
The
The
The switch
switch
switch
switch key,
key,
key,
key, delay
delay
delay
delay setting
setting
setting
setting key
key
key
key
The
The
The
The key
key
key
key operation
operation
operation
operation <
<
<
< 2
2
2
2 seconds:
seconds:
seconds:
seconds: Power
Power
Power
Power supply
supply
supply
supply ON/OFF
ON/OFF
ON/OFF
ON/OFF of
of
of
of digital
digital
digital
digital display
display
display
display meter
meter
meter
meter
The
The
The
The key
key
key
key operation
operation
operation
operation≥
≥
≥
≥2
2
2
2 seconds:
seconds:
seconds:
seconds: Setting
Setting
Setting
Setting initial
initial
initial
initial value
value
value
value of
of
of
of digital
digital
digital
digital display
display
display
display meter
meter
meter
meter of
of
of
of absolute
absolute
absolute
absolute measurement:
measurement:
measurement:
measurement: Display
Display
Display
Display
"Set".
"Set".
"Set".
"Set".
The
The
The
The initial
initial
initial
initial values
values
values
values of
of
of
of digital
digital
digital
digital display
display
display
display meter
meter
meter
meter of
of
of
of different
different
different
different measuring
measuring
measuring
measuring range
range
range
range are
are
are
are respectively
respectively
respectively
respectively 0,
0,
0,
0, 25,
25,
25,
25, 50
50
50
50 …
…
…
… 275
275
275
275 mm
mm
mm
mm
under
under
under
under the
the
the
the metric
metric
metric
metric system
system
system
system mode;
mode;
mode;
mode;
The
The
The
The initial
initial
initial
initial values
values
values
values of
of
of
of digital
digital
digital
digital display
display
display
display meter
meter
meter
meter of
of
of
of different
different
different
different measuring
measuring
measuring
measuring range
range
range
range are
are
are
are respectively
respectively
respectively
respectively 0,
0,
0,
0, 1
1
1
1”
”
”
”,
,
,
, 2
2
2
2”
”
”
” …
…
…
…11
11
11
11”
”
”
” under
under
under
under

BestScope
BestScope
BestScope
BestScope International
International
International
International Limited
Limited
Limited
Limited
20
Image
Image
Image
Image Tester
Tester
Tester
Tester
the
the
the
the English
English
English
English system
system
system
system mode.
mode.
mode.
mode.
After
After
After
After reinstalling
reinstalling
reinstalling
reinstalling a
a
a
a battery,
battery,
battery,
battery, the
the
the
the initial
initial
initial
initial value
value
value
value setting
setting
setting
setting will
will
will
will be
be
be
be carried
carried
carried
carried out
out
out
out automatically.
automatically.
automatically.
automatically.
The
The
The
The default
default
default
default initial
initial
initial
initial value
value
value
value of
of
of
of the
the
the
the digital
digital
digital
digital display
display
display
display meter
meter
meter
meter is
is
is
is 0.
0.
0.
0.
3.
3.
3.
3. 2.
2.
2.
2. ABS/INC
ABS/INC
ABS/INC
ABS/INC …
…
…
… UNIT:
UNIT:
UNIT:
UNIT: Absolute/relative
Absolute/relative
Absolute/relative
Absolute/relative measurement
measurement
measurement
measurement mode
mode
mode
mode convert
convert
convert
convert key,
key,
key,
key, the
the
the
the delay
delay
delay
delay metric
metric
metric
metric system/English
system/English
system/English
system/English
system
system
system
system to
to
to
to measurement
measurement
measurement
measurement mode
mode
mode
mode convert
convert
convert
convert key.
key.
key.
key.
The
The
The
The key
key
key
key operation
operation
operation
operation <2
<2
<2
<2 seconds:
seconds:
seconds:
seconds: Absolute
Absolute
Absolute
Absolute and
and
and
and relative
relative
relative
relative measurement
measurement
measurement
measurement mode
mode
mode
mode convert:
convert:
convert:
convert:
Relative
Relative
Relative
Relative measurement
measurement
measurement
measurement mode
mode
mode
mode with
with
with
with "INC"
"INC"
"INC"
"INC" indication,
indication,
indication,
indication, absolute
absolute
absolute
absolute measurement
measurement
measurement
measurement mode
mode
mode
mode with
with
with
with "ABS"
"ABS"
"ABS"
"ABS" indication.
indication.
indication.
indication.
The
The
The
The key
key
key
key operation
operation
operation
operation ≥
≥
≥
≥2
2
2
2 seconds:
seconds:
seconds:
seconds: Metric/English
Metric/English
Metric/English
Metric/English system
system
system
system convert:
convert:
convert:
convert: The
The
The
The English
English
English
English system
system
system
system
measurement
measurement
measurement
measurement mode
mode
mode
mode with
with
with
with "in"
"in"
"in"
"in" indication,
indication,
indication,
indication, otherwise
otherwise
otherwise
otherwise it
it
it
it is
is
is
is the
the
the
the metric
metric
metric
metric system
system
system
system measurement
measurement
measurement
measurement mode.
mode.
mode.
mode.
3.3.
3.3.
3.3.
3.3. The
The
The
The data
data
data
data output
output
output
output key:
key:
key:
key:
The
The
The
The key
key
key
key operation
operation
operation
operation <
<
<
< 2
2
2
2 seconds:
seconds:
seconds:
seconds: It
It
It
It will
will
will
will deliver
deliver
deliver
deliver output
output
output
output once,
once,
once,
once, and
and
and
and it
it
it
it will
will
will
will display
display
display
display on
on
on
on the
the
the
the LCD
LCD
LCD
LCD screen
screen
screen
screen once
once
once
once as
as
as
as
"
"
"
" ".
".
".
".
Continuous
Continuous
Continuous
Continuous key
key
key
key operation
operation
operation
operation ≥
≥
≥
≥ 2
2
2
2 seconds:
seconds:
seconds:
seconds: It
It
It
It will
will
will
will deliver
deliver
deliver
deliver output
output
output
output display
display
display
display data
data
data
data continuously,
continuously,
continuously,
continuously, and
and
and
and the
the
the
the LCD
LCD
LCD
LCD screen
screen
screen
screen
displays
displays
displays
displays continuously
continuously
continuously
continuously "
"
"
" ".
".
".
".
The
The
The
The output
output
output
output data
data
data
data will
will
will
will be
be
be
be ended
ended
ended
ended if
if
if
if you
you
you
you press
press
press
press this
this
this
this key
key
key
key again.
again.
again.
again.
4.
4.
4.
4. Power
Power
Power
Power supply:
supply:
supply:
supply:
●
●
●
● Digital
Digital
Digital
Digital display
display
display
display meter
meter
meter
meter adopts
adopts
adopts
adopts one
one
one
one SR44
SR44
SR44
SR44 battery.
battery.
battery.
battery. Please
Please
Please
Please replace
replace
replace
replace the
the
the
the battery
battery
battery
battery when
when
when
when the
the
the
the digit
digit
digit
digit displayed
displayed
displayed
displayed on
on
on
on
LCD
LCD
LCD
LCD screen
screen
screen
screen is
is
is
is unclear
unclear
unclear
unclear or
or
or
or when
when
when
when displaying
displaying
displaying
displaying "
"
"
" ".
".
".
".
●
●
●
● The
The
The
The digital
digital
digital
digital display
display
display
display meter
meter
meter
meter will
will
will
will cut
cut
cut
cut off
off
off
off the
the
the
the power
power
power
power automatically
automatically
automatically
automatically if
if
if
if the
the
the
the digital
digital
digital
digital display
display
display
display meter
meter
meter
meter is
is
is
is not
not
not
not used
used
used
used for
for
for
for
5
5
5
5 minutes
minutes
minutes
minutes and
and
and
and it
it
it
it will
will
will
will resume
resume
resume
resume to
to
to
to the
the
the
the original
original
original
original value
value
value
value prior
prior
prior
prior to
to
to
to the
the
the
the auto
auto
auto
auto cutting
cutting
cutting
cutting off
off
off
off if
if
if
if rotating
rotating
rotating
rotating the
the
the
the screw
screw
screw
screw rod
rod
rod
rod
or
or
or
or pressing
pressing
pressing
pressing "ON/OFF
"ON/OFF
"ON/OFF
"ON/OFF …
…
…
… SET"
SET"
SET"
SET" key.
key.
key.
key. Please
Please
Please
Please press
press
press
press "ON/OFF
"ON/OFF
"ON/OFF
"ON/OFF …
…
…
… SET"
SET"
SET"
SET" key
key
key
key to
to
to
to turn
turn
turn
turn off
off
off
off the
the
the
the power
power
power
power supply
supply
supply
supply
for
for
for
for energy
energy
energy
energy saving
saving
saving
saving if
if
if
if it
it
it
it is
is
is
is not
not
not
not to
to
to
to be
be
be
be used.
used.
used.
used.
●
●
●
● Insert
Insert
Insert
Insert a
a
a
a coin
coin
coin
coin to
to
to
to the
the
the
the slot
slot
slot
slot on
on
on
on the
the
the
the battery
battery
battery
battery cover
cover
cover
cover and
and
and
and rotate
rotate
rotate
rotate clockwise
clockwise
clockwise
clockwise to
to
to
to lose
lose
lose
lose and
and
and
and open
open
open
open the
the
the
the battery
battery
battery
battery cover.
cover.
cover.
cover.
Take
Take
Take
Take out
out
out
out the
the
the
the used
used
used
used battery.
battery.
battery.
battery.
●
●
●
● Change
Change
Change
Change for
for
for
for a
a
a
a new
new
new
new battery
battery
battery
battery with
with
with
with the
the
the
the positive
positive
positive
positive polarity
polarity
polarity
polarity heading
heading
heading
heading up.
up.
up.
up. Screw
Screw
Screw
Screw tightly
tightly
tightly
tightly the
the
the
the battery
battery
battery
battery cover
cover
cover
cover anti-
anti-
anti-
anti-
clockwise.
clockwise.
clockwise.
clockwise.
5.
5.
5.
5. The
The
The
The data
data
data
data output:
output:
output:
output:
●
●
●
● The
The
The
The data
data
data
data output
output
output
output is
is
is
is of
of
of
of the
the
the
the standard
standard
standard
standard RS232
RS232
RS232
RS232 C
C
C
C format,
format,
format,
format, and
and
and
and can
can
can
can be
be
be
be connected
connected
connected
connected to
to
to
to the
the
the
the serial
serial
serial
serial PC
PC
PC
PC port
port
port
port via
via
via
via
Table of contents
Popular Microscope manuals by other brands
Bresser
Bresser 9203000 operating instructions

3B SCIENTIFIC PHYSICS
3B SCIENTIFIC PHYSICS 200 1003268 instruction manual

KERN Optics
KERN Optics OBE 121 User instructions
Canton
Canton SLM-2ER operation instruction

König Electronic
König Electronic CMP-USBMICRO10 manual
Kontiki
Kontiki MM8044C instruction manual
