Setma E06LR20004 User manual

1
E06LR20004
This interface can insert navigation video, reverse camera video, DVR system, DVD or Digital TV video
onto the Land rover, Jaguar wide screens, etc. with 10inch screen, single screen display. All the
above 3 models have the same installation.
Features:
E06LR20004 model has the built-in wince navigation, very simple connection. OEM speaker is
used for navigation sound, also can use external speaker.
OEM touch screen can be use to control inserted MP5, Navigation, DVR and so on.
OEM “Mode” key is used to switch among each video.
FN model has also the multimedia audio and video player for MP3/MP5 files playing. The files
can be stored by U-disk or SD card. OEM Aux can be used for high quality sound.

2
This interface has the high quality image processor inside. Together with the wireless mirror
link box, it can mirror the phone images on car screens in high quality, including live traffic,
waze and so on.
1. Installation instruction:
1. Dismantle the OEM screen(see
below picture)
2. Open the back shell and replace
OEM shell②by our shell①
3. Take down this small original board and connect
the white ribbon in place of the original one.
4. Put back the original small board together with
the replacement shell and connect
correctly these ribbons.
②
①

3
5. Fix these screws.
6. Connect these ribbons with our
Sub-board correctly.
7. Fix our sub-board and let the LVDS cable go
outside here.
·
8. Fix this back shell together
with the frame.

4
Reverse power output wire: can connect camera
here for power.
When install 360 systems or switch to reverse
camera manually, pull out this
connector, and connect this end,
marked with “in”, to power.
connect this connector to external
keypad for manual switch.
Connect this yellow wire to
OEM BATT, and connect this
Black wire to GND
Connect this “Camera
in” to reverse
camera.
Connect this brown wire to the yellow/white wire
behind OEM head unit to use OEM key to switch.
Connect this red wire (ACC-OUT)to
ACC.
This ACC-OUT wire can supply power
to added devices [max: 1A].
5
2. User instruction:
(1)navigation startup
When starting up the navigation, if there is no SD card inserted, you will
be asked to calibrate the touch screen. Just follow to click each icon until
it disappear.
Then you will see the navigation menu. Each icon will have its own
function. When pressing “Navigation”, it will go to navigation map. You
can also select to go to map directly at the map bottom.
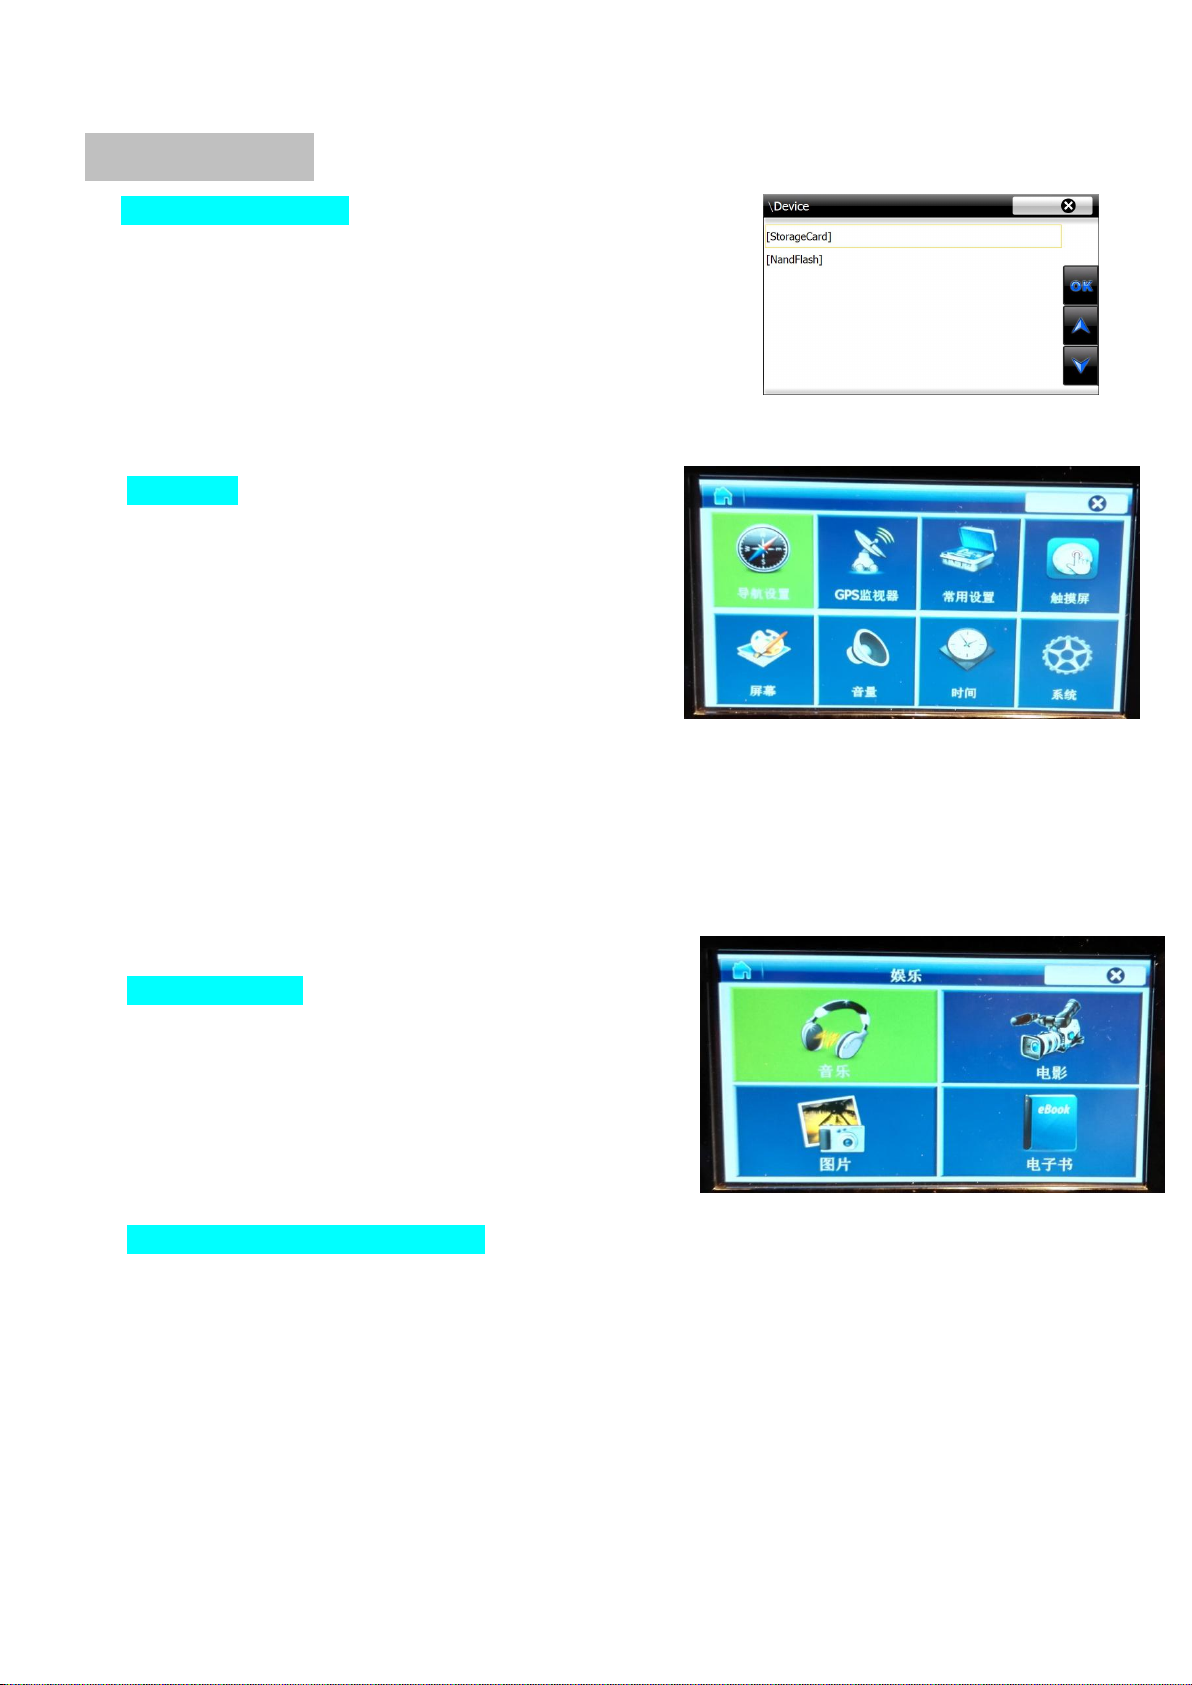
(2)setting
When pressing the left upper icon, it will get back to menu.
You will see 8 icons here:
Navigation setting: this icon is use to select the
suitable map on SD card and set the path. Next time
startup, it will remember this option automatically.
GPS monitor: this icon is used to observe the GPS
signal. Navigation baud rate: 9600, COM2 port. This
navigation will be compatible with other baud rate automatically according to the map.
General setting: this is mainly used to set the GPS system language.
Touch screen: this is used to calibrate the touch screen when necessary.
Screen: this is used to adjust the screen position, brightness etc. It has no function here.
Volume: this is for key tone, usually select “close”
Time: time setting, usually not use, it will show the GPS time when using map.
System: it will show the system internal storage
condition.
(3)Entertainment
This navigation module includes the powerful ARM A6
processor and entertainment processor. So, the MP3, MP5 files
can be played fluently. Connect the AUX cable then can use OEM
speaker for quality sound.
USB covert cable is available for external USB storage, MP3,
MP5 files stored here can be played, too.
(4)Navigation module software update
When the navigation system update, you just need to put the software into SD card, insert it and power up, it
will update automatically. It will pop up the calibration image after finishing the update.

6
3. DIP setting
DIP
Down(=ON)
Up(=OFF)
1
RGB on
RGB off
2,3
AV1/2 on
AV1/2 off
4
External navigation=High resolution
External navigation=low resolution
5
When reversing[green wire=12V] : switch to
added reverse camera video.
When reversing[green wire=12V] :
switch to OEM reverse camera video.
6
No function, stay up.
7,8
No function, stay up.
4. User instruction:
(1)Switch:
”Mode” This original key is used to switch displays among each video.
Users can also use the external keypad to switch.
(2)Digital TV/DVD/DVR operation:
When on AV1/AV2 video, and touch the screen, there will pop up on screen the control menu,
press each icon. This interface has already included varied IR code for different video devices.
Users can select the correct one through 3 side buttons. When pressing the “Menu” there will
pop up the menu, and you can select in AV1 option the TV, DVR, or DVD. And in the AV2 option,
you can also select TV and other devices. When selecting to “None”, this control setting
frame will be closed.
White/gray wire[IR-out]:it has powerful output capacity, can support maximum 5 external
devices.
(3)reverse
When reversing, the green wire will output 12V, which can give power to reverse camera. It will
display the corresponding video according to the DIP5 setting. Display OEM camera
video[DIP5=OFF]or display added camera video[DIP5=ON]。

7
5. Parameter
No.
Name
Parameter
1
Video input range
0.7Vpp with 75 Ωimpedance
2
sync amplitude
3~5Vpp with 5K ohm impedance
Sync should be negative polarity
3
Map resolution
set by DIP4.
High resolution:800X480 or VGA(640X480)
4
Av1 , cam video
0.7Vpp with 75 Ωimpedance
5
Av1 , cam format
NTSC/PAL/SECAM convert automatically
6
Normal work power consumption
2.4W [0.4A @5V]
7
Standby current
< 10uA
8
Reverse trigger threshold
>5V trigger
9
SD map
SD card storage,support varied map formats: NaviOne,navitel,
Sygic,
Igo,Primo etc.
10
Work temperature
-40 ~ +85C
11
size
15.22cm * 9cm * 2.1cm
12
Navigation control
4-wire touch screen
13
USB port
Max 1A output,with OTG。
Navigation module parameter
1
processor
SiRFatlasVI (800M Cortex A9 + 300M DSP)
2
RAM
256 MB DDR3 (support max 512MB)
3
FLASH
128MB (support max 8GB)
4
Software storage
SD card(support SDHC)
5
OS system
WINCE6.0 CORE
6
Audio type
|ape|flac|aac|wav|mp3|wma|ogg|
7
Video type
|rmvb|mp4|3gp|mov|avi|divx|xvid|wmv|mpg|rm|flv|mkv|
8
Video decode performance
QVGA>25 FPS
9
Software compile type
ARMV4I
Table of contents
Other Setma Car Video System manuals


