manuals.online logo
Brands
  1. Home
  2. •
  3. Brands
  4. •
  5. SEVERIN
  6. •
  7. Iron
  8. •
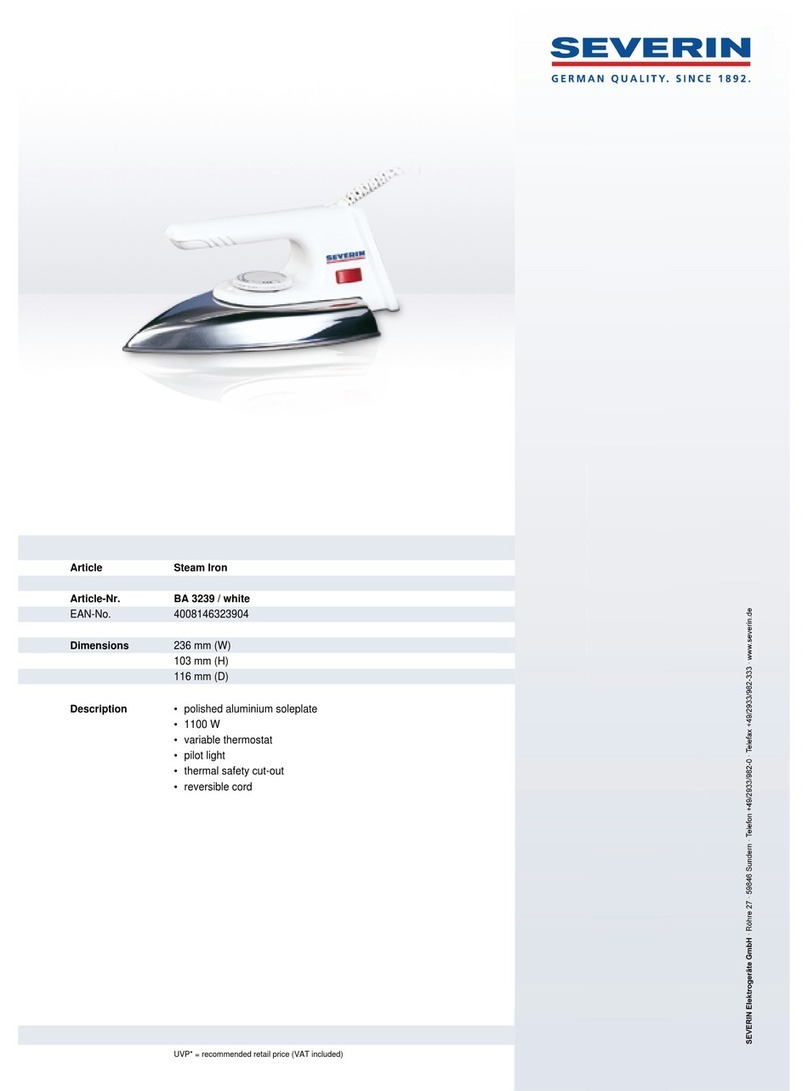
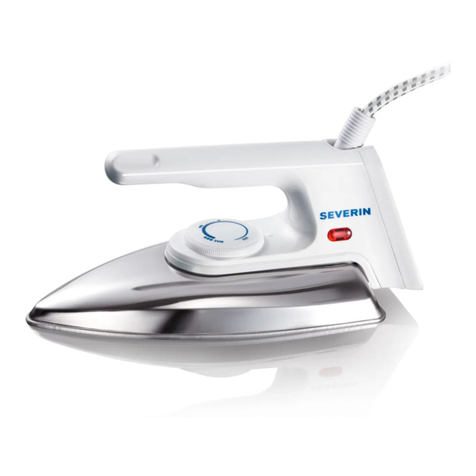
  9. SEVERIN BA 3239 - User manual

SEVERIN BA 3239 - User manual

Other manuals for BA 3239 -

2

Other SEVERIN Iron manuals

SEVERIN BA 3237 User manual

SEVERIN

SEVERIN BA 3237 User manual

SEVERIN BA 3244 User guide

SEVERIN

SEVERIN BA 3244 User guide

SEVERIN BA-3254 User manual

SEVERIN

SEVERIN BA-3254 User manual

SEVERIN BA-3279 User manual

SEVERIN

SEVERIN BA-3279 User manual

SEVERIN DAMPFBÜGELAUTOMAT BA 3237 User manual

SEVERIN

SEVERIN DAMPFBÜGELAUTOMAT BA 3237 User manual

SEVERIN DAMPFBÜGELAUTOMAT BA 3277 User guide

SEVERIN

SEVERIN DAMPFBÜGELAUTOMAT BA 3277 User guide

SEVERIN BA 3288 User manual

SEVERIN

SEVERIN BA 3288 User manual

SEVERIN BA 3289 User manual

SEVERIN

SEVERIN BA 3289 User manual

SEVERIN BA 3274 User manual

SEVERIN

SEVERIN BA 3274 User manual

SEVERIN BA 3298 - User manual

SEVERIN

SEVERIN BA 3298 - User manual

SEVERIN BA 3258 User manual

SEVERIN

SEVERIN BA 3258 User manual

SEVERIN BA 3237 User manual

SEVERIN

SEVERIN BA 3237 User manual

SEVERIN BA 3257 User manual

SEVERIN

SEVERIN BA 3257 User manual

SEVERIN DAMPFBUGELAUTOMAT BA 3259 User manual

SEVERIN

SEVERIN DAMPFBUGELAUTOMAT BA 3259 User manual

SEVERIN BA 3257 User manual

SEVERIN

SEVERIN BA 3257 User manual

SEVERIN BA 9659 User manual

SEVERIN

SEVERIN BA 9659 User manual

SEVERIN BA 3211 User manual

SEVERIN

SEVERIN BA 3211 User manual

SEVERIN BA 3285 - CENTRALE VAPEUR User manual

SEVERIN

SEVERIN BA 3285 - CENTRALE VAPEUR User manual

SEVERIN BA3276 User manual

SEVERIN

SEVERIN BA3276 User manual

SEVERIN DAMPFBÜGELAUTOMAT BA 3245 User guide

SEVERIN

SEVERIN DAMPFBÜGELAUTOMAT BA 3245 User guide

SEVERIN BA 3261 User manual

SEVERIN

SEVERIN BA 3261 User manual

SEVERIN BA 3264 User guide

SEVERIN

SEVERIN BA 3264 User guide

SEVERIN BA 3234 User manual

SEVERIN

SEVERIN BA 3234 User manual

SEVERIN DAMPFBÜGELAUTOMAT BA 3267 User manual

SEVERIN

SEVERIN DAMPFBÜGELAUTOMAT BA 3267 User manual

Popular Iron manuals by other brands

Lelit PG024N manual

Lelit

Lelit PG024N manual

Imetec INTELLIVAPOR K1 operating instructions

Imetec

Imetec INTELLIVAPOR K1 operating instructions

Hoyer DB 1750 C3 operating instructions

Hoyer

Hoyer DB 1750 C3 operating instructions

Singer SteamLogic instruction manual

Singer

Singer SteamLogic instruction manual

Russell Hobbs RHI007 Instructions and warranty

Russell Hobbs

Russell Hobbs RHI007 Instructions and warranty

Philips GC2900 series user manual

Philips

Philips GC2900 series user manual

Clatronic DB 3703 instruction manual

Clatronic

Clatronic DB 3703 instruction manual

TEFAL FV4093Z0 manual

TEFAL

TEFAL FV4093Z0 manual

Gorenje SIH 2200 BS instruction manual

Gorenje

Gorenje SIH 2200 BS instruction manual

Maxwell MW-3010 Manual instruction

Maxwell

Maxwell MW-3010 Manual instruction

Primula Vapormat instruction manual

Primula

Primula Vapormat instruction manual

Magio MG-541 manual

Magio

Magio MG-541 manual

Bosch Sensixx B22L manual

Bosch

Bosch Sensixx B22L manual

Philips GC651 Specifications

Philips

Philips GC651 Specifications

Vitek VT-1247 VT Manual instruction

Vitek

Vitek VT-1247 VT Manual instruction

Cleanmaxx 3397 instruction manual

Cleanmaxx

Cleanmaxx 3397 instruction manual

Philips GC800 user manual

Philips

Philips GC800 user manual

dyras ESI-2400AC instruction manual

dyras

dyras ESI-2400AC instruction manual

manuals.online logo
manuals.online logoBrands
  • About & Mission
  • Contact us
  • Privacy Policy
  • Terms and Conditions

Copyright 2025 Manuals.Online. All Rights Reserved.


FIN

GUS
Bügelautomat
Iron
Fer à repasser
Strijkijzer
Plancha
Ferro da stiro
Strygejern
Strykjärn
Silitysrauta
Żelazko
Σδερο
Электрический утюг








Manuale d’uso
Instrucciones de uso
Gebruiksaanwijzing
Mode d'emploi
Instructions for use
Gebrauchsanweisung
Brugsanvisning
Bruksanvisning
Käyttöohje


Instrukcja obsługi
Руководство по эксплуатации
Οδηγες χρσεως
Dear Customer,
Before using the appliance, please read the
following instructions carefully.
Connection to the mains supply
The appliance should only be connected to
an earthed socket installed in accordance
with the regulations.
Make sure that the supply voltage
corresponds with the voltage marked on the
rating label.
This product complies with the directives
which are binding for the CE-labelling.
Familiarisation:
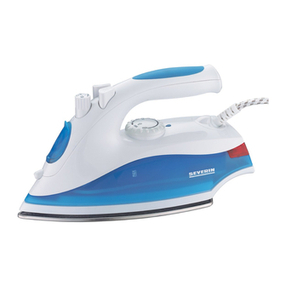
1. Housing
2. Soleplate
3. Indicator lamp
4. Temperature control knob
5. Power cord
6. Base stand (rear)
Important safety instructions
●Do not leave the iron unattended while
connected or on an ironing board.
Always remove the plug from the wall
socket when leaving the working area.
●This appliance is not intended for use by
any person (including children) with
reduced physical, sensory or mental
capabilities, or lacking experience and
knowledge, unless they have been given
supervision or instruction concerning the
use of the appliance by a person
responsible for their safety.
●Children should be supervised to ensure
that they do not play with the appliance.
●The iron operates at very high
temperatures. Do not touch any part of
the appliance except the handle. Burns
can occur from touching the hot parts of
the housing or the soleplate. When
operating the iron, hold only by the
handle.
●Do not allow the power cord to touch
hot surfaces.
●Always remove the plug from the wall
socket after use, and also
- in case of any malfunction and
- during cleaning
●When removing the plug from the wall
socket, never pull on the power cord. Do
not let the power cord hang free.
●The iron must be used and stored on a
stable and durable surface only.
●With the iron placed on its base stand,
ensure that this too is on a stable and
durable surface.
●Do not use the iron if it has been
dropped onto a hard surface or if it shows
any other sign of damage.
●In order to comply with safety
regulations and to avoid hazards, repairs
of electrical appliances must be carried
out by qualified personnel, including the
replacement of the power cord. If repairs
are needed, please send the appliance to
one of our customer service departments.
The addresses can be found in the
appendix to this manual.
●No responsibility is accepted if damage
results from improper use, or if the
instructions are not complied with.
●If the iron is passed to another person,
this instruction manual must accompany
it.
Operation
Start up
Place the iron upright on its base stand,
insert the plug into the wall socket and set
the infinitely adjustable temperature control
knob to its ••• position.
Leave the iron connected for a short while
after the indicator lamp has gone out. This
will lessen the smell typically encountered
when first switching the iron on.
Please ensure sufficient ventilation.
Afterwards, clean the iron according to the
instructions given in the paragraph “General
Care and Cleaning”.
7
Iron

Preparation
Before ironing starts, we recommend the
following:
-
Laundry to be ironed should be sorted
according to the fabric ironing
temperature indicated on the label. Start
with the lowest temperature.
-
Information on the appropriate ironing
temperature can usually be found on the
garment’s characterisation label.
-
The meaning of the symbols is as follows:
• Synthetics
(low temperature)
•• Silk and wool
(medium temperature)
••• Cotton and linen
(high temperature)
The markings also appear on the
temperature control knob in the form of dot
symbols.
In addition, please note the following:
-
When ironing highly sensitive fabrics, or
if you are not sure about the fabrics, you
may carefully test-iron at a non-visible
point, eg inside of seam.
-
If the laundry is being dried in a dryer
before ironing, the temperature should
be adjusted to “iron dry”. Very dry
fabrics are difficult to iron.
●For storage, and also when ironing is
interrupted, the iron must be placed
upright on its base stand (resting
position).
Ironing
Place the iron upright on its base stand,
insert the plug into the wall socket and set
the infinitely adjustable temperature control
knob to the required temperature. (Refer to
temperature information on the label).
During the heating-up process the indicator
lamp will be on. The lamp will go out once
the required ironing temperature is reached.
The iron is now ready to use.
General Care and Cleaning
Before cleaning the iron, ensure it is
disconnected from the power supply and has
cooled down completely.
If necessary, the unit may be wiped with a
dry lint-free cloth.
To avoid the risk of electric shock, do not
clean the iron with water and do not
immerse it in water.
In order to protect the clean soleplate, you
may occasionally apply a small amount of
paraffin to the warm plate, wiping it off with
a woollen cloth.
Starch, fat and other deposits on the
soleplate may be removed with a woollen
cloth soaked in a vinegar-water solution.
Do not use abrasives or harsh cleaning
solutions.
Do not place the soleplate on any rough
surfaces.
Disposal Do not dispose of old or defective
appliances in domestic garbage;
this should only be done through
public collection points.
Guarantee
This product is guaranteed against defects in
materials and workmanship for a period of
two years from the date of purchase. Under
this guarantee the manufacturer undertakes
to repair or replace any parts found to be
defective, providing the product is returned
to one of our authorised service centres. This
guarantee is only valid if the appliance has
been used in accordance with the
instructions, and provided that it has not
been modified, repaired or interfered with
by any unauthorised person, or damaged
through misuse.
This guarantee naturally does not cover
wear and tear, nor breakables such as glass
and ceramic items, bulbs etc. If the product
fails to operate and needs to be returned,
pack it carefully, enclosing your name and
address and the reason for return. If within
the guarantee period, please also provide the
guarantee card and proof of purchase.
8