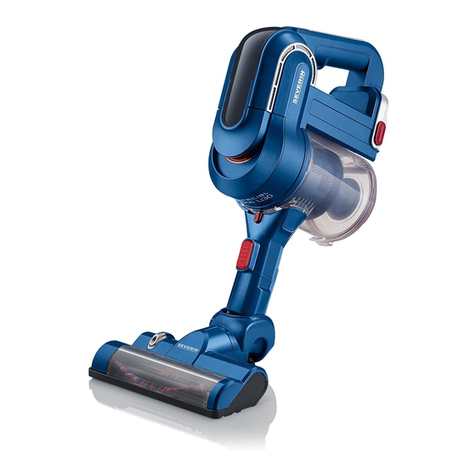
SEVERIN AH7914 User manual

DE Gebrauchsanweisung
GB Instructions for use
FR Mode d’emploi
NL Gebruiksaanwijzing
ES Instrucciones de uso
IT Manuale d’uso
DK Brugsanvisning
SE Bruksanvisning
FI Käyttöohje
PL Instrukcja obsługi
GR O
RU
Akku-Handstaubsauger 4
Rechargeable Vacuum Cleaner 9
Aspirateur rechargeable 14
Stofzuiger op batterijen 20
Aspiradora recargable 25
Aspirapolvere a batterie 30
Batteridrevet støvsuger 35
Batteridriven dammsugare 40
Akkukäyttöinen pölynimuri 44
Odkurzacz bezprzewodowy 49
πααφ υπ 54
59
www.severin.com

2
Liebe Kundin, lieber Kunde,
wir wünschen Ihnen mit dem Qualitätsprodukt aus dem Hause SEVERIN
viel Freude und bedanken uns für Ihr Vertrauen.
Die Marke SEVERIN steht seit über 120 Jahren für Beständigkeit,
deutsche Qualität und Entwicklungskraft. Jedes Gerät wurde mit Sorgfalt
hergestellt und geprüft.
Mit der sprichwörtlichen Sauerländer Gründlichkeit, Genauigkeit und
Ehrlichkeit überzeugt das Familienunternehmen aus Sundern seit der
Gründung 1892 mit innovativen Produkten Kunden in aller Welt.
In den sieben Produktgruppen Kaffee, Frühstück, Küche, Grillen,
Haushalt, Personal Care und Kühlen & Gefrieren bietet SEVERIN mit über
250 Produkten ein umfassendes Elektrokleingeräte-Sortiment. Für jeden
Anlass das richtige Produkt!
Lernen Sie die SEVERIN-Produktvielfalt kennen und besuchen Sie uns
unter www.severin.de oder www.severin.com.
Ihre
Geschäftsleitung und Mitarbeiter
der SEVERIN Elektrogeräte GmbH

3
1
4
2
5
6
7
3
8
15
14
11
8
12
13
10
9
16

4
Akku-Handstaubsauger
Bitte die Gebrauchsanweisung sorgfältig vor
der Benutzung des Gerätes durchlesen und
für den weiteren Gebrauch aufbewahren.
Das Gerät darf nur von Personen benutzt
werden, die mit den Sicherheitsanweisungen
vertraut sind.
Anschluss
Die Netzspannung muss der auf dem
Typenschild des Netzteils angegebenen
Spannung entsprechen.
Das Gerät entspricht den Richtlinien, die für
die CE-Kennzeichnung verbindlich sind.
Aufbau
1. Ein-Aus-Schalter
2. Kontrollleuchte
3. Luftaustrittsöffnungen
4. Ladebuchse (Geräteunterseite)
5. Akkufachabdeckung (Geräteunterseite)
6. Filter
7. Wandhalter
8. Netzteil
9. Fugenbürste
10. Gummidüse
11. Fugendüse
12. Klinkenstecker
13. 12 V Fahrzeug-Ladekabel
14. Staubbehälter
15. Saugöffnung mit innenliegendem
Saugstutzen
16. Entriegelungstaste
Sicherheitshinweise
Um Gefährdungen zu
vermeiden und um
Sicherheitsbestimmungen
einzuhalten, dürfen
Reparaturen am Gerät und
an der Anschlussleitung nur
durch unseren Kundendienst
durchgeführt werden. Daher
im Reparaturfall unseren
Kundendienst telefonisch
oder per Mail kontaktieren
(siehe Anhang).
Vor jeder Reinigung und
vor jedem Einsetzen oder
Entnehmen des Akkus das
Netzteil aus der Steckdose
ziehen.
Das Gerät darf aus Gründen
der elektrischen Sicherheit
nicht mit Flüssigkeiten
behandelt oder gar darin
eingetaucht werden.
Das Gerät darf nur mit
dem mitgelieferten Netzteil
benutzt werden.
Das Gerät kann von
Kindern ab 8 Jahren
sowie von Personen mit
reduzierten physischen,
sensorischen oder mentalen
DE

5
Fähigkeiten oder Mangel an
Erfahrung und/oder Wissen
benutzt werden, wenn sie
beaufsichtigt oder bezüglich
des sicheren Gebrauchs
des Gerätes unterwiesen
wurden und die daraus
resultierenden Gefahren
verstanden haben.
Kinder dürfen nicht mit dem
Gerät spielen.
Reinigung und Benutzer-
Wartung dürfen nicht durch
Kinder ohne Beaufsichtigung
durchgeführt werden.
Kinder jünger als 8 Jahre
sind vom Gerät und
der Anschlussleitung
fernzuhalten.
Kinder von Verpackungsmaterial
fernhalten. Es besteht u.a.
Erstickungsgefahr!
Den Akku-Sauger niemals ohne Filter
betreiben.
Vor der Inbetriebnahme das komplette
Gerät inkl. Anschlussleitung und
eventueller Zubehörteile auf Mängel
und Beschädigungen überprüfen, die
die Funktionssicherheit des Gerätes
beeinträchtigen könnten. Falls das Gerät
z.B. zu Boden gefallen ist oder an der
Anschlussleitung gezogen wurde, können
von außen nicht erkennbare Schäden
vorliegen. In diesen Fällen das Gerät
nicht in Betrieb nehmen.
Das Netzteilkabel darf nicht geknickt
werden und muss so verlegt sein, dass es
nicht zur Stolperfalle wird.
Keine heißen oder glühenden
Gegenstände und ätzende oder
brennbare Flüssigkeiten aufsaugen.
Niemals Feinstäube wie z.B. Mehl oder
Toner aufsaugen.
Weder das Gerät noch die
Anschlussleitung dürfen äußerer
Hitzeeinwirkung ausgesetzt werden.
Die Akkus niemals auseinandernehmen,
hohen Temperaturen (z.B. durch
Sonneneinstrahlung) aussetzen oder ins
Feuer werfen.
Akkus niemals kurzschließen, d.h.
nicht beide Pole zur gleichen Zeit
berühren, insbesondere nicht mit
elektrisch leitenden Gegenständen.
Akkus so lagern, dass sie auch bei der
Lagerung nicht durch andere Akkus oder
Metallgegenstände kurzgeschlossen
werden.
Beschädigte Akkus dürfen nicht benutzt
werden. Akkus vorsichtig aus dem
Gerät entnehmen und ordnungsgemäß
entsorgen. Jeden Kontakt mit eventuell
austretender Flüssigkeit vermeiden.
Wird das Gerät falsch bedient, oder
zweckentfremdet verwendet, kann keine
Haftung für evtl. auftretende Schäden
übernommen werden.
Das Gerät ist dazu bestimmt, im Haushalt
und ähnlichen Anwendungen verwendet
zu werden, wie z.B.
- in Küchen für Mitarbeiter in Läden,
Büros und anderen ähnlichen
Arbeitsumgebungen,

6
- in landwirtschaftlichen Betrieben,
- von Kunden in Hotels, Motels und
weiteren typischen Wohnumgebungen,
- in Frühstückspensionen.
Wandhalter
Der Wandhalter dient zur Aufbewahrung des
Gerätes und als Ladestation.
Den Wandhalter senkrecht mit den
beiliegenden Dübeln und Schrauben in
der Nähe einer Steckdose befestigen. Der
Klinkenstecker muss in der Wandhalterung
eingesetzt sein und muss nach oben zeigen.
Die Fugendüse mit Bürste und die
Gummidüse können rechts und links des
Gerätes auf die Halterung gesteckt werden.
Vor der ersten Inbetriebnahme
Vor der ersten Inbetriebnahme muss
der Entladeschutz am Ein-/Aus-Schalter
entfernt werden! Dazu den Entladeschutz
nach oben herausziehen und entsorgen.
Ladevorgang
Vor der ersten Inbetriebnahme des
Akkusaugers muss der leere Akku zunächst
ca. 10 Stunden aufgeladen werden.
Netzteil in eine Steckdose stecken.
Ein/Aus-Schalter in die Null-Stellung
bringen.
Den Akku-Sauger in den Wandhalter
einsetzen. Der Ladevorgang beginnt und
die Kontrollleuchte leuchtet rot. Sobald
die rote Kontrollleuchte erlischt, ist das
Gerät einsatzbereit.
Der Akku-Sauger kann am Netzteil
angeschlossen bleiben, um ihn
dauernd betriebsbereit zu halten.
Während des Ladevorgangs kann sich
das Netzteil leicht erwärmen. Dies ist ein
normaler Vorgang und kein Anzeichen
einer Funktionsstörung.
Wird der Akku-Sauger eine längere Zeit
nicht benutzt, kann sich die Kapazität des
Akkus verringern. Nach einigen Lade-/
Entladevorgängen wird aber wieder die
ursprüngliche Kapazität erreicht.
12 V Anschluss
Mit dem 12 V Anschluss kann der Akku
des Gerätes über den Zigarettenanzünder
des Fahrzeugs aufgeladen werden.
Den kleinen Stecker des Anschlusskabels
in die 12V Buchse des Akku-Saugers
und den großen Stecker in den
Zigarettenanzünderanschluss des
Fahrzeugs stecken.
Die Spannungsversorgung erfolgt direkt
aus dem Bordnetz des Fahrzeugs. Die
Kontrollleuchte leuchtet rot.
Flüssigkeiten aufsaugen
Die Gummidüse vor dem Aufsaugen von
Flüssigkeiten vollständig in die Saugöffnung
stecken.
Fugendüse
Die Fugendüse wird zum Saugen von
Fugen, Ecken und anderen schwer
zugänglichen Stellen vorne in die
Saugöffnung eingesteckt.
Fugenbürste
Die Fugenbürste wird vorne auf die
Fugendüse gesteckt. Sie dient zum Reinigen
von unebenen Flächen, wie z.B. Tastaturen.
Inbetriebnahme
Akku-Sauger vom Wandhalter abnehmen.
Bei Bedarf das entsprechende Zubehör in
die Saugöffnung stecken.
Das Gerät mit dem Ein/Aus-Schalter

7
einschalten. Die Kontrollleuchte leuchtet
grün.
Den Staubbehälter rechtzeitig entleeren,
bevor der aufgesaugte Schmutz bzw.
die Flüssigkeit über die Höhe des
innenliegenden Saugstutzens steigt
(siehe Max-Markierung).
Lässt die Akkuleistung während des
Betriebes nach, blinkt die Kontrollleuchte
grün, bevor sich der Akku-Sauger
automatisch ausschaltet, um eine
Tiefentladung des Akkus zu verhindern.
Dann den Akku-Sauger wieder
aufladen. Achten Sie darauf das
Gerät auszuschalten, bevor es in die
Ladestation eingesetzt wird.
Reinigung
Allgemein
Vor der Reinigung den Akku-Sauger vom
Wandhalter abnehmen.
Das Gerät und das Netzteil dürfen aus
Gründen der elektrischen Sicherheit nicht
mit Flüssigkeiten behandelt oder gar darin
eingetaucht werden.
Das Gehäuse, falls erforderlich, mit einem
leicht angefeuchteten Tuch abwischen
und nachtrocknen.
Staubbehälter entleeren
Wenn bei vollem Akku die Saugkraft
nachlässt, ist der Staubbehälter mit dem
Filter zu entleeren.
Akku-Sauger mit dem Staubbehälter nach
unten gerichtet in die Hand nehmen.
Entriegelungstaste drücken, den
Staubbehälter schräg nach unten öffnen,
Filter entnehmen und den Schmutz
entleeren.
Den Filter durch Abklopfen oder
vorsichtiges Abbürsten reinigen. Der
Staubfilter kann zur Reinigung vom
Filterhalter gelöst werden. Hierzu Filter
und Filterhalter in entgegengesetzte
Richtungen drehen und den Filter
abnehmen.
Bei starker Verschmutzung den Filter
in einer Seifenlösung auswaschen und
vollständig trocknen lassen. Dann den
Filter wieder auf den Filterhalter aufsetzen
und durch Drehung verriegeln.
Filterhalter, Staubbehälter und Düsen
können ebenso gereinigt werden.
Akku austauschen oder entsorgen
Der Akkupack im Gerät muss zur
Entsorgung oder zum Austausch
entnommen werden.
Zum Austausch dürfen nur Original
Ersatz-Akkus verwendet werden, die
in unserem Ersatzteil-Shop erworben
werden können.
Das Akkufach befindet sich unter dem
Gerät. Zum Öffnen die Schraube an
der Akkufachabdeckung mit Hilfe eines
Schraubendrehers lösen und den
unteren Teil des Verriegelungshakens
am Steckverbinder drücken. So lassen
sich die beiden Teile des Steckverbinders
durch einfaches Abziehen lösen.
Zum Einsetzen eines neuen Akkus
die beiden Teile des Steckverbinders
so zusammenstecken, dass der
Verriegelungshaken an der Rastnase
einhakt.
Akkus dürfen nicht in den Hausmüll
gelangen sondern müssen über die
dafür vorgesehenen
Sammelstellen entsorgt
werden. Dies gilt auch für
Akkus von unbrauchbar
gewordenen Geräten.

8
Ersatzteile und Zubehör
Ersatzteile oder Zubehör können bequem
im Internet auf unserer Homepage www.
severin.de unter dem Unterpunkt „Service /
Ersatzteil-Shop“ bestellt werden.
Entsorgung
Geräte, die mit diesem Symbol
gekennzeichnet sind, müssen
getrennt vom Hausmüll entsorgt
werden. Diese Geräte enthalten
wertvolle Rohstoffe, die wiederverwertet
werden können. Eine ordnungsgemäße
Entsorgung schützt die Umwelt und die
Gesundheit Ihrer Mitmenschen. Ihre
Gemeindeverwaltung bzw. Ihr Fachhändler
gibt Auskunft über die ordnungsgemäße
Entsorgung.
Garantie
Von den nachfolgenden
Garantiebedingungen bleiben die
gesetzlichen Gewährleistungsrechte
gegenüber dem Verkäufer und eventuelle
Verkäufergarantien unberührt. Wenden
Sie sich im Garantiefall daher direkt an
den Händler. Zusätzlich gewährt SEVERIN
eine Herstellergarantie von zwei Jahren ab
Kaufdatum. In diesem Zeitraum beseitigen
wir kostenlos alle Mängel, die nachweislich
auf Material- oder Fertigungsfehlern beruhen
und die Funktion wesentlich beeinträchtigen.
Weitere Ansprüche sind ausgeschlossen.
Von der Garantie ausgenommen sind:
Schäden, die auf Nichtbeachtung der
Gebrauchsanweisung, unsachgemäße
Behandlung oder normalen Verschleiß
zurückzuführen sind, ebenso leicht
zerbrechliche Teile wie z. B. Glas, Kunststoff
oder Glühlampen. Die Garantie erlischt bei
Eingriff nicht von SEVERIN autorisierter
Stellen. Sollte eine Reparatur erforderlich
werden, setzen Sie sich bitte telefonisch
oder per Mail mit unserem Kundendienst in
Verbindung. Die Kontaktdaten finden Sie im
Anhang der Anleitung.

9
Rechargeable Vacuum Cleaner
Dear Customer,
Before using the appliance, please read the
following instructions carefully and keep this
manual for future reference. The appliance
must only be used by persons familiar with
these instructions.
Connection to the mains supply
Make sure that the supply voltage
corresponds with the voltage marked on
the rating label of the adaptor. This product
complies with all binding CE labelling
directives.
Familiarisation
1. On/Off switch
2. Indicator lamp
3. Air outlet openings
4. Charging jack (on underside)
5. Battery compartment cover (on
underside)
6. Filter
7. Wall bracket
8. Adaptor
9. Crevice brush
10. Rubber nozzle
11. Crevice tool
12. Charging plug
13. 12 V charging cable for cars
14. Dust container
15. Suction aperture with inner suction tube
16. Release button
Important safety instructions
In order to avoid hazards,
and to comply with safety
requirements, repairs to this
electrical appliance or its
power cord must be carried
out by our customer service.
If repairs are needed,
please send the appliance
to our customer service
department (see appendix).
Always disconnect the
adaptor from the wall
socket before cleaning
the appliance, and before
fitting or removing the
rechargeable battery pack.
To avoid the risk of electric
shock, do not clean the
appliance with liquids or
immerse it.
The appliance must only be
used with the supplied AC
adaptor.
This appliance may be used
by children (at least 8 years
of age) and by persons with
reduced physical, sensory
or mental capabilities, or
lacking experience and
knowledge, provided they
GB

10
have been given supervision
or instruction concerning the
use of the appliance and
fully understand all dangers
and safety precautions
involved.
Children must not be
permitted to play with the
appliance.
Children must not be
permitted to carry out any
cleaning or maintenance
work on the appliance
unless they are supervised.
The appliance and its power
cord must be kept well away
from children under 8 at all
times.
Caution: Keep any packaging materials
well away from children – these are
a potential source of danger, e.g. of
suffocation.
Do not operate the vacuum cleaner
without its filter.
Every time the appliance is used, the
main body including the power cord as
well as any attachment fitted should
be checked thoroughly for any defects.
Should the appliance, for instance, have
been dropped onto a hard surface, or if
excessive force has been used to pull the
power cord, it must no longer be used:
even invisible damage may have adverse
effects on the operational safety of the
appliance.
The power cord of the adaptor must not
be kinked, and should be routed in such a
way that no one can accidentally trip over
it.
Never use the appliance to pick up hot
or smouldering material, nor acid or
inflammable liquids. Do not attempt to
pick up fine-dust matter such as flour or
toner powder.
Do not allow the appliance or its power
cord to touch hot surfaces, or to come into
contact with any heat sources.
Do not, under any circumstances, attempt
to dismantle the battery pack; do not
expose it to high temperatures (eg from
direct sunlight); do not dispose of it in a
fire.
Do not short-circuit the battery poles, ie
do not touch both terminals at the same
time, especially when using electrically
conductive objects. Battery packs must be
stored in such a way that they cannot be
accidentally short-circuited by any metal
objects or other battery packs.
Damaged battery packs must no longer
be used. Remove battery backs carefully
from the appliance and dispose of them
in compliance with statutory regulations.
Avoided contact with any leaking fluid.
No responsibility will be accepted if
damage results from improper use, or if
these instructions are not complied with.
This appliance is intended for domestic or
similar applications, such as the
- staff kitchens in shops, offices and other
similar working environments,
- agricultural working environments,
- by customers in hotels, motels etc. and

11
similar accommodation,
- in bed-and breakfast type environments.
Wall mounting
The wall bracket is designed for storing the
appliance and also serves as a charging
unit.
First insert the charging plug into the wall
bracket, facing up.
Mount the wall bracket vertically, near a wall
socket, using the screws provided with the
appliance.
Both the crevice tool with brush and the
rubber nozzle can be stored on the left and
right sides of the appliance.
Before using for the first time
Caution: Before the appliance is used for
the first time, the discharge protection
tab on the On/Off switch must be
removed. Simply pull the tab upwards and
out, and dispose of it.
Charging process
Before using the vacuum cleaner for the
first time, the battery must be charged for a
period of approximately 10 hours.
Insert the adaptor into a wall socket.
Put the On/Off switch to its off position.
Place the vacuum cleaner in the wall
bracket. The charging process begins
automatically and the indicator light
shows red. Once the red indicator light
goes out, the appliance is ready for use.
This appliance can remain on charge
indefinitely without damage or danger
and is therefore fully charged and ready
for use at all times.
Whilst charging, the adaptor will become
warm. This is perfectly normal and safe
and does not indicate a malfunction of
any kind.
If the vacuum cleaner is not being used
for a long period of time, the capacity of
the battery may decrease by a certain
amount. However, full capacity will be
restored after several charge/discharge
cycles.
12 V operation
With the 12 V connector, the battery
pack may be recharged through the car
cigarette-lighter socket.
Insert the small plug of the connecting
cable into the 12V jack of the vacuum
cleaner, and the larger plug into the car’s
cigarette-lighter socket.
Power is now supplied directly from the
car’s electrical system; the indicator lamp
shows red.
Picking up liquid matter
Before picking up liquid matter, ensure that
the rubber nozzle is fully inserted in the
suction aperture.
Crevice tool
The crevice tool can be inserted into the
suction aperture to clean crevices, corners
and other areas difficult to reach.
Crevice brush
The crevice brush can be fitted to the crevice
tool and is suitable for cleaning uneven
surfaces such as computer keyboards etc.
Operation
Remove the vacuum cleaner from its wall
bracket.
If required, fit any of the nozzle
attachments to the suction aperture.
Switch on the appliance using the On/Off

12
switch. The indicator lamp shows green.
Always ensure that the dust container is
emptied in good time, before the dust or
liquid matter collected reaches the level of
the inner suction tube (see max marking).
If the battery loses power during
operation, the green indicator lamp starts
flashing and the appliance switches off
after a while; this is to prevent excessive
discharge of the battery pack. In this
case, the battery pack needs recharging.
Always ensure that the appliance is
switched off before putting it in the
charging station.
Cleaning and care
General
Before cleaning the appliance, remove
the vacuum cleaner from the wall bracket.
To avoid the risk of electric shock, do not
clean the appliance or the adaptor with
liquids and do not immerse them.
If necessary, the housing may be wiped
with a damp cloth. Wipe dry afterwards.
To empty the dust container
Reduced vacuuming power despite a fully
charged battery pack indicates that the dust
container and filter inlay must be emptied.
Hold the vacuum cleaner with the dust
container facing downwards.
Push the release button, open the dust
container in a downward and forward
direction, remove the filter and empty it.
The filter may be cleaned by slightly
tapping it, or by gentle brushing. The
filter can be separated from its holder by
simply turning filter and holder in opposite
directions and taking the filter off.
Should the filter be visibly dirty, it should
be thoroughly cleaned with soapy
water; make sure to let it dry completely
afterwards. Once dry, replace the filter to
its holder and lock it by turning it.
The filter holder, dust container and
attachment tools may be cleaned the
same way.
Replacement or disposal of the
rechargeable battery pack
The rechargeable battery pack contained
in this appliance must be removed for
replacement or disposal.
When replacing the battery pack, use only
original battery packs, available from our
online parts shop.
The battery compartment is located on
the underside of the appliance. Open the
compartment by removing the screw in
the cover using a suitable screwdriver,
and then press the lower end of the
locking catch on the connectors. In that
way, both sides of the connection can be
separated by pulling them apart.
When inserting a new battery pack, push
together the two connectors and ensure
that the catch locks over the stop.
Never dispose of old battery packs in
domestic garbage, but only through
the proper public
collection points. This
also applies to the
battery packs of defective
appliances.
Disposal Devices marked with this symbol
must be disposed of separately
from your household waste, as
they contain valuable materials
which can be recycled. Proper disposal
protects the environment and human health.

13
Your local authority or retailer can provide
information on the matter.
Guarantee
This product is guaranteed against defects
in materials and workmanship for a period
of two years from the date of purchase.
Under this guarantee the manufacturer
undertakes to repair or replace any parts
found to be defective, providing the product
is returned to one of our authorised service
centres. This guarantee is only valid if the
appliance has been used in accordance with
the instructions, and provided that it has not
been modified, repaired or interfered with
by any unauthorised person, or damaged
through misuse.
This guarantee naturally does not cover
wear and tear, nor breakables such as
glass and ceramic items, bulbs etc. This
guarantee does not affect your statutory
rights, nor any legal rights you may have
as a consumer under applicable national
legislation governing the purchase of goods.
If the product fails to operate and needs
to be returned, pack it carefully, enclosing
your name and address and the reason for
return. If within the guarantee period, please
also provide the guarantee card and proof
of purchase.

14
Aspirateur rechargeable
Chère cliente, Cher client,
Avant d’utiliser cet appareil, veuillez lire
soigneusement les instructions suivantes et
conserver ce manuel pour future référence.
L’appareil doit être utilisé exclusivement
par des personnes familiarisées avec les
présentes instructions.
Branchement au secteur
Assurez-vous que la tension d’alimentation
correspond à la tension indiquée sur la fiche
signalétique de l’adaptateur. Ce produit est
conforme à toutes les directives relatives au
marquage “CE”.
Familiarisez-vous avec votre appareil
1. Interrupteur Marche/Arrêt
2. Témoin lumineux
3. Orifices d’évacuation d’air
4. Prise de chargement (à la base)
5. Couvercle du logement de la batterie (à
la base)
6. Filtre
7. Support mural
8. Adaptateur
9. Brosse pour prolongateur plat
10. Embout en caoutchouc
11. Prolongateur plat
12. Fiche de chargement
13. Câble connecteur 12 V pour recharge
en voiture
14. Compartiment à poussières
15. Embout aspirant avec tuyau d’aspiration
interne
16. Bouton de déblocage
Importantes consignes de sécurité
Afin d’éviter tout risque de
blessures, et pour rester
en conformité avec les
exigences de sécurité, les
réparations de cet appareil
électrique ou de son cordon
d’alimentation doivent être
effectuées par notre service
clientèle. Si des réparations
sont nécessaires, veuillez
envoyer l’appareil à notre
service après-vente (voir
appendice).
Débranchez toujours
l’adaptateur de la prise
murale avant de nettoyer
l’appareil et avant d’installer
ou de retirer la batterie
rechargeable.
Pour éviter le risque de
chocs électriques, ne pas
nettoyer l’appareil avec du
liquide et ne pas le plonger
dans du liquide.
L’appareil doit être
utilisé uniquement avec
l’adaptateur AC fourni.
FR

15
Cet appareil peut être utilisé
par des enfants âgés d’au
moins 8ans, à condition
qu’ils bénéficient d’une
surveillance ou qu’ils aient
reçu des instructions quant
à l’utilisation de l’appareil
en toute sécurité et qu’ils
comprennent bien les
dangers encourus.
Le nettoyage et l’entretien
par l’utilisateur ne doivent
pas être effectués par des
enfants, à moins qu’ils ne
soient âgés de plus de
8ans et qu’ils soient sous la
surveillance d’un adulte.
Conserver l’appareil et son
câble hors de portée des
enfants âgés de moins de 8
ans.
Cet appareil peut être utilisé
par des personnes dont
les capacités physiques,
sensorielles ou mentale sont
réduites ou dont l’expérience
ou les connaissances ne
sont pas suffisantes, à
condition qu’ils bénéficient
d’une surveillance ou qu’ils
aient reçu des instructions
quant à l’utilisation de
l’appareil en toute sécurité
et en comprennent bien les
dangers potentiels.
Les enfants ne doivent pas
utiliser l’appareil comme un
jouet.
Attention : Tenez les enfants à l’écart
des emballages, qui représentent
un risque potentiel, par exemple, de
suffocation.
N’utilisez pas cet aspirateur sans filtre.
Avant toute utilisation, vérifiez
soigneusement que l’appareil, son cordon
d’alimentation et ses accessoires ne
présentent aucun signe de détérioration
qui pourrait avoir un effet néfaste sur la
sécurité de fonctionnement de l’appareil.
Au cas où l’appareil, par exemple, serait
tombé sur une surface dure, ou si une
force excessive aurait été employée pour
tirer sur le cordon d’alimentation, il ne doit
plus être utilisé.
Le cordon d’alimentation de l’adaptateur
ne doit pas être tordu et doit être posé
au sol de façon à prévenir les risques de
trébuchement.
N’utilisez jamais l’appareil pour aspirer
des matériaux chauds, acides ou
inflammables. Ne pas tenter d’aspirer des
particules fines de poussière telles que la
farine ou la poudre de toner.

16
Ne permettez jamais que l’appareil ou le
cordon d’alimentation touche une surface
chaude ou entre en contact avec une
source de chaleur.
Ne tentez, en aucune circonstance, de
démonter la batterie ; ne pas l’exposer à
des températures élevées (comme par
ex. les rayons directs du soleil) ; ne pas
la jeter au feu.
Ne pas court-circuiter les bornes de la
batterie, comme par exemple toucher les
deux bornes en même temps, surtout
en employant des objets conducteurs
d’électricité. La batterie doit être rangée
de façon à prévenir le court-circuitage
accidentel par un objet métallique
quelconque ou d’autres batteries.
Une batterie endommagée ne doit plus
être utilisée. Retirez délicatement la
batterie de l’appareil et éliminez-la en
conformité avec les règlements locaux.
Evitez tout contact avec des fuites de
liquides.
Aucune responsabilité n’est acceptée
en cas de dégâts dus à une mauvaise
utilisation ou si on ne se conforme pas à
ces consignes.
Cet appareil est destiné à être utilisé
dans des applications domestiques et
analogues telles que :
- des coins cuisines réservés au
personnel dans des magasins,
bureaux et autres environnements
professionnels ;
- des fermes ;
- l’utilisation par les clients des hôtels,
motels et autres environnements à
caractère résidentiel ;
- des environnements de type chambres
d’hôtes.
Montage
Le support mural est destiné au rangement
de l’appareil et lui sert également de
chargeur.
Branchez d’abord la fiche de chargement
dans la prise murale, vers le haut.
Montez le support mural verticalement, à
proximité d’une prise de courant, en vous
servant des vis livrées avec l’appareil.
Le prolongateur plat avec la brosse et
l’embout en caoutchouc peuvent être rangés
sur les côtés gauche et droit de l’appareil.
Avant la première utilisation
Attention : Avant d’utiliser l’appareil pour
la première fois, enlevez la languette
empêchant l’appareil de se décharger
de l’interrupteur marche/arrêt. Tirez
simplement la languette vers le haut et
jetez-la.
Chargement
Avant d’utiliser l’aspirateur pour la première
fois, il faut charger la batterie pendant
environ 10 heures.
Branchez l’adaptateur sur une prise
murale.
Placez l’interrupteur marche/arrêt sur la
position arrêt.
Insérez l’aspirateur dans le support
mural. Le processus de charge démarre
automatiquement et le témoin lumineux
s’allume rouge. Une fois que le témoin
lumineux s’éteint, l’appareil est prêt à être
utilisé.
Cet appareil peut rester en charge
indéfiniment sans dégât ni danger, il
est par conséquent en charge complète
prêt à l’emploi à tout moment.
L’adaptateur chauffe au cours du
chargement. C’est tout à fait normal

17
et sans danger et n’indique pas une
défaillance quelconque.
Si l’aspirateur n’est pas utilisé pendant
une longue période, la capacité de
la batterie pourrait être quelque peu
réduite. La pleine capacité reviendra
néanmoins au bout de quelques cycles
de chargement/déchargement.
Fonctionnement 12 V
Grâce au câble connecteur 12 V, le
pack batterie peut être rechargé en
le branchant sur l’allume-cigare de la
voiture.
Insérez la petite fiche du câble
connecteur dans la douille de 12V de
l’aspirateur, et la grande fiche dans la
prise de l’allume-cigare de la voiture.
L’alimentation électrique est à présent
fournie automatiquement par la voiture et
le témoin lumineux s’allume rouge.
Aspiration des liquides
Avant d’aspirer un liquide, vérifiez que
l’embout en caoutchouc est inséré
complètement dans la bouche d’aspiration.
Prolongateur plat
Le prolongateur plat peut être inséré dans
l’orifice d’aspiration pour nettoyer les fentes,
coins et autres endroits d’accès difficile.
Brosse pour prolongateur plat
La brosse se fixe sur le prolongateur plat
et convient au nettoyage des surfaces
irrégulières telles que les claviers etc.
Utilisation
Oter l’aspirateur de son support mural.
Si nécessaire, adaptez au choix un
des accessoires fournis à l’ouverture
d’aspiration.
Mettez l’appareil en marche au moyen
de l’interrupteur Marche/Arrêt. Le témoin
lumineux s’allume vert.
Videz régulièrement le bac à poussière,
et toujours avant que la poussière ou le
liquide ramassé n’arrive au niveau du
tube d’aspiration intérieur (voir repère
max.).
Si la batterie perd de sa puissance
pendant l’utilisation, le témoin lumineux
vert se met à clignoter et l’appareil
s’éteint ; ceci afin d’éviter une décharge
complète du pack batterie. Dans ce
cas, le pack batterie doit être rechargé.
Assurez-vous toujours que l’appareil
est arrêté avant de le replacer sur son
support mural.
Nettoyage
Généralités
Avant de nettoyer l’aspirateur, enlevez-le
du support mural.
Pour éviter tout risque de choc électrique,
ne nettoyez pas l’appareil ni l’adaptateur
avec du liquide u et ne le plongez pas
dans l’eau ou d’autres liquides.
Au besoin, on peut essuyer le boîtier avec
un chiffon humide. Essuyez ensuite pour
sécher.
Pour vider le compartiment à poussières
Une puissance d’aspiration réduite même
avec une batterie d’alimentation chargée
indique que le compartiment à poussières et
le filtre doivent être vidés.
Tenez l’aspirateur avec le bac à poussière
vers le bas.
Poussez le bouton de déblocage du
couvercle, ouvrez le compartiment à
poussières vers le bas et vers l’avant,

18
Enlevez le filtre et videz le compartiment.
Le filtre peut être nettoyé en le
tapant légèrement ou en le brossant
délicatement. Le filtre peut être séparé
de son support en tournant simplement
le filtre et le support dans des directions
opposées et en ôtant le filtre.
Si le filtre est visiblement sale, il faut
le nettoyer à l’eau savonneuse, en
s’assurant de bien le laisser sécher
après cela. Une fois sec, replacez le filtre
sur son support et verrouillez-le en le
tournant.
Les porte filtre, bac à poussière et
accessoires peuvent être nettoyés de la
même façon.
Remplacement ou mise au rebut de la
batterie rechargeable
Le pack batterie rechargeable contenu
dans cet appareil doit être enlevé lors du
remplacement ou mise au rebut.
Remplacez toujours la batterie par
une batterie d’origine; des batteries de
remplacement sont disponibles dans
notre boutique de pièces de rechange en
ligne.
Le compartiment à batterie est situé sous
l’appareil. Ouvrez le compartiment en
retirant la vis du couvercle à l’aide d’un
tournevis adapté, puis appuyez sur la
partie inférieure du loquet de blocage des
connecteurs. De cette façon, les deux
parties de la connexion peuvent être
séparées.
Lors de l’installation d’un nouveau pack
batterie, raccordez les deux connecteurs
et assurez-vous que le loquet du
connecteur de la batterie s’enclenche sur
le loquet de fermeture du connecteur de
l’appareil.
Ne jetez jamais les packs batterie
usagés avec les ordures ménagères,
mais mettez-les au rebut dans des
centre de collecte
appropriés. Ceci
s’applique également
pour les packs batterie
d’appareils défectueux.
Mise au rebut
Les appareils qui portent ce
symbole doivent être collectés
et traités séparément de vos
déchets ménagers, car ils
contiennent des matériaux précieux qui
peuvent être recyclés. En vous débarrassant
correctement de ces appareils, vous
contribuez à la prévention de potentiels
effets négatifs sur la santé humaine et
l’environnement. Votre mairie ou le magasin
auprès duquel vous avez acquis l’appareil
peuvent vous donner des informations à ce
sujet.
Garantie
Cet appareil est garanti par le fabricant
pendant une durée de deux ans à partir
de la date d‘achat, contre tous défauts de
matière et vices de fabrication. Au cours de
cette période, toute pièce défectueuse sera
remplacée gratuitement. Cette garantie ne
couvre pas l‘usure normale de l‘appareil,
les pièces cassables telles que du verre,
des ampoules, etc., ni les détériorations
provoquées par une mauvaise utilisation et
le non-respect du mode d‘emploi. Aucune
garantie ne sera due si l‘appareil a fait l‘objet
d‘une intervention à titre de réparation ou
d‘entretien par des personnes non-agréées
par nous-mêmes. Cette garantie n‘affecte
pas les droits légaux des consommateurs

19
sous les lois nationales applicables en
vigueur, ni les droits du consommateur
face au revendeur résultant du contrat
de vente/d‘achat. Si votre appareil ne
fonctionne plus normalement, veuillez
l‘adresser, sous emballage solide, à une de
nos stations de service après-vente agréées,
muni de votre nom et adresse. Si vous
retournez votre appareil pendant la période
de garantie, n‘oubliez pas de joindre à votre
envoi la preuve de garantie (ticket de caisse,
facture etc.) certifiée par le vendeur.

20
Stofzuiger op batterijen
Beste Klant,
Voordat men dit apparaat gebruikt, moet men
de volgende instructies goed doorlezen en
bewaar dit manuaal voor latere referentie. Dit
apparaat moet alleen gebruikt worden door
personen bekent met de gebruiksaanwijzing.
Aansluiting
Zorg ervoor dat de netspanning overeenkomt
met de spanning zoals aangegeven op het
typeplaatje van de adapter. Dit product komt
overeen met de richtlijnen aangegeven op
het CE-label.
Beschrijving
1. Aan/uit schakelaar
2. Indicatielampje
3. Luchtuitlaat
4. Laadstekerbus (aan onderzijde)
5. Deksel batterijruimte (aan onderzijde)
6. Filter
7. Muurbevestiging
8. Adapter
9. Spleten borstel
10. Rubberen mondstuk
11. Kierenzuiger
12. Laadstop
13. 12 V aansluitingskabel voor auto
14. Stofbak
15. Vacuum-mondstuk met inwendige
zuigpijp
16. Ontgrendeldrukknop
Belangrijke veiligheidsinstructies
Om risico te voorkomen,
en te voldoen aan de
veiligheidseisen, mogen
reparaties aan dit elektrische
apparaat of het power snoer
slechts uitgevoerd worden
door onze klantenservice.
Wanneer reparaties nodig
zijn, stuur het dan aan
de klantenservice van de
fabrikant (zie aanhangsel).
Ontkoppel altijd de adapter
van het stopcontact
voordat het apparaat
schoongemaakt wordt en
voordat de oplaadbare
batterij geplaatst of
verwijderd wordt.
Om elektrische schokken
te voorkomen dit apparaat
nooit met vloeistoffen
schoonmaken of
onderdompelen.
Het apparaat mag alleen
gebruikt worden met de
meegeleverde AC adapter.
Dit apparaat mag gebruikt
worden door kinderen
(tenminste 8 jaar oud)
en door personen met
NL
Other manuals for AH7914
1
Table of contents
Languages:
Other SEVERIN Vacuum Cleaner manuals

SEVERIN
SEVERIN 7058 User manual

SEVERIN
SEVERIN BR 7943 User manual

SEVERIN
SEVERIN 7025 User manual

SEVERIN
SEVERIN BR 7953 User manual

SEVERIN
SEVERIN 7023 User manual

SEVERIN
SEVERIN BC 7048 Guide

SEVERIN
SEVERIN BR 7933 User manual

SEVERIN
SEVERIN 7172 User manual

SEVERIN
SEVERIN RB7025 Installation guide

SEVERIN
SEVERIN 7044 User manual

SEVERIN
SEVERIN 7119 User manual

SEVERIN
SEVERIN MY 7114 User manual

SEVERIN
SEVERIN CY 7089 User manual

SEVERIN
SEVERIN MY 7114 User manual

SEVERIN
SEVERIN 7025 User manual

SEVERIN
SEVERIN 7045 User manual

SEVERIN
SEVERIN 7157 User manual

SEVERIN
SEVERIN AH7914 User manual

SEVERIN
SEVERIN CY 7106 User manual

SEVERIN
SEVERIN BC 7048 User manual