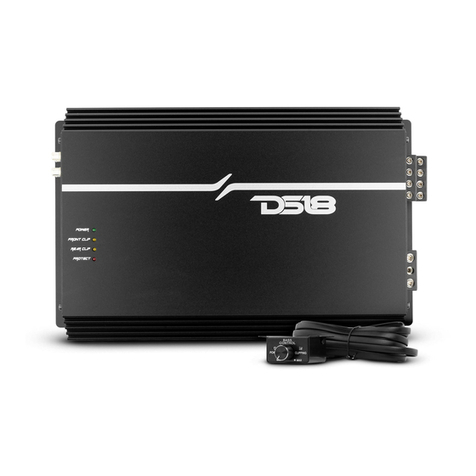
SFaudio SFR-7000 User manual

User's Manual
Please keep this manual for future reference > > >
Professional Power Amplifier
SFR-4000+SFR-7000+SFR-9000+SFR-14000
www.sfaudio.es

Professional Audio Equipment
IMPORTANT PRECAUTIONS
1. Read all documentation before operating your equipment. Retain all documentation for further reference.
2. Mains voltage must be correct and the same as that printed on the rear of the unit. Damage caused by
connection to improper AC voltage is not covered by any warranty.
3. Always operate the unit with the AC ground wire connected to the electrical system ground. Precautions
should be taken so that the means of grounding of a piece of equipment is not defected .
4. Connecting amplifier outputs to oscilloscopes or other test equipment while the amplifier is in bridged
mode may damage both the amplifier and test equipment.
5. Do not drive the inputs with a signal level greater than that required to drive equipment to f ull output.
6. Do not run the output of any amplifier channel back into another channel 's input. Do not parallel or
series connect an amplifier output with any other amplifier output.
7. In system setup ,amplifier's output power must be greater 50%-100% than the loaded loudspeaker's
rated power.
8. Make sure the signal correctly connect to the amplifier's input channel at current input mod e.
9. Please turn off the power switch ,when pull off the power cord and signal cable or select the input mode
switch.
10. In typical use, Please set the volume to 0dB position.
11. Sometime, one signal to more than one amplifier, suggest use signal distributor.
12. Please clean the dust filter ,every 15 days.
WARRANTY CONDITIONS
Allproducts are warranted for a period of one year from all manufacturers defects.
The warranty begins when the product is sold to the end-user, and no more than 12 months after
The warranty is void if their are any signs of tampering of the unit, unless authorized by an ag ent of in writing .
If by chance the unit were to be defective, at that point the client must pre-pay the shipment back to
the warranty center with it?s original package.
The amplifiers have all protections but bad use can damaged the amplifier and is not covered by the warranty.
The amplifier have some mechanical parts that if over used abusively is not covered by theLimited Warranty.
For any further information or question regarding the SFR series amplifier please contact your di stributor
or place from which you purchased this product.
1

1. Air Exit
This part is the air exit. Don t obstruct it.'
2. POWER Indicator
This indicator lights when the power amplifier
is switching on.
" "
6. SIGNAL Indicator
The illumination of the LED only indicates a safe
operation.
" "
3. CLIP Indicator
Any illumination of the clip indicates a state of
over modulation (distortion at extremely high
volumes). In this case, check the output signal
of your mixer and turn down the input gain
control. Please keep in mind that the power
amplifier con not correct any distortion.
" "
7. Handles
Those handles are used for easy transportation.
4. Channel 1 Volume Control
In stereo mode, this potentiometer allows the
adjustment of the channel 1 input level. ( left
channel ). In Bridge mode, this potentiometer
allows the adjustment of the two channels at
the same time.
8. Power Switch
Use this switch to switch your power amplifier on.
Switch off the device and find out the problem.
This power amplifier is protected overheat,
overload, short circuit, DC, softstart.
9. Channel 2 Volume Control
In stereo mode, this potentiometer allows the
adjustment of the channel 2 input level. (Right
channel)
In bridge mode, this potentiometer is disabled.
Professional Audio Equipment
5. PROTECTION Indicator
When this indicator lights, that means the
power amplifier is in the protection mode.
" "
2
SFR SERIES DESCRIPTION FRONT PANEL:
8
3
67
SFR-14000

SFR SERIES DESCRIPTION REAR PANEL:
Professional Audio Equipment
3
11. Channel 1 XLR Input
This XLR input is a balanced input. Connect
this input to the left output of your mixer.
12. Channel 2 XLR Input
This XLR input is a balanced input.
Connect this
input to the right output of y our mixer.
13. Channel 1 Turn lock Output
Connect this turn lock output to a speaker.
14. Channel 2 Turn Lock Output
Connect this turn lock output to a speaker.
15. AC Cord
Plug this cord into the power supply socket.
(Before using the power amplifier, check if
the power supply is 220V).
16 . A ir Entra nc e
This part is the air entrance. Don t obstructit.'
17. Channel 1 Link Socket
Th is b al an ced socket i s use d to l in k an other
amp li fier.
18. Channel 2 Link Socket
Th is b al an ced socket i s use d to l in k an other
amp li fier.
12
11
1413 1718
15
1 6

4
CONNECTING FOR 2U MODEL:
Professional Audio Equipment
Ch1 OUTPUT
Ch2 OUTPUT
+: 1+
+: 1+
-: 1-
-: 1-
En modo Stereo conectar cada una de las entradas CH1 y CH2 a las salidas del mezclador.
El selector MODE debe de estar en la posición Stereo.
Conectar los altavoces a los conectores de salida.
Ajustar el volumen con los potenciómetros frontales de volumen de cada canal.

SPECIFICATIONS
SAFETY INSTRUCTIONS:
Read all safety instructions before operating amplifier.
Install equipment as follows:
-- Install in a flat place, not bending or curved.
-- Do not install near water and moisture.
-- Place power amplifier away from heat sources, such as radiators or other heat source.
Keep in mind the following when connecting amplifiers
-- Read the user manual before connecting the amplifier
-- Connect each connection of the amplifier perfectly. If not, it may cause hum, damage, electric
shock in case of disconnection.
-- To prevent electric shocks, do not open top cover.
Connect the power cord with safety after check fo AC power.
Professional Audio Equipment
5
Net Weight /Gross Weight 1 5 K g /1 9 .5 K g 17Kg/21Kg 1 8 K g /2 2 K g 1 8 K g /2 2 K g
20Hz-20KHz 0.5dB±
Frequency Response
< 0 .0 5 % < 0 .0 8 %< 0 .0 5 % < 0 .0 8 %
THD+N(20Hz-20KHz)
3 0 V /μs 3 0 V /μs 4 0 V /μs3 0 V /μsSlew Rate
400Damping Factor(8 20Hz-1KHz)
,Ω
3 6 d B 3 9 .7 d B3 8 .2 d B 4 0 .8 d BVoltage Gain(rated power@8 )
Ω
> 9 0 d B > 9 0 d B > 9 5 d B > 9 5 d BSignal to Noise Ratio
0.775V/1.0V/1.4VInput Sensitivity(8 )
Ω
20K balance/10K unbalance
Ω Ω
Input Impedance
Two variable speed fans, rear-to-front air flowCooling
Front : AC switch,Ch1 and Ch2 gain knobs;
Rear:
30Hz Low cut :clip limiter switch,
150Hz Low pass
Sensitivity switch,GND switch,Stereo/Parallel/Bridge switch,
switch,
switch
Controls
Indicators
>70dB >70dB>70dB >70dB
CrossTalk(20-20KHz)
Amplifier Protection
Dimensions
Packing Dimensions
Power Requirements
483mmX462mmX89mm
610mmX575mmX170mm
230V/50Hz
short circuit,t hermal,over load,clip limiter, DC voltage,soft start,
ult rasonic and RF protect ion
@8 Stereo Output Power
Ω
@4 Stereo Output Power
Ω
@ Output Power8 Bridge
Ω
SFR-4000 SFR-9000SFR-7000 SFR-14000
800W 1450W 2000W1600W
1200W 2100W 3000W2400W
2400W 4200W 6000W4800W
SFR SERIES SPECIFICATIONS
Input:X L R
Ou t p u t : S p e a ko n,connector
Front : STANDBY-orange LED,POWER-White LED,SIGNAL-Green LED ,
CLI P-Red LED ,PROT-Red LED;Rear: orange LEDBridge-
Connectors (each channel)
This manual suits for next models
3
Table of contents
