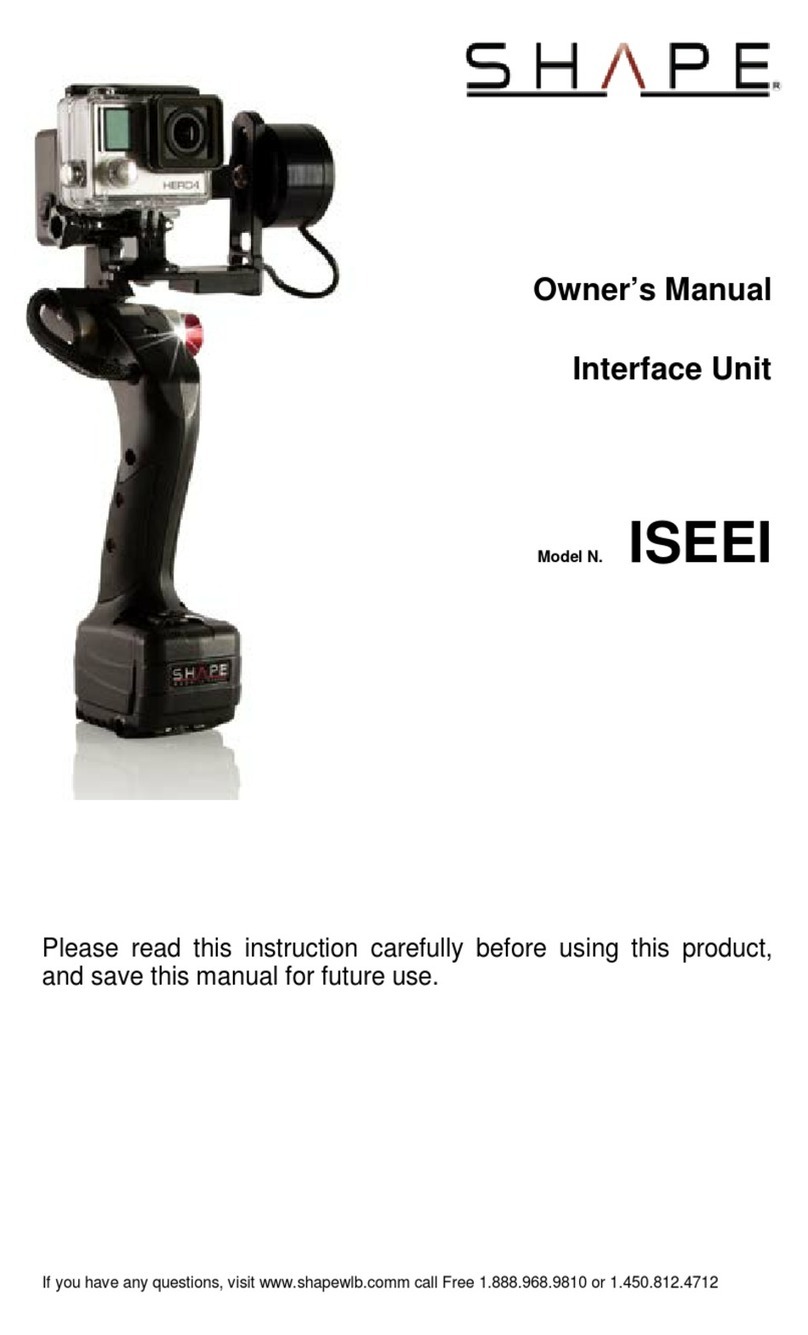
Shape ISEE+ User manual

Owner’s Manual
Model N. ISEE+
Please read this instruction carefully before using this product,
and save this manual for future use.
If you have any questions, visit www.shapewlb.com or call 1.888.968.9810 (Us&Can Free) or 1.450.812.4712

2
THANK YOU FOR PURCHASING THE SHAPE®ISEE+ GIMBAL
The SHAPE® ISEE+ is a digitally controlled 2-axis
gimbal designed to dynamically stabilize a camera’s
line of sight with a defined horizon.
The ISEE+ was designed and calibrated for small body
cameras and medium to large sized smartphones. The
manufacturer does not guarantee acceptable
performance when used with other types of camera or
digital devices.
A joystick allows the adjustment of the camera line of
sight at +/- 45° of the horizon.
The angle of the handle relative to the gimbal assembly
can be modified with the help of our patented Push-
button technology joint.
The unit is powered by two standard LP-E6 batteries.
Each ISEE+ unit includes multiple precisely calibrated
profiles made by the manufacturer. Any malfunction or
loss of calibration will need repair from authorized
service personnel.
COPYRIGHT
© SHAPE wlb Inc. 2015
All Rights Reserved

Contents
READ THIS FIRST!..............................................................4
READ THIS FIRST!..............................................................5
WHAT’S IN THE BOX ...........................................................7
COMPONENTS...................................................................9
TECHNICAL SPECIFICATIONS.............................................11
BEFORE USING THE GIMBAL..............................................14
INSTALLING A CAMERA ON THE ISEE+ ...............................15
INSTALLING A SMARTPHONE ON THE ISEE+ .......................17
SELECTING THE CORRECTPROFILE ...................................18
SUGGESTED HANDLING POSTURES ...................................20
WARRANTY ....................................................................21
CONTACT US...................................................................22
NOTES............................................................................23

4
READ THIS FIRST!
Please allow yourself at least 45 minutes to learn the operating
limits of the device. This will help avoid substandard
performances, damage to the unit or possible injury.
WARNING
Always keep equipment out of reach of children under 5.
WARNING
To reduce the risk of electrical fire, keep all liquids away from this
equipment. Use and store only in locations which are not exposed to the
risk of dripping liquids, and do not place any liquid containers on top of
the equipment.
CAUTION
Refer servicing to authorized service personnel. Do not remove screws
to open the cover panels unless instructed to do so by an authorized
service personnel.
CAUTION
To reduce the risk of material damage, only use with recommended
accessories.
CAUTION
The high temperature parts of the device that are in direct contact with
the skin may cause or aggravate burn injuries.

5
READ THIS FIRST!
Do not to let sand, dust, or dirt to adhere or seep into
the unit.
This unit is not waterproof, so it cannot be used
underwater.
This unit is not splash-proof, do not use in close
proximity to raining, flowing or splashing water
Do not subject the unit to strong shocks or vibration.
Doing so may result in damage and/or malfunction.
Keep the unit away from any volatile substances.
Do not expose the unit to fire or direct heat sources.
Do not expose the unit to relative humidity higher than
90%, non-condensing.
Do not expose the unit to rapid temperature changes.

6
READ THIS FIRST!
FCC WARNING STATEMENT (USA)
This device complies with part 15 of the FCC Rules. Operation is
subject to the following two conditions: (1) this device may not
cause harmful interference, and (2) this device must accept any
interference received, including interference that may cause
undesired operation.
CAUTION:
This equipment has been tested and found to comply with the
limits for a Class B digital device, pursuant to part 15 of the FCC
Rules. These limits are designed to provide reasonable protection
against harmful interference in a residential installation.
This equipment generates, uses and can radiate radio frequency
energy and, if not installed and used in accordance with the
instructions, may cause harmful interference to radio
communications. However, there is no guarantee that interference
will not occur in a particular installation. If this equipment does
cause harmful interference to radio or television reception, which
can be determined by turning the equipment off and on, the user is
encouraged to try to correct the interference by one or more of the
following measures:
Reorient or relocate the receiving antenna.
Increase the separation between the equipment and
receiver.
Connect the equipment into an outlet on a circuit
different from that to which the receiver is connected.
Consult the dealer or an experienced radio/TV
technician for help.
FCC WARNING:To assure continued FCC emission limit
compliance, follow the attached installation instructions and the
user must use only shielded interface cables when connecting to
host computer or peripheral devices. Also, any unauthorized
changes or modifications to this equipment could void the user’s
authority to operate this device and void the warranty offered by
the manufacturer.

7
WHAT’S IN THE BOX
SHAPE®ISEE+ Unit
Battery Charger LP-E6
2 x LP-E6 Batteries
Continued next page….

8
WHAT’S IN THE BOX (CONTINUED)
SHILL® Smartphone mount
3x ¼-20 screws
Allen Key ¼-20
Allen Key 10-32
European Adapter
12v car adapter cable

9
COMPONENTS
Gimbal
Threaded
holes ¼-20
Battery Cover
Push Button
joint
Handle
Threaded
hole ¼-20
Camera Bracket
Stand
Pitch Joystick
Pitch Joystick
Switch
On/Off
Controller Box

10
COMPONENTS
LED INDICATOR COLOR CODES
Red
Normal Operation
Flashing red (~4Hz)
Low Battery
Rapid flashing red (~8Hz)
Critical
Purple
Pitch errors
Yellow
Roll errors
Orange
Critical error
White
Initialisation

11
TECHNICAL SPECIFICATIONS
Weight:
2,90 lbs (1,31kg) without batteries
3,25 lbs (1,47kg) with batteries
Dimensions:
Height: 11 ⅛”(295mm)
Length: 9 ¼” (234mm)
Width: 7 ¼” (184mm)
Camera Adjustments
Height: 1 5/16” (36mm)
Side: 1 14/16” (50mm)
Camera: 5 ½ ” (140mm)
Front/Back: 1/8” (28mm)
Temperature Range
0°C to 30°C
NOTE:
This unit has been tested with the Sony A7S, Sony NEX-7,
Panasonic GH4, Blackmagic Pocket Cinema Camera and
Smartphones.
The maximum weight for the ISEE+ to be balance and works
properly is 2 lbs (0,9 kg). For more info, please refer to page 18.

12
TECHNICAL SPECIFICATIONS
GIMBAL RANGE OF MOTION
Pitch:
+/- 60° (Maximum, do not exceed)
Roll:
345° (Do not operate near the Mechanical Stop)
Mechanical
Stop : ~15°
345°

13
TECHNICAL SPECIFICATIONS
It is possible to adjust the angle of the stopper:
WARNING: DO NOT adjust for more than a complete turn.

14
BEFORE USING THE GIMBAL
Batteries
1. Make sure both LP-E6 batteries are well charged.
2. Open the battery cover, insert the batteries and close
the cover.
Operating the push button
The angle of the handle relative to the gimbal assembly can be
modified with the help of our patented Push-button technology
joint.
The ISEE+, push button technology joint offers great flexibility by
allowing the user to change the angle of the ISEE+ handle quickly
and easily.
To manipulate the Push-button, place the right hand on the
controller box and the left hand on the handle, and push the
button with your left thumb to change the angle of the handle.
Note: Do not operate the Push-button without holding the
controller box with your right hand. The gimbal will fall forward
and this may damage the device.

15
INSTALLING A CAMERA ON THE ISEE+
1. Secure the camera and its mount to the Camera
bracket with one of the included 1/4-20 screws. Place
the center of gravity (CoG) of the camera as close as
possible to the Roll axis by sliding the camera left or
right on the Camera Bracket.
2. Adjust the camera bracket front and back on each side
3. Adjust the camera bracket up and down on each side:

16
INSTALLING A CAMERA ON THE ISEE+ (CONTINUED)
4. Adjust the bracket on the roll motor from left to right:
DO NOT remove the screw completely.
5. You might not get the perfect center of gravity on your
first try. You have to test to see if the camera and the
bracket are correctly adjusted for the center of gravity.
To verify that the camera is properly installed, lay the
unit on a flat surface and verify that, when moved
manually, the camera does not return to its previous
position. The camera should stay balanced and
stable when the unit is not open.
6. Put the power switch to the ON position.
7. You should see a red light appear once the unit is on.
8. Wait a few seconds for the Gimbal to find its horizon.
9. Select the correct profile for your camera (follow the
instruction at page 18)
10. The joystick at the back of the unit will allow you to
control the stabilized pitch.
11. The ISEE+ is now ready. Keep the device’s limits in
mind when operating (see page 12 for details on limits)
NOTE:
The accuracy of the camera’s CoG adjustments will directly
impact the device’s performance. Improper adjustments will lead
to substandard performance.

17
INSTALLING A SMARTPHONE ON THE ISEE+
1. Insert the Smartphone in the Smartphone mount by pulling
on the top part.
2. Attach the SHILL®Smartphone mount to the camera bracket
with the supplied ¼-20 screw and Allen Key.
3. Make sure that the lens of the Smartphone is facing your
subject, and that it is placed closest to the pitch motor.
4. Slide the Smartphone in the Smartphone mount. Make sure
that the lens is not hidden by the mount.
5. Adjust the Smartphone and the Smartphone mount on the
camera bracket until the CoG is aligned with the pitch and
roll axes.
6. Follow steps 6 to 11 from USING THE GIMBAL WITH A CAMERA
(page 16)
NOTE:
The SHILL® Smartphone mount expands to accept devices from
2”(5.1cm) to 3.3”(7.6cm) width.

18
SELECTING THE CORRECT PROFILE
The ISEE+ has 3 pre-calibrated profiles based on different weight.
Each profile has its own LED light color:
HOW TO SET THE CORRECT PROFILE FOR YOUR
CAMERA:
At the back of the control box, there’s a small button:
Light
weight camera:
Medium
weight camera:
Heavy
weight camera:
Camera with heavier/longer lens

19
SELECTING THE CORRECT PROFILE (CONTINUED)
To open the menu to change the profile, press and hold the button for
3 seconds. Pick the profile designed for your camera weight. To
change between profiles, press one time the button and you’ll see the
LED light changing color.
Once you have selected the profile you need, hold the button for 3
seconds to close the menu. The LED light will change to red. You are
now in the operation mode and ready to use your ISEE+.
To make sure you have the right profile for your camera:
To make sure you have the right profiles for an optimized use, you
have to operate the ISEE+ at its extremes.
With full charged batteries, try to operate the ISEE+ in the situation you
will use it. If the results are not optimal, try the stronger profile.

20
SUGGESTED HANDLING POSITIONS
Drill position
Briefcase position
Bike Handle position
Table of contents
Other Shape Camera Accessories manuals
Popular Camera Accessories manuals by other brands

Blackmagicdesign
Blackmagicdesign Blackmagic URSA Installation and operation manual

Evo
Evo Prime1 User and maintenance manual

PROAIM
PROAIM CINEMA VCTR-TH Assembly manual

Induro
Induro BHS-Series operating instructions

Scotty
Scotty AirFlo Duo user guide

Aigis Mechtronics
Aigis Mechtronics HS9383S Series Installation and operating instructions