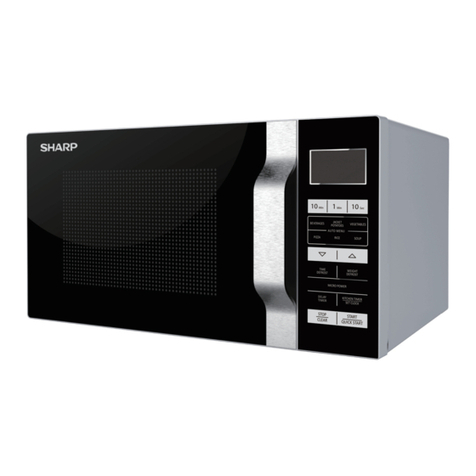
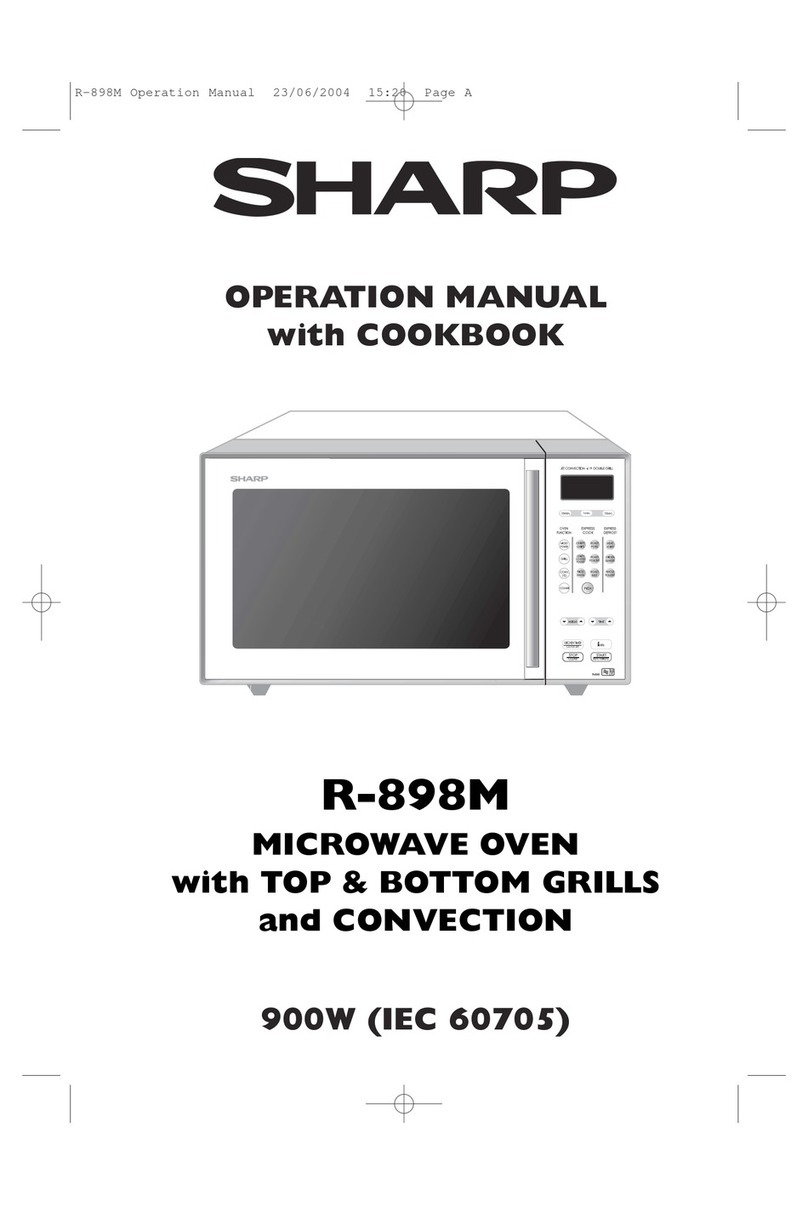
Sharp R-6781J Instruction Manual

ENGLISH
Important
800 W (IEC test procedure)
R-6781J
MICROWAVE OVEN WITH
TOP AND BOTTOM GRILL
OPERATION MANUAL WITH COOKBOOK
OPERATION MANUAL
This operation manual contains important information which you should read carefully before using
your microwave oven.
IMPORTANT: There may be a serious risk to health if this operation manual is not followed or if the oven
is modified so that it operates with the door open.
R-6781J English 31/08/2004 16:15 Page A

R-6781J English 31/08/2004 16:15 Page B

ENGLISH
VJLTKM R-6781J IFHG
cjjndtncndetn nht<jdfzbyv
zjhvfnbdzsü ljrevtznjd:
Gj <tpjgfczjcnb
UJCN H VÄR 335-2-25-97
UJCN H 51318.44.1-99
UJCN H 51318.14.2-99
Gj ÄVC
UJCN 51318.11-99
Dj bcgjkztzbt Cnfnmb 5 Pfrjzf Hjccbqcrjq Atlthfwbb ≤J pfobnt ghfd gjnht<bntktq≥, f
nfröt Erfpf Ghfdbntkmcndf Hjccbqcrjq Atlthfwbb @ 720 jn 16 b+zy 1997 u.
ecnfzfdkbdftncy chjr ckeö<s lfzzjq vjltkb 7 ktn c vjvtznf ghjbpdjlcndf ghb eckjdbb
bcgjkmpjdfzby d cnhjujv cjjndtncndbb c bzcnherwbtq gj ärcgkefnfwbb b ghbvtzytvsvb
ntüzbxtcrbvb cnfzlfhnfvb.
Cnhfzf-bpujnjdbntkm: Ghjbpdtltzj d Fzukbb
Abhvf-bpujnjdbntkm: IFHG Rjhgjhtqiz
*hblbxtcrbq flhtc bpujnjdbntky:
22-22 Zfufqrt-xj, F<tzj-re, Jcfrf 545-8522, Ygjzby
BZAJHVFWBY J CTHNBABRFWBB GHJLERWBB
VBRHJDJKZJDFY GTXM C UHBKTV
VJLTKM R-6781J IFHG
cthnbabwbhjdfzf HJCNTCN—VJCRDF
R-6781J English 31/08/2004 16:15 Page C

ГА РАНТИЙНЫЙ ТАЛОН НА ИЗДЕЛИЕ SHARP
Уважаемый покупатель!
Выражаем Вам признательность за выбор изделия SHARP.
В течение гарантийного срока, начинающегося с даты покупки изделия первым покупателем, гарантия на
изделие SHARP предоставляется в отношении любых дефектов, произошедших по вине производителя.
Настоящая гарантия действительна в течение 12 (двенадцати) месяцев (36 (тридцати шести) месяцев на ЖК
телевизоры; 36 (тридцати шести) месяцев на компрессоры для холодильников; 24 (двадцати четырех)
месяцев на магнетроны для СВЧ печей;) с даты покупки изделия первым покупателем при соблюдении
условий, перечисленных ниже, если рекомендованные режимы эксплуатации изделия, изложенные в
инструкции по эксплуатации, полностью соблюдены.
Если Ваше изделие SHARP нуждается в гарантийном обслуживании, обращайтесь в один из
Специализированных Сервисных Центров, информация о которых приведена на внутренней стороне талона.
Настоящая гарантия предусматривает замену дефектных узлов и деталей и выполнение ремонтных работ
бесплатно.
Гарантия действительна на территории Российской Федерации при соблюдении следующих условий:
1. Данное изделие должно быть куплено на территории Российской Федерации.
2. Данное изделие должно быть использовано в соответствии с инструкцией по эксплуатации (прилагается
к изделию). В случае нарушения правил хранения, транспортировки, установки и эксплуатации,
изложенных в инструкции по эксплуатации, гарантия недействительна.
3. Гарантия действительна только при наличии четко, правильно и полностью заполненного настоящего
гарантийного талона (с подписью и печатью Продавца). Без предъявления данного талона, в случае
отсутствия в нем полной информации или при наличии каких-либо изменений в талоне, претензии к
качеству изделия не принимаются, и гарантийный ремонт не производится.
4. Гарантия недействительна:
а) если изделие имеет механические повреждения
б) если изделие ремонтировалось, или в нем произведены изменения не в авторизованном сервисном
центре
в) если использовались ненадлежащие расходные материалы или запасные части
г) если неисправность вызвана попаданием внутрь изделия посторонних предметов, веществ,
жидкостей, насекомых и т.п.
д) если неисправность вызвана стихийными бедствиями, пожаром, бытовыми и другими факторами,
независящими от SHARP
е) если повреждения вызваны несоответствием параметров источников питания и связи
соответствующим государственным стандартам
ж) в случае любых изменений в установке, настройке и/или программировании.
з) в случае внесения несанкционированных изменений в гарантийный талон (поправок и исправлений)
и) если серийный номер или номер модели на изделии изменен, удален, стерт или неразборчивый
5. Гарантия не распространяется на расходные материалы, например: картриджи, лампы, программное
обеспечение, фильтры, батареи и т. п. в соответствии с указаниями инструкции по эксплуатации.
6. Гарантия не предусматривает чистку изделия, плановое техническое обслуживание и замену расходных
материалов и запчастей, пришедших в негодность ввиду нормального износа и / или ограниченного срока
службы.
7. Настоящая гарантия распространяется на официально поставляемые изделия, приобретенные для
личного использования, не связанного с извлечением прибыли.
8. Настоящая гарантия применяется дополнительно к обязательным гарантиям, предоставляемым
покупателям законом.
Внимание!
Настоящая гарантия осуществляется только при наличии правильно заполненного гарантийного талона и
оригинала товарного чека с указанием даты продажи.
Список авторизованных сервис-центров может быть изменен без предварительного
уведомления.
SHARP ELECTRONICS (EUROPE) GMBH
R-6781J English 31/08/2004 16:15 Page D

ENGLISH
Город Название Адрес Телефон
Москва КДС-Технический центр 123290, Шелепихинская наб., 18 (095) 797-34-34
Москва Алина-Видеопроф-Сервис 115470, Нагатинская наб., 40/1, стр. 5 (095) 118-01-56, 118-19-90
Москва Алина-Видеопроф-Сервис 109172, ул. Большие Каменщики, 19 (095) 912-90-13, 912-76-23
Москва Алина-Видеопроф-Сервис 109280, Ослябинский пер., 3 (095) 275-78-21, 741-25-44
Москва Алина-Видеопроф-Сервис 109172, Краснохолмская наб., 13/15, стр. 1 (095) 912-99-27, 912-98-75
Москва Алина-Видеопроф-Сервис 109369, Новочеркасский б-р, 13 (095) 357-40-51, 356-61-54
Москва Алина-Видеопроф-Сервис 103064, ул. Казакова, 13 (095) 261-90-12
Москва Алина-Видеопроф-Сервис 103055, ул. Новослободская, 48/2 (095) 973-25-71
Архангельск Архсервис-центр 163046, ул. Воскресенская, 85 (8162) 66-18-66
Астрахань Марктех 414000, ул. Володарского, 12 (8512) 22-36-33, 39-43-92
Белгород Союз-Сервис 308034, пр-т Ватутина, 5a (0722) 25-34-00, 54-20-20
Братск Лексика Электроникс 655708, ул. Пионерская, 23 (3953) 47-69-07, 45-13-67
Владимир Электрон-Сервис 600022, ул. Ново-Ямская, 73 (0922) 24-08-19
Волгоград Планета-Сервис и К 400107, ул. Рионская, 3 (8442) 39-62-38, 39-51-01
Волгоград Радиотехника 400006, ул. Штеменко, 33 (8442) 77-15-12, 72-71-27
Волгоград Мир Видео-1 400005, пр-т Ленина, 58/1 (8442) 34-41-36, 34-05-94
Волжский Мир Видео-1 404127, ул. Дружбы, 21 (8443) 56-60-22
Воронеж Орбита-Сервис 394030, ул. Донбасская, 1 (0732) 77-66-25
Воронеж Радиоимпорт-Сервис 394052, ул. Матросова, 66 (0732) 76-96-00, 36-25-95
Екатеринбург Сентри 620098, пр-т Космонавтов, 45 (3432) 35-86-02
Екатеринбург Норд-Сервис 620057, ул. Донская, 31 (3432) 35-94-43, 34-24-37
Ижевск ДС 426000, ул. Карла Маркса, 393 (3412) 43-16-42, 43-50-64
Иркутск Эверест 664040, 15-й Советский пер., 2 (3952) 45-19-11, 53-12-92
Казань Ай-Ти-Эс 420105, ул. Сакко и Ванцетти, 8 (8432) 92-59-62
Казань Техника 420043, ул. Вишневского, 14 (8432) 38-31-37, 38-31-07
Калининград Вестер-Сервис 236029, ул. Горького, 50 (0112) 27-34-32, 27-31-51
Калуга Мастер-Сервис 248600, ул. Рылеева, 39 корп. 2 (0842) 56-18-21, 56-18-22
Киров Экран-Сервис 610027, ул. Воровского, 43 (8332) 37-20-78, 67-00-98
Королев Паллада 141070, ул. Фрунзе, 17 (095) 511-83-64
Кострома Аксон Сервис 156603, ул. Станкостроительная, 5б (0942) 22-05-12, 22-03-82
Красноярск Интернационал Сервис 660062, ул. Вильского, 3 (3912) 45-33-05
Красноярск Дон-ТВ Сервис 660025, ул. Железнодорожников, 11 (3912) 21-94-82, 36-67-09
Курган ТВ-Сервис 640020, ул. Кирова, 83 (3522) 22-75-42, 22-34-43
Курск Экран Сервис Лимитед 305001, ул. Добролюбова, 17 (0712) 56-00-51, 56-00-53
Липецк СПС-Липецк 398600, Петровский пр-д, 1 (0742) 77-74-56, 77-38-76
Магадан ВидеоСервис 685000, ул. Гагарина, 28в, оф. 64 (41322) 757-06
Нижний Новгород Бытовая Автоматика 603086, б-р Мира, 16 (8312) 77-57-79
Нижний Новгород Электроника 603005, ул. Алексеевская, 9 (8312) 19-41-08, 19-41-10
Нижний Новгород Электроника 603016, ул. Лескова, 8 (8312) 59-46-20, 54-68-18
Новосибирск Сонико-Н 630112, ул. Красина, 51 (3832) 77-76-96, 77-02-64
Новый Уренгой Анкор 629300, ул. 26-го съезда КПСС, 10б (34949) 461-45, 461-56
Ноябрьск ТелеРадиоБытТехника 629807, Тюменская обл., ул. Городилова, 8 (34964) 512-38, 233-94
Обнинск Радиотехника 249037, ул. Треугольная, 1 (08439) 644-14, 613-73
Омск Сибтекс 644077, пр-т Мира, 47 (3812) 26-84-39, 26-84-41
Оренбург КомИнКом 460052, ул. Брестская, 7 (3532) 62-68-88, 62-77-01
Авторизованные сервисные центры
R-6781J English 31/08/2004 16:15 Page E

Информацию об авторизованных сервисных центрах в других регионах и о сервисных центрах
наших торговых партнеров, Вы можете узнать у фирмы, продавшей Вам товар, на интернет-
странице http://www.sharp.ru или по бесплатному междугороднему телефону 8-800-200-7427.
Город Название Адрес Телефон
Орск Аста-Сервис 462431, пр-т Ленина, 77 (35372) 173-97, 145-99
Пермь ЛЭБТ 614077, б-р Гагарина, 58а (3422) 90-34-00, 90-34-80
Псков Фронда 180007, ул. Киселева, 16, оф. 21 (8112) 44-31-98, 44-61-98
Ростов-на-Дону Элтех 344079, ул. Ленина, 63 (8632) 47-41-52, 62-52-68
Ростов-на-Дону Софт-Сервис 344011, пер. Островского, 124 (8632) 99-30-60, 32-37-90
Ростов-на-Дону ТВ-Сервис 344018, ул. Мечникова, 73д (8632) 34-51-21
Рыбинск Самсон 152900, ул. Ломоносова, 3 (0855) 20-14-04, 52-81-09
Рязань Фаворит 390000, ул. Астраханская, 21, Дом Быта, комн. 112 (0912) 28-99-22
Рязань Сервисный Центр 390011, Куйбышевское шоссе, 21 (0912) 44-63-17
Санкт-Петербург РемCервис 190068, пр-д Римского-Корсакова, 37/15 (812) 327-05-79, 327-05-80
Санкт-Петербург Сонико 191158, Московское шоссе, 16/1 (812) 126-53-89, 127-21-29
Санкт-Петербург Курсор-Сервис 192283, Загребский б-р, 33/1 (812) 108-20-19, 101-73-97
Самара Энон-Сервис 443090, ул. Советской Армии, 148 (8462) 24-07-40, 24-43-61
Самара Мелодия-Сервис 443110, пр-т Ленина, 3 (8462) 36-90-92
Самара Сервис-Центр 443096, ул. Мичурина, 15 (8462) 34-94-28, 34-94-63
Самара Сервис-Центр 443096, пр-т Ленина, 14 (8462) 34-29-79
Самара Сервис-Центр 443096, ул. Мориса Тереза, 13а (8462) 16-88-54
Саранск Видео-Сервис 430016, ул. Терешковой, 18a (8342) 24-54-85
Саратов Аэлита 410005, ул. Пугачевская, 157 (8452) 51-75-61
Саратов Архипелаг 2002 410600, ул. Московская, 134/146 (8452) 51-66-33, 51-68-06
Сочи Техинсервис 354000, ул. Юных Ленинцев, 1 (8622) 62-02-95
Та г анрог АСЦ Кристи 347900, ул. Фрунзе, 45 (8634) 46-47-54, 38-30-48
Тамбов БВС-2000 392002, ул. Энгельса, 5 (0752) 75-17-18
Тобольск Тюмень Импорт-Сервис 625456, ул. Ремезова, 3 (34511) 589-11
Томск ДС 634034, ул. Учебная, 26 (3822) 42-74-50, 42-74-28
Томск Спектр 634063, ул. С. Лазо, 15 (3822) 67-35-73, 67-33-55
Томск Академия-Сервис 634055, Академический пр., 1, бл. А, оф. 204 (3822) 25-85-80, 25-98-08
Тюмень Тюмень Импорт-Сервис 625026, ул. Мельникайте, 97 (3452) 22-35-31, 31-12-80
Тюмень Аверс-Сервис 625007, ул. Мельникайте, 131a (3452) 39-12-18, 39-12-29
Ульяновск Мастер-Сервис 432017, ул. Минаева, 42 (8422) 32-07-33
Ульяновск Апрель 432600, ул. Л. Толстого, 38 (8422) 32-78-89, 31-83-72
Уссурийск Вега-Гарант 692508, ул. Советская, 29 (42341) 400-39, 210-35
Уфа Альянс-Сервис 450104, ул. Российская, 21 (3472) 31-45-49, 35-58-31
Хабаровск Контур-Сервис 680009, пр-т 60-летия Октября, 210 (4212) 72-85-02
Чебоксары ВТИ-Сервис 428029, пр-т И. Яковлева, 4/2 (8352) 20-65-94, 20-64-64
Челябинск Импорт-Сервис-Челябинск 454080, ул. Энтузиастов, 16 (3512) 34-04-95, 34-05-05
Челябинск Импорт-Сервис-Челябинск 454070, ул. Гагарина, 8 (3512) 52-05-05
Челябинск Импорт-Сервис-Челябинск 454075, ул. Комарова, 114 (3512) 72-66-00
Челябинск Импорт-Сервис-Челябинск 454078, ул. Комаровского, 4 (3512) 61-05-49
Челябинск РемБытТехника 454081, ул. Артиллерийская, 102 (3512) 72-72-28, 72-56-01
Авторизованные сервисные центры
R-6781J English 31/08/2004 16:15 Page F

ENGLISH
✁
✁
Уважаемый Покупатель!
Во избежание лишних проблем просим Вас внимательно ознакомиться с информацией,
содержащейся в гарантийном талоне и инструкции по эксплуатации.
Настоящим Я подтверждаю, что приобрел данное изделие Шарп пригодным к
эксплуатации, в полном комплекте и с русской инструкцией по эксплуатации.
ФИО покупателя Подпись
Информация о приобретении изделия
Модель
Серийный номер
Дата приобретения
Цена
Подпись Продавца / Печать
Адрес Продавца
Продавец / Компания
Улица
Город
Телефон
Информация о Покупателе
ФИО
Улица
Город
Телефон
Журнал Гарантийных Работ
Дата приема Дата выдачи Тип дефекта, описание, Фамилия и подпись
изделия в ремонт изделия ремонтных работ и инженера, печать
использованные запасные сервисного центра
части
R-6781J English 31/08/2004 16:15 Page G

✁
✁
R-6781J English 31/08/2004 16:15 Page H

1
CONTENTS
ENGLISH
OVEN AND ACCESSORIES . . . . . . . . . . . . . . . . . . . . . . . . . . . . . . . . . . . . . . . . . . . . .2
CONTROL PANEL . . . . . . . . . . . . . . . . . . . . . . . . . . . . . . . . . . . . . . . . . . . . . . . . . . . .3
IMPORTANT SAFETY INSTRUCTIONS . . . . . . . . . . . . . . . . . . . . . . . . . . . . . . . . . . . . .4-6
INSTALLATION . . . . . . . . . . . . . . . . . . . . . . . . . . . . . . . . . . . . . . . . . . . . . . . . . . . . . .6
BEFORE OPERATION . . . . . . . . . . . . . . . . . . . . . . . . . . . . . . . . . . . . . . . . . . . . . . . . . .7
SETTING THE CLOCK . . . . . . . . . . . . . . . . . . . . . . . . . . . . . . . . . . . . . . . . . . . . . . . . .7
ENERGY SAVE MODE . . . . . . . . . . . . . . . . . . . . . . . . . . . . . . . . . . . . . . . . . . . . . . . . .8
USING THE STOP BUTTON . . . . . . . . . . . . . . . . . . . . . . . . . . . . . . . . . . . . . . . . . . . . .8
MICROWAVE POWER LEVELS . . . . . . . . . . . . . . . . . . . . . . . . . . . . . . . . . . . . . . . . . . . .9
MICROWAVE COOKING . . . . . . . . . . . . . . . . . . . . . . . . . . . . . . . . . . . . . . . . . . . . . .10
GRILL COOKING . . . . . . . . . . . . . . . . . . . . . . . . . . . . . . . . . . . . . . . . . . . . . . . .10 - 11
HEATING WITHOUT FOOD . . . . . . . . . . . . . . . . . . . . . . . . . . . . . . . . . . . . . . . . . . . .11
DUAL COOKING . . . . . . . . . . . . . . . . . . . . . . . . . . . . . . . . . . . . . . . . . . . . . . . . . . .12
OTHER CONVENIENT FUNCTIONS . . . . . . . . . . . . . . . . . . . . . . . . . . . . . . . . . . .13 - 14
AUTOMATIC OPERATION . . . . . . . . . . . . . . . . . . . . . . . . . . . . . . . . . . . . . . . . . .15 - 16
PIZZA CHART . . . . . . . . . . . . . . . . . . . . . . . . . . . . . . . . . . . . . . . . . . . . . . . . . . . . . .16
AUTO COOK CHART . . . . . . . . . . . . . . . . . . . . . . . . . . . . . . . . . . . . . . . . . . . . . . . .17
AUTO DEFROST CHART . . . . . . . . . . . . . . . . . . . . . . . . . . . . . . . . . . . . . . . . . . . . . . .18
RECIPES FOR AUTOCOOK AC-5 . . . . . . . . . . . . . . . . . . . . . . . . . . . . . . . . . . . . . . . .19
CARE AND CLEANING . . . . . . . . . . . . . . . . . . . . . . . . . . . . . . . . . . . . . . . . . . . . . . .20
SERVICE CALL CHECK . . . . . . . . . . . . . . . . . . . . . . . . . . . . . . . . . . . . . . . . . . . . . . . .21
COOKBOOK . . . . . . . . . . . . . . . . . . . . . . . . . . . . . . . . . . . . . . . . . . . . . . . . . . .22 - 45
SPECIFICATIONS . . . . . . . . . . . . . . . . . . . . . . . . . . . . . . . . . . . . . . . . . . . . . . . . . . . .46
R-6781J English 31/08/2004 16:15 Page 1

2
OVEN AND ACCESSORIES
1. Grill heating element (top grill)
2. Oven lamp
3. Control panel
4. Door opening button
5. Waveguide cover
6. Oven cavity
7. Turntable motor shaft
8. Grill heating element (bottom grill)
9. Door seals and sealing surfaces
10. Ventilation openings
11. Power cord
12. Outer cabinet
ACCESSORIES:
Check to make sure the following accessories are
provided:
13. Turntable
14. Rack
Place the turntable over the turntable motor shaft on
the floor of the cavity.
Before first using the turntable and the rack, clean with
mild soapy water.
Do not cut or scratch the turntable.
3
4
10
11
13
8
14
NOTE:
When you order accessories, please mention the part
name and model name to your dealer or SHARP
authorised service agent.
12
56789
12
WARNING:
The accessories (e.g. turntable) will become
very hot during Grill, Dual and Automatic
operation (except Auto Defrost) modes.
Always use thick oven gloves when
removing the food or turntable from the oven
to prevent burns.
R-6781J English 31/08/2004 16:15 Page 2

Operating buttons
7LESS/MORE buttons
8PIZZA button
9AUTO DEFROST button
10 COOKING MODE dial
Rotate the dial so that indicator points to
appropriate symbol:
Microwave
Microwave and Top Grill
Microwave and Bottom Grill
Top Grill
Bottom Grill
Top and Bottom Grills
11 WATT button
12 TIME/WEIGHT dial
13 STOP button
14 (START) +1min button
15 CLOCK button
16 AUTO COOK button
Digital Display and Indicators
1LESS/MORE indicator
2AUTO indicator - will light during automatic
operation
3WEIGHT (KG) indicator
4MICROWAVE (WATT) indicator
5CLOCK SET/TIMER indicator
6COOKING IN PROGRESS indicator
3
CONTROL PANEL
ENGLISH
8
9
10
11
13
12
14
7
16
15
2
3456
1
R-6781J English 31/08/2004 16:15 Page 3

To avoid the danger of fire
The microwave oven should not be left
unattended during operation. Power
levels that are too high or cooking times
that are too long may overheat foods
resulting in a fire.
This oven is not designed to fit into a kitchen unit.
The electrical outlet must be readily accessible so
that the unit can be unplugged easily in an
emergency.
The AC power supply must be 230 V, 50 Hz, with
a minimum 16 A distribution line fuse, or a
minimum 16 A distribution circuit breaker.
It is recommended that a separate circuit serving
only this appliance be provided.
Do not place the oven in areas where heat is
generated. For example, close to a conventional
oven.
Do not install the oven in an area of high humidity
or where moisture may collect.
Do not store or use the oven outdoors.
If food being heated begins to smoke,
DO NOT OPEN THE DOOR. Turn off and
unplug the oven and wait until the food
has stopped smoking. Opening the door
while food is smoking may cause a fire.
Use only microwave-safe containers and
utensils. See Page 22 - 23.
Do not leave the oven unattended when
using disposable plastic, paper or other
combustible food containers.
Clean the waveguide cover, the oven
cavity and the turntable after use. After
cooking fatty foods without a lid, always
clean the cavity and especially the grill
heating elements thoroughly. These must
be dry and free from grease. Built-up
grease may overheat and begin to
smoke or catch fire.
Do not place flammable materials near the oven or
ventilation openings. Do not block the ventilation
openings.
Remove all metallic seals, wire twists, etc., from
food and food packages. Arcing on metallic
surfaces may cause a fire.
Do not use the microwave oven to heat oil for deep
frying. The temperature cannot be controlled and
the oil may catch fire.
4
IMPORTANT SAFETY INSTRUCTIONS
To make popcorn, use only special microwave
popcorn makers.
Do not store food or any other items inside the oven.
Check the settings after you start the oven to ensure
the oven is operating as desired.
See the corresponding hints in the cookery book
section.
To avoid the possibility of injury
WARNING:
Do not operate the oven if it is damaged or
malfunctioning. Check the following before use:
a)The door; make sure the door closes properly
and ensure it is not misaligned or warped.
b)The hinges and safety door latches; check to
make sure they are not broken or loose.
c)The door seals and sealing surfaces; ensure
that they have not been damaged.
d)Inside the oven cavity or on the door; make
sure there are no dents.
e)The power supply cord and plug; ensure that
they are not damaged.
Never adjust , repair or modify the oven
yourself. It is hazardous for anyone
other than a competent person to carry
out any service or repair operation
which involves the removal of a cover
which gives protection against exposure
to microwave energy.
Do not operate the oven with the door open or
alter the door safety latches in any way.
Do not operate the oven if there is an object
between the door seals and sealing surfaces.
Do not allow grease or dirt to build up
on the door seals and adjacent parts.
Follow the instructions for “Care and
Cleaning” on page 20. Failure to
maintain the oven in a clean condition
could lead to a deterioration of the
surface that could adversely affect the
life of the appliance and possibly result
in a hazardous situation.
Individuals with PACEMAKERS should check with
their doctor or the manufacturer of the pacemaker
for precautions regarding microwave ovens.
To avoid the possibility of electric shock
Under no circumstances should you remove the
outer cabinet.
IMPORTANT SAFETY INSTRUCTIONS: READ CAREFULLY AND KEEP FOR FUTURE REFERENCE
R-6781J English 31/08/2004 16:15 Page 4

5
IMPORTANT SAFETY INSTRUCTIONS
ENGLISH
Pierce the skin of such foods as potatoes, sausages
and fruit before cooking, or they may explode.
To avoid the possibility of burns
Use pot holders or oven gloves when removing
food from the oven to prevent burns.
Always open containers, popcorn makers, oven
cooking bags, etc., away from the face and hands
to avoid steam burns.
To avoid burns, always test food
temperature and stir before serving and
pay special attention to the temperature
of food and drink given to babies,
children or the elderly.
Temperature of the container is not a true indication
of the temperature of the food or drink; always
check the food temperature.
Always stand back from the oven door when
opening it, to avoid burns from escaping steam
and heat.
Slice stuffed baked foods after heating to release
steam and avoid burns.
Keep children away from the door and accessible
parts that may become hot when the grill is in use.
Children should be kept away to prevent them
burning themselves.
Do not touch the oven door, outer cabinet, rear
cabinet, oven cavity, ventilation openings, bottom
grill, accessories and dishes during GRILL, DUAL
and AUTOMATIC operation (except AUTO
DEFROST) as they will become hot. Before
cleaning make sure they are not hot.
To avoid misuse by children
WARNING: Only allow children to use
the oven without supervision when
adequate instructions have been given
so that the child is able to use the oven
in a safe way and understands the
hazards of improper use.
Do not lean or swing on the oven door. Do not
play with the oven or use it as a toy.
Children should be taught all important safety
instructions: use of pot holders, careful removal of
food coverings; paying special attention to
packaging (e.g. self-heating materials) designed to
make food crisp, as they may be extra hot.
Never spill or insert any objects into the door lock
openings or ventilation openings. In the event of a
spill, turn off and unplug the oven immediately, and
call an authorised SHARP service agent.
Do not immerse the power supply cord or plug in
water or any other liquid.
Do not let the power supply cord hang over the
edge of a table or work surface.
Keep the power supply cord away from heated
surfaces, including the rear of the oven.
Do not attempt to replace the oven lamp yourself or
allow anyone who is not an electrician authorised by
SHARP to do so. If the oven lamp fails, please consult
your dealer or an authorised SHARP service agent.
If the power supply cord of this appliance is
damaged, it must be replaced by an authorised
SHARP service agent.
To avoid the possibility of explosion and
sudden boiling:
WARNING: Liquids and other foods must
not be heated in sealed containers since
they are liable to explode.
Never use sealed containers. Remove seals and
lids before use. Sealed containers can explode due
to a build up of pressure even after the oven has
been turned off.
Take care when microwaving liquids. Use a wide-
mouthed container to allow bubbles to escape.
Microwave heating of beverages can
result in delayed eruptive boiling,
therefore care has to be taken when
handling the container.
To prevent sudden eruption of boiling liquid and
possible scalding:
1. Stir liquid prior to heating/reheating.
2. It is advisable to insert a glass rod or similar
utensil into the liquid whilst reheating.
3. Let liquid stand for at least 20 seconds in the
oven at the end of cooking time to prevent
delayed eruptive boiling.
Do not cook eggs in their shells, and
whole hard boiled eggs should not be
heated in microwave ovens since they
may explode even after microwave
cooking has ended. To cook or reheat
eggs which have not been scrambled or
mixed, pierce the yolks and the whites,
or the eggs may explode. Shell and slice
hard boiled eggs before reheating them
in the microwave oven.
R-6781J English 31/08/2004 16:15 Page 5

6
IMPORTANT SAFETY INSTRUCTIONS
Other warnings
Never modify the oven in any way.
Do not move the oven while it is in operation.
This oven is for home food preparation only and
may only be used for cooking food. It is not
suitable for commercial or laboratory use.
To promote trouble-free use of your oven
and avoid damage.
Never operate the oven when it is empty except
where recommended in the operation manual, see
Page 11. Doing so may damage the oven.
When using a browning dish or self-heating
material, always place a heat-resistant insulator
such as a porcelain plate under it to prevent
damage to the turntable due to heat stress.
The preheating time specified in the dish’s
instructions must not be exceeded.
Do not use metal utensils, which reflect microwaves
and may cause electrical arcing. Do not put cans in
the oven.
Use only the turntable designed for this oven.
Do not place anything on the outer cabinet during
operation.
Do not use plastic containers for microwaving if the
oven is still hot from using the GRILL, DUAL and
AUTOMATIC operation (except AUTO
DEFROST), because they may melt. Plastic
containers must not be used during above modes
unless the container manufacturer says they are
suitable.
NOTE:
If you are unsure how to connect your oven, please
consult an authorised, qualified electrician.
Neither the manufacturer nor the dealer can
accept any liability for damage to the oven or
personal injury resulting from failure to observe the
correct electrical connection procedure.
Water vapour or drops may occasionally form on
the oven walls or around the door seals and
sealing surfaces. This is a normal occurrence and
is not an indication of microwave leakage or a
malfunction.
INSTALLATION
1. Remove all packing materials from the inside of the
oven cavity. Discard the loose polythene sheet from
between the door and cavity. Remove the feature
sticker, if attached, from the outside of the door.
2. Check the oven carefully for any signs of damage.
3. Place the oven on a flat, level surface strong
enough to support the oven’s weight plus the
heaviest item likely to be cooked.
4. The oven door may become hot during
cooking. Place or mount the oven so that
the bottom of the oven is 85 cm or more
above the floor. Keep children away
from the door to prevent them burning
themselves.
5. Do not allow the power supply cord to
run over any hot or sharp surfaces,
such as the hot air vent area at the top
rear of the oven.
6.Ensure there is a minimum of free space above the
oven of 20 cm.
7. Securely connect the plug of the oven to a
standard earthed (grounded) household electrical
outlet.
✓Remove this film
20 cm
R-6781J English 31/08/2004 16:15 Page 6

7
BEFORE OPERATION
SETTING THE CLOCK
ENGLISH
Your oven comes pre-set for Energy Save Mode so when you first plug it in nothing will appear on the
digital display.
To operate the oven in Energy Save Mode:
1. Plug in the oven. Nothing will appear on the display at this time.
2. Open the door. The oven display will show “.0”.
3. Close the door.
4. Heat the oven without food (See page 11).
NOTE: You can change to Clock Set Mode if you prefer, see below. If you decide to set the clock, Energy
Save Mode does not work.
In Energy Save Mode, if you do not operate the oven for 2 minutes or more (i.e. closing the door,
pressing the STOP key, or at the end of cooking), you will not be able to operate the oven until you
open and close the oven door.
If this occurs during cooking, the programme will be
erased. The time of day will also be erased.
5. When you want to reset the time of day, follow the
above example again.
6. If you do not set the clock, press the STOP button
once. “.0” will appear on the display. When the
operation of the oven is finished, “.0” will reappear
on the display instead of the time of day.
7. If you set the clock, energy save mode does not work.
There are two setting modes: 12 hour clock and 24 hour clock.
x1
1. To set the 12 hour clock, press the
CLOCK button once, as shown:
Example: To set the 24 hour clock to 23:35:
x2
1. Choose the 24 hour clock by
pressing the CLOCK button
twice.
2. Set the hours. Rotate the TIME/
WEIGHT dial clockwise until the
correct hour is displayed.
3. Change from hours to
minutes by pressing the
CLOCK button once.
Check the display.
4. Set the minutes. 5. Start the clock.
NOTES:
1. You can rotate the TIME/WEIGHT dial clockwise or
counter clockwise.
2. Press the STOP button if you make a mistake during
programming.
3. If the oven is in cooking mode and you wish to know
the time of day, touch the CLOCK button.
As long as your finger is touching the button, the time
of day will be displayed.
4. If the electrical power supply to your microwave oven
is interrupted, plug in the oven again, then open and
close the door. The display will show: “.0”.
x2
2. To set the 24 hour clock, press the
CLOCK button twice, as shown:
x1
x1
R-6781J English 31/08/2004 16:15 Page 7

ENERGY SAVE MODE
8
USING THE STOP BUTTON
Use the STOP button to:
1. Erase a mistake during programming.
2. Stop the oven temporarily during cooking.
3. Cancel a programme during cooking, press
the STOP button twice.
1. Make sure the
correct time
appears on the
display.
3. Adjust the display
to 0 by rotating the
TIME/WEIGHT
dial.
2. Press the CLOCK
button once.
x1
4. Press (START) +1min
button. The power will be
off and the display will
show nothing.
Display:
x1
Your oven has two operating modes, Energy Save Mode and Clock Set Mode.
The difference between them is that when you are not using the oven, in Energy save Mode nothing will
appear on the digital display and in Clock Set Mode the time will be shown.
In Energy Save Mode, if you do not operate the oven for 2 minutes or more (i.e. closing the door, pressing
the STOP key, or at the end of cooking), you will not be able to operate the oven.
To restore power on, open the door.
If you set the clock, energy save mode will be cancelled.
To start energy save mode manually, follow the instructions below.
Example:
To start the energy save mode, (the current time is 23:35):
R-6781J English 31/08/2004 16:15 Page 8

9
MICROWAVE POWER LEVELS
ENGLISH
Your oven has 5 power levels. To choose the
power level for cooking, follow the advice given in
the recipe section. Generally the following
recommendations apply:
800 WATT (800 P) 100 % used for fast
cooking or reheating e.g. soup, casseroles,
canned food, hot beverages, vegetables, fish, etc.
560 WATT (560 P) 70 % used for longer
cooking of dense foods such as roast joints, meat
loaf and plated meals, also for sensitive dishes
such as cheese sauce and sponge cakes. At this
reduced setting, the sauce will not boil over and
food will cook evenly without over cooking at the
sides.
P = POWER
400 WATT (400 P) 50 % for dense foods which
require a long cooking time when cooked
conventionally, e.g. beef dishes, it is advisable to
use this power setting to ensure the meat will be
tender.
240 WATT (240 P) 30 % (Defrost setting) to
defrost, select this power setting, to ensure that the
dish defrosts evenly. This setting is also ideal for
simmering rice, pasta, dumplings and cooking egg
custard.
80 WATT (80 P) 10 % For gentle defrosting, eg.
cream gateaux or pastry.
•To select Microwaving, rotate the COOKING MODE dial to the MICROWAVE setting.
•Select the desired microwave power setting by pressing the WATT button.
•If the WATT button is pressed once, 800P (100 %) will be displayed.
If you miss your desired level, continue pressing the WATT button until you reach the level again.
•If the level is not selected, the level 800P (100 %) is automatically set.
R-6781J English 31/08/2004 16:15 Page 9

10
MICROWAVE COOKING
Your oven has 2 grill heating elements, and a combination of 3 grill cooking modes.
Select the desired grill mode by rotating the COOKING MODE dial to the desired setting.
NOTES:
1. When the door is opened during the cooking
process, the cooking time on the digital display
stops automatically. The cooking time starts to count
down again when the door is closed and the
(START) +1min button is pressed.
2. If you wish to know the power level during
cooking, press the WATT button.
As long as your finger is pressing the WATT
button, the power level will be displayed.
3. You can rotate the TIME/WEIGHT dial clockwise
or counter-clockwise. If you rotate the dial counter-
clockwise, the cooking time will decrease from 90
minutes by degrees.
4. If you have not used the oven for over 2 minutes,
open and shut the door before programming.
Example:
Suppose you want to heat soup for 2 minutes and 30 seconds on 560 W microwave power.
3. Enter desired cooking
time by rotating the
TIME/WEIGHT dial
clockwise.
2. Press the WATT
button twice for
560 W microwave
power.
COOKING MODE DIAL GRILL HEATING ELEMENT IN USE
Top Grill
Bottom Grill
Top and Bottom Grill together
1. Rotate the COOKING
MODE dial to the
MICROWAVE setting.
x1
4. Press the (START)
+1min button once to
start cooking.
Cooking Time: Increasing unit:
0-5 minutes 10 seconds
5-10 seconds 30 seconds
10-30 minutes 1 minute
30-90 minutes 5 minutes
Your oven can be programmed for up to 90 minutes.
(90.00). The input unit of cooking (defrosting) time
varies from 10 seconds to five minutes. It depends on
the total length of the cooking (defrosting) time as
shown on the table opposite:
x2
GRILL COOKING
R-6781J English 31/08/2004 16:15 Page 10

11
ENGLISH
GRILL COOKING
WARNING:
The oven cavity, door, outer cabinet, turntable, rack, dishes and especially the bottom
grill will become very hot, always use thick oven gloves when removing the food or
turntable from the oven to prevent burns.
2. Enter the desired cooking time
by rotating the TIME/WEIGHT
dial clockwise.
1. Rotate the COOKING
MODE dial to the
TOP GRILL setting.
3. Press the (START)
+1min button to start
cooking.
Example:
Suppose you want to cook cheese on toast for 5 minutes using the top grill only: (Place toast on the rack.)
x1
1. The rack is recommended when grilling.
2. You may detect smoke or a burning smell when using
the grill for the first time, this is normal and not a sign
that the oven is out of order. (Please see heating
without food below.)
Display:
3. After cooking using TOP GRILL and BOTTOM GRILL
the display may show ‘Hot’.
WARNING:
The oven door, outer cabinet & oven cavity will become hot.
Take care to avoid burns when cooling the oven down after operation.
You may detect smoke or a burning smell when using the grill(s) or dual grill for the first time. This is normal and
not a sign that the oven is out of order.
To avoid this problem, when first using the oven, operate both top and bottom grills without food for 20 minutes.
IMPORTANT: During grill operation, to allow smoke or smells to disperse open a window or switch the kitchen
ventilation on. Make sure there is no food in the oven.
2. Enter the required
heating time. (20 min.)
1. Rotate the COOKING
MODE dial to the TOP
& BOTTOM GRILL setting.
3. Start cooking by
pressing the
(START)
+1min button.
HEATING WITHOUT FOOD
4. The oven will count
down. When the
oven has finished
cooking, open the
door to cool the
oven cavity.
x1
R-6781J English 31/08/2004 16:15 Page 11

12
DUAL COOKING
Setting Initial Microwave
power Grill heating
element
COOKING MODE
dial
Your oven has 2 DUAL cooking modes to combine the Microwave with the Grill(s). To select the DUAL cooking
mode, rotate the COOKING MODE dial to the desired setting. Generally, dual cooking time shortens the total
cooking time.
3. Enter the desired
cooking time by
rotating the
TIME/WEIGHT
dial clockwise.
1. Rotate the COOKING
MODE dial to the
DUAL 1 setting,
combining microwaving
with the TOP GRILL.
2. Press the WATT
button twice for 80 W
microwave power.
Display:
*If you want to adjust the microwave power, press the WATT button.
You can select up to 800 W power.
Example:
Suppose you want to cook for 20 minutes on DUAL 1, combining 80 W (10 %) with the TOP GRILL:
NOTE: After cooking, the display may show “Hot”.
x1
x2
4. Press the (START)
+1min button to start
cooking.
WARNING:
The oven cavity, door, outer cabinet, turntable, rack, dishes and especially the bottom
grill will become very hot, always use thick oven gloves when removing the food or
turntable from the oven to prevent burns.
DUAL 1
DUAL 2
240 W
240 W
Top grill
Bottom grill
R-6781J English 31/08/2004 16:15 Page 12
Table of contents
Other Sharp Microwave Oven manuals

Sharp
Sharp Carousel R-1511 User manual

Sharp
Sharp R-420LK User manual

Sharp
Sharp R-872 User manual

Sharp
Sharp R-508HS User manual

Sharp
Sharp Carousel R-7A85 Use and care manual

Sharp
Sharp R-390L Use and care manual

Sharp
Sharp YC-PS201AE User manual

Sharp
Sharp R-480F Instruction Manual

Sharp
Sharp R-3731 User manual

Sharp
Sharp R-380D User manual

Sharp
Sharp R-763IN User manual

Sharp
Sharp R-7H55 User manual

Sharp
Sharp R-3A56 User manual

Sharp
Sharp R224HW Use and care manual

Sharp
Sharp R-21J User manual

Sharp
Sharp R-242 User manual

Sharp
Sharp SMD2470AS Operating instructions

Sharp
Sharp R-64ST Instruction Manual

Sharp
Sharp R-2130 Use and care manual

Sharp
Sharp Carousel R-1852A User manual