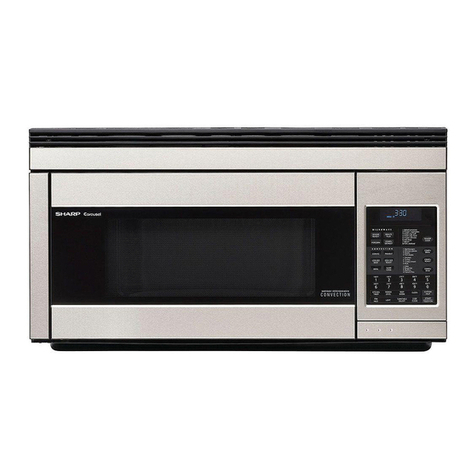
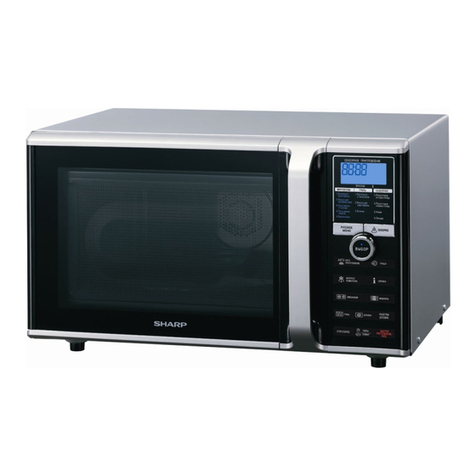
Sharp R-8380 User manual

R-8380
SHARP SERVICE MANUAL
SX707R8380J//
CONVECTION
MICROWAVE OVEN
MODEL R-8380.
In the interests of user-safety the set should be restored to its original
condition and only parts identica!to those specified should be used.
(RD16101 U)
TABLE OF CONTENTS Page
FOREWORD ....................................................................................................................................................... 1
CAUTION, MICROWAVE RADIATION .......................................................................................................... 1
PRODUCT DESCRIPTION ............................................................................................................................... 2
OPERATING INSTRUCTIONS ......................................................................................................................... 3
OPERATION ....................................................................................................................................................... 4
SERVICING ..................................................................................................................................................... 11
TOUCH CONTROL PANEL ASSEMBLY ..................................................................................................... 21
COMPONENT REPLACEMENT AND ADJUSTMENT PROCEDURE ..................................................... 30
MICROWAVE MEASUREMENT PROCEDURE .......................................................................................... 35
PICTORIAL DIAGRAM .................................................................................................................................. 36
CONTROL PANEL CIRCUIT ......................................................................................................................... 37
PRINTED WIRING BOARD .......................................................................................................................... 38
PARTS LIST .................................................................................................................................................... 39
PACKING AND ACCESSORIES ................................................................................................................... 48
SHARPCORPORATlON

SERVICE MANUAL
SHARP
CONVECTION MICROWAVE OVEN
R-8380
FOREWORD
This Manual has been prepared to provide Sharp Corp. Service
Personnel with complete Operation and Service Information for
the SHARP CONVECTION MICROWAVE oven, R-8380.
It is recommended that service personnel carefully study the
entire text of this manual so they will be qualified to render
satisfactory customer service.
Check interlock switches and door seal carefully. Special at-
tention should be given to avoid electrical shock and microwave
radiation hazard. (RD361 OZU)
CAUTION
MICROWAVE RADIATION
Personnel should not be exposed to the microwave energy-
which may radiate from the magnetron or other microwave
generating devices if it is improperly used or connected. All
input and output microwave connections, waveguidesflanges
and gaskets must be secured. Never operate the device without
a microwave energy absorbing load attached. Never look into
an open waveguide or antenna while the device is energized.
Note( Parts List) : The parts marked m*n are used in voltage
more than 250V. (RD36202U)
SHARPCORPORATlON
OSAKA, JAPAN (RD37201 I
PRODUCT DESCRIPTION
WIRING DIAGRAM

R-8380
PRODUCT DESCRIPTION
SPECIFICATION
beI vvelgnt 1 Approx. L4 Kg
(RD4410
ITEM
Power Requirements 240 Volts
50 Hertz
DESCRIPTION
Single phase, 3 wire earthed
Power Consumption Microwave cooking 1.3 kW
Convection cooking 1.6 kW
Power Output 650 watts nominal of RF microwave energy (2 liter water load)
Operating frequency of 2450M Hz
Convection Heater Power Output 1.5kW
Case Dimensions Width 520 mm
Height 336 ,mm including foot
Depth 466 mm
Cooking Cavity Dimensions Width 340 mm
Height 215 mm
Depth 350 mm
Turntable diameter
Control Complement
m .I, I
330mm
Touch Control System
Clock( (I:00 - 12:59) )
Timer (0 - 99min.99 sec. )
Microwave Cooking Control
Repetition Rate;
HIGH ........................ Full power throughout the cooking time
MED HIGH .................................... approx. 70% of Full Power
MED ............................................... approx. 50% of Full Power
MED LOW, DEFROST ................. approx. 30% of Full Power
LOW ............................................... approx. 10% of Full Power
Convection Temperature Control Range;
40 “C, 70 “C to 250 “C
SENSOR COOK pad
COMPU COOK pad
CONVECTION COOKING FUNCTION pads
NUMBER AND TEMPERATURE pads
VARIABLE COOKING CONTROL pads
STOP/CLEAR pad
ONE TOUCH REHEAT pad
EASY DEFROST pad
INSTANT COOK pad
MORE/LESS pads
AUTO START/CLOCK pad
TIMER/HOLD pad
START pad
1 e.1 I
NOTE: Numbers and letters shown after sentences such as “RD44101 U” are for factory use only.
2

R-8380
OPERATING INSTRUCTIONS
Auto-TouchTM Control Panel
Touch to select sensor cook mode
1 -Fresh vegetables 1 -Roast beef Touch to enter cooking times, clock time, convec-
2 -Frozen veaetables 2 -Roast lamb tion temperature or to select the Sensor or Compu
3 --Baked potatoes
4 -Frozen dinners
5 --Bacon
6 -Chlcken pees
7 -Fish fillets
6 -Rice 8 Pasta
9 -Cake
0 -Corned meats
3 -Roast pork
4 -Roast chicken
5 -Roast turkey
6 -Roast dinner
7 -Mixed gnll
6 -Grilled chlcken
9 -Cake layers
0 --Biscuits
Cook categories.
0 CONVECTION COOKING FUNCTION PADS
Touch to cook for each function
VARIABLE COOKING CONTROL PADS
Touch to select microwave power setting. If not
touched, HIGH is automatically selected.
1 minute at HIGH or increase
@ TIMER/HOLD PAD
Touch to set minute timer or HOLD function
@AUTO START/CLOCK PAD
Touch to set clock or auto start time
0
II STOP/CLEAR PAD
Touch to erase during programming.
Touch once to stop operation of oven during cook-
ing; touch twice to cancel cooking programme.
-
@MORE(A), LESS(r) pads
Touch to increase/decrease the time in one minute
increments during cooking or to increase/decrease
the time whilst programming the One Touch Reheat,
Sensor Cook, Compu Cook or Easy Defrost modes.
@START PAD
Touch to start oven after setting programme.

OPERATION
DESCRIPTION OF OPERATING SEQUENCE
The following is a description of component functions
during oven operation. (RD71101U)
OFF CONDITION
Closing the door activates all door interlock switcnes :
Upper latch switch, lower latch switch and stop switch
(In this condiction, the monitor switch contacts are
opened.)
When oven is plugged in, 240 volts A.C. is supplied to
control unit. (Figure O-l )
1. The display will show flashing “88:88”.
To set any program or set the clock, you must first
touch the STOP/CLEAR pad. The display will clear,
and 1:OO will appear and count up every minute.
Note: When the door is opened, the oven lamp comes
2. A sigal is input to the control unit, energizing the
coil of shut-off relay (RYl).
RYl contacts close, completing a circuit to the
damper motor.
The damper motor now operates moving the damper
to the open position, thereby closing the contacts
of the damper switch inputs a signal to the control
unit.
The coil of relay RYl is de-energized, opening its
contacts, thereby turning off the damper motor.
COOKING CONDITION
HIGH COOKING
Program desired cooking time and Variable Cooking
Control by touching the NUMBER pads and HIGH pad
of the Variable Cooking Control. When the START pad
is touched, the following operations occur:
1. The contacts of relays are closed and components
connected to the relays are turned on as follows.
(For details, refer to Figure O-2)
RELAY CONNECTED$.COMPONENTS
RY-1 damper motor
RY-2 fan motor
RY-3 convectidn motor
RY-A oven lame / turntable motor
MICRO RELAY Dower transformer
HEATER RELAY convection heater
2. 240 volts A.C. is supplied to the primary winding
of the power transformer and is converted to about
3 volts A.C. output on the filament winding, and
approximately 2150 volts A.C. on the high voltage
winding.
3. The filament winding voltage heats the magnetron
filament and the H.V. winding voltage is sent to a
voltage doubler circuit.
4. The microwave energy produced by the magnetron
is channeled through the waveguide into the cavity
feed-box, and then into the cavity where the food
is placed to be cooked.
5. Upon completion of the cooking time, the power
transformer, oven lamp, etc. are turned off, and the
generation of microwave energy is stopped. The
oven will revert to the OFF condition.
6. When the door is opened during a cook cycle, upper
latch switch, lower latch switch and stop switch are
activated with the following results. The circuits to
the turntable motor, the cooling fan motor, and the
high voltage components are deenergized, the oven
lamp remains on, and the digital readout displays
the time still remaining in the cook cycle when the
door was opened.
7. The monitor switch is electrically monitoring the
operation of the upper latch switch and lower latch
switch and is mechanically associated with the door
so that it will function in the following sequence.
(1)
(2)
When the door opens from a closed position,
the lower latch switch opens its contacts, and
then the monitor switch and upper latch switch
contacts close.
When the door is closed from the open posi-
tion, the monitor switch and upper latch switch
contacts first open, and then the contacts of the
lower latch switch close.
If the upper latch switch and lower latch switch fail
with its contacts closed when the door is opened, the
closing of the monitor switch contacts will form a short
circuit through the fuse, upper latch switch and lower
latch switch, causing the fuse to blow.
MED HIGH, MED, MED LOW, DEFROST, LOW
COOKING
When Variable Cooking Power is programed, the 240
volts A.C. is supplied to the power transformer
intermittently through the contacts of MICRO RELAY
which is operated by the control unit within a 32 sec-
ond time base. Microwave power operation is as fol-
lows: t
VARI-MODE ON TIME OFF TIME -
HIGH
(100% power)
MED HIGH
(approx. 70% power)
MED
(approx. 50% power)
MED LOW, DEFROST
(aoorox. 30% power)
32 sec.
24 sec.
18 sec.
12 sec.
-
0 sec.
8 sec.
14 sec.
20 sec.
LOW
(approx. 10% power) 6 sec. -
26 sec.
Note: The ON/OFF time ratio does not correspond
with the percentage of microwave power, be-
cause approx. 2 seconds are needed for heating
of the magnetron filament.
EASY DEFROST COOKING
The EASY DEFROST key is a special function key to
defrost meats and other food faster and better.
EASY DEFROST automatically defrosts foods.
This key has 4 defrost stages.
When the food weight is entered by using the number
pads, the oven will cook according to the special
cooking sequence, refer to Easy Defrost Chart on Op-
eration Manual.
4

R-8380
CONVECTION COOKING CONDITION
PREHEATING CONDITION (Figure O-3)
Program desired convection temperature by touching
the CONVECTION pad and the temp. pad.
When the START pad is touched, the following oper-
ations occur:
1. The coil of shut-off relays (RY2,RY3 and RY4) are
energized, the oven lamp, cooling fan motor,
turntable motor and convection motor are turned
on.
2. The coil of relay (RYl) is energized by the control
unit. The damper is moved to the closed position,
opening the damper switch contacts.
The opening of the damper switch contacts sends
a signal to the LSI on the control unit de-energizing
the relay (RYl) and opening the circuit to the
damper motor.
3. The coil of heater relay is energized by the control
unit and the mains supply voltage is added to the
convection heater.
4. When the oven temperature reaches the selected
preheat temperature, the following operations oc-
cur:
4-l. The heater relay is de-energized by the con-
trol unit temperature circuit and thermistor,
opening the circuit to the conveqtion heater.
4-2. the oven will continue to function for 15
minutes, turning the heater on and off, as
needed to maintain the selected preheat tem-
perature.
The oven will shut-down completely after 15
minutes.
CONVECTION COOKING CONDITION
When the preheat temperature is reached, a beep signal
will sound indicating that the holding temperature has
been. reached in the oven cavity. Open the door and
place the food to be cooked in the oven. Program de-
sired cooking time and convection temperature by
touching the NUMBER pad, CONVECTION pad and
Temperature pad. When the START pad is touched,
the following operation occur:
1. The numbers of the digital readout start the count
down to zero.
2. The oven lamp, turntable motor, cooling fan motor
and convection motor are energized.
3. Heater relay is energized (if the cavity temperature
is lower than the selected temperature) and the
mains supply voltage is applied to the convection
heater to return to the selected cooking temperature.
4. Upon completion of the cooking time, the audible
signal will sound, and oven lamp, turntable motor,
cooling fan motor and convection motor, are
de-energized. At the end of the convection cycle, if
the cavity air temperature is above 118 “C, the cir-
cuit to RY2 will be maintained (by the thermistor
circuit) to continue operation of the cooling fan
motor unit the temperature drops below 118 “C, at
which time the relay will be de-energized, turning
off the fan motor. Relay RY3 will however, open as
soon as the convection cycle has ended, turning off
the convection fan motor.
5. At the end of the convection cook cycle, shut-off
relay (RYI) is energized turning on the damper
motor. The damper is returned to the open position,
closing the damper switch contacts which send a
signal to the control unit, de-energizing shut-off
relay (RYl).
AUTOMATIC MIX COOKING CONDITION
Program desired cooking time and temperature by
touching the number pads and the LOW MIX/BAKE
or HIGH MIX/ROAST pad
The LOW MIX/BAKE pad is preprogrammed for 180
“C with 10% micro wave power, while the HIGH
MIX/ROAST pad is preprogrammed for 200 “C with
30% microwave power. When the START pad is
touched, the following operations occur:
1. The numbers of the digital readout start the count
down to zero.
2. The shut-off relay (RY2, RY3 and RY4) are ener-
gized, turning on the oven lamp, turntable motor,
cooling fan motor and convection motor.
3. The shut-off relay (RYl ) is energized.
The damper door is closed from the open position.
4. The heater relay is energized, adding the mains
supply voltage to the convection heater.
5. Now, the oven is in the convection cooking con-
dition.
6. When the oven Temperature reaches the selected
temperature, the following operations occur:
6-l. The power supply voltages is alternated to
the convection heater and power transfor-
mer.
6-2. The convection heater operates through the
heater relay contacts and the power trans-
former operates through the micro relay
contacts.
6-3. These are operated by the control unit to
supply alternately within a 32 second time
base, convection heat and microwave en-
ergy.
The relationship between the convection and micro-
wave power operations are as follows.
Note: The ON and OFF time ratio does not correspond
with the percentage of microwave power, be-
cause approx. 2 seconds are needed for heating
of the magnetron filament.
YERowA”E POWER
--.10x
I
t I
IoN eOW”ECTloN
.,yEo$Tu.E
Note: During alternate Microwave/Convection opera-
tion, the convection heater is energized only if
5
R-8380
the cavity temperature drops below the set tem-
perature.
SENSOR COOKING CONDITION
Using the SENSOR COOK function, the foods are
cooked without figuring time, power level or quantity.
When the oven senses enough steam from the food, it
relays the information to its microprocessor which will
calculate the remaining cooking time and .power level
needed for best results.
When the food is cooked, water vapor is developed.
The sensor “senses” the vapor and its resistance in-
creases gradually. When the resistance reaches the
value set according to the menu, supplementary cook-
ing is started.
The time of supplementary cooking is determined by
experiment with each food category and inputted into
the LSI.
An example of how sensor works:
1. Broccoli at room temperature.
Vapor is emitted very&,$;wly.
, : ‘v4+
2. Heat broccoli. Moisture and humidity is emitted
rapidly. You mlthearomaasitcooks.
SENSOR ! %q
i / %
J ?!-c
I j;/.;
Cooking Sequence.
1. Touch SENSOR COOK or ONE TOUCH REHEAT
pad.
NOTE:The oven should not be operated on SEN-
SOR COOK immediately after plugging in
the unit. Wait five minutes before cooking
on SENSOR COOK.
2. Select desired Sensor setting.
3. Touch START pad.
4.
The coil of shut-off relays(RY2,RY4) are energized,
the oven lamp and cooling fan motor are turned
on, but the power transformer is not turned on.
After about 16 seconds, the micro relay is ener-
gized. The power transformer is turned on, micro-
wave energy is produced and first stage is started.
The 16 seconds is the cooling time required to re-
move any vapor from the oven cavity and sensor.
NOTE: During this first stage, do not open the door
5. or touch STOP/CLEAR pad.
When the sensor detects the vapor emitted from the
food, the display switches over to the remaining
cooking time and the timer counts down to zero.
At this time, the door may be opened to stir food,
turn it or season, etc.
6.
7.
When the timer reaches zero, an audible signal
sounds. The shut-off relays and micro relay are-
de-energized and the power transformer, oven
lamp, etc. are turned off.
Opening the door or touching the STOP/CLEAR
pad, the time of day will reappear on the display
and the oven will revert to an OFF condition.
COMPU COOK
Thre COMPU COOK pad is aspecial function pad to
compute the oven temperature, microwave power and
cooking time and roast, bake and grill foods. The
COMPU COOK has H,lGH MIX/BAKE mode, LOW MIX
/BAKE mode or convection mode.
3. Sensor detects moisture and humidity and calcu-
lates cooking time and variable power.
6

R-8380
7

A -8380
9;
L
:
LII
,J z II
1-1
I
F
8

R-8380
DOOR OPEN MECHANISM
The door can be opened by pushing the open button
on the control panel. When the open button is pushed,
the open lever pushes the latch lever. The latch lever
pushes lower latch head on the door upward. The
upper latch head is linked with the lower latch head,
so now, the door can be opened.
UPPER LATCH SWITCH
The upper latch switch is activated by the upper latch
head on the door.
When the door is opened, the switch interrupt the cir-
cuit to all components, except oven lamp, fan motor,
damper motor and control unit. Then the cook cycle
is stopped.
A cook cycle cannot be take place until the door is
firmly closed and the start pad is depressed with the
cooking time set.
DESCRIPTION AND FUNCTION OF COMPONENTS
MONITOR SWITCH
The monitor switch is mounted on the middle of latch
hook. It is activated (the contacts opened) by the
lower latch head when the door is closed. The switch
is intended to render the oven inoperative by means of
blowing the fuse when the contacts of the upper latch
switch and lower latch switch fail to open when the
door is opened.
Function
1. When the door is opened, the monitor switch con-
tacts close (to the ON condition) due to their being
normally closed. At this time the upper latch
switch, lower latch switch and stop switch are in
the OFF condition (contacts open) due to their
being normally open contact switches.
2. As the door goes to a closed position, the monitor
switch contacts are first opened and upper latch
switch contacts are closed and then the stop
switch and the lower latch switch contacts close.
(On opening the door, each of these switches op-
erate inversely.)
3. If the door is opeped during cooking, and the upper
latch switch and lower latch switch contacts fail to
open, the fuse blows simultaneously with closing
of the monitor switch contacts.
CAUTION: BEFORE REPLACING A BLOWN FUSE,
TEST THE UPPER LATCH SWITCH AND
LOWER LATCH SWITCH FOR PROPER
OPERATION.
LOWER LATCH SWITCH
The lower latch switch is activated by the lower latch
head on the door. (
When the door is opened, the switch interrupts the
circuit to the convection heater and the power trans-
former. Then the cook cycle is stopped. &=;z; TO CHAPTER “TEST PROCE-
STOP SWITCH
The stop switch is activated by the upper latch head.
When the door is opened while the oven is in cook
cycle, th stop switch contacts open to de-energize the
micro relay, heater relay and relays (except RYI ) cir-
cuits in the control unit and causes cook time count
down to- pause.
, LATCH HOOK
‘N_, /UPPER LATCH SWITCH
‘\ UPPER
,‘I LATCH
1 HEAD HOOK LEVER
UPPER LATCH LEVER
I- ‘lb
’ c ‘,b STOP SWITCH
2’ 1
I LOWER
LATCH MONITOR SWITCH
HEAD
i : ~~LOWER LATCH SWlTCH
‘i:j ,id
I ‘If+,
-“_b
“2 ~
-x9, LATCH LEVER
@i j DOOR OPEN LEVER
L.iTCti LEVER
OPEN BUTTON
Figure D-l. Upper Latch Switch,
Lower Latch Switch,
Stop switch and Monitor Switch,
9

R-8380
CONVECTION COOKING SYSTEM
This oven is designed with a hot air heating system
where food is not directly heated up by the convection
heater, but is instead heated by forced circulation of
the hot air produced by the convection heater.
The air heated by the convection heater is circulated
through the convection passage provided on the outer
casing of the oven cavity by means of the convection
fan which is driven by the convection motor. It then
enters the inside of the oven through the vent holes
provided on the back side of the oven. Next,the hot
air heats the food on the turntable and leaves the oven
cavity through the vent in the oven cavity rear wall.
Without leaving the oven, this hot air is reheated by the
convection heater, passes through the convection
passage and enters the inside of the oven cavity again,
in a continuing cycle.
In this way, the hot air circulates inside the oven cavity
to raise its temperature and, at the same time, comes
into contact with the food being cooked.
When the temperature inside the oven cavity reaches
the selected temperature, the convection heater is
de-energized. When the temperature inside the oven
cavity drops below the selected temperature, the con-
vection heater is energized again. In this way, the in-
side of the oven cavity is maintained at approximately
the selected temperature.
When the convection time reaches “0”, the convection
heater is deenergized and the convection fan stops
operating and the oven shuts off.
At the high temperature(more then 118 “C), the fan
motor remains roataing. Automatically the fan motor
will be shut down at low temperature(less than 118
“C).
CONVECTION HEATER s
The convection heater is located at the rear of the oven
cavity. It is intended to heat air driven by the con-
vection fan. The heated air is kept in the oven and
force-circulated and reheated by th% convection heater.
THERMISTOR
The thermistor is a negative temperature coefficient
type. The temperature in the oven cavity is detected
through the resistance of the thermistor, and then the
control unit causes the heater relay to operate, thus the
current to the heating element is turned ON/OFF.
own&“,I” Convrctlori
7 P.**aqe
I,-~
‘,
‘, .T’ conic<fl”r
- - HearPr
iurnlablr ROILER STAY
Motor
Figure D-2. Convection Cooking System Figure D-3. Damper Mechanism
DAMPER OPEN-CLOSE MECHANISM
Usually, the damper is in the open position except
during convection cooking.
Damper position is set automatically by damper motor,
damper switch, damper cam and damper shaft.
These components are operated by a signal that judges
if microwave cooking or convection cooking operation
is selected by the control unit.
Microwave Cooking:
Damper is in the open position, because a portion of
cooling air is channeled through the cavity to remove
steam and vapors given off from the heating foods.
It is then exhausted at the top of the oven cavity into
a condensation compartment.
Convection Cooking:
Damper is in the closed position, so that no hot air will
be allowed to leak out the oven cavity.
1. When power supply cord is plugged in:
When power supply cord is plugged in, a sig-
nal is sensed in the control unit, and ooerates
l-l.
1-2.
1-3.
1-4.
l-5.
shut-off relay (RYl ).
Contacts of shut-off relay (RYl) close, the
damper motor is energized, opening the
damper door.
When the damper is moved to the open posi-
tion by the damper cam, damper switch is
closed (ON position).
The signal of damper switch is re-sensed in
the control unit and shut-off relay (RYI ) is
turned off.
The 240 volts A.C. to the damper motor is
stopped and the motor turns off.
Damper Operation
2. When oven is microwave cooking:
Damper is in the open position.
3. When oven is convection cookina:
3-l.
3-2.
3-3.
3-4.
Damper motor is energized-by touching the
convection, temperature and START pads.
Whep damper is in the closed position
(damper switch is OFF), its signal is sensed
by the control unit, and shut-off relay (RYI )
is de-energized.
The damper is held in the closed position
during the convection cooking operation.
At the end of the convection cooking, shut-off
relay (RYl) is energized, and the damper is
returned to the open position.
NOTE: If the damper is not in the proper position,
closed during convection or open during
microwave, the control unit will stop oven op-
eration after 1 minute.
10

R-8380
SERVICING
TROUBLESHOOTING GUIDE
When troubleshooting the oven, it is helpfull to follow
the Sequence of Operation in performing the checks.
Many of the possible causes of trouble will require that
a specific test be performed. These tests are given a
procedure letter which will be found in the “Test
Procedure”section.
IMPORTANT: If the oven becomes inoperative be-
cause of a blown fuse (M8A) in the
monitor switch circuit, check the mon-
itor switch, upper latch switch and
lower latch switch before replacing the
fuse (M8A). If th fuse (M8A) is re-
placed, the monitor switch should be
replaced at same time.
PROBLEM POSSIBLE CAUSE I TEST PROCEDURE OR
I /
CORRECTION :
Home fuse blows when power
cord is plugged into wall recepta-
cle.
13A fuse fitted in the plug blows
when power cord is plugged into
wall receptacle (The fuse should
a BS 1362 13A A.S.T.A. fuse.)
Fuse(M8A) blows when power
cord is plugged into wall recepta-
cle.
88:88 do not appear in display
when power cord is first plugged
into wall outlet.
Display does not operate properly
when STOP/CLEAR pad is
touched. (Buzzer should sound
and time of day should appear in
disotav.)
Oven lamp does not light with No power in home.
door opened. Open wire in power cord or wire harness.
-r
!
/
,
f
1
I-
!
1
[
I
OFF CONDITION
Shorted wire in power cord or wire har-
ness.
Shorted wire in power cord or wire har- /
ness.
Shorted wire in power cord or wire har-
ness.
Defective monitor switch.
No power at outlet.
Blown fuse (M8A).
Blown magnetron temp. fuse.
Defective fan thermal cut-out and/or oven
thermal cut-out.
Open wire in power cord, wiring harness,
or wiring between control panel assembly
units.
Defective control unit.
Defective key unit.
defective control unit.
Defective stop switch.
Defective oven lamp.
Blown fuse (M8A).
Defective fan thermal cut-out and/or oven
thermal cut-out.
Blown magnetron temp. fuse.
Defective control unit.
Open or loose wire connection to the
above components.
Replase cord or check wiring. j
Replase power cord or check ~
and repair harness. At replac- ~
ing fuse, it should be a BS :
1362 13A A.S.T.A. fuse.
Replace power cord or check :
and repair harness, replace I
fuse. I
Procedure F.
Check home fuse.
Procedure G.
Procedure I.
Procedure J or H.
Replace or repair wiring. I
Procedure 0.
Check kev unit.
Procedure 0.
Procedure E.
Check wall outlet.
Replace same or repair wir-
ing.
Replace.
Procedure G. I
Procedure J or H.
Procedure I.
Procedure 0.
Check wiring.
11

PROBLEM POSSIBLE CAUSE TEST PROCEDURE OR
CORRECTION
COOKING CONDITION
Oven lamp does not light in cook Defective contacts of shut-off relay (RY4) Procedure N.
cycle. (Does light when door is on Control unit.
opened) Defective control unit. Procedure 0.
Oven lamp does not light at all. Burned out bulb. Replace.
Open wiring to oven lamp socket. Check and repair wiring.
Oven lamp lights, but turntable Defective turntable motor. Replace.
motor does not operate. Open or loose wiring to turntable motor Check and repair wiring.
and lower latch switch.
Defective lower latch switch. Procedure E.
Turntable motor operates normally Defective cooling fan motor. Replace.
but cooling fan motor does not Defective shut-off relay (RY2) on control Procedure N.
operate. unit.
Open or loose wiring to above compo- Check and repair wiring.
nents.
MICROWAVE COOKING
1Oven does not go into a cook cy- Upper latch, lower latch and/or stop Procedures E or adjust them.
/ cle when START pad is touched. switches defective or out of adjustment.
Defective micro relay. Procedure M.
Defective control unit. Procedure 0.
Defective key unit. Procedure 0.
1 Open or loose wiring to above compo- Check and repair wiring.
nents. 1
1
/
I Oven seems to be operating but Defective magnetron.
~little or no heat is produced in j Defective micro relay.
oven load.( Food incompletely
cooked or not cooked at all at end
of cookcycle)
Defective power transformer.
/ Defective high voltage rectifier assembly. / Procedure B. I
I Procedure C.
j Defective high voltage capacitor.
,! Defective control unit.
Procedure A.
/ Procedure M.
**
1Procedure D.
/ Procedure 0.
Open or loose wiring to above compo- / Check and repair wiring.
nents. Low voltage. Dirty oven cavity. /
/ ,
Oven goes into a cook cycle but
j extremely Turntable motor does not operate. / Refer to preceding turntable ’
uneven heating is i motor problem.
: produced in oven load (food). ;
I Oven does not cook properly ’ Defective micro relay. / Procedure M. I
~when programmed for MEDIUM Defective control unit.
levels. (Operates Defective key unit, I Procedure 0. 1
etc. power ,
1properly on HIGH) 1Check key unit.
, Open or loose wiring between above Check and repair wiring. /
, components.
Oven does not cook properlyOven does not cook properly Defective EASY DEFROST function.Defective EASY DEFROST function.
! when programmed in the EASY! when programmed in the EASY / Refer to EASY DEFROST // Refer to EASY DEFROST /
/ section in operation manual. j/ section in operation manual. j
DEFROST cooking mode.DEFROST cooking mode. Defective micro relay.Defective micro relay. , Procedure M., Procedure M. //
Defective control unit.Defective control unit. j Procedure 0.j Procedure 0. II
Defective key unit. 1Check key unit. /
I
Open or loose wiring between above Check and repair wiring.
components. j
12

R-8380
PROBLEM POSSIBLE CAUSE ! TEST PROCEDURE OR
CORRECTION
CONVECTION COOKING
CONV indicator lights but oven Defective control unit. ~Procedure 0.
does not go into cook cycle when Defective key unit, Check key unit.
START pad is touched. /
j Defective thermistor. j Procedure L.
I Open wiring in circuit to above compo-
nents. Check and repair wiring.
CONV indicator lights, but con- / Defective convection heater.
vection heater does not heat. j Defective heater relay.
Defective control unit.
i Procedure K.
I Procedure M.
/ Procedure 0.
! Upper latch switch and/or lower latch 1 Procrdure E or adjust them.
i switch are defective or out of adjustment. /
/ Open or loose wire connection to the ;*Check and repair wiring.
~above components.
~Temperature in the oven cavity is Defective convection heater. i’ ~ Procedure K.
~lower or higher than preset. Defective control unit. 1 Procedure 0.
: Defective convection motor. / Replace. -
I Defective thermistor. j Procedure L.
Defective damper motor. j Replace.
: Defective damper switch. / Procedure E.
Defective drive mechanism of convection Check.
fan.
Oven seems to be operating but
temperature in the oven is lower
than preset.
Shorted wire to thermistor.
Thermistor shorted.
Check and repair wiring.
Procedure L.
Open or loose wire connection to
thermistor. ~Check and repair wiring.
Oven stops after about 3 minutes
since START pad is touched. !
I Thermistor opened.
Lower than preset tmperature. j Low power supply voltage.
Cooling fan motor runs Thermistor shorted.
intermitantly or all the time.
Convection cycle runs 2 mintes Thermistor open.
then shuts down.
I Procedure L.
j Check voltage.
Procedure L.
Procedure L.
L
Convection indicator does not Stop switch is defective or out of adjust- Procedure E or adjust it.
light and oven does not go into a ment.
cook cycle when START pad is Defective key unit. Procedure 0.
touched. Defective control unit. / Procedure 0. I
-1
SENSOR COOKING
1Oven is in the sensor cooking
condition but AH sensor does not
end stage 1 or does not stop
~cooking cycle or the oven stops
soon.
T AH sensor ooen or short. / Procedure P.
L Defective control unit. 1 Procedure 0.
i
L
Open or loose wire connection to the
above comoonents. Check and repair wiring.
AH sensor assembly and/or steam duct
are not re-installed correctry.
?Ipen or short wire to AH sensor.
Wrong wiring to power transformer.
4
Check and repair them.
Check and repair wiring.
Check and repair wiring. Or-
ange wire (HOT) must be
connected to the upper ter-
minal of power transformer.
13

TEST PROCEDURES
PROCEDURE
LElTER COMPONENT TEST
A MAGNETRON ASSEMBLY -EST
DISCHARGE THE HIGH VOLrAGE CAPACITOR BEFORE TOUCHING ANY OVEN COMPO-
NENTS OR WIRING.
To test for an open filament, isolate the magnetron from the high voltage circuit. A continuity
check across the magnetron filament leads should indicate less than 1 ohm.
To test for a shorted magnetron, connect the ohmmeter leads between the magnetron filament
leads and chassis ground. This test should indicate an infinite resistance. If there is little or no
resistance, the magnetron is grounded and must be replaced.
Power output of the magnetron can be measured by performing a water temperature rise test.
This test should only be used if above rests do not indicate a faulty magnetron and there is no
defect in the following components or wiring: high voltage rectifier assembly, high voltage
capacitor, and power transformer.
MICROWAVE OUTPUT POWER
Microwave output power from the magnetron can be measured by way of substitution, i.e. it can
be measured by using water load how much it can be absorbed by the water load. To measure
the microwave output power in the microwave oven, the relation of calorie and watt is used.
When P(W) heating works for t(second), approximately P x t/4.2 calorie is generated. On the
other hand, if the temperature of the water with V(ml) rises AT ( “C) during this microwave
heating period, the calorie of the water is V x AT.
The formular is as follows;
Pxt/4.2=Vx AT
P (W) = 4.2 x V x AT/t
Our condition for the water load is as follows:
Water load ... 2000 ml, Heating time ...I 29 seconds
P=65x AT i
Measuring method; s
1. Put the water load of two (2) litres on the center of ihe oven shelf. The water load should
be arranged in two (2) Pyrex beakers, the size of which is one (1) litre, and be placed at right
and left, side by side, on the oven shelf.
2. Measure the temperature of water before heating and also after heating during 129 seconds
by microwave, and calculate the temperature rise. The temperature rise should be the average
of temperature differences measured in each beaker.
3. The output power should be calculated as follows. In case the measuring result is not satis-
factory, execute the measurement several times and judge the result from the synthetic point
of view. Microwave output power should be within + 15% of the nominal one.
Calculation of output power;
Microwave output power ...P (W) = 65 x AT ( “C)
AT = ( ATL + ATR) / 2 : average temperature rise
ATL = (TL2 - TLI ), ATR = (TR2 - TRl)
TL2 : water temperature after heating in left beaker
TLl : water temperature before heating in left beaker
TR2 : water temperature after heating in right beaker
TRI : water temperature before heating in right beaker
Measuring condition;
As the microwave output is affected by several conditions, the measurement should be made
carefully with following attentions.
1. Initial temperature of salt water should be 10 f 1 “C. Well and quickly stir the water and the
temperature measurement should be done immediately after heating.
2. The graduation of thermometer should be scaled by 0.1 “C at minimum and an accurate mer-
cury thermometer is recommended.
3. Water container should be one (1) litre beaker made of Pyrex glass and its diameter approxi-
mately 12 cm.
14

TEST PROCEDURES (CONT’D)
PROCEDURE
LETTER COMPONENT TEST
4. Room temperature should be around 20 “C.
5. Power supply voltage should be specification voltage.
B POWER TRANSFORMER TEST
DISCHARGE THE HIGH VOLTAGE CAPACITOR BEFORE TOUCHING ANY OVEN COMPO-
NENTS OR WIRING.
Disconnect the primary input terminals and measure the resistance of the transformer with an
ohmmeter. Check for continuity of the coils with an ohmmeter. On the R x 1 scale, the resistance
of the primary coil should be approx. 1.5 ohm and the resistance of the high voltage coil should
be approximately 87 ohms; the resistance of the filament coil should be less than 1 ohm.
(HIGH VOLTAGES ARE PRESENT TO HIGH VOLTAGE TERMINAL, SO DO NOT ATTEMPT TO
MEASURE THE FILAMENT AND HIGH VOLTAGE.)
C HIGH VOLTAGE RECTIFIER ASSEMBLY TEST
DISCHARGE THE HIGH VOLTAGE CAPACITOR BEFORE TOUCHING ANY OVEN C~MPO-
NENTS OR WIRING.
HIGH VOLTAGE RECTJFIER TEST
Isolate the high voltage rectifier assembly from the circuit. Using the highest ohm scale of the
meter, read the resistance across the high voltage rectifier terminals and observe, reverse the leads
to the high voltage rectifier terminals and observe meter reading. If a short is indicated in both
directions, or if an infinite resistance is read in both directions, the high voltage rectifier is prob-
ably defective and should be replaced with rectifier.
SHORT PROTECTOR TEST
D
Isolate the high voltage rectifier assembly from the circuit. Using the highest ohm scale of the
meter, read the resistance across the short protector terminals, reverse the leads to the short
protector terminals and observe meter reading. If an infinite resistance is read in both directions,
the rectifier is good.
If a short is indicated in either direction, the one is probably defective and should be replaced
with the high voltage rectifier.
HIGH VOLTAGE CAPACITOR TEST
DISCHARGE THE HIGH VOLTAGE CAPACITOR BEFORE TOUCHING ANY OVEN COMPO-
NENTS OR WIRINGS.
E
If the capacitor is open, no high voltage will be available to the magnetron. Disconnect input
leads and check for short or open, between the terminals using.an ohmmeter.
Checking with a high ohm scale, if-the high voltage capacitor is normal, the meter will indicate
continuity for a short time and should indicate approxcmately IOM CI once the capacitor is
charged. If the above is not the case, check the capacitor with an ohmmeter to see if it is shorted
between the terminals. If it is shorted, replace the capacitor. (RD82603U)
SWITCH TEST
Isolate the switch and check the contacts by using an ohmmeter using the following table
If improper operation is indicated, make the necessary switch adjustment or replacement.
Table: Switch Connection
ConnAtion j Common Terminal-Normally Open Termmal
(COM) (NO)
:Common Terminal-Normally Close Terminal
(OM) (NC)
Operation !
Plunger released Open clrcuft Close circuit
Plunger pushed 1 Closed circuit -------
- Open circuit
(RD82701 U)
15

=i-8380
TEST PROCEDURES (CONT’D)
PROCEDURE
LETTER COMPONENT TEST
F MONITOR SWITCH TEST
Disconnect oven from power supply. Disconnect the lead wire to the monitor switch. Connect
one ohmmeter lead to NC terminal of monitor switch, and the other lead to COM terminal of
monitor switch, as shown figure. When the door is opened, the meter should indicate a close
circuit. When the plunger of monitor switch is pushed by a screw-driver through the latch hook
hole on the front plate of the oven cavity with the door opened, the meter should indicate an
open circuit. In case improper operation is indicated, replace the defective monitor switch. After
testing moniter switch, re-connect the wire leads to the monitor switch.
G FUSE M8A
If the fuse in the monitor switch circuit is blown when the door is opened, check the upper latch
switch, lower latch switch and monitor switch according to the Test Procedure for those
switches, before replacing the blown fuse.
If the fuse is blown by improper switch operation, replace the defective switch and fuse at the
same time.
Replace just the fuse if the switches operate normally.
CAUTION; REPLACEMENT FUSE MUST BE THE L&TED FUSE IN PARTS LIST.
H OVEN THERMAL CUT-OUT TEST t
Oven thermal cut-out is thermal cut-out. A continuity check across the thermal cut-out terminals
should indicaeflosed circuit unless the temperature of the oven thermal cu.+oGf%aches
approximately 104 “C. The thermal cut-out closes automatically at approximatefyy,C,j If im-
proper operatjonis’indicated replace thermal cut-out.
When the oven thermal cut-out opens, it indicates overheating of the heater duct. Check the
convection motor and convection fan or check if the ventilation openings are not blocked.
I MAGNETRON TEMP. FUSE TEST
A continuity check across the temp. fuse terminals should indicate a closed circuit.
If the temperature of the magnetron reaches 145 “C, the temp. fuse opens. If the temp. fuse has
opened, replace the fuse. An open temp. fuse indicates overheating of the magnetron assembly.
Check for restricted air flow to the magnetron through the opening in the chassis, especially the
fan duct. Or an open temp. fuse indicates stop of fan motor. Check for fan motor.
J FAN THERMAL CUT-OUT TEST
Fan thermal cut-out is thermal cut-out. A continuity check across the thermal cut-out terminals
should indicate an closed circuit unless the temperature of the thermal cut-out reaches approxi-
mately 104 “C. The thermal cut-out closes automatically at approximately 84 “C. If improper
operation is indicated replace thermal cut-out.
When the fan thermal cut-out opens, it indicates overheating of the cooling fan motor. Check the
cooling fan motor or check if the ventilation openings are not blocked.
16

R-8380
TEST PROCEDURES (CONT’D)
PROCEDURE
LElTER COMPONENT TEST
K CONVECTION HEATER TEST
Make sure the convection heater is fully cooled and test as follows;
a. Disconnect wire leads and measure the resistance with an ohmmeter. On the R x 1 scale, the
resistance between the heating element terminals should be as followings.
Convection Heater: 380hms
b. Disconnect wire leads and measure the insulation resistance with 500V - 1OOM R insulation
resistance meter. The insulation resistance between convection heater terminal and cavity
should be more than 10M D.
L THERMISTOR TEST
Disconnect connector-E from the CPU unit. Measure the resistance of the thermistor with an
ohmmeter. Connect the ohmmeter leads to Pin No’s E-4 and E-5.
I Room Temp. / Resistance
: 68 “F(20 “C) - 86 “F(30 “C) / Approx. 326k fI - 175k f2 1 I
If the meter does not indicate above resistance. reolace the thermistor.
M MICRO RELAY AND HEATER RELAY TEST
Disconnect the wire IeJds from relay terminals (l),(3), (5) and (6).
CONTACTS:
With 12 volts D.C. applied to the surge relay coil (1) and (6), a check
of contact with an ohmmeter should indicated (3) and (5) contacts are
closed.
Without 12 volts D.C. applied to the relay coil (1) and (6), an ohmmeter 30-
should indicate those contacts are opened. If improper operation is lo-
indicated, replace the relay. If proper operation is indicated, check for
loose on broken wire connections.
COIL:
A continuity check of the relay coil should indicate approximately 160
Q. If the motor does not imdicate above ohms, replace the relay.
lFi2iik5
COIL 5
N RELAY TEST
Remove the outer case and check voltage between Pin Nos. 1 and 3 of the 3-pin connector (A)
on the control unit with an A.C. voltmeter.
The meter should indicate 240 volts, if not check oven circuit.
Shut-off,Cook and Heater Relay Test
These relays are operated by D.C. voltage.
Check voltage at the relay coil with a D.C. voltmeter during the microwave cooking or convection
cooking operation.
DC. voltage indicated ..........Defective relay.
DC. voltage not indicated ........Check diode which is connected to the relay coil. If diode is
good, control unit is defective.
RELAY SYMBOL / OPERATIONAL / CONNECTED COMPONENTS
VOLTAGE !
RYl ; Approx. 12 V.D.C. / Damper motor
RY2 1 Approx. 12 V.D.C. I Cooling fan motor
RY3 I Approx. 12 V.D.C. : ConvectIon motor
RY4 i Approx. 12 V.D.C. Turntable motor and Oven lamp
MICRO RELAY ~ Approx. 12 V.D.C. T Power transformer
------+-
HEATER RELAY ~ Approx. 12 V.D.C. Heating element
(RD82ROEwI
17

TEST PROCEDURES (CONT’D)
PROCEDURE
LETTER COMPONENT TEST
0 TOUCH CONTROL PANEL ASSEMBLY TEST
The touch control panel consists of circuits including semiconductors such as LSI, ICs, etc.
Therefore, unlike conventional microwave ovens, proper maintenance cannot be performed with
only a voltmeter and ohmmeter. In this service manual, the touch control panel assembly is di-
vided into two units Control Unit and Key Unit and troubleshooting by unit replacement is de-
scribed according to the symptoms indicated.
1. Key Unit.
The following symptoms indicate a defective key unit. Replace the key unit.
a) When touching the pads, a certain pad produces no signal at all.
b) When touching a number pad, two figures or more are displayed.
c) When touching the pads, sometimes a pad produces no signal.
2. Control Unit
The following symptoms indicate a defective control unit. Replace the control unit.
2-l In connection with pads.
a) When touching the pads, a certain group of pads do not produce a signal.
b) When touching the pads, no pads produce a signal.
2-2 In connection with indicators
a) At a certain digit, all or some segments do not light up.
b) At a certain digit, brightness is low.
c) Only one indicator does not light up.
d) The corresponding segments of all digits do not light up; or they continue to light up.
e) Wrong figure appears.
f) A certain group of indicators do not light up.
g) The figure of all digits flicker.
2-3 Other possible troubles caused by defective control unit.
a) Buzzer does not sound or continues to sound.
b) Clock does not operate properly.
c) Cooking is not possible.
d) Proper temperature measurement is not obtained.
Note:- When defective components, the Control Unit or Key Unit are replaced, the defective part
or parts must be properly packed for return in the shipping carton, with its cushion mate-
rial, in which the new replacement part was shipped to you. (RD82SOl U)
18

TEST PROCEDURES (CONT’D)
PROCEDURE
LElTER COMPONENT TEST
P AH SENSOR TEST
Checking the initial sensor cooking condition
(1) The oven should be plugged in at least five minutes before sensor cooking.
(2) Room temperature should not exceed 95 “F(35 “C).
(3) The unit should not be installed in any area where heat and steam are generated. The unit
should not be installed, for example, next to a conventional surface unit. Refer to the
“INSTALLATION Instructions”.
(4) Exhaust vents are provided on the back of the unit for proper cooling and air flow in the
cavity.To permit adequate ventilation, be sure to install so as not to block these vents.
There should be some space for air circulation.
(5) Be sure the exterior of the cooking container and the interior of the oven are dry. Wipe off
any moisture with a dry cloth or paper towel.
(6) The Sensor works with food at normal storage temperature.For example, chicken pieces
would be at refrigerator temperature and canned soup at room temperature.
(7) Avoid using aerosol sprays or cleaning solvents near the oven while using Sensor settings.
The sensor will detect the vapor given of by the spray and turn off before food is properly
cooked. <’
(8) After 30 minutes if the sensor has not detected the vapor of the food, ERROR will appear
and the oven will shut off.
Water load cooking test
Make sure the oven has b&en plugged in at least five minutes before checking sensor cook op-
eration. The cabinet should be installed and screws tightened.
(1) Fill approximately 200 milliliters (7.2 oz) of tap water in a 1000 milliliter measuring cup.
(2) Place the container on the center of tray in the oven cavity.
(3) Close the door.
(4) Touch SENSOR COOK pad and number pad 2. Now, the oven is in the sensor cooking
condition and SC-2 will appear in the display.
(5) Touch Start pad.The oven will operate for the first 16 seconds, without generating micro-
wave energy.
NOTE: ERROR will appear if the door is opend or STOP/CLEAR pad is touched during first
stage of sensor cooking.
(6) After approximately 16 seconds, microwave energy is produced, oven should turn off when
water is boiling (bubling).
If the oven does not turn off, replace the AH sensor or check the control unit, refer to expla-
nation below:
TESTING METHOD FOR AH SENSOR AND/OR CONTROL UNIT
To determine if the sensor is defective, the simplest method is to replace it with a new re-
placement sensor.
(1) Disconnect oven from power supply and remove outer case.
(2) Discharge the high voltage capacitor.
(3) Remove the AH sensor.
(4) Install the new AH sensor.
(5) Re-install the outer case.
(6) Reconnect the oven to the power supply and check the sensor cook operation proceed as
follows:
6-l. Fill approximately 200 milliliters (7.2 oz) of tap water in a 1000 milliliter measuring
cup.
6-2. Place the container on the center of tray in the oven cavity.
6-3. Close the door.
6-4. Touch SENSOR COOK pad and number 2 pad.
6-5. Touch Start pad. The control panel is in automatic Sensor operation.
6-6. The oven will turn off automatically when the water is boiling (bubling).
If new sensor dose not operate properly, the problem is with the control unit.
19
Table of contents
Other Sharp Microwave Oven manuals

Sharp
Sharp R-314FS User manual

Sharp
Sharp Carousel R-480E User manual

Sharp
Sharp R-559Y User manual

Sharp
Sharp Carousel R-1874 User manual

Sharp
Sharp R-4A68 User manual

Sharp
Sharp R-508DK User manual

Sharp
Sharp Carousel SMC1662DS User manual

Sharp
Sharp CAROUSEL R-190HK User manual

Sharp
Sharp Carousel R-1874 User manual

Sharp
Sharp R-24AT User manual

Sharp
Sharp Carousel R-360E User manual

Sharp
Sharp R-5L16 User manual

Sharp
Sharp R-200Y Use and care manual

Sharp
Sharp R-559YW User manual

Sharp
Sharp R-290H User manual

Sharp
Sharp R-363(IN) User manual

Sharp
Sharp Carousel R-209K User manual

Sharp
Sharp R-420L User manual

Sharp
Sharp R-420CK User manual

Sharp
Sharp R-940 User manual