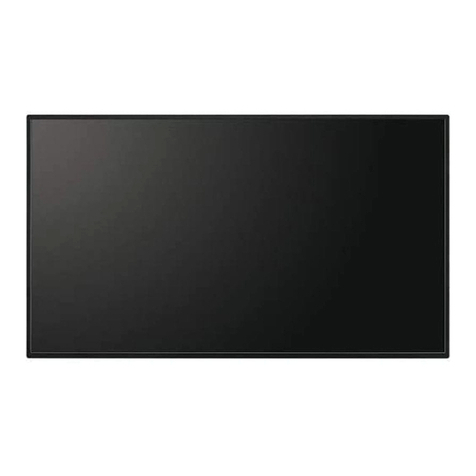
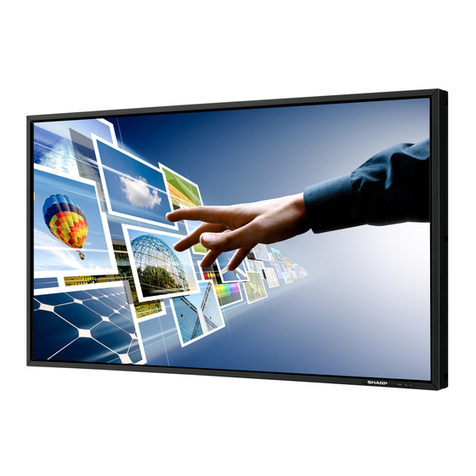
Sharp MultiSync ME652 User manual

User’s Manual
Large Format Display
MultiSync® ME652
MultiSync® ME552
MultiSync® ME502
MultiSync® ME432
MODEL:
PN-ME652
PN-ME552
PN-ME502
PN-ME432
Please nd your model name on the label on the rear side of the monitor.

English−2
Table of Contents
DEAR CUSTOMER..............................................................2
Important Information ........................................................3
Safety Precautions and Maintenance ............................ 5
Recommended Use & Maintenance ............................ 11
Trademark and Software License ................................12
Part Names........................................................................13
Connecting Peripheral Equipment..................................15
Connecting the Supplied Power Cord............................17
Mounting (for Customer) .................................................17
Preparing the Remote Control ........................................ 18
Turning Power On/Off ......................................................19
Power ON and OFF .....................................................19
Using Power Management ..........................................20
Basic Operation................................................................21
Menu Screen .....................................................................24
About the home screen................................................24
Application - File Explorer...............................................26
Application - Web Browser..............................................28
Application - Updater .......................................................29
Application - MediaPlayer................................................ 30
Advanced Operation ........................................................35
Creating a Power and Reboot Schedule .....................35
Setting Security and Locking the Monitor Controls ......36
Setting the Remote Control ID Function ...................... 40
Connecting Multiple Monitors ......................................41
External Control................................................................42
Controlling the Monitor via RS-232C ...........................42
Controlling the Monitor via LAN ...................................43
Commands ..................................................................46
Troubleshooting ...............................................................47
Screen Image and Video Signal Issues .......................47
Hardware Issues ..........................................................48
Specications ...................................................................50
Compatible signal list ...................................................50
Product Specications .................................................51
Appendix-A External Resources.....................................52
Appendix-B Common Settings Menu List......................53
Picture..........................................................................53
Audio............................................................................55
Appendix-C Administrator Settings Menu List..............56
Input & Output..............................................................56
Schedule ......................................................................58
Network........................................................................58
Protect .........................................................................60
Setup ...........................................................................61
Application ...................................................................62
System .........................................................................63
About ...........................................................................64
Mounting Precautions
(For SHARP dealers and service engineers) ................. 65
Mounting (for Trained Installers) ..................................65
Manufacturer’s Recycling and Energy Information ......69
Energy Saving .............................................................69
Addition explanation to EcoDesign Regulation ............69
DEAR CUSTOMER
Thank you for your purchase of a product. To ensure safety and many years of trouble-free operation of your
product, please read the “Important Information” carefully before using this product.
Mounting the monitor requires expertise and the work must be carefully performed by a trained service person in
accordance with the section “Mounting Precautions (For SHARP dealers and service engineers)”.
NOTE:
For box contents, please refer to the Setup Manual provided in the box.
Product warranty does not cover damage caused by improper installation. Failure to follow these recommendations
could result in voiding the warranty.
English−3
Important Information
To maintain compliance with EMC regulations, use shielded cables to connect to the following terminals: USB port, USB
Type C port and Audio output terminal. Use shielded cables with ferrite core to connect to the following terminals: HDMI input
terminal, RS-232C input terminal.
Supplier’s Declaration of Conformity
SHARP LCD MONITOR, PN-ME652/PN-ME552/PN-ME502/PN-ME432
This device complies with Part 15 of the FCC Rules. Operation is subject to the following two conditions: (1) This device
may not cause harmful interference, and (2) this device must accept any interference received, including interference that
may cause undesired operation.
Responsible Party:
SHARP ELECTRONICS CORPORATION
100 Paragon Drive, Montvale, NJ 07645
TEL: (630) 467-3000 www.sharpnecdisplays.us
U.S.A. ONLY
WARNING:
An apparatus with CLASS I construction shall be connected to a MAIN socket outlet with a protective earthing connection.
(For Customers in U.K.)
IMPORTANT
• The wires in this mains lead are coloured in accordance with the following code:
GREEN-AND-YELLOW: “Earth”
BLUE: “Neutral”
BROWN: “Live”
• As the colours of the wires in the mains lead of this apparatus may not correspond with the coloured markings identifying the terminals in your plug
proceed as follows:
• The wire which is coloured GREEN-AND-YELLOW must be connected to the terminal in the plug which is marked by the letter E or by the safety
earth symbol or coloured green or green-and-yellow.
• The wire which is coloured BLUE must be connected to the terminal which is marked with the letter N or coloured black.
• The wire which is coloured BROWN must be connected to the terminal which is marked with the letter L or coloured red.
• Ensure that your equipment is connected correctly. If you are in any doubt consult a qualied electrician.
“WARNING: THIS APPARATUS MUST BE EARTHED.”

English−4
Information on the Disposal of this Equipment and its Batteries
IF YOU WISH TO DISPOSE OF THIS EQUIPMENT OR ITS BATTERIES, DO NOT USE THE ORDINARY WASTE BIN, AND
DO NOT PUT THEM INTO A FIREPLACE!
Used electrical and electronic equipment and batteries should always be collected and treated SEPARATELY in accordance
with local law.
Separate collection promotes an environment-friendly treatment, recycling of materials, and minimizing nal disposal of
waste. IMPROPER DISPOSAL can be harmful to human health and the environment due to certain substances! Take USED
EQUIPMENT to a local, usually municipal, collection facility, where available.
Remove USED BATTERIES from equipment, and take them to a battery collection facility; usually a place where new
batteries are sold.
If in doubt about disposal, contact your local authorities or dealer and ask for the correct method of disposal.
ONLY FOR USERS IN THE EUROPEAN UNION, AND SOME OTHER COUNTRIES; FOR INSTANCE NORWAY AND
SWITZERLAND: Your participation in separate collection is requested by law.
The symbol shown above appears on electrical and electronic equipment and batteries (or the packaging) to remind users
of this. If ‘Hg’ or ‘Pb’ appears below the symbol, this means that the battery contains traces of mercury (Hg) or lead (Pb),
respectively.
Users from PRIVATE HOUSEHOLDS are requested to use existing return facilities for used equipment and batteries.
Batteries are collected at points of sale. Return is free of charge.
If the equipment has been used for BUSINESS PURPOSES, please contact your dealer who will inform you about take-back.
You might be charged for the costs arising from take-back. Small equipment (and small quantities) might be taken back by
your local collection facility. For Spain: Please contact the established collection system or your local authority for take-back
of your used products.
Securing personal information: Personally identiable information, such as IP addresses, may be saved on the monitor.
Before transferring or disposing of the monitor, clear this data by performing the FACTORY RESET function.
NOTE: (1) The contents of this manual may not be reprinted in part or whole without permission.
(2) The contents of this manual are subject to change without notice.
(3) Great care has been taken in the preparation of this manual; however, should you notice any questionable points, errors or omissions,
please contact us.
(4) The image shown in this manual is indicative only. If there is inconsistency between the image and the actual product, the actual product
shall govern.
(5) Notwithstanding articles (3) and (4), we will not be responsible for any claims on loss of prot or other matters deemed to result from using
this device.
(6) This manual is commonly provided to all regions so they may contain descriptions that are pertinent for other countries.

English−5
Safety Precautions and Maintenance
FOR OPTIMUM PERFORMANCE, PLEASE NOTE
THE FOLLOWING WHEN SETTING UP AND
USING THE LCD COLOR MONITOR:
About the Symbols
To ensure safe and proper use of the product, this manual uses a number of symbols to prevent injury to you and
others as well as damage to property. The symbols and their meanings are described below. Be sure to understand
them thoroughly before reading this manual.
WARNING Failing to heed this symbol and handling the product incorrectly could result in
accidents leading to major injury or death.
CAUTION Failing to heed this symbol and handling the product incorrectly could result in
personal injury or damage to surrounding property.
Examples of symbols
This symbol indicates a warning or caution.
This symbol indicates a prohibited action.
This symbol indicates a mandatory action.
WARNING
UNPLUG THE
POWER CORD
Unplug the power cord if the product malfunctions.
Should the product emit smoke or strange odors or sounds, or if the product has been dropped or
the cabinet broken, turn off the product’s power, then unplug the power cord from the power outlet.
Contact your dealer for repairs.
Never try to repair the product on your own. Doing so is dangerous.
DO NOT
MODIFY
Do not open or remove the product’s cabinet.
Do not disassemble the product.
There are high voltage areas in the product. Opening or removing product covers and modifying the
product may expose you to electric shock, re, or other risks.
Refer all servicing to qualied service personnel.
PROHIBITED
Do not use the product if it has structural damage.
If you notice any structural damage such as cracks or unnatural wobbling, please refer servicing
to qualied service personnel. If the product is used in this condition, the product may fall or cause
personal injury.

English−6
WARNING
Handling the power cord.
PROHIBITED
Do not scratch or modify the cord.
• Do not place heavy objects on the cord.
• Do not let the weight of the product rest on the cord.
• Do not cover the cord with a rug, etc.
• Do not bend, twist or pull the cord with excessive force.
• Do not apply heat to the cord.
Handle the power cord with care. Damaging the cord could lead to re or electric shock. If the cord
gets damaged (exposed core wires, broken wires, etc.), turn off the product’s power, then unplug the
power cord from the power outlet. Ask your dealer to replace it.
DO NOT
TOUCH
Do not touch the power plug if you hear thunder.
Doing so could result in electric shock.
DO NOT
TOUCH
WITH WET
HANDS
Do not connect or disconnect the power cord with wet hands.
It may cause an electric shock.
REQUIRED
Please use the power cord provided with this product in accordance with the power cord table. Do
not exceed the product’s specied power supply voltage where it is installed. Doing so could result
in a re or electric shock. Please refer to the power supply voltage information in the specication.
If a power cord is not supplied with this product, please contact us. For all other cases, please
use the power cord with the plug style that matches the power socket where the product is located.
The compatible power cord corresponds to the AC voltage of the power outlet and has been
approved by, and complies with, the safety standards in the country of purchase.
MUST BE
EARTHED
This equipment is designed to be used in the condition of the power cord connected to the earth.
If the power cord is not connected to the earth, it may cause electric shock. Please make sure the
power cord is connected to the wall outlet directly and earthed properly. Do not use a 2-pin plug
converter adapter.
REQUIRED
For proper installation it is strongly recommended to use a trained service person.
Failure to follow the standard installation procedures could result in damage to the product or injury
to the user or installer.
REQUIRED
Please install the product in accordance with the following information.
This product cannot be used or installed without the table top stand or other mounting accessory for
support.
When transporting, moving, or installing the product, please use as many people as necessary
(at least two) to be able to lift the product by the two handles without causing personal injury or
damage to the product.
• ME652: DO NOT use this product on the oor with the table top stand. Please use this product
on a table or with a mounting accessory for support.
Please refer to the instructions included with the optional mounting equipment for detailed
information about attaching or removing.
Do not cover the vent on the product. Improper installation of the product may result in damage to
the product, an electric shock or re.

English−7
WARNING
REQUIRED
Do not install the product in the locations below:
• Poorly ventilated spaces.
• Near a radiator, other heat sources, or in direct sunshine.
• Continual vibration areas.
• Humid, dusty, steamy, or oily areas.
• An environment where there are corrosive gases (sulfur dioxide, hydrogen sulde, nitrogen
dioxide, chlorine, ammonia, ozone, etc.).
• Outdoors.
• High-temperature environment where humidity changes rapidly and condensation is likely to
occur.
• A ceiling or wall that is not strong enough to support the product and mounting accessories.
Do not mount the product upside down.
REQUIRED
Prevent tipping and falling for earthquakes or other shocks.
To prevent personal injury or damage to the product caused by tipping over due to earthquakes or
other shocks, make sure to install the product in a stable location and take measures to prevent
falling.
The measures to prevent falling and tipping are intended for reducing the risk of injury, but may not
guarantee the effectiveness against all earthquakes.
The product may tip causing personal injury.
• When using the product with the optional table top
stand, fasten the product to a wall using a cord or
chain that can support the weight of the product in
order to prevent the product from falling.
• Depending on the table top stand, the stand has
the structure for preventing tipping.
• Please refer to the table top stand manual.
• Be sure to remove the cord or chain from the wall
before moving the product to prevent personal
injury or damage to the product.
The product may fall causing personal injury.
• Do not attempt to hang the product using an
installation safety wire.
Cord or chain Clamp
Screw (M4)
Screw Holes
ME652
• Please install the product in an area on the wall or ceiling strong enough to support the weight of
the product.
• Prepare the product using mounting accessories, such as hook, eyebolt, or mounting parts, and
then secure the product with a safety wire. The safety wire must not be tight.
• Please make sure the mounting accessories are strong enough to support the product weight
and size before installing it.

English−8
WARNING
REQUIRED
Stability Hazard.
The product may fall, causing serious personal injury or death. To prevent injury, this product must
be securely attached to the oor/wall in accordance with the installation instructions.
Many injuries, particularly to children, can be avoided by taking simple precautions such as:
• ALWAYS use stands or installation methods recommended by the manufacturer of the product
set.
• ALWAYS use furniture that can safely support the product.
• ALWAYS ensure the product is not overhanging the edge of the supporting furniture.
• ALWAYS educate children about the dangers of climbing on furniture to reach the product or its
controls.
• ALWAYS route cords and cables connected to your product so they cannot be tripped over,
pulled or grabbed.
• NEVER place a product in an unstable location.
• NEVER place the product on tall furniture (for example, cupboards or bookcases) without
anchoring both the furniture and the product to a suitable support.
• NEVER place the product on cloth or other materials that may be located between the product
and supporting furniture.
• NEVER place items that might tempt children to climb, such as toys and remote controls, on the
top of the product or furniture on which the product is placed.
If the existing product is going to be retained and relocated, the same considerations as above
should be applied.
PROHIBITED
Do not place this product on a sloping or unstable cart, stand or table. Doing so could lead to falling
or tipping and cause personal injury.
PROHIBITED
Do not insert objects of any kind into the cabinet slots. It may cause electric shock, re, or product
failure. Keep objects away from children and babies.
If objects get into the cabinet slot, turn off the product’s power, then unplug the power cord from the
power outlet. Contact your dealer for repairs.
DO NOT WET
Do not spill any liquids into the cabinet or use your product near water.
Immediately turn off the power and unplug your product from the wall outlet, then refer servicing to
qualied service personnel. It may cause an electric shock or start a re.
Do not install the product under equipment that discharges water, such as air conditioners.
PROHIBITED
Do not use ammable gas sprays to remove dust when cleaning the product. Doing so could lead
to a re.
PROHIBITED
Usage of the product must not be accompanied by fatal risks or dangers that, could lead directly to
death, personal injury, severe physical damage or other loss, including nuclear reaction control in
nuclear facility, medical life support system, and missile launch control in a weapon system.

English−9
CAUTION
Handling the power cord.
REQUIRED
The monitor should be installed close to an easily accessible power outlet.
REQUIRED
When connecting the power cord to the product’s AC input terminal, make sure the connector is fully
and rmly inserted.
An incomplete connection of the power cord may cause overheating of the plug; it allows dust to get
on the plug connection, which can lead to a re. Touching the pins of a partially inserted plug may
lead to an electric shock. If a clamp and a screw are provided with the product, fasten the power
cord to the product by attaching them to prevent a loose connection.
REQUIRED
Handling the power cord by following below to avoid re or electric shock.
• When connecting or disconnecting the power cord, pull the power cord out by holding onto its
plug.
• Unplug the power cord from the power outlet before cleaning the product or when not planning to
use the product for an extended time.
• When the power cord or plug is heat or damaged, unplug the power cord from the power outlet,
and contact a qualied service person.
REQUIRED
Regularly dust off the power cord by using a soft dry cloth.
REQUIRED
Before moving the product, make sure the product power is off, then unplug the power cord from the
power outlet and check that all cables connecting the product to other devices are disconnected.
PROHIBITED
Do not use the power cord with a power tap.
Adding an extension cord may lead to re as a result of overheating.
PROHIBITED
Do not bind the power cord and the USB cable.
It may trap heat and cause a re.
PROHIBITED
Do not connect to a LAN with excessive voltage.
When using a LAN cable, do not connect to a peripheral device with wiring that might have
excessive voltage. Excessive voltage on the LAN port may cause an electric shock.
PROHIBITED
Do not climb on the table where the product is installed. Do not install the product on a wheeled
table if the wheels on the table have not been properly locked. The product may fall, causing
damage to the product or personal injury.
REQUIRED
Installation, removal, and height adjustment of the optional table top stand.
• When installing the table top stand, handle the unit with care to avoid pinching your ngers.
• Installing the product at the wrong height can cause tipping.
Please install your product at proper height to prevent personal injury or damage to the product.
PROHIBITED
Do not push or climb on the product. Do not grab or hang onto the product. Do not rub or tap the
product with hard objects. The product may fall, causing damage to the product or personal injury.
PROHIBITED
Do not hit or strike the screen.
Do not push against the screen with a pointed object.
It can cause serious damage to the product or personal injury.

English−10
CAUTION
REQUIRED
Incorrect usage of batteries can result in leaks or bursting.
• Use the specied batteries only.
• Insert batteries matching the (+) and (–) signs on each battery to the (+) and (–) signs of the
battery compartment.
• Do not mix battery brands.
• Do not combine new and old batteries. This can shorten battery life or cause liquid leakage of
batteries.
• Remove dead batteries immediately to prevent battery acid from leaking into the battery
compartment.
If leaked battery uid gets on your skin or clothing, rinse immediately and thoroughly. If it gets
into your eye, bathe your eye well rather than rubbing and seek medical treatment immediately.
Leaked battery uid that gets into your eye or your clothing may cause a skin irritation or
damage your eye.
• If you will not use the remote control for a long time, remove the batteries.
• Leaving a battery in an extremely high temperature surrounding environment, or a battery
subject to extremely low air pressure, that can result in an explosion or the leakage of ammable
liquid or gas.
• Properly dispose of depleted batteries. Disposal of a battery into water, re, or a hot oven, or
mechanically crushing, cutting, or modifying a battery can result in an explosion.
• Do not short-circuit the batteries.
• Do not charge the batteries. The batteries provided are not rechargeable.
• Contact your dealer or local authorities when disposing of batteries.
PROHIBITED
Do not stay in contact with the parts of the product that become hot for long periods of time. Doing
so may result in low-temperature burns.
REQUIRED
Suitable for entertainment purposes at controlled luminous environments, to avoid disturbing
reections from the screen.
REQUIRED
We recommend wiping clean the ventilation holes a minimum of once a month. Failure to do so
could lead to re or electric shock or damage to the product.
REQUIRED
To ensure the product’s reliability, please clean the ventilation holes at the rear side of the cabinet
at least once a year to remove dirt and dust. Failure to do so could lead to re or electric shock or
damage to the product.
REQUIRED
Avoid locations with extreme temperatures and humidity. Failure to do so could lead to re or
electric shock or damage to the product. The usage environment for this product is as follows:
• The operating temperature: 0 °C to 40 °C/32 °F to 104 °F/
humidity: 20 to 80% (without condensation)
• The storage temperature: -20 °C to 60 °C/-4 °F to 140 °F/
humidity: 10 to 90% (without condensation)
NOTE: • This product can only be serviced in the country where it was purchased.
• Continuous operating time and warranty.
This product is designed for a maximum daily use of 18 hours. Continual use in excess of 18 hours per day is not
covered by the warranty.
• When you use a network, your communication data is exposed to the risks of being stolen or illegally accessed.
To avoid these risks, you need to use this monitor in a secure network environment.

English−11
Recommended Use & Maintenance
nRecommended Use
Ergonomics
To realize the maximum ergonomic benets, we recommend the following:
• For optimum performance of the monitor, allow 20 minutes for warming up. Avoid reproduction of still patterns
on the monitor for long periods of time to avoid image persistence (after image effects).
• Rest your eyes periodically by focusing on an object at least 5 feet away. Blink often.
• Position the monitor at a 90° angle to windows and other light sources to minimize glare and reections.
• Adjust the monitor’s brightness, contrast and sharpness controls to enhance readability.
• Get regular eye checkups.
• Use the preset Size and Position controls with standard input signals.
• Use the preset color settings.
• Use non-interlaced signals.
• Do not view the primary color blue on a dark background. It is difcult to see and may cause eye fatigue due to
insufcient contrast.
• Restarting the Android system.
To maintain stable operation of APPLICATION mode, the Android system must be restarted once a day.
If [Power Save] is enable, turn off the power.
If [Power Save] is disable, turn off the main power.
Android system can be restarted at the specied time (See page 58).
nMaintenance
Cleaning the LCD Screen
• When the LCD screen is dusty, please gently wipe with a soft cloth.
• Clean the LCD screen surface with a lint-free, non-abrasive cloth. Avoid using any cleaning solution or glass
cleaner!
• Please do not rub the LCD screen with a hard or abrasive material.
• Please do not apply pressure to the LCD screen surface.
• Please do not use OA cleaner as it will cause deterioration or discoloration on the LCD screen surface.
Cleaning the Cabinet
• Unplug the power supply.
• Gently wipe the cabinet with a soft cloth.
• To clean the cabinet, dampen the cloth with a neutral detergent and water, wipe the cabinet and follow with a dry
cloth.
NOTE: DO NOT clean with benzene thinner, alkaline detergent, alcoholic system detergent, glass cleaner, wax,
polish cleaner, soap powder, or insecticide. Rubber or vinyl should not be in contact with the cabinet for an
extended period of time.
These types of uids and materials can cause the paint to deteriorate, crack or peel.

English−12
Trademark and Software License
nTrademarks
DisplayPort™ and the DisplayPort™ logo are trademarks owned by the Video Electronics Standards Association (VESA®)
in the United States and other countries.
Microsoft® and Windows® are either registered trademarks or trademarks of Microsoft Corporation in the United States
and/or other countries.
MultiSync is a trademark or registered trademark of Sharp NEC Display Solutions, Ltd. in Japan and other countries.
The terms HDMI, HDMI High-Denition Multimedia Interface, HDMI Trade Dress and the HDMI Logos are
trademarks or registered trademarks of HDMI Licensing Administrator, Inc.
Blu-ray is a trademark of Blu-ray Disc Association.
MacOS is a trademark of Apple Inc., registered in the U.S. and other countries.
Android is a trademark or registered trademarks of Google LLC.
Ethernet is a registered trademark of Xerox Corporation.
VESA is either registered trademark or trademark of Video Electronics Standards Association in the United States and/or other countries.
USB Type-C® and USB-C® are registered trademarks of USB Implementers Forum.
All other brands and product names are trademarks or registered trademarks of their respective owners.
[Notice] About the MPEG-4 AVC, MPEG-4 Visual license included in this product
1. MPEG AVC
THIS PRODUCT IS LICENSED UNDER THE AVC PATENT PORTFOLIO LICENSE FOR THE PERSONAL USE OF
A CONSUMER OR OTHER USES IN WHICH IT DOES NOT RECEIVE REMUNERATION TO (i) ENCODE VIDEO IN
COMPLIANCE WITH THE AVC STANDARD (“AVC VIDEO”) AND/OR (ii) DECODE AVC VIDEO THAT WAS ENCODED BY
A CONSUMER ENGAGED IN A PERSONAL ACTIVITY AND/OR WAS OBTAINED FROM A VIDEO PROVIDER LICENSED
TO PROVIDE AVC VIDEO. NO LICENSE IS GRANTED OR SHALL BE IMPLIED FOR ANY OTHER USE. ADDITIONAL
INFORMATION MAY BE OBTAINED FROM MPEG LA, L.L.C. SEE HTTP://WWW.MPEGLA.COM
2. MPEG-4 Visual
THIS PRODUCT IS LICENSED UNDER THE MPEG-4 VISUAL PATENT PORTFOLIO LICENSE FOR THE PERSONAL AND
NON-COMMERCIAL USE OF A CONSUMER FOR (i) ENCODING VIDEO IN COMPLIANCE WITH THE MPEG-4 VISUAL
STANDARD (“MPEG-4 VIDEO”) AND/OR (ii) DECODING MPEG-4 VIDEO THAT WAS ENCODED BY A CONSUMER
ENGAGED IN A PERSONAL AND NONCOMMERCIAL ACTIVITY AND/OR WAS OBTAINED FROM A VIDEO PROVIDER
LICENSED BY MPEG LA TO PROVIDE MPEG-4 VIDEO. NO LICENSE IS GRANTED OR SHALL BE IMPLIED FOR
ANY OTHER USE. ADDITIONAL INFORMATION INCLUDING THAT RELATING TO PROMOTIONAL, INTERNAL AND
COMMERCIAL USES AND LICENSING MAY BE OBTAINED FROM MPEG LA, LLC. SEE HTTP://WWW.MPEGLA.COM

English−13
Part Names
nFront View
2
3
1
1Remote Control Sensor (See page 18)
2Ambient light sensor (See page 54)
3Power Indicator (See page 19)
TIP: Ambient light sensor detects the level of ambient
light, allowing the monitor to make automatic
adjustments to the backlight setting, resulting in a
more comfortable viewing experience. Do not cover
this sensor.
nRear View
USB1
HDMI 1 (ARC) IN
HDMI 2 IN
LAN
RS-232C
OPTICAL OUT
AUDIO OUT
USB-C
REMOTE IN
USB2
HDMI 3 IN
USB3
&
$
#
@
!
0
^
(
*
(
8 9
HDMI
%
)
*
7
6
5
4
3
2
1
1Power Button (See page 19)
2MENU/EXIT Button (See page 14)
3RIGHT Button*1(See page 14)
4LEFT Button*1(See page 14)
5DOWN Button*1(See page 14)
6UP Button*1(See page 14)
7INPUT/SET Button (See page 14)
8AC input terminal (See page 17)
9Main Power Switch (See page 19)
0Digital audio output (optical) terminal
(See page 15)
!LAN terminal (See page 15)
@RS-232C input terminal (See page 15)

English−14
#AUDIO output terminal (See page 15)
$REMOTE input terminal (See page 15)
%USB ports (See page 15)
^HDMI 1/2/3 input terminal (HDMI1 (ARC)/HDMI2/
HDMI3) (See page 16)
&USB Type-C port (power supply 5 V/3 A)
(See page 16)
*Internal Speaker
(Handle
)Label
Button Functions
TIP: OSD is an abbreviation of On-Screen Display.
2MENU/EXIT:
Opens the OSD menu when the OSD menu is closed.
Acts as a back button within the OSD menu to move to the
previous OSD menu.
Acts as an exit button to close the OSD menu when on the
main menu.
3RIGHT*1:
Navigates to the right through the OSD Control menus.
Increases adjustments for individual OSD settings.
Directly adjusts the VOLUME when the OSD menu is closed
with HDMI/USB-C input.
4LEFT*1:
Navigates to the left through the OSD Control menus.
Decreases adjustments for individual OSD settings.
Directly adjusts the VOLUME when the OSD menu is closed
with HDMI/USB-C input.
5DOWN*1:
Navigates down through the OSD Control menus.
6UP*1:
Navigates up through the OSD Control menus.
7INPUT/SET:
INPUT: Opens the INPUT menu when the OSD menu is
closed.
[HOME], [HDMI1], [HDMI2], [HDMI3], [USB-C].
Input names are shown as their factory preset
name.
SET: Selects, or sets the setting for the highlighted function
in the OSD menu.
*1: The RIGHT, LEFT, DOWN and UP functions change according to the
monitor orientation (landscape/portrait).
nRemote Control
1
2
1Signal transmitter
2Operation buttons (See page 21)

English−15
Connecting Peripheral Equipment
USB1
HDMI 1 (ARC) IN
HDMI 2 IN
LAN
RS-232C
OPTICAL OUT
AUDIO OUT
USB-C
REMOTE IN
USB2
HDMI 3 IN
USB3
8
5
4
3
2
1
7
HDMI
6
1Digital audio output (optical) terminal
For connection to an audio device equipped with a digital
audio input terminal.
2LAN terminal (RJ-45)
Connect to LAN in order to manage and control the monitor
over the network.
3RS-232C input terminal (D-Sub 9-pin)
Connect RS-232C input from external equipment, such
as a computer, in order to control RS-232C functions.
See page 42.
4AUDIO output terminal
Audio signal output from USB-C and HDMI to an external
device (stereo receiver, amplier, etc.).
NOTE: This connector is not a headphone terminal.
5REMOTE input terminal
Use an optional sensor unit by connecting it to your monitor.
NOTE: Do not use this connector unless specied.
TIP: • When the optional sensor unit is connected, the
monitor’s remote control sensor is disabled.
• For the remote control, please use the remote
control included with this monitor.
6USB ports
USB1 (Hub/0.5 A): Downstream port (USB Type-A).
USB2 (Hub/0.9 A): Downstream port (USB Type-A).
Connection used by external USB devices (such as
cameras, ash memory, keyboards, etc.).
USB ash drive reader for use with the internal Media
Player.
USB3 (Hub/0.9 A): Downstream port (USB Type-A) for a
device connected to the USB-C port.
A computer connected to the USB-C port can be
controlled by the external devices via this port.
This connection can also be used by external USB
devices (such as cameras, ash memory, keyboards,
etc.).
NOTE: • Please make sure the connector shape and
orientation is correctly aligned when connecting
the USB device or cable.
• Connecting/disconnecting a USB ash drive
with the monitor already powered on is not
recommended. To prevent damage to the
monitor and possible corruption of the connected
device’s data les, the monitor’s main power
switch should be off before making connections
or disconnections.
TIP: • Format a USB ash drive in the FAT32 format.
Refer to the computer’s instruction user’s manual
or Help le on how to format a USB ash drive.
• If the monitor does not recognize a connected
USB ash drive, make sure the le structure is
FAT32.
• The monitor is not guaranteed to work with all
USB storage devices sold commercially.
• Android system folders might be created
automatically when a USB ash drive is connected
to USB1/USB2/USB3.

English−16
7HDMI 1/2/3 input terminal (HDMI1 (ARC)/HDMI2/
HDMI3)
HDMI signals input.
Please use an HDMI cable with the HDMI logo.
When input signal is 4K, please use high-speed HDMI
cable.
HDMI1(ARC):
Also supports ARC (Audio Return Channel) for audio
output.
ARC sends the monitor’s sound to audio equipment with
an HDMI1 ARC connector.
TIP: • Use the included ARC-supported HDMI cable. The
audio equipment will output the monitor’s audio.
The audio equipment can be controlled with the
included remote control.
• Some HDMI cables and devices may not
show an image correctly due to different HDMI
specications.
• This monitor supports HDCP (High-bandwidth
Digital Contents Protection) coding. HDCP is a
system for preventing illegal copying of video
data sent over a digital signal. If you are unable
to view material via the digital inputs, this does
not necessarily mean that the monitor is not
functioning properly.
• Compatible signal list is on the page 50.
8USB Type-C port (power supply 5 V/3 A)
Check the shape of the connectors when connecting a USB
cable. When supplying power via the USB Type-C port, use
a USB cable supporting 3 A.
You can connect a device that supports DisplayPort
alternate mode. In order to supply power to connected
devices, it is necessary to support the Power delivery
standard.
NOTE: Do not tie the USB cable. Otherwise, it may cause
overheating or re.
TIP: The Power Delivery function is not guaranteed to
work with all devices. Please check the connected
device’s user manual and specications for its power
capabilities and requirements.
To maintain compliance with EMC regulations, use shielded cables to connect to the following terminals: USB port, USB
Type C port and Audio output terminal. Use shielded cables with ferrite core to connect to the following terminals: HDMI input
terminal, RS-232C input terminal.
Connecting External Equipment
TIP: • Do not connect or disconnect cables when turning on the monitor’s main power or other external equipment’s power
as this may result in loss of image.
• Do not use an attenuating (built-in resistor) audio cable. Using an audio cable with a built-in resistor will lower the
sound level.
Before making connections:
• Turn off the device’s power before connecting it to the monitor.
• Refer to the device’s user manual for available connection types and instructions for the device.
• We recommend turning off the monitor’s main power before connecting or disconnecting a USB ash drive to avoid data
corruption.
• Check the USB ash drive for viruses as necessary.

English−17
Connecting the Supplied Power Cord
Screw
Clamp
2
78 - 98 N•cm
3
1
ME652
ME432
ME502
ME552
NOTE: Please make sure that enough power is supplied to the monitor. Please refer to the “Power Supply” in the specication
(See “Product Specications” on page 51).
Mounting (for Customer)
Please contact your supplier as they may be able to provide a list of qualied installation professionals. Mounting on a wall or
ceiling and hiring a technician is the customer’s responsibility.
Maintenance
• Periodically check for loose screws, gaps, distortions, or other problems that may occur with the mounting equipment.
If a problem is detected, please refer to qualied personnel for service.
• Regularly check the mounting location for signs of damage or weakness that may occur over time.
NOTE: If using a cover made of glass or acrylic to protect the panel surface of the main unit, the panel is sealed and the
internal temperature rises.
Reduce the monitor’s brightness to prevent the internal temperature from rising. If the monitor is connected to a
computer, use the computer’s power management function to control the monitor’s automatic power off.

English−18
Preparing the Remote Control
nInstall the remote control batteries
The remote control is powered by two 1.5 V AAA batteries.
To install or replace batteries:
123
NOTE: • If you do not intend to use the remote control for a long period of time, remove the batteries.
• Use manganese or alkaline batteries only.
nOperating Range for the Remote Control
Point the top of the remote control toward the monitor’s remote control sensor during button operation.
Use the remote control within a distance of about 7 m (23 ft.) from the remote
control sensor, or at a horizontal and vertical angle of within 30° and within a
distance of about 3.5 m (10 ft.).
TIP: The remote control system may not function when direct sunlight or strong
illumination strikes the remote control sensor, or when there is an object in the
path.
Handling the remote control
• Do not expose to strong shock.
• Do not allow water or other liquid to splash on the remote control.
If the remote control gets wet, wipe it dry immediately.
• Avoid exposure to heat and steam.
• Except to install the batteries, do not open the remote control.

English−19
Turning Power On/Off
The Main Power switch must be in the ON position in order to power up the monitor using the POWER ON button on the remote
control or the POWER button on the Control Panel.
⏻ Button
Main Power Switch
ON OFF
nOperations after rst power-on
When you turn on the power for the rst time, the initial setting screen appears. Navigate the cursor to [Start] using the
▲/▼ buttons on the remote control and press the SET button to start. Congure the initial settings, such as setting the
language, date and time, etc.
Power ON and OFF
Press the ⏻ button on the Control Panel or POWER ON button on the remote control to turn on the monitor.
The monitor’s power LED indicates the current status of the monitor. Please refer to the following table for information about the
power indicator.
Power indicator status
and lighting pattern Condition Recovery
Glowing blue Normal 1. Turn on the monitor using the remote
control or the monitor button.
2. Send an AV signal input to the monitor.
Blinking green*1Under any of the conditions below, no input signal has
been detected by the monitor during the period of time
you set:
• Connecting a cable to the USB Type-C port and [USB
Power] is set to [Auto].
• [USB Power] is set to [On].
• [Auto Input Change] is set to a setting except for
[None].
• [Quick Start] is enable.
• Under the [Lock Settings], [Key] or [Key & IR] is set
to [Select] and [All Lock] or [Custom Lock] is set to
[Mode].
*1: Time setting for auto power save is available at [Power Save Settings] (See page 60).
*2: [Mode] in [Power Save Settings] is set to [Normal].

English−20
Power indicator status
and lighting pattern Condition Recovery
Glowing amber No AV signal input has been detected by the monitor
during the period of time you set. (with network signal
input)
1. Turn on the monitor using the remote
control or the monitor button.
2. Send an AV signal input to the monitor.*2
3. Disconnect and reconnect a signal
cable.
Blinking amber No AV signal input has been detected by the monitor
during the period of time you set. (no network signal input)
Glowing red Turn off the monitor by the remote control or the monitor
button.
Turn on the monitor by the remote control or
the monitor button.
*1: Time setting for auto power save is available at [Power Save Settings] (See page 60).
*2: [Mode] in [Power Save Settings] is set to [Normal].
TIP: • The blue power indicator that the monitor is powered on and functioning normally can be turned off in the monitor’s
OSD menu options. See page 62.
• The indicator glows amber when the [Schedule] function is enabled.
NOTE: If the indicator is blinking red in a combination of long and short durations, a certain failure might have occurred. Please
contact your supplier.
The backlight used for this monitor has a limited life and its brightness decreases with the usage time.
Also, if the same still image is shown for a long time, “Image Persistence” may occur. “Image Persistence” is a phenomenon in
which the image of an LCD remains visible after the device has turned off.
The “Image Persistence” is gradually eliminated by changing the screen, but if the same screen is shown for too long, the
“Image Persistence” will not disappear.
To avoid shortening this monitor’s lifetime, please note the following:
• Turn off the monitor’s main power switch when not in use.
• Use the ⏻ button on the main unit or the STANDBY button on the remote control to put the unit in standby state.
• Use [Power Save Settings] in the [Protect] OSD menu. When there is no input signal the monitor will automatically switch to
power save mode.
• Use [Schedule] in the OSD menu to automatically control the monitor’s on and standby power states as required. When
using the schedule function, set [Date & Time] in the [System] OSD menu.
Using Power Management
This function decreases the power consumption of the monitor when it is not in use.
When connected to a computer, power consumption by the monitor reduces automatically if the keyboard or mouse are not
used during the time set in the computer’s power management settings. Refer to your computer’s user manual for more
information.
When connected to an AV source, such as a Blu-ray, DVD, or streaming video player, power consumption by the monitor
reduces automatically after a certain amount of time has passed since the monitor recognized “no signal input”. This option is
turned on or off in the [Power Save] settings in [Power Save Settings] menu of the OSD. See page 60.
TIP: • Depending on the computer and display card used, this function may not operate.
• After the video signal is lost, the monitor automatically turns off after a preset time period. Please refer to the [Time
Setting] in [Power Save Settings] page 60.
• Schedules can be created for the monitor to power on or standby at specic times. See page 35.
• Please refer to the [Power Save] in [Power Save Settings] for the power management function.
This manual suits for next models
3
Table of contents
Other Sharp Monitor manuals

Sharp
Sharp PN-V600A User manual

Sharp
Sharp PN-E802 Professional User manual

Sharp
Sharp PN-E601 User manual

Sharp
Sharp LL-B240 User manual

Sharp
Sharp PN-V600A User guide

Sharp
Sharp PN-R903A User guide

Sharp
Sharp LC-15M4E User manual

Sharp
Sharp LL-T15S3 User manual

Sharp
Sharp PN-L601B User manual

Sharp
Sharp PN-80TC3 User guide

Sharp
Sharp PN-R703 User guide

Sharp
Sharp PN-L703WA User manual

Sharp
Sharp LL-T15G3 User manual

Sharp
Sharp PN-T322B User manual

Sharp
Sharp PN-325 User manual

Sharp
Sharp PN-L862B User manual

Sharp
Sharp PN-Y496 User guide

Sharp
Sharp PN-HW751 User manual

Sharp
Sharp LL-T15S1 - 15" LCD Monitor User manual

Sharp
Sharp LL-S201A User manual