Please read this manual carefully before using
the product. This manual should be kept in a
safe place for handy reference.
ENGLISH
CONTENTS
• IMPORTANT SAFETY INSTRUCTIONS.....EN-1
• PART NAMES..............................................EN-2
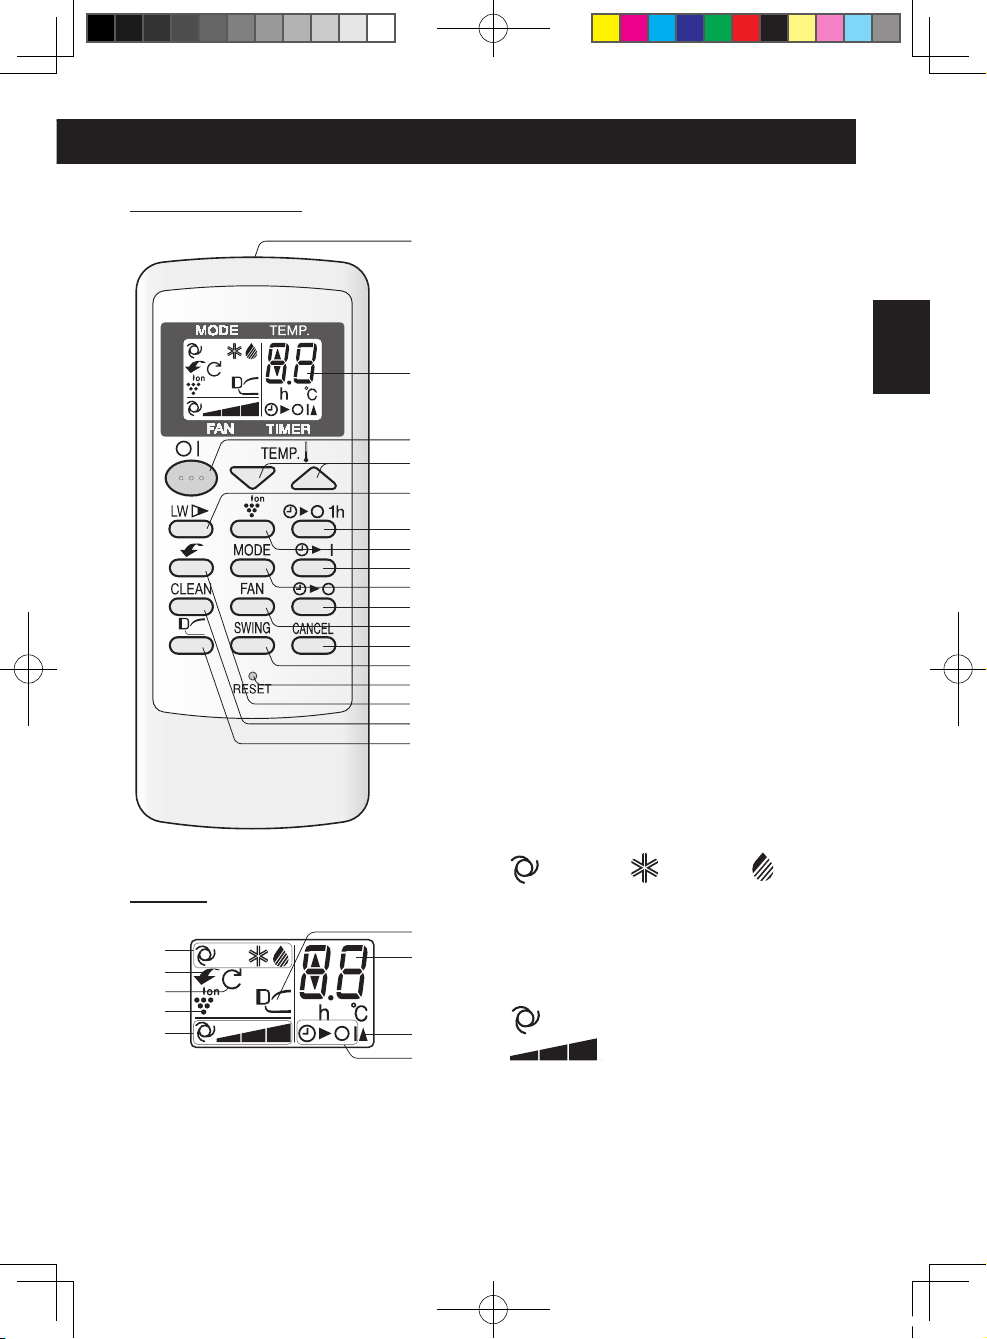
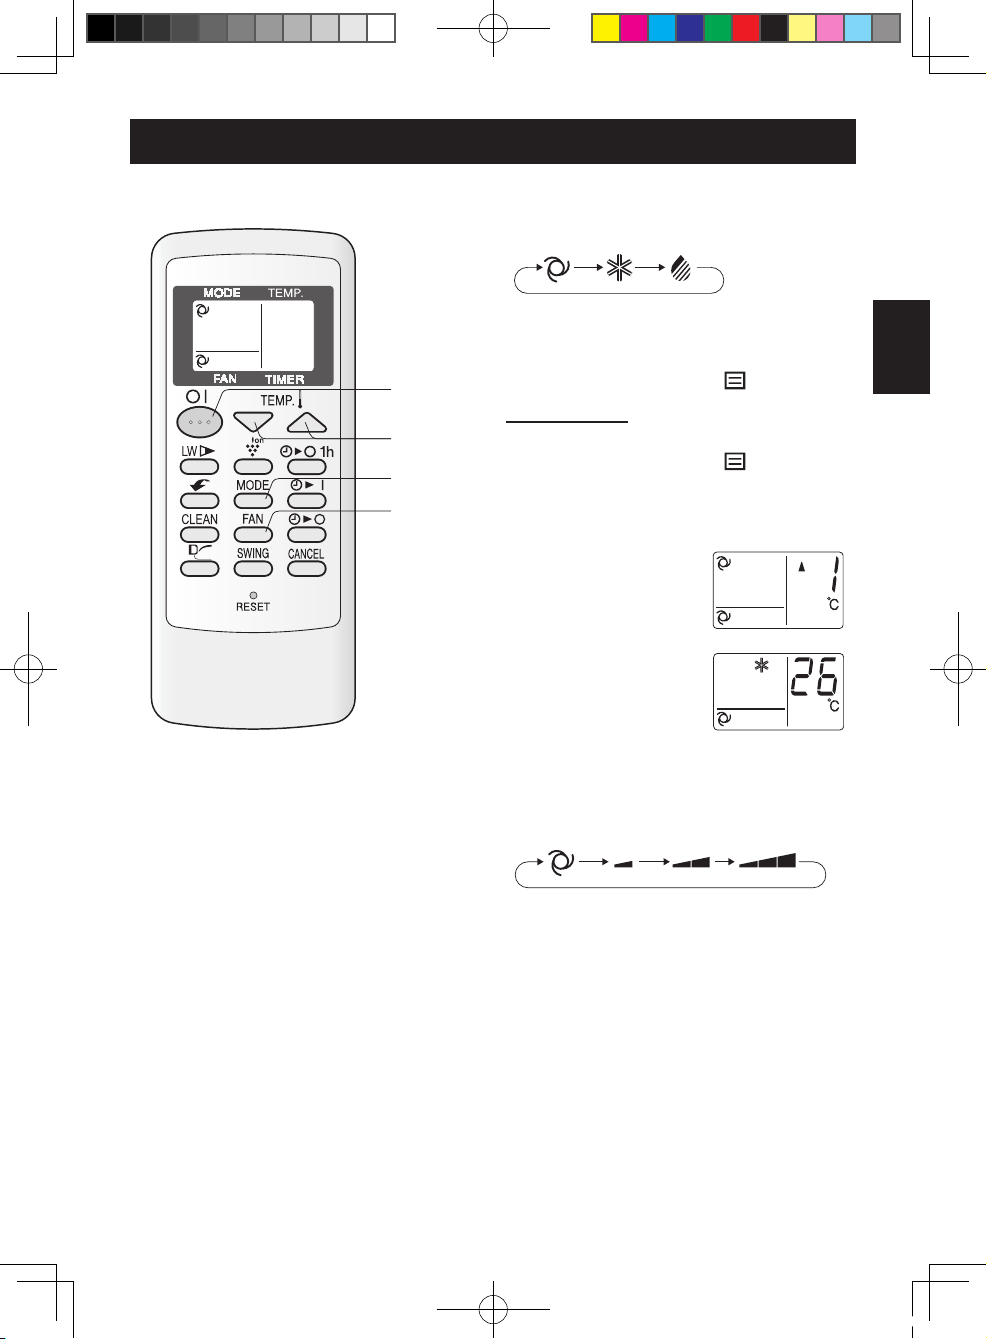
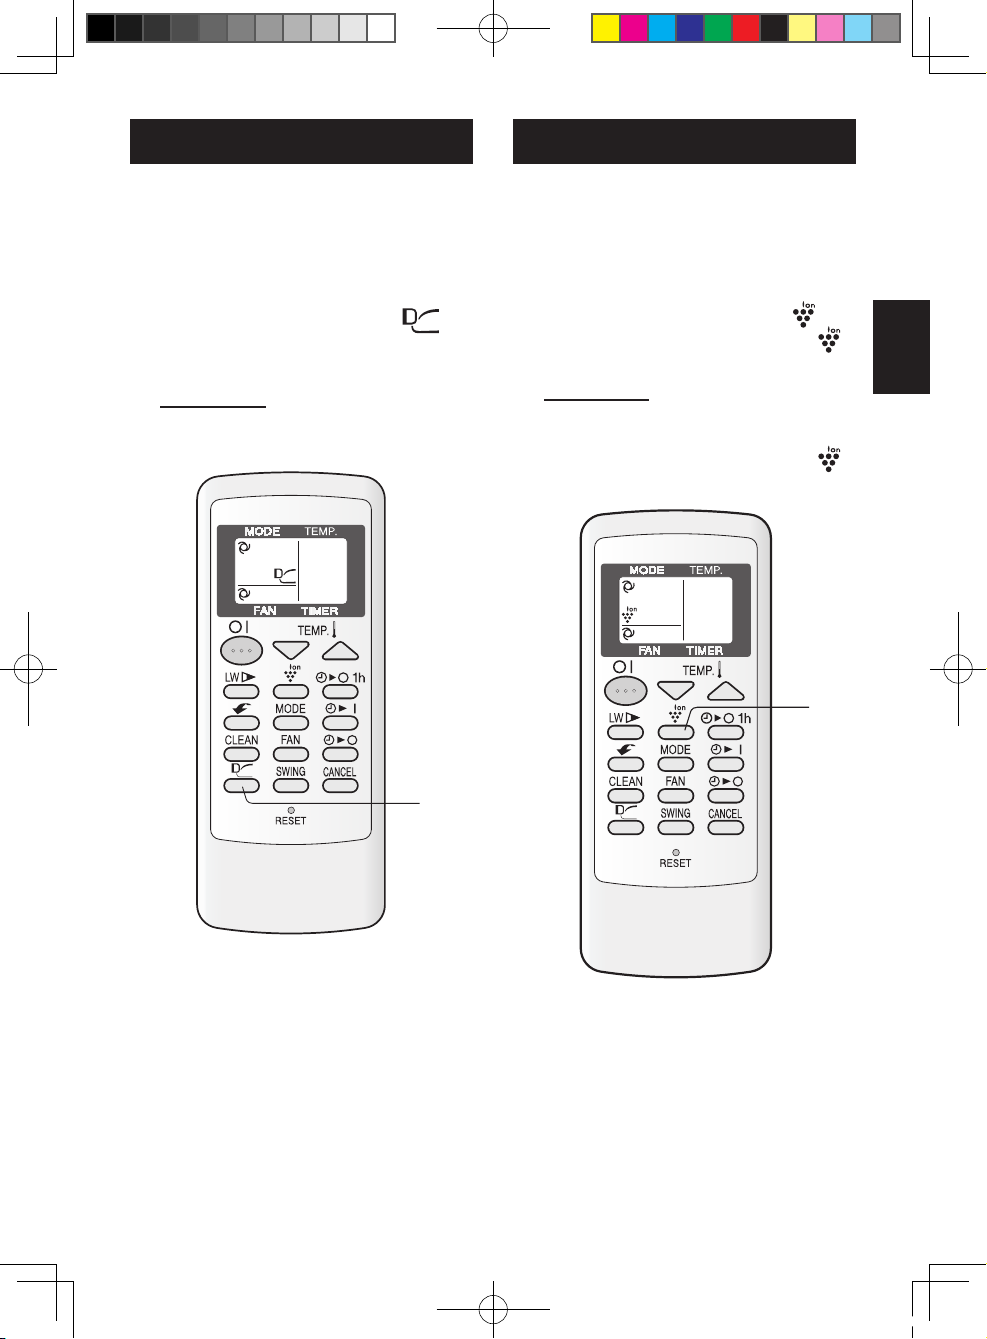
• USING THE REMOTE CONTROL ..............EN-4
• AUXILIARY MODE ......................................EN-4
• TIPS ON SAVING ENERGY........................EN-4
• BASIC OPERATION....................................EN-5
•
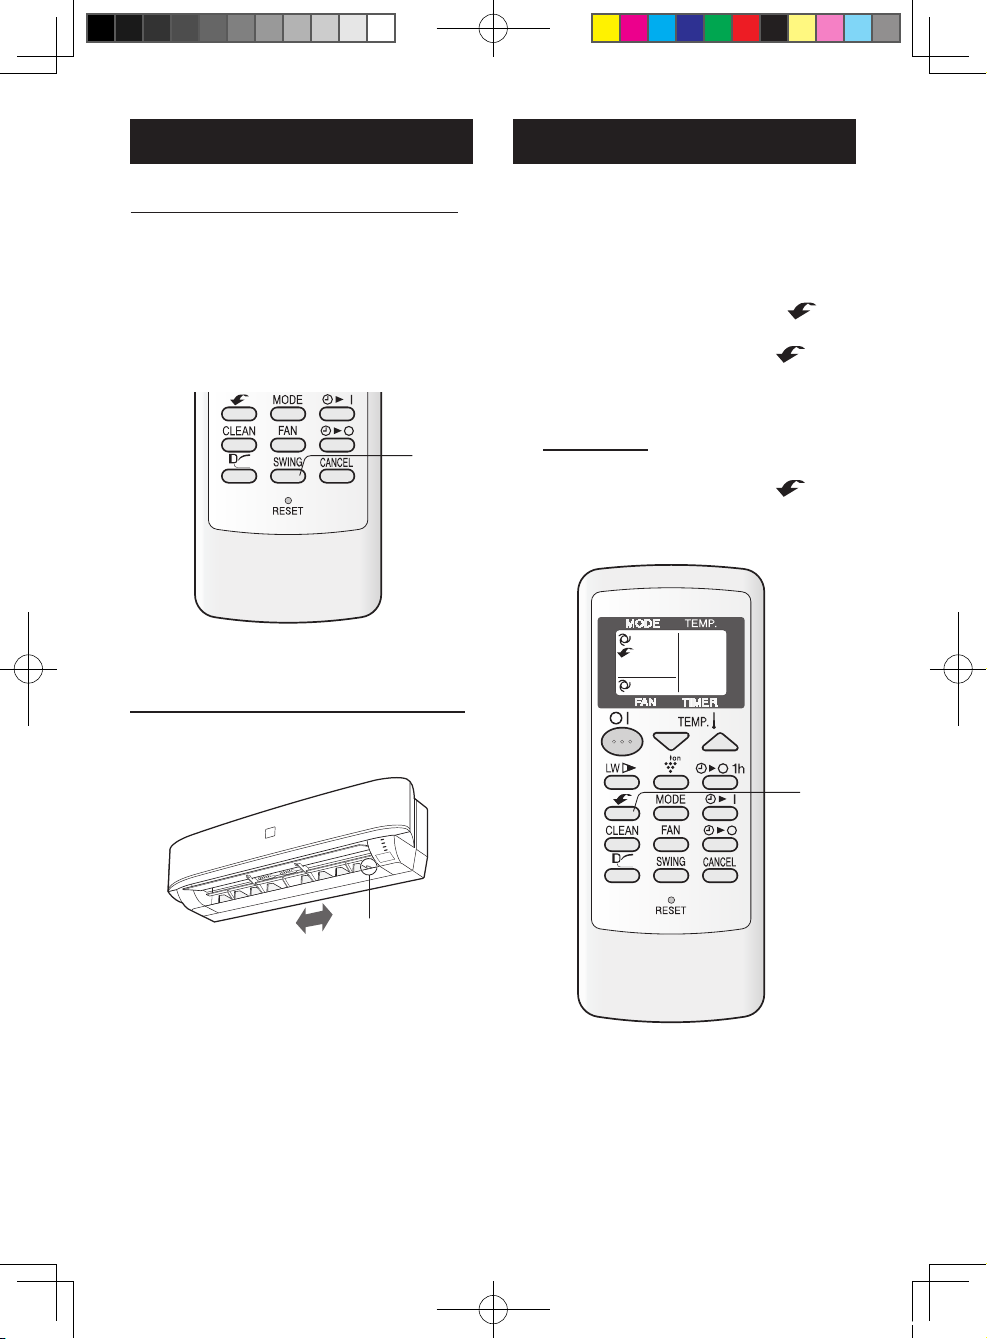
ADJUSTING THE AIR FLOW DIRECTION
........EN-6
• SUPER JET OPERATION...........................EN-6
• GENTLE COOL AIR ....................................EN-7
• PLASMACLUSTER OPERATION ...............EN-7
• SELF CLEAN OPERATION.........................EN-8
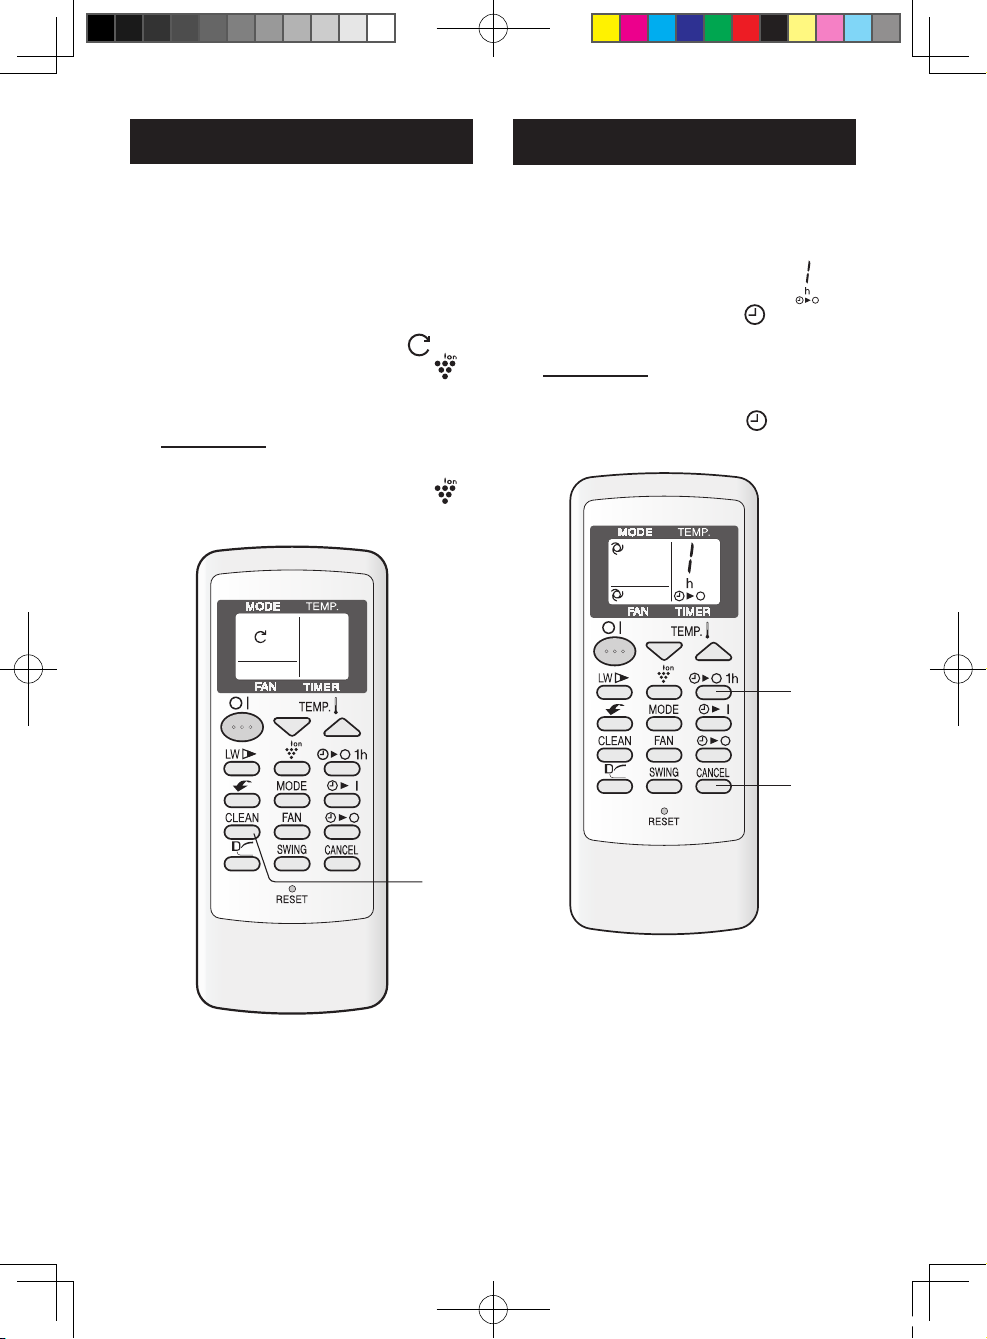
• ONE-HOUR OFF TIMER.............................EN-8
• TIMER OPERATION....................................EN-9
• POWER CONSUMPTION INDICATOR.......EN-10
• INSTANT LOW WATTAGE OPERATION ....EN-10
• MAINTENANCE ..........................................EN-11
• BEFORE CALLING FOR SERVICE ............EN-12
• OPERATING CONDITION...........................EN-12
IMPORTANT SAFETY
INSTRUCTIONS
WARNINGS
• Do not pull or deform the power supply cord.
Pulling and misuse of the power supply cord
can result in damage to the unit and cause
electrical shock.
• Be careful not to expose your body directly to
the outlet air for a long time. It may affect your
physical conditions.
• When using the air conditioner for infants,
children, elderly, bedridden, or disabled people
make sure the room temperature is suitable for
those in the room.
• Never insert objects into the unit. Inserting
objects can result in injury due to the high
speed rotation of internal fans.
• Ground the air conditioner without fail. Do not
connect the grounding wire to gas pipe, water
pipe, lightning rod or telephone grounding
wire. Incomplete grounding may cause electric
shock.
• If anything is abnormal with the air conditioner
(ex. a burning smell), stop the operation
immediately and turn the circuit breaker OFF.
• The appliance shall be installed in accordance
with national wiring regulations. Improper
cable connection can cause the power supply
cord, plug and the electrical outlet to overheat
and cause re.
• If the supply cord is damaged, it must be
replaced by the manufacturer or its service
agent or a similarly qualied person in order
to avoid a hazard. Use only the manufacture-
specied power cord for replacement.
• Do not splash or pour water directly on the
unit. Water can cause electrical shock or
equipment damage.
• Do not attempt to install/remove/repair the unit
by yourself. Incorrect work will cause electric
shock, water leak, re etc. Consult your dealer
or other qualied service personnel for the
installation/removal/repair of the unit.
CAUTIONS
• Open a window or door periodically to
ventilate the room, especially when using gas
appliances. Insufcient ventilation may cause
oxygen shortage.
• Do not operate the buttons with wet hand. It
may cause electric shock.
• For safety, turn the circuit breaker off when not
using the unit for an extended period of time.
• Check the outdoor unit mounting rack
periodically for wear and to make sure it is
rmly in place.
• Do not put anything on the outdoor unit nor
step on it. The object or the person may fall
down or drop, causing injury.
• This unit is designed for residential use. Do
not use for other applications such as in a
kennel or greenhouse to raise animals or grow
plants.
• Do not place a vessel with water on the unit.
If water penetrates into the unit, electrical
insulations may deteriorate and cause electric
shock.
• Do not block the air inlets nor outlets of the
unit. It may cause insufcient performance or
troubles.
• Be sure to stop the operation and turn the
circuit breaker off before performing any
maintenance or cleaning. A fan is rotating
inside the unit and you may get injured.
• This appliance is not intended for use by
young children or inrm persons without
supervision. Young children should be
supervised to ensure that they do not play with
the appliance.
• Make sure to connect the air conditioner to
power supply of the rated voltage and fre-
quency. Use of a power supply with improper
voltage and frequency can result in equipment
damage and possible re.
• Do not install the unit in a place where inam-
mable gas may leak. It may cause re.
Install the unit in a place with minimal dust,
fumes and moisture in the air.
• Arrange the drain hose to ensure smooth
drainage. Insufcient drainage may cause wet-
ting of the room, furniture etc.
• Make sure a leak breaker or a circuit breaker
is installed, depending on the installation loca-
tion, to avoid electrical shock.