Sharper Image GR-T200 Instruction Manual

Instruction Manual and
Warranty Information GR-T200
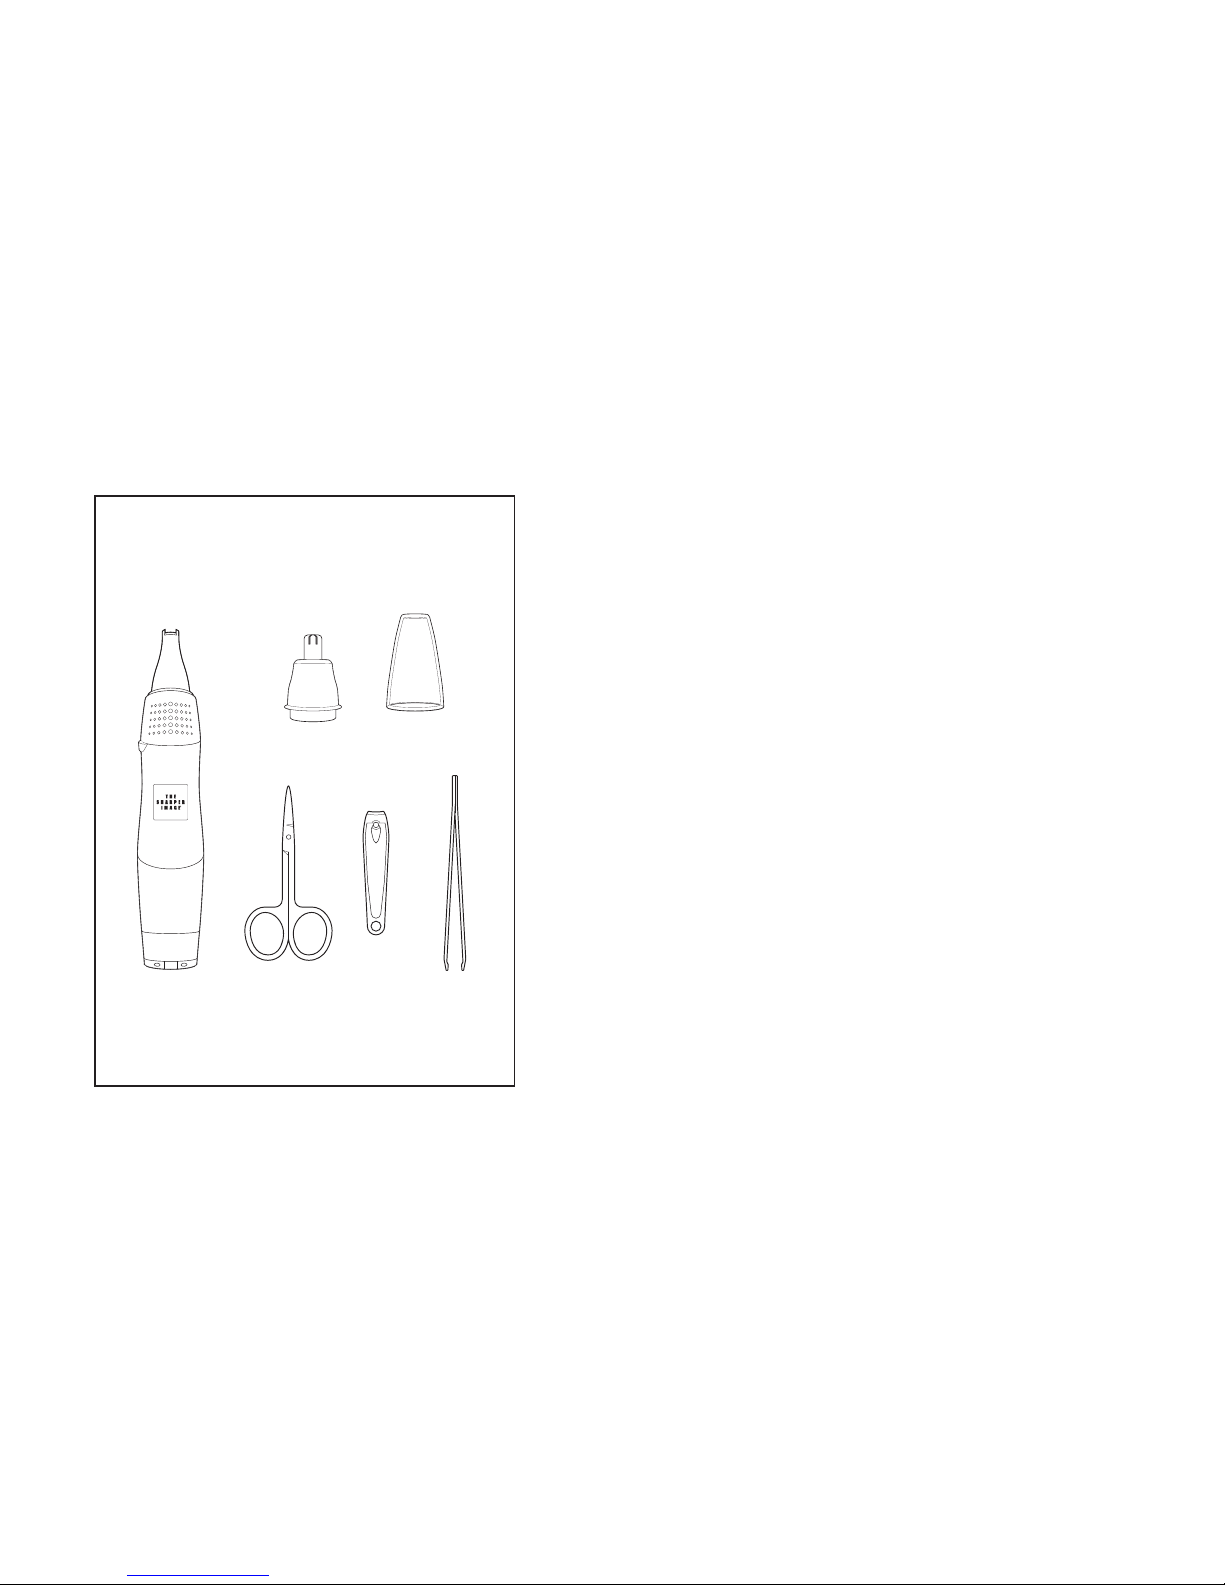
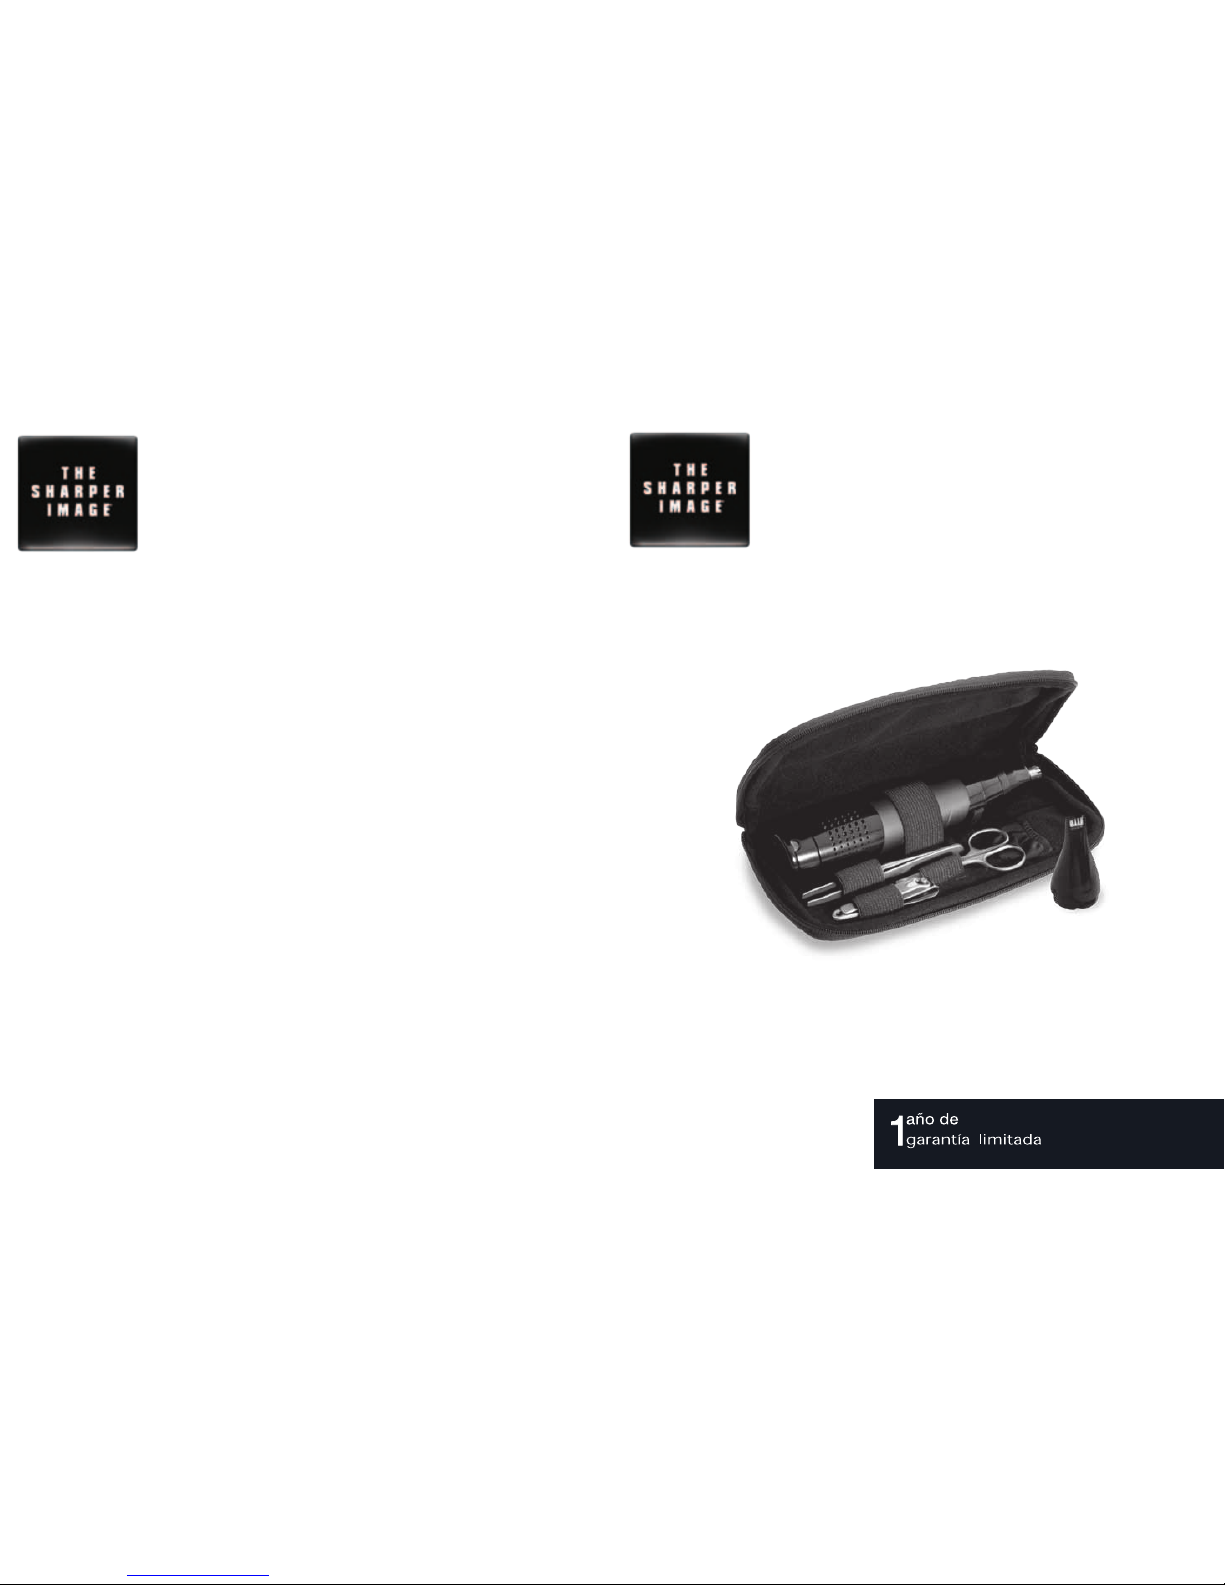
Deluxe Nose/Ear
Hair Trimmer
El nombre y logotipo de THE SHARPER IMAGE ® son marcas registradas.
Comercializado y distribuido por SI Products bajo licencia. ©The Sharper Image.
Todos los derechos reservados.
IB-GRT200
GARANTÍA LIMITADA POR UN AÑO
SI PRODUCTS vende sus productos con el propósito de que no tengan defectos de fabricación ni de mano
de obra por un plazo de un año a partir de la fecha de compra original, con las siguientes excepciones.
SI PRODUCTS garantiza que sus productos no tendrán defectos de material ni de mano de obra bajo
condiciones de uso y servicio normales. Esta garantía se extiende únicamente a consumidores y no a
distribuidores.
Para obtener servicio para su producto SI PRODUCTS, envíe por correo el producto y su recibo de compra
fechado (como comprobante de compra), con franqueo pagado, a la siguiente dirección:
SI PRODUCTS Consumer Relations
Service Center Dept. 168
3000 Pontiac Trail
Commerce Township, MI 48390
No se aceptarán pagos contra entrega.
SI PRODUCTS no autoriza a nadie, incluyendo entre otros a distribuidores, posteriores consumidores
compradores del producto a un distribuidor, o compradores remotos, a obligar a SI PRODUCTS de
forma alguna más allá de las condiciones aquí establecidas. La garantía de este producto no cubre
daños causados por uso inadecuado o abuso, accidente, conexión de cualquier accesorio no autorizado,
alteración del producto, instalación inadecuada, reparaciones o modificaciones no autorizadas, uso
inadecuado de la fuente de energía/electricidad, cortes de energía, caída del producto, funcionamiento
incorrecto o daño de una pieza de funcionamiento debido al no cumplimiento del mantenimiento
recomendado por el fabricante, daños durante el transporte, robo, negligencia, vandalismo, o condiciones
climáticas, pérdida de uso en el período durante el cual el producto está en una instalación de reparación
o a la espera de piezas o reparación, o cualquier otra condición, sin importar cual sea, que se encuentre
fuera del control de SI PRODUCTS.
Esta garantía es válida únicamente si el producto es comprado y operado en el país en el cual se compró
el producto. Un producto que requiera modificaciones o adaptación para habilitar su funcionamiento
en cualquier país que no sea aquel para el que fue diseñado, fabricado, aprobado y/o autorizado, o la
reparación de productos dañados por estas modificaciones no está cubierto bajo esta garantía.
LA GARANTÍA AQUÍ ESTABLECIDA SERÁ LA ÚNICA Y EXCLUSIVA GARANTÍA. NO HABRÁ NINGUNA OTRA
GARANTÍA EXPRESA NI IMPLÍCITA, INCLUYENDO NINGUNA GARANTÍA DE COMERCIALIZACIÓN O APTITUD
NI NINGUNA OTRA OBLIGACIÓN POR PARTE DE LA COMPAÑÍA CON RESPECTO A PRODUCTOS CUBIERTOS
POR ESTA GARANTÍA. SI PRODUCTS NO TENDRÁ RESPONSABILIDAD ALGUNA POR NINGÚN DAÑO
INCIDENTAL, CONSECUENTE NI ESPECIAL. BAJO NINGÚN CONCEPTO ESTA GARANTÍA REQUERIRÁ MÁS
QUE LA REPARACIÓN O EL REEMPLAZO DE ALGUNA PIEZA O PIEZAS QUE SE HALLEN DEFECTUOSAS
DENTRO DEL PERÍODO DE VIGENCIA DE LA GARANTÍA.
NO SE EFECTUARÁN REEMBOLSOS. SI NO HAY PIEZAS DE REPUESTO DISPONIBLES PARA LOS
MATERIALES DEFECTUOSOS, SI PRODUCTS SE RESERVA EL DERECHO DE REALIZAR SUSTITUCIONES DEL
PRODUCTO EN LUGAR DE REPARARLO O CAMBIARLO.
Esta garantía no se extiende a la compra de productos abiertos, usados, reparados, embalados otra vez
y/o abiertos y vueltos a cerrar, incluyendo entre otras cosas la venta de dichos productos en sitios de
remate por Internet y/o la venta de dichos productos por revendedores o mayoristas. Todas y cada una
de las garantías cesarán y terminarán inmediatamente con respecto a cualquier producto o pieza del
mismo que sean reparados, cambiados, alterados o modificados sin el consentimiento previo explícito y
por escrito de SI PRODUCTS.
Esta garantía le proporciona derechos legales específicos. Es posible que usted tenga derechos
adicionales que pueden variar de un estado a otro. Debido a regulaciones particulares, es posible que
algunas de las limitaciones y exclusiones no se apliquen en su caso. Por más información con respecto a
nuestra línea de productos en los EE.UU., visítenos en: www.siproducts.com
Centro de servicio de
SI Products
1.888.856.6781
8:30a.m. – 7:00p.m. (EST) de
lunes a viernes
Dirección de correo:
SI Products
Consumer Relations
Service Center Dept. 168
3000 Pontiac Trail
Commerce Township, MI
48390
correo electrónico:
cservice@siproducts.com
El manual en español empieza
a la página 10

23
Grooming doesn't get easier than this.
Thank you for purchasing The Sharper Image® Deluxe Nose/Ear Hair Trimmer.
This product, along with the entire The Sharper Image collection, connects
innovation with cutting-edge design to provide you with years of dependability
and enjoyment. Now you can groom on the go, or right at home, with the sleek
simplicity of The Sharper Image Deluxe Nose/Ear Hair Trimmer.
IMPORTANT SAFETY INFORMATION:
This appliance is not intended for use by persons (including children) with
reduced physical, sensory or mental capabilities, or lack of experience and
knowledge, unless they have been given supervision or instruction concerning
use of the appliance by a person responsible for their safety.
READ ALL INSTRUCTIONS BEFORE USING
SAFETY PRECAUTIONS
•ThisDeluxeNose/EarHairTrimmerisforhouseholduseonly.
•Childrenshouldbesupervisedtoensurethattheydonotplaywiththeappliance.
•Usethisapplianceonlyforitsintendeduseasdescribedinthismanual.
•Neverdroporinsertanyobjectintoanyoftheappliance’sopenings.
•Donotuseoutdoorsoroperatewhereaerosol(spray)productsarebeingused,or
where oxygen is being administered.
•Alwaysstorethisapplianceinamoisture-freearea.Donotstoreitintemperatures
exceeding 140°F(60°C).
•Donotusethisappliancewithdamagedorbrokencutters,asinjurymayoccur.
•Alwaysremembertoturnonthetrimmerbeforeyouinsertitinto
your nose or ear to avoid painfully snagging hairs.
•Neverinsertthemorethan1/4”oftipofnosehairtrimmerinto
nose or ear. Foreign objects should not come into contact with the
ear drum.
Caution – Please read all instructions carefully before
operating.
•Neverleavetheapplianceunattended,especiallyifchildren
are present.
•Nevercovertheappliancewhenitisinoperation.
•Thisunitshouldnotbeusedbychildrenwithoutadult
supervision.
•Alwayskeepthecordawayfromhightemperatureandfire.
•Donotlift,carry,hang,orpulltheproductbythepowercord.
•Iftheadaptorsustainsdamage,youmuststopusingthis
product immediately and contact The Sharper Image Service
Center. (See the warranty section for The Sharper Image
address.)
SAVE THESE INSTRUCTIONS
Caution: All
servicing of
this product
must be
performed
by
authorized
SI Products
Service
Personnel
only.

Main Features:
• Twointerchangeabletitanium-coatedblades
• Built-invacuumkeepsyou–andyourcountertop–clean
• Storeshairsdirectlyintoanylonlterreservoir
• Handyip-outmirrorwithintegratedLEDspotlight
• Rinsescleanwithwaterinseconds
• Zipperedtravelstoragecaseincluded
• Completewithpersonalscissors,nailclipper&tweezers
• Handsomecobaltbluechromenish
• Requires1(one)'AA'alkalinebattery
Contents:
a) Trimmer with linear edging head
b) Rotary head
c) Removable protective cap
d) Small scissors
e) Clippers
f) Tweezers
Getting Started
Battery Installation:
The trimmer requires 1 (one) 'AA' alkaline battery.
1.Toopenbatterycompartment,turnbaseoftheunitapproximately¼”inch
counterclockwise and pull off.
2.Insert1(one)“AA”batteryintounit,positiveendinrst.
3.Replacethebase,andturn¼”inchclockwisetolockinplace.
4. Dead batteries should be removed immediately and disposed of properly.
5. DO NOT use rechargeable batteries. The lower voltage in recharged batteries
impairs performance.
Battery Cautions – PLEASE NOTE: The use of non-alkaline batteries will harm
operatingperformance.Batteriesshouldnotbeleftintheunit–iftheunitisnotin
use for long periods of time. To prevent battery corrosion, the unit should be kept
in a dry environment. Do not use rechargeable batteries.
5
4
Fig. 1
Deluxe Nose/Ear Hair Trimmer
GR-T200_Deluxe Trimmer.ai 6/18/09 4:24:15 PM
GR-T200_Accessories.ai 6/18/09 4:28:17 PM
GR-T200_Trimmer Head_Cap.ai 6/18/09 4:27:22 PM
a.
b. c.
d.
e.
f.

7
6
How to Use
• Youcanusethetrimmertotrimnoseandearhair.
• Testtrimmeronasmallareaofyourarmor
leg. If any sensitivity occurs, discontinue using
immediately. Do not use trimmer on sensitive or
irritated skin.
• Turntrimmeroffbeforeputtingonortakingoff
attachments or cleaning.
Trimming Nose Hair
1. Make sure nasal passages are clean
before trimming.
2. Remove the Protective Cap by pulling it
off the trimmer (Fig. 2).
3. Turn trimmer ON by pressing the
On/Off POWER button (Fig. 3).
4. Carefully insert the trimmer tip into one nostril.
CAUTION: DO NOT insert the tip more
than ¼” into nostril.
5. Slowly move the trimmer tip in and out of each
nostril to remove unwanted hair (Fig. 4).
6. For best results, make sure the side of the tip is
heldrmlyagainsttheskin.Thiswillreducethe
tickling effect that can occur.
7. Clean trimmer immediately after using.
Trimming Ear Hair
1. Clean outer area of ear and make sure it
is free of wax.
2. Remove the Protective Cap by pulling it
off the trimmer.
3. Turn the trimmer ON by pressing the
On/Off POWER button.
4.Pullearattoheadwithonehandandhold
trimmer with the other hand (Fig. 5).
5. Move trimmer tip around edges of ear to remove
hairs extending beyond the outer ear. Carefully
inserttrimmertipintoouterearnomorethan¼”.
CAUTION: To avoid injury do not put
any part of the trimmer into the ear.
Do not insert the trimmer further than
¼” into the ear as this could cause
damage to the eardrum.
6. Clean trimmer immediately after using.
Changing Trimmer Heads
There are two interchangeable blade heads. The
rotary head is recommended to trim nose hairs, and
the linear head is designed especially for ear and
eyebrow hairs.
1. First, turn the trimmer OFF.
2. Detach trimmer head by tuning it
counterclockwise to the unlocked position,
then pull off.
3. Attach the other trimmer head by turning it
clockwise into the locked position.
Cleaning Hair Reservoir
Foreasycleaning,thenylonlterreservoir
stores all the hair. This is possible by the
powerful built-in vacuum.
1. First, turn the trimmer OFF.
2. Hold the trimmer upright for clean removal
of hair reservoir.
3. Detach the nose head. Remove hair stored
onthelter(Fig.6).
GR-T200_Trimmer_Diagram-01.ai 6/22/09 3:02:33 PM
GR-T200_Trimmer_Diagram-02.ai 6/22/09 3:27:21 PM
GR-T200_Trimmer_Diagram-03.ai 6/22/09 3:29:06 PM
Fig. 2
Fig. 3
Fig. 4
Fig. 5
Fig. 6
GR-T200_Trimmer_Diagram-04.ai 6/22/09 3:34:05 PM
GR-T200_Trimmer Head_Cleaning.aiPage 1 7/8/09 12:29:54 AM

©2009 THE SHARPER IMAGE and its affiliated companies, all rights reserved. THE SHARPER
IMAGE is a registered trademark of THE SHARPER IMAGE and its affiliated companies.
All rights reserved.
IB-GRT200
SI Products
Service Center
1.888.856.6781
8:30a.m. – 7:00p.m. (EST)
M – F
Mail To: SI Products
Consumer Relations
Service Center Dept. 168
3000 Pontiac Trail
Commerce Township, MI
48390
e-mail:
cservice@siproducts.com
ONE YEAR LIMITED WARRANTY
SI PRODUCTS sells its products with the intent that they are free of defects in manufacture and
workmanship for a period of one year from the date of original purchase, except as noted below.
SI PRODUCTS warrants that its products will be free of defects in material and workmanship under
normal use and service. This warranty extends only to consumers and does not extend to Retailers.
To obtain warranty service on your SI PRODUCTS product, mail the product and your dated sales receipt
(as proof of purchase), postpaid, to the following address:
SI PRODUCTS Consumer Relations
Service Center Dept. 168
3000 Pontiac Trail
Commerce Township, MI 48390
No COD's will be accepted.
SI PRODUCTS does not authorize anyone, including, but not limited to, Retailers, the subsequent
consumer purchaser of the product from a Retailer or remote purchasers, to obligate SI PRODUCTS in any
way beyond the terms set forth herein. This warranty does not cover damage caused by misuse or abuse;
accident; the attachment of any unauthorized accessory; alteration to the product; improper installation;
unauthorized repairs or modifications; improper use of electrical/power supply; loss of power; dropped
product; malfunction or damage of an operating part from failure to provide manufacturer’s recommended
maintenance; transportation damage; theft; neglect; vandalism; or environmental conditions; loss of use
during the period the product is at a repair facility or otherwise awaiting parts or repair; or any other
conditions whatsoever that are beyond the control of SI PRODUCTS.
This warranty is effective only if the product is purchased and operated in the country in which the
product is purchased. A product that requires modifications or adoption to enable it to operate in any
other country than the country for which it was designed, manufactured, approved and/or authorized, or
repair of products damaged by these modifications is not covered under this warranty.
THE WARRANTY PROVIDED HEREIN SHALL BE THE SOLE AND EXCLUSIVE WARRANTY. THERE
SHALL BE NO OTHER WARRANTIES EXPRESS OR IMPLIED INCLUDING ANY IMPLIED WARRANTY OF
MERCHANTABILITY OR FITNESS OR ANY OTHER OBLIGATION ON THE PART OF THE COMPANY WITH
RESPECT TO PRODUCTS COVERED BY THIS WARRANTY. SI PRODUCTS SHALL HAVE NO LIABILITY FOR
ANY INCIDENTAL, CONSEQUENTIAL OR SPECIAL DAMAGES. IN NO EVENT SHALL THIS WARRANTY
REQUIRE MORE THAN THE REPAIR OR REPLACEMENT OF ANY PART OR PARTS WHICH ARE FOUND TO BE
DEFECTIVE WITHIN THE EFFECTIVE PERIOD OF THE WARRANTY.
NO REFUNDS WILL BE GIVEN. IF REPLACEMENT PARTS FOR DEFECTIVE MATERIALS ARE NOT AVAILABLE,
SI PRODUCTS RESERVES THE RIGHT TO MAKE PRODUCT SUBSTITUTIONS IN LIEU
OF REPAIR OR REPLACEMENT.
This warranty does not extend to the purchase of opened, used, repaired, repackaged and/or resealed
products, including but not limited to sale of such products on Internet auction sites and/or sales of such
products by surplus or bulk resellers. Any and all warranties or guarantees shall immediately cease and
terminate as to any products or parts thereof which are repaired, replaced, altered, or modified, without
the prior express and written consent of SI PRODUCTS.
This warranty provides you with specific legal rights. You may have additional rights which may vary from
state to state. Because of individual regulations, some of the above limitations and exclusions may not
apply to you. For more information regarding our product line in the USA,
please visit: www.siproducts.com
GR-T200
Cortadora De Lujo Para
Vellos De La Nariz/Oreja
Manual de instrucciones
e información de garantía

El cuidado personal nunca fue tan fácil.
GraciasporadquirirTheSharperImage®con estación de acoplamiento para iPod/iPhone.
Este producto, junto con toda la colección The Sharper Image®, combina la innovación de
alta tecnología con el diseño para proporcionarle años de confiabilidad y disfrute. Ahora
puede realizar su cuidado personal en el camino o en su hogar, con la pulcra simplicidad
de la cortadora de lujo para vellos de la nariz/oreja The Sharper Image.
IMPORTANTES INSTRUCCIONES DE SEGURIDAD:
Este artefacto no está diseñado para ser usado por personas (incluidos niños) con
capacidades físicas, sensoriales o mentales disminuidas, o con falta de experiencia
yconocimiento,amenosqueunapersonaresponsabledesuseguridadlesbrinde
supervisión o instrucción con respecto al uso del artefacto.
LEA TODAS LAS INSTRUCCIONES ANTES DE USAR
PRECAUCIONES DE SEGURIDAD
• Estacortadoradevellosparanariz/orejadelujoestádiseñadaparausodomésticosolamente.
• Losniñosdebensersupervisadosparaasegurarsedequenojueguenconelartefacto.
• Utiliceesteartefactosóloparaelusoparaelcualfuediseñadoycomosedescribeen
este manual.
• Nuncalodejecaerniinserteningúnobjetoenningunadelasaberturasdelartefacto.
• Nolohagafuncionarafueraodondeseutilizanproductosderociadoporaerosolodondese
está administrando oxígeno.
• Siempreguardeesteartefactoenunárealibredehumedad.Nologuardeatemperaturasque
superen los 140°F (60°C).
• Nouseesteartefactoconcuchillasdañadasorotas,yaquepuedenproducirselesiones.
• Siemprerecuerdeencenderlacortadorapersonalantesdeintroducirlaensunarizuorejapara
evitar dolorosos tirones del vello.
• Nuncaintroduzcalapuntadelacortadoradevellosparanarizmásde¼pulg.(6mm)dentro
delanarizolaoreja.Losobjetosextrañosnodebenentrarencontactoconeltímpano.
Precaución - Lea todas las instrucciones con atención antes de
poner en funcionamiento.
•Nuncadejeelartefactosinvigilancia,especialmentesihayniños
presentes.
•Nuncacubraelartefactomientrasestáenfuncionamiento.
•Estaunidadnodebeserusadaporniñossinlasupervisióndeun
adulto.
•Siempremantengaelcablealejadodelastemperaturasaltasydel
fuego.
•Nolevante,lleve,cuelguenitiredelaunidadtomándoladelcablede
corriente.
•Sieladaptadorsedaña,debesuspenderelusodeesteaparatode
inmediato y contactar el Centro de servicio de The Sharper Image®.
(Ver la dirección de The Sharper Image®en la Sección de Garantía).
GUARDE ESTAS INSTRUCCIONES
Caution: All
servicing of
this product
must be
performed
by
authorized
SI Products
Service
Personnel
only.
1110

Características principales:
• Doscuchillasintercambiablesrecubiertasdetitanio
• Laaspiraciónincorporadalomantienelimpioaustedyalmostrador
• Almacenalosvellosdirectamenteenundepósitodeltrodenylon
• PrácticoespejodesmontableconunaluzLEDintegrada
• Selimpiaensegundosenjuagándolaconagua
• Estuchedeviajeconcremalleraincluido
• Completocontijeras,cortaúñasypinzaspersonales
• Eleganteacabadocromadoenazulcobalto
• Requiereuna(1)bateríaalcalina“AA”
Índice:
a) Cortadora personal con cabezal de reborde lineal
b) Cabezal giratorio
c) Tapa de protección desmontable
d) Tijeraspequeñas
e) Cortaúñas
f) Pinzas
Introducción
Instalación de la batería:
La cortadora personal requiere una (1) batería alcalina “AA”.
1. Para abrir el compartimiento de la batería, gire la base de la unidad aproximadamente ¼
pulg.(6mm)hacialaizquierdaytirehaciaafuera.
2. Introduzcauna(1)batería“AA”enlaunidad,comenzandoporelextremopositivo.
3. Vuelva a colocar la base, y gírela ¼ pulg. (6 mm) hacia la derecha para trabarla en
su lugar.
4. Lasbateríasagotadassedebenquitardeinmediatoysedebeneliminar
adecuadamente.
5. NO use baterías recargables. El voltaje más bajo de las baterías recargadas afecta
negativamente el funcionamiento.
Precauciones con la batería – TENGA EN CUENTA: El uso de baterías no alcalinas
dañaráeldesempeñodelfuncionamiento.Lasbateríasnosedebendejarenlaunidad,sila
unidad no se va a usar durante períodos de tiempo prolongados. Para evitar la corrosión de
la batería, la unidad se debe mantener en un ambiente seco. No use baterías recargables.
Fig. 1
Cortadora De Lujo Para Vellos De
La Nariz/Oreja
GR-T200_Deluxe Trimmer.ai 6/18/09 4:24:15 PM
GR-T200_Accessories.ai 6/18/09 4:28:17 PM
GR-T200_Trimmer Head_Cap.ai 6/18/09 4:27:22 PM
a.
b. c.
d.
e.
f.
1312

Cómo utilizar
• Puedeusarlacortadorapersonalpararecortarelvello
de la nariz y la oreja.
• Pruebelacortadorapersonalenunáreapequeñadesu
brazo o pierna. Si aparece sensibilidad, deje de usarla
de inmediato. No use la cortadora personal sobre piel
sensible o irritada.
• Apaguelacortadorapersonalantesdecolocaroquitar
accesorios o de limpiarla.
Cómo recortar el vello de la nariz
1.Asegúresedequelosconductosnasalesestén
limpios antes de recortar el vello.
2. Quite la tapa de protección tirando de la misma para
separarla de la cortadora personal (Fig. 2).
3. Encienda la cortadora personal presionando el botón
de encendido y apagado (On/Off) (Fig. 3).
4. Introduzca cuidadosamente la punta de la cortadora
personaldeloricionasal.
PRECAUCIÓN: NO introduzca la punta más de ¼
pulg. (6 mm) dentro del orificio nasal.
5. Mueva lentamente la punta de la cortadora personal hacia
adentroyhaciaafueraencadaoricionasalparaeliminar
el vello no deseado (Fig. 4).
6.Paraobtenermejoresresultados,asegúresedeque
elladodelapuntasemantengarmecontralapiel.
Estoreduciráelefectodecosquilleoquepuedeocurrir.
7.Limpielacortadorapersonalinmediatamentedespués
de usar.
Cómo recortar el vello de la oreja
1. Limpieeláreaexternadelaorejayasegúresedeque
no tenga cera.
2. Quite la tapa de protección tirando de la misma para
separarla de la cortadora personal.
3. Encienda la cortadora personal presionando el botón
de encendido y apagado (On/Off).
4. Conunamanotiredelaorejaparaquequedeplana
contra la cabeza y con la otra mano sostenga la
cortadora personal (Fig. 5).
5. Mueva la punta de la cortadora personal alrededor
delosbordesdelaorejaparaeliminarelvelloque
sobresale de la parte exterior de la oreja. Introduzca
cuidadosamente la punta de la cortadora personal
en la parte externa de la oreja a no más de ¼ pulg.
(6 mm).
PRECAUCIÓN: para evitar lesiones no ponga
ninguna parte de la cortadora personal dentro del
oído. No introduzca la cortadora personal más de
¼ pulg. (6 mm) dentro de la oreja ya que esto podría
provocar daños al tímpano.
6. Limpielacortadorapersonalinmediatamentedespués
de usar.
Cambio de los cabezales de la cortadora personal
Hay dos cabezales de cuchillas intercambiables.
Se recomienda el cabezal giratorio para recortar los vellos
de la nariz y el cabezal lineal está diseñado especialmente
para los vellos de la oreja y las cejas.
1. Primero apague la cortadora personal.
2. Destrabe el cabezal de la cortadora personal girándolo
hacialaizquierdahastalaposicióndedestrabadoy
luego tire del mismo.
3. Coloqueelotrocabezaldelacortadorapersonal
girándolo hacia la derecha hasta la posición
de trabado.
Limpieza del depósito de vello
Paraunafácillimpieza,eldepósitodeltrodenylon
guarda todo el vello. Esto es posible por la potente
función de aspirado incorporada.
1. Primero apague la cortadora personal.
2. Sostenga la cortadora personal en posición vertical para
quitarlimpiamenteeldepósitodevello.
3. Destrabe el cabezal de nariz. Quite el vello
almacenadoenelltro(Fig.6).
GR-T200_Trimmer_Diagram-01.ai 6/22/09 3:02:33 PM
GR-T200_Trimmer_Diagram-02.ai 6/22/09 3:27:21 PM
GR-T200_Trimmer_Diagram-03.ai 6/22/09 3:29:06 PM
Fig. 2
Fig. 3
Fig. 4
Fig. 5
Fig. 6
GR-T200_Trimmer_Diagram-04.ai 6/22/09 3:34:05 PM
GR-T200_Trimmer Head_Cleaning.aiPage 1 7/8/09 12:29:54 AM
1514
Table of contents
Languages:
Other Sharper Image Electric Shaver manuals

Sharper Image
Sharper Image 203208 User manual

Sharper Image
Sharper Image 204420 User manual

Sharper Image
Sharper Image GR-T300 User manual

Sharper Image
Sharper Image CA900 User manual

Sharper Image
Sharper Image 100871 User manual

Sharper Image
Sharper Image GR-T250 User manual

Sharper Image
Sharper Image 203207 User manual

Sharper Image
Sharper Image 204934 User manual

Sharper Image
Sharper Image 206598 User manual

Sharper Image
Sharper Image 206899 User manual