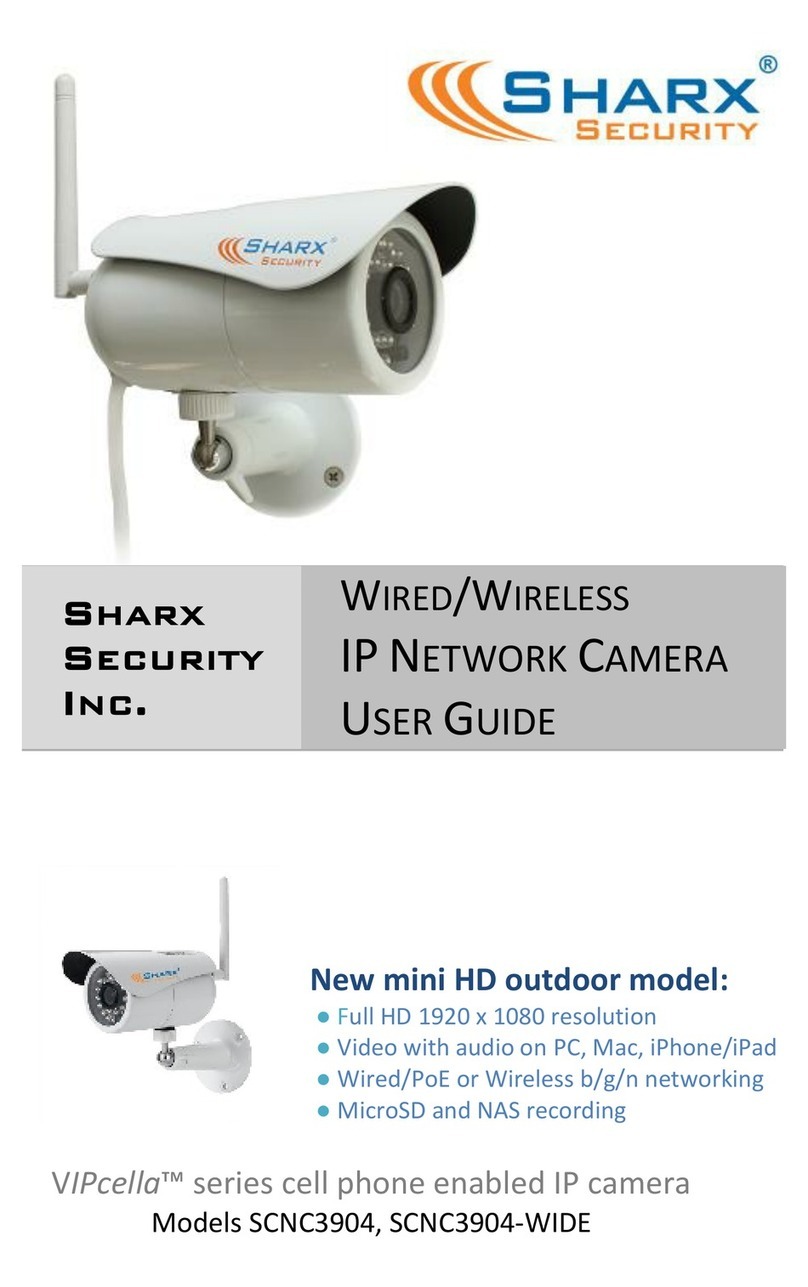
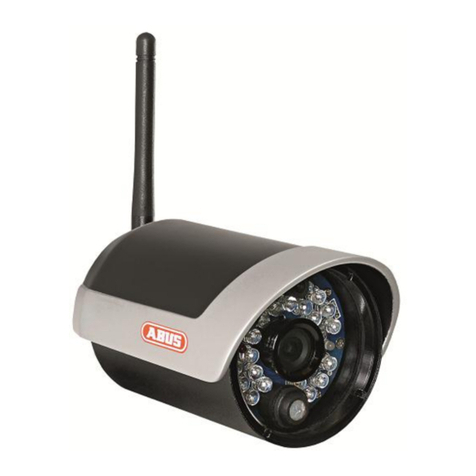
SHARX SECURITY SCNC2606 User manual

VIPcella™ series cell phone enabled IP cameras
SCNC2606, SCNC2607, SCNC2700, SCNC3605,SCNC3606
New 2012 series featuring:
Wireless b/g/n networking
MicroSD and NAS recording
SHARX
SECURITY
INC.
WIRED/WIRELESS
IP NETWORK CAMERA
USER GUIDE

Page 2
Introduction
Congratulations! You just purchased one of the finest IP network cameras
currently available, and this new version can record to a MicroSD memory card
Using a Mac or PC you can view high quality live streaming video with audio
direct from the camera. It is excellent for applications such as a baby monitor,
nanny cam, pet cam, security & surveillance, remote observation, elder and
patient care as well as limited video conferencing or event broadcasting.
The camera also supports mobile viewing of live video or pictures using a web
enabled cell phone such as iPhone, BlackBerry, Droid, SonyEricsson, or similar.

Page 3
Many common usage scenarios are handled directly by the camera’s built in
web server without the need for software installations, downloads, accounts
or monthly fees beyond your standard internet service.
Setup of the camera is mostly automatic if you have a current, industry
standard router with the “Universal Plug and Play” feature (UPnP). Examples
are NetGear WNR2000, LinkSys E1200, Dlink DIR-655. Older routers and some
models provided by internet service providers may require some manual setup
steps to enable remote viewing. Current Apple Airport routers are fully
supported by Sharx with our detailed, step by step setup instructions.
After you are familiar with the basic functionality of the camera you can enjoy
many additional advanced features. For instance, you can enable the
automatic sending of motion detection email alerts or automatic uploading of
pictures to online servers using the FTP protocol.
An exciting new feature is the ability to turn the camera into a DVR (Digital
Video Recorder) by recording video or pictures to a MicroSD memory card.
You can even turn the camera into a standalone NVR (Network Video
Recorder) by enabling functionality to save video files to a network server.
This could be a commercial FTP server on the internet or your own standalone
NAS (Network Attached Storage) hard drive. These features do not require a
computer. Some customers prefer to use a computer for recording video,
especially for recording multiple cameras, and that is supported as well.
In our experience, we find that our customers get comfortable with advanced
features quickly and then start using the camera on a daily basis to keep in
touch with their home or loved ones.
This requires a reliable network connection. If you have an older router that is
not up to the task, we highly recommend upgrading to one of the current
models before you proceed with the camera setup.
It is important to note that you do not need an expensive router. Even current
$40 - $80 units from NetGear, LinkSys or Dlink are perfectly fine as long as
your router is upgraded with the latest firmware available from the
manufacturer. In fact, expensive routers that have too many nonstandard
enhancements can often be less desirable than the basic 802.11 b/g/n models.
With an up to date router you’ll enjoy faster overall performance, better
wireless transmission range, and improved network security.

Page 4
Contents
Introduction.................................................................................................................2
Contents ......................................................................................................................4
Pre-requisites and Setup Overview .............................................................................5
Initial Connection ........................................................................................................6
Mac Quickstart ............................................................................................................7
PC Quickstart .............................................................................................................10
PC Only: Troubleshooting Internet Explorer Settings................................................12
Generic Quickstart.....................................................................................................13
Reserving the Camera’s IP Address ...........................................................................14
Wifi Wireless Setup ...................................................................................................15
Wifi Troubleshooting.................................................................................................20
Apple Airport Remote Access Setup..........................................................................21
Is the Remote Access Setup already done?...............................................................22
Enabling UPnP for Automatic Remote Access Setup.................................................23
Overview of Manual IP Address Setup (without UPnP) ............................................24
Manual Setup Step 1: Assigning a Permanent Local IP Address................................25
Manual Setup Step 2: Configuring your Router to allow Remote Access ................. 28
Setup Step 3: Choosing a Name for your Camera on the Internet............................ 29
Setup Step 4: Automatic Updating of your Camera’s Internet IP Address................30
Important Notes ........................................................................................................30
Night Vision Settings ................................................................................................. 31
Video with Audio using Safari, Firefox, or Chrome Browser .....................................32
Positioning and Mounting ......................................................................................... 33
Motion Detection or Timed Emails and FTP Uploads................................................36
Stream Setup and Recording Options .......................................................................40
Recording to built-in Micro-SD card .......................................................................... 41
Using the camera as a continuously recording DVR..................................................43
NAS drive setup .........................................................................................................44
Automatic Uploading to an FTP server......................................................................46
Recording Video using a Computer...........................................................................47
MultiLive: PC Software for Multiple Camera Recording............................................48
Viewing Live Video on your Cell Phone .....................................................................49
iPhone and Android Apps.........................................................................................51
Audio/Video Stream Reference.................................................................................51
Resetting the Camera back to Factory Settings.........................................................55
Setting the Time and Time Zone ...............................................................................55
Glossary: A quick Review of Networking Terminology..............................................57
Appendix A: Wireless setup instructions without Cat5.............................................58
Appendix B: Setup instructions for ATT (2Wire) Router............................................59
Appendix C: Motion Detection Adjustment ..............................................................60
Appendix D: Known issues ........................................................................................61
Appendix E: Burglar Alarm System Integration .........................................................62
Appendix F: The SCNC2607 sees too much pink and purple! ...................................63
Contact us..................................................................................................................64

Page 5
Pre-requisites and Setup Overview
This manual applies to all the 2011/2012 series Sharx Security VIPcella™
cameras, which includes the SCNC2606, SCNC2607, SCNC2700, SCNC3605 and
SCNC3606 models. Besides the camera, you only need:
PC, Mac, or Linux computer with internet browser. The computer is
only required for initial setup. Later the camera can work by itself
without any computer present at the camera location
A wired or wireless router with an available Cat5 wired network jack.
For wireless cameras, your router’s wired network connection is only
needed for initial setup. If no Cat5 jack is available, see Appendix A.
For standalone recording without a computer, you need a MicroSD or
MicroSDHC memory card from 1 to 16 GB capacity. This card is pre-
installed in all outdoor models but not included with indoor models.
You can start using the camera on your own network immediately after
powering the camera up and connecting the Cat5 cable to your router. You
just need to look up the IP address that your router assigned to the camera.
However, depending on the capabilities of your router and the functions you
intend to use, there are additional setup steps that are typically needed:
IP address reservation: required on many routers to prevent the
camera’s IP address from changing whenever the router is restarted
Wifi setup : required if you intend to use the camera wireless
Remote access setup: required for access over the internet if you do
not have a router that has already done this automatically with UPnP
No-IP hostname setup: highly recommended if you have DSL internet
Email server setup: required if you want motion detection emails
Stream setup: required if you have multiple cameras, intend to record
to MicroSD or NAS, or intend to use multiple camera functions
Optional: enable additional functions such as recording with or
without motion detection, emails, uploads, or NAS drive storage

Page 6
Initial Connection
All cameras come with a Cat5 network cable that can be used to connect the
camera to one of the LAN jacks of your router. Then connect the included AC
adapter to the camera and to power. Different camera models may use
different voltages so be sure not to switch AC adapters. For all wireless models
you should connect the antenna now, making sure it is finger tight.
IMPORTANT: Make sure the Cat5 network cable is plugged into your router,
not the computer, even if your computer has a network jack.
For outdoor models SCNC3605N / SCNC3606
with connection box:
The cable from the camera connects to the box
first. For testing and setup it is not required to
tighten the silver lock ring.
The AC adapter also connects to the box. A small
green light shows if the box has power. Then
you connect the Cat5 cable from the box to the
router. The other connections are optional (see Appendix)
On indoor models the camera’s power light will come on within a few seconds
and turn red/orange if the Cat5 connection is ok. Outdoor cameras purposely
do not have a visible power light but you can check the link light on your
router to see if the camera is powered up and communicating with the router.
On the SCNC2607 / 2607W you should remove the clear plastic film that is
protecting the lens cover. For clearest video never touch the lens.
To get started using your camera, you need to know the IP address that your
router assigned to the camera. Then by adding http:// in front of the IP
address you get a web link to the camera’s built-in web server.
The following Quickstart sections will show you how to find the camera’s IP
address in your router, and how to reserve it so that it always stays the same.
Proceed to the Mac Quickstart section if you have a Mac with Apple Airport
Extreme or Time Capsule. Proceed to PC Quickstart section if you have a PC
running Windows 7, Vista, or XP, or proceed to Generic Quickstart for Mac
computers without Airport or for Linux and other platforms.

Page 7
Mac Quickstart
This Quickstart section applies to the most common configuration for Mac
users: You have an Apple Airport (Extreme or Time Capsule), and your Airport
is directly connected to a standard, non routing DSL or cable modem.
In this section you will be interacting mostly with the Airport Utility 5.6. Please
note that the Airport Utility (and this Quickstart section) does not apply if you
do not have an Apple Airport router. In that case, go to Generic Quickstart.
Start the Airport Utility by clicking on its icon in your Mac’s Utilities folder. If
you do not have Airport Utility 5.6 you can download it from Apple.com. If you
already have version 6.0 on your Mac, that’s ok, both version 5.6 and 6.0 can
co-exist on the same Mac. Version 6.0 is simplified for easy reference but
cannot be used for setup, so you cannot proceed until you have version 5.6
Now select your Airport by highlighting its picture on the left. Click on
“Manual Setup”and enter the Airport password if needed, and you should
now see the Airport Utility summary screen. Let’s verify a few things:
1) The version of the Airport firmware should be 7.6.1 or later if you have
a current generation Airport. Unfortunately Apple does not provide
firmware updates for the earliest Airports. Those could be used with
Sharx cameras but require manual IP address setup (see page 24)
2) The “Wireless Mode” should be “Create a Wireless Network”.
3) Click on the globe shaped icon on top, then look at the bottom of the
menu for the “Connection Sharing” menu. This Quickstart chapter
assumes you have: “Share a Public IP Address”. If you have
“Bridge Mode (Off)” it means you have another router on your
network that you may need to eliminate or place into bridge mode
before you can have your Airport in “Share a Public IP address” mode.
With your camera powered up and connected to the Airport, it is ready to use
as soon as you look up the IP address as follows:
Click on the white/blue Airport icon at the top and select the “Summary” tab.
Near the bottom of the summary page, click on “Wireless Clients”. The
individual entries on this summary page may not look like clickable buttons,
but most are. A click on the words “Wireless Clients” brings you to a screen
that has 3 tabs. Click on the “DHCP Clients” tab and you’ll see a list of devices
with their MAC addresses and IP addresses.

Page 8
One of these entries will be your Sharx camera. You can tell by comparing the
MAC address to the sticker on the back of the camera (or tag on the cable).
You could start using your camera immediately using the IP address. Just add
http:// in front of it and open it in a browser, such as http://10.0.1.3
To see video, click on “Enter”. Until you change it, the default login is
Username: admin Password: admin
In general it is best to reserve the IP address to your camera so that you can
bookmark the IP address without worry about unexpected changes.
Still assuming that your Airport’s “Connection Sharing”is set to “Share a
public IP address”, click on the Internet icon on top. Then select the DHCP tab.
If you have a new generation Airport you will see a “DHCP reservations” box.
Click on the + (add) button below this box and enter a description for your
camera, such as “SharxCam1”, and select “Reserve by Mac Address”.
Then click on “Continue” and enter the MAC address shown on the back of
your camera. Be careful about typos. There are numbers from 0-9 and letters
in the range of A-F only. There is no letter O, just number 0 and letter D.
Usually an IP address is pre-filled, but do not use it. Instead, use the same IP
address for your camera as you saw earlier in the “DHCP clients” tab.
Make sure that the last group of digits for this IP address does not end in 1 or
254 since those addresses are usually reserved. Click “Done”, and you should
have the entry in the “DHCP reservations”. Click “Update” to restart.
Now the Sharx IP camera should always be on your network at the IP address
that you reserved, regardless of whether you’re using the camera with a wired
network connection or wireless after completing the wireless setup.

Page 9
With older generation Airports the IP address reservation feature is missing in
the Airport Utility, however the Sharx camera can be set up for a fixed local IP
address using the camera’s own TCP/IP setup menu (see page 24).
Next you will probably want to set up the wireless connection. To prepare
your Airport for easiest and most reliable connection to a Sharx camera, check
the following settings using the Airport Utility:
1. For Airport Extreme or Time Capsule make sure “Use Wide Channels”
is OFF in the Wireless Options “Advanced…” menu. We recommend
that “Wireless Channel” is either 1, 6, or 11 instead of “Automatic”
2. On new generation Airports it is recommended to set “Wireless
Security” to “WPA2 Personal”. On the camera, this corresponds to
Security Mode: “WPA2-PSK” with the Encryption Type: “AES”
The older generation Airports (without the 802.11n option) need WPA
security which is only available if you select the mixed mode
“WPA/WPA2 Personal”, and in this case the camera needs to be set
up with “WPA-PSK” with encryption type: “TKIP”, not “AES”.
3. When using the recommended WPA or WPA2 security, make sure
your wireless password is between 8 and 63 characters and does not
contain apostrophes ` ‘ ” . For best compatibility with all wireless
devices we recommend to use only upper case and lower case letters
and numbers and no other characters. Please note that this key
(password) is case sensitive. The older WEP wireless security is not
recommended for using Sharx cameras with Apple Airport.
4. If you have set up your network with extra tight security using the
“MAC Address Access Control” feature in the Airport Utility, then you
will need to add the camera’s MAC address to the allowed list.
5. If you have set up your wireless network as “Closed” with a hidden
name, it is highly recommended to temporarily set your network into
a normal configuration with a visible network name. Otherwise your
camera will not be able to see your network as one of the available
choices to connect to. After setup you can hide your network name
again. In general, a hidden network name adds more confusion than
actual security. There are tools that can reveal hidden names easily.
After you’ve checked the above settings, proceed to the section titled Wifi
Wireless Setup.

Page 10
PC Quickstart
This Quickstart section applies to the most common configuration for PC
users: You have a current generation router such as NetGear, LinkSys, or Dlink
connected to a standard, non routing DSL or cable modem, or you have a
combination modem and router which has all functions in one box.
Some of our customers have more complicated networks because they have
added a wireless router to a wired router, or have business firewalls or VoIP
routers in front of the main router. In those situations we recommend that
you consult an expert to simplify your network by eliminating redundant
routers or placing all but one router into bridge mode.
With your camera powered up and connected to the router, some PCs will
automatically discover the camera and show a pop up window or icon to let
you know that a new device has been found. The popup window shows the
complete local IP address for the camera. Or, it could be that your camera is
automatically discovered by your computer and is shown in the list of attached
network devices. On Windows XP this list is called “My Network Places”. On
Vista and Windows 7 it is just called “Network”.
However, some PCs and routers do not have the UPnP Universal Plug-and-Play
feature enabled. In following we will show alternate ways to find the address
that your router has assigned to the camera.
If you are familiar with your router’s menus you can log in to your router and
see the IP address for the Sharx SCNC series network camera in one of your
router’s LAN status screens. By the way, in this document we’re using the
words “router” and “gateway” interchangeably.
For PC users, we also supply a program on the CD called CameraSetup. If you
install this program on your PC with Windows 7, Vista, or XP, it will tell you the
addresses of all current generation Sharx cameras on your network. If this is
the first time you are running the program you may need to click “Refresh”
several times. You can use this program to set up cameras but we recommend
that you use this program only to find your IP address. Then do all setup by
going directly to the camera using the IP address, either by double-clicking on
the address or by typing the number into your browser (with http:// in front)
If no camera is found it could be that your Antivirus or Firewall program is
blocking the CameraSetup program. In that case you should either disable

Page 11
your Firewall program or use the alternate method of finding the IP address by
checking the menus in your router as described in the next section.
Regardless of the method you used to find your camera’s IP address, once
you’ve clicked on the icon or entered the IP address manually into your
browser (with http://), you get to the main login screen for the camera:
To see video, click on “Enter”, then username: admin and password: admin.
When using the camera for the first time on a PC with Internet Explorer, your
PC will ask you for permission to install the viewing software (called ActiveX).
This ActiveX is needed to decode the MPEG4 video stream and control the
camera. Click to OK this at the top of your screen, then again click on OK on
the install menu that will pop up in the middle of your screen. If you have a
popup blocker like Norton or Google Toolbar you will need to disable it.
Within a few seconds you can then see live video from the camera.
NOTE: If the camera shows video but also displays the message “Connecting,
waiting…”, close Internet Explorer and wait a couple of minutes for the
camera to obtain current time from an internet time server and restart itself.
To complete the camera setup, it is easier if you close all video windows and
go to the main login screen again, then instead of clicking on Enter you would
just click on Setting. Now proceed to the section titled Wifi Wireless Setup.

Page 12
PC Only: Troubleshooting Internet Explorer Settings
On PCs, Sharx Security cameras are compatible with Internet Explorer 7 –10.
(For use with Safari, Firefox or Chrome please see page 32)
If you find that your Internet Explorer window looks oddly shifted, please
check the zoom level / magnification icon at the bottom right of the Internet
Explorer window. It should be at 100% for proper viewing of the camera since
Internet Explorer can only zoom text and graphics but not a live video stream.
If you used “refresh” and have a black video screen, close and restart the
Internet Explorer window since it cannot refresh a live video stream.
If the camera has trouble installing the required ActiveX software, it could be
due to one of the following reasons:
1) If you have nonstandard Internet Explorer settings, your should reset your
Internet Explorer to defaults by going to the Internet Explorer Tools menu,
then Internet Options -> Advanced -> Reset…
2) If this is a work environment where your IT department has set restrictive
settings, ask them to temporarily lower the restrictions so that you can
install the Sharx Security ActiveX. Installation is only required once.
3) If you are running the 64 bit version of Windows 7, and if your computer
has separate icons for the standard Internet Explorer and the 64 bit
Internet Explorer, be sure to use the standard icon so that you are not
starting the 64 bit-only version of Internet Explorer.
4) If you have old or overly aggressive Antivirus or Firewall software we
recommend that you uninstall that software and use the free Microsoft
Security Essentials instead. Similarly, be sure that you do not have any
popup blocker software such as the ones bundled with Google, MSN, Bing
or Yahoo toolbars. With a popup blocker it could be that you would miss
the question about whether it’s ok to install the Sharx ActiveX, and as a
result it would not get installed and you wouldn’t see video.

Page 13
Generic Quickstart
The previous Quickstart sections showed you how to obtain the initial IP
address of the camera if you have a Mac or PC with typical configuration.
In other cases it may be easiest to log into your router’s web based setup
menu. For the exact details you may need to refer to your router’s manual,
which is usually available for download on the router manufacturer’s support
web site.
Typically you access your router’s web menu by typing the router’s IP address
into a browser window. Common IP addresses are: http://192.168.0.1,
http://192.168.1.1, http://192.168.10.1 , or http://192.168.1.254 .
Once you’re logged into your router, you would look for a status screen or
menu that mentions LAN or DHCP client list (LAN means local area network).
Typically there is a list of attached devices, and among these it is easy to pick
out the IP camera since the name starts with SCNC, or there will be a 12 digit
number that matches the number on the tag or sticker of the camera.
Regardless of the method you used to find your camera’s IP address, once
you’ve clicked on the icon or entered the IP address manually into your
browser (with http://), you get to the main login screen for the camera:
To see video, click on “Enter”, then username: admin and password: admin.
To complete the camera setup, it is easier if you close all video windows and
go to the main login screen again, then instead of clicking on “Enter” you
would just click on “Setting”.

Page 14
Reserving the Camera’s IP Address
Some routers tend to remember and keep the camera’s IP address as it was
the first time you plugged it in.
However, many current generation routers tend to re-assign all IP addresses
every time the router or a camera or computer is restarted. Aside from the
inconvenience of having to find the camera’s current IP address again, this can
also interfere with some of the other setup steps.
Therefore it is important to check if your router has an address reservation
menu, sometimes also called “DHCP reservation” or “Static DHCP”.
On NetGear routers you click on the “LAN setup” menu on the left under the
“Advanced” heading. Linksys E series routers tend to have a button for “DHCP
reservation” in the middle of the basic setup screen.
Most routers show you a list of currently attached devices for which you can
reserve the IP address. Typically you just select the device and then click on
“Add” or “Reserve”, which moves the item to the list of reserved addresses.
Then you typically click on “save settings” or “update” to make this choice
permanent, and from now on the camera’s IP address is locked and will not
change even after power failures or restarts.
This allows you to add the camera’s IP address to your browser’s bookmarks
or favorites menu and gives you a convenient way to login to the camera.
On current generation Apple Airport routers the address reservation menu is
very different. Please refer to the MAC Quickstart section for details.
On older Apple Airport routers, older Linksys routers such as WRT-54G, and
some of the freebie routers provided by the DSL internet companies such as
ATT and Verizon, there is unfortunately no address reservation menu.
In that case, the IP address needs to be set up in the camera as shown in the
chapter titled “Manual Setup Step 1: Assigning a Permanent IP Address for
your Camera”.
To summarize: If you can find your router’s address reservation menu, you
should use it now to lock the camera’s IP address in the router. If you cannot
find your router’s address reservation menu, you would set up the camera’s
IP address manually, but do not try both methods at the same time.

Page 15
Wifi Wireless Setup
Most likely your wireless network was set up with a password (also known as
wireless key). If you don’t remember it, you can check your router’s wireless
setup menu or ask the person who set up your wireless network.
Without your password you cannot proceed with your camera’s wireless
setup, so you can either continue to use your camera in wired mode or set up
a new password in your router. Another possibility is to disable passwords in
your router but an unsecured wireless network is not recommended.
Clicking on “Setting” from the main camera login screen will get you to this:
Click on “Network”, then click on “Wireless”, and you’ll get to this screen:
Do NOT type anything in the SSID field. Instead, use the “Search…” function so
that your camera can tell you which networks it can see:

Page 16
You may see a whole list of networks in your neighborhood. Select your
network among this list, then click “Apply”, and check if your network name
has now been filled into the SSID field. If nothing shows up, try “Search” again,
or un-hide your network name if your router is configured as a closed system.
Please make sure “Infrastructure” is selected before proceeding, since that is
the most common type of network. “AdHoc” is for network experts only.
The “Security mode” needs to match the type of wireless password used on
your router exactly. The old type is WEP. Newer routers may use WPA or
WPA2 passwords (keys).
Not sure what you have? Check your router’s wireless setup menu. In general
it would be a good idea to use WPA2 in your router, and more specifically the
combination of WPA2 with AES. However, if you are comfortable with your
existing wireless security and do not feel like changing, you can also use the
older WPA or the very old WEP wireless security. First we will show the setup
for WPA2 or WPA and then we show the setup for the older WEP security.

Page 17
Current Apple Airport and most new generation routers use WPA2 with AES:
However, older Apple Airport and many other routers use WPA with TKIP:
Please remember that both WPA and WPA2 keys are case sensitive and need
to be between 8 and 63 characters. Please note: do not use the quote or
apostrophe characters ` ” ‘. When you have entered the key, click on “Apply”.
You’ll get a message about “wireless setup accepted successfully” but that
only means that the information was stored in the camera. Now you should
use the “Test” feature to check if you typed it correctly.
If the test reports “Success!” you can remove the network cable and it should
work wireless after a short delay. If the test reports “no wireless connection”,
please double check your key (password) and refer both to the Wifi
troubleshooting and “Known issues” section of this User Guide.

Page 18
If you have WEP passwords, the procedure is similar:
In almost all cases you would select Authentication to be “Auto”
The next setting is critical, so you need to be careful to select the right choice.
Some laptop computers are more forgiving and will connect anyway, but the
camera needs to know exactly what type of WEP encryption is used.
Fortunately there is a way to tell based on the exact number of characters
used in your encryption key.
Key length 5 characters = WEP64 with ASCII
Key length 13 characters = WEP128 with ASCII
Key length 10 characters = WEP64 with HEX
Key length 26 characters = WEP128 with HEX
For example, Verizon often sets up their DSL modem / Wifi router with a
password similar to the customer’s telephone number, which is 10 digits and
therefore implies WEP64 and HEX. Some routers are configured for a key index
other than the factory default of 1. This is very rare.
When you’re done, click “Apply”, then “Test”.
Important: Do not forget to click on “Apply” before you leave the page.
Without “Apply” the wireless settings that you tested will not be saved.
If the test reports “Success!” you can remove the network cable and it should
work wireless after a short delay of about 30 seconds.

Page 19
Congratulations! At this point you should be able to use your camera wired or
wireless on your local network using the same local IP address.
If it doesn’t connect, we recommend that you temporarily remove wireless
security from your router for a quick experiment to see if the setup succeeds
with no passwords. Then put the password back in and try again. Many times
this will refresh your memory about the exact spelling of your password.
Also, it could be either that the camera is too close to or too far from your
router, or that your router was set up with the tightest possible security which
allows only known devices to connect to your network. In this case, do not
forget to add the MAC address of this camera to your allowed list. In this
context, MAC refers to a hardware network address and is unrelated to
Macintosh computers. The MAC address is printed on the back of the camera.
During setup it is best to have the camera at least a couple of feet away from
the antenna of the wireless router. The maximum distance is dependent on
the kinds of walls and objects that are between your wireless router antenna
and your camera. A distance of 75 ft across and 1 floor up/down is typical.
One easy test for determining the maximum recommended distance is by
using a laptop at the camera location. If your laptop shows at least 50% signal
strength at that exact same location then the camera should be ok too. Any
less than that may be unreliable, so you may want to move your router or the
camera, or adjust the angle of your router’s antennas.
Keep in mind that the wireless signal travels easily through common building
materials such as wood, glass, sheet rock, and vinyl siding, but does not go at
all through metal, and concrete with metal rebar can be a challenge.
If there are any big metal objects such as a fridge, filing cabinet, or HVAC
ducting in between the Wifi router and the camera, try to reposition either the
camera or the router so that the metal object doesn’t block the signal.
Also, many microwave ovens and older 2.4 GHz cordless phones may interfere
with all Wifi networking while in operation. Using a laptop you may not notice
a pause, but with a camera that transmits or records video continuously any
interruption will be much more obvious. Nearby Bluetooth devices such as cell
phone headsets, Playstation game controllers, or a wireless keyboard and
mouse can also interfere with wireless networks if the devices are too close.
The best placement for a wireless router is in an area that is higher up and free
of nearby clutter, for example on top of a wooden book shelf.

Page 20
Wifi Troubleshooting
If the camera does not connect and you’ve already checked the settings
mentioned on the previous page and you made sure the antenna is connected
properly, please log in to your router and double-check the setting for wireless
channel selection. On an Apple Airport you would use the Airport Utility.
If the Wifi channel is set to “Auto”, we recommend changing it to one of the
following fixed Wifi channels: 1, 6 or 11.
On N mode routers be sure to turn off “wide channel spacing”, sometimes
also referred to as “40 Mhz mode” or “up to 300 mb speed”. This is not
compatible. You should use “standard channel spacing”, also known as “20
Mhz” or “up to 130/150 mb speed”. Mixed 20/40 Mhz should be avoided.
If the “search” function of the wireless setup page found your Wifi network it
means that the wireless networking hardware is working. If it then doesn’t
connect it means that there is a password or IP address related issue.
You can temporarily turn off passwords on your Wifi router, and if you then
set “Security mode” to “off” in the camera, it should connect unless you have
set your router to reject connection attempts from unknown devices.
Assuming that you are now at least connecting without passwords, you can
proceed to add wireless security to your router and try again. We recommend
WPA2 if available, otherwise WPA. The older WEP mode is obsolete and may
not work correctly on Apple Airport. If you have trouble, switch to WPA2.
Since each password type can have 2 variations, this means you could have 4
possible combinations: WPA-TKIP, WPA-AES, WPA2-TKIP, and WPA2-AES.
Some routers like Apple Airport series do not show clearly which one of these
settings is being used, so if you have difficulty you should try all 4 possible
combinations. On a laptop you typically do not need to specify the exact
password type since the laptop will try everything automatically. The camera is
more picky, it needs to know exactly what type of password you are using and
does not try anything other than the exact type that you entered.
Remember to “Apply” first, then “Test”. If it says “Connected!”at the end of
the test, you can remove the cable. However, as long as the cable is still
attached, the camera’s “System” menu will show “No wireless connection”.
If you still have trouble, be sure to check the Appendix for known issues.
This manual suits for next models
4
Table of contents
Other SHARX SECURITY IP Camera manuals
