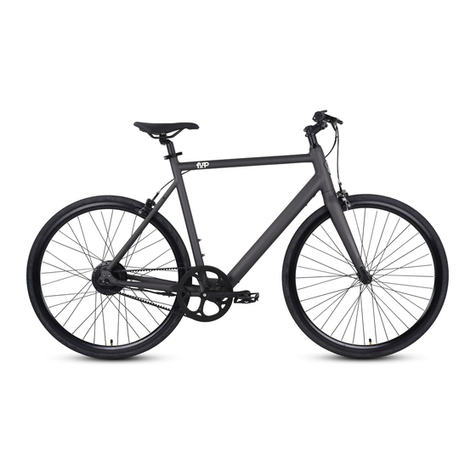
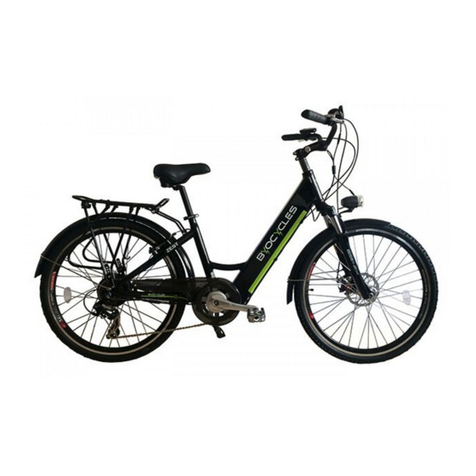
Shell SR-3B User manual


Table of contents
2
Shell
RIDE
Explanation of symbols 3
Introduction 4
Delivery contents 4
Intended use 5
Important safety instructions 5
Technical specifications 7
General information 8
Unboxing and assembly 9
Control and charging functions 13
Battery Usage 14
Before using your e-bike 16
Getting started 17
Display Functions 18
Storage, maintenance and cleaning 24
Manufacturer’s Limited Warranty 26
Canadian Limited Warranty 30
Customer service 34
Disposal instructions 35
Certifications 35
Trademark 36

Explanation of symbols
Contains important information for avoiding injuries.
Contains important information for preventing damage to the product.
Draws your attention to important information and notes when reading the
instruction manual.
Shell
RIDE 3

Thank you for purchasing the Shell SR-3B e-bike!
Please read the instruction manual carefully before operating the e-bike, and ensure that the
e-bike is used properly and in accordance with the instructions.
Retain this instruction manual for future reference. Only give the SR-3B e-bike to third
parties in conjunction with the instruction manual. Ensure any third party has completely read
and follows the SR-3B e-bike manual.
The instruction manual and illustrations within it may differ depending on the model.
We hope you enjoy safely using your Shell SR-3B e-bike
Delivery contents
Introduction
4
Shell
RIDE
User manual
SR-3B Electric Bike
AC Adapter
Battery Key Tools

The Shell SR-3B e-bike is a vehicle designed for one person for passenger transport.
The e-bike is exclusively for private use and is not suitable for commercial use.
Only use the e-bike as described in this instruction manual. Any other use is considered improper and
may result in material damage or even injury to people.
The manufacturer and distributor accept no liability for damage caused by unintended or improper use.
Important safety information
Intended use / Important
safety information
5
• Please strictly comply with the safety regulations stated in the manual. The manufacturer or distributor
cannot be held liable for any injury to persons, material damage, accidents or legal disputes resulting from
the violation of the safety regulations. Liability is always limited to the purchase value of the e-bike.
• The e-bike has been designed to transport one person with a maximum weight of 250 lbs.
• Please check your e-bike before every ride (see the “Storage, maintenance and cleaning” section).
• Do not use the e-bike if there is visible damage or if the power cord or plug is damaged.
• Modifying the e-bike is not permitted.
• Repairs may only be carried out by qualified personnel authorized by Shell or their distributors.
Liability and warranty claims are excluded if repairs are carried out independently or in the event
of improper connections or incorrect operation.
• Always wear a safety helmet, appropriate clothing, protective gear and flat-heeled shoes.
• Hold the handlebars with both hands while riding the e-bike.
Shell
RIDE

Important safety information
6
• Practice riding the e-bike on open and level terrain initially.
• Obey all local traffic laws and regulations. Do not ride where prohibited by local laws.
• The e-bike is suitable for use on flat, dry surfaces. Do not ride through water, during rain, at night
or in poor visibility.
• The e-bike is not suitable for performing stunts DO NOT TRY to jump it or perform any other
dangerous maneuvers.
• Do not leave the e-bike outdoors. Please store it in a dry, dark location.
• Before each ride, check that all screws are firmly tightened.
• Be careful not to touch any moving parts during the ride, in order to avoid injuries.
People who should not ride the e-bike include:
• Children under 14 years of age.
• If you under the influence of alcohol or drugs.
• If you have a problem with balance or motor skills that would interfere with their ability to
maintain balance.
• If your weight exceeds 250 lbs.
Shell
RIDE

Technical specifications
7
Shell
RIDE
Motor: Rear-wheel hub motor with 250-watt capacity
Battery: 36 V / 8.0 Ah lithium ion
Charging time: Approx. 3.2 hours
Brakes: Front and rear disc brakes
Features: LED display, reflectors
Dead weight: 38.0 lbs. (17.2 kg)
Maximum load: 250 lbs. (113.4 kg)
Maximum speed: 16.0 mph (25.75 km/h)
Maximum range: TBD
Tires: 27.5” pneumatic tube tires front and rear
Product size: L-42.0” x H-36.75” (L-107 cm x H-93 cm)

General information
8
Shell
RIDE
1 - Removable/Locking Battery
2 - Bell
3 - Brake lever (disc brake)
4 - Throttle/Display
5 - Electric brake
6 - Rear hub motor
7 - 27.5” wheels
8 - Charging port
9 - On/Off switch
10 - Kickstand
3
4
5
1
2
7
10
9
8
6

Unboxing and Assembly
9
Shell
RIDE
It is recommended that the bike be inspected and adjusted by a certified bicycle mechanic
before riding.
You Will Need:
4mm, 5mm and 6mm Allen wrench
13mm and 15mm open wrench
1- Carefully remove the bike from the box.
A. Use caution when opening the box as there may be staples exposed when opening the lid.
B. It is easier to clip the zip ties attaching the front wheel to the bike and remove the front wheel
from the box first.
C. Take out all the accessories and the box with pedals and other miscellaneous parts, and the
Battery Charger before removing the bike.
2- Remove all bubble wrap and other packaging materials and place them back into the box.
3- Tighten the seat-post into the seat-tube and hang the bike from a bike repair stand (if possible).
A. If you do not have a repair stand, place the bike on
the floor and engage the kickstand. Use caution as the
bike could tip over prior to install the front wheel, even
with the kickstand engaged.

Unboxing and Assembly
10
Shell
RIDE
4- Adjust the Seat
Your seat height is adjusted by a quick release. Pull the quick release
lever, Insert your seat post to at least the minimum insertion line
marked on the post. Tighten the adjusting nut by quick release lever,
then push the quick release lever to the closed position. The seat angle
is adjusted with the nuts that attach the seat to the seat rail. Ensure
that the nuts are tightened firmly and that the seat does not move
forward or back while you are sitting on it.
6- Aligning and tightening the handlebars
Using an allen key, loosen the 2 side bolts (B) and turn the
handlebar through 90 degrees. Adjust the tension of the
headset by turning bolt A if necessary but first release the
side bolts, adjust then re-tighten. Note that the you only need
to tighten the bolt A until the handlebar assembly and fork
have no free play, but so that the handlebar assembly and
fork can still freely turn left and right. If the wheel does not
move freely left to right the top cap bolt is too tight. If this is
the case turn the top cap bolt back some.
5- Adjustment of the seat post
The adjustment method is as follows :
Loose the hand release of the seat post, take out the seat post; Adjust the screw, Place the seat
post back in the frame tube as former station, and tighten the clamp of the seat position.
90°

Unboxing and Assembly
11
Shell
RIDE
7- Disc brakes
Disc brakes should come from the factory
pre-adjusted to the correct braking specifications.
If your front disc brake needs to be adjusted or
does not apply adequate stopping power to the
wheel, it may need to be adjusted, please find
steps as below:
i. First adjust the clearance between the right (inside) brake pad and the disc.
Use a 5mm allen wrench to move the inside pad inward toward the disc rotor till it touches the
rotor. Back off slightly until the pad does not touch the rotor surface.
ii. Next adjust the clearance between the left (outside) brake pad and the disc:
Turn the barrel adjuster located on the front brake lever clockwise to move the outside brake pad
inward until it touches the rotor. Back off slightly (1/4 turn) until the pad does not touch the rotor
surface and the wheel spins freely.
If there is contact between the brake pads and rotor after performing the above steps bring your
bike to your local dealer for adjustment.
Wheel quick release
Rotor
Cable
clamp bolt
Caliper
Cable
barrel
adjuster

Unboxing and Assembly
12
Shell
RIDE
8- Attach the pedals
The pedals are left and right side specific. The
end near the threads will have an L or R on them,
indicating Left and Right. The right side is threaded
normally, and the left is reverse threaded. This must
be screwed in opposite to the right (to the left).
Thread in by hand and tighten by wrench!
DO NOT CROSSTHREAD!
9- Pump tires to desired pressure
The range for the tires is usually from 5psi to 30psi. You can find this indication on the tire.
i. 5psi is the lowest the tire is rated for.
ii. 15-25psi is the recommended range for most off-road riding, depending on your preferences
and the specific terrain you are traveling.
iii. 25-30psi is for pavement for hard, smooth surfaces.
10- Check all bolts for tightness, including
A. Stem (handlebar and steer-tube bolts)
B. Wheel axles
C. Crank arms
D. Chainring
E. Kickstand

Control and charging functions
13
Shell
RIDE
Throttle:
The SR-3B is equipped with a throttle with an on/
off switch. Like on a motorcycle, throttles are de-
signed to let the user apply 0-100% of the motor’s
power at will. The throttle either acts independent-
ly, or in tandem with a pedal assist sensor.
Brakes:
The brakes on an electric bike are the same as on a normal bike, with one exception: most have
integrated cutoff switches which kill the motor when activated. These “inhibitor” switches are a safety
feature designed to prevent the motor from accidentally engaging and causing injury. If for any rea-
son you need the motor to stop turning, remember to simply squeeze one of the brake levers.
Battery Removal:
step 1: Insert the key to the battery.
Turn the key clockwise.
step 2: Grasp the battery with both hands and
slide up to remove for easy charging.
The battery is the power source of the bike and has it’s own on/off switch. To charge the battery,
remove the rubber cap on battery. Plug the charger into the power outlet and wait until the light on
the charging unit is illuminated. Plug the other end of the cord into the bike. The light will turn green
when it’s fully charged.

• Never remove the battery from the casing.
• Charge the battery every 2 months for at least 1 hour, even if the e-bike has not been in use,
otherwise it will lose capacity.
• Regular charging protects the battery from total discharge.
• Never heat the battery or throw it into an open fire.
• Never dispose of battery cells in household waste.
• Never get moisture on the battery contacts.
• The optimal operating temperature for the battery is between 50°F (10°C) and 85°F (30°C).
Above and below this temperature, the power output will deteriorate, resulting in a reduced range.
• The e-bike may only be charged using the charger supplied. Ensure the correct voltage supply
(110 ~ 120 Vac @ 60 Hz).).
• The e-bike must not be charged if the charging cable is damaged. Please contact customer service.
• A battery’s service life and performance depends on its age, care and how often it has been used.
Battery usage
14
Shell
RIDE

• For optimum battery life, charge and store the e-bike in a dry and clean environment, preferably at
a temperature between 45 - 60°F (7 - 15°C).
• Charging the e-bike takes up to 4.5 hours. If the charger is permanently connected to the battery
and power supply, this will have a negative effect on the battery life.
• The e-bike and the charger must not be covered during charging.
• Depending on the charge state, lithium batteries have a freezing point of approx. -4°F (-20°C)
to -13°F (-25°C). If a battery cell freezes, it will be irretrievably destroyed and the whole battery
will need to be replaced. A lithium ion battery loses capacity at low temperatures, just like
conventional batteries.
• Compared to other battery models, lithium-ion batteries experience very little self-discharge and have
a very low memory effect, but they must be charged periodically.
• Please note that an over-discharged battery will be irreparably destroyed and will have to be replaced
for a fee. The battery should also never be completely discharged during operation.
15
Battery usage
Shell
RIDE

• Allow the battery to charge fully before using the e-bike for the first time.
• Check your e-bike before every ride (see the section on “storage, maintenance and cleaning”).
• Fold the side stand up before riding to avoid accidents and injuries.
• Wear comfortable clothing and suitable sturdy shoes while riding.
• Before riding the e-bike for the first time, make sure you have plenty of space and ensure that
there are no obstacles in the way.
• Wear a safety helmet for your own safety.
Before using your e-bike
Wear a safety helmet and
protectors for your own safety.
16
Shell
RIDE

Getting started
17
Shell
RIDE
1. Powering the Unit On
A. Make sure the battery is fully inserted and locked into the bike.
B. Get on the bike, ready to ride.
C. Turn the battery on by press the power switch to the ON position
D. Press and hold the power button on the display
E. Use the power button on the throttle to shift your pedal assist power level
F. To turn off, press and hold the power button again for a couple seconds.
You can also turn the bike off at the battery.
2. Riding Tips to Maximize Your Battery
To increase battery life and reduce wear on the components, follow these tips:
A. Use the pedals as often as possible, especially when starting. DO NOT simply rely on the
throttle for power.
B. Minimize starts and stops by looking ahead and planning the route.
C. Use higher tire pressure
3. Before First Ride (After Initial Build and Inspection)
A. Adjust seat to comfortable height.
B. Adjust the seat rails positioning for comfort.
C. Adjust the handlebar and brake lever position to your liking.
D. Squeeze brake levers and test the braking power with the bike in a stand, or just walking alongside the
bike. DO NOT attempt to ride the bike if the brakes are not adjusted properly.
4. Before Every Ride
A. Check tire pressure and tread wear. Check the sidewalls for damage.
B. Check the brakes, ensure brakes have adequate power and appropriate amount of brake pad remaining.
C. Check that wheels are straight and turning freely. Ensure spokes are consistently tight.
D. Check the Chain tension and lube the chain to reduce friction.
E. Check that the handlebars and stem are secure; and tighten all stem bolts to 7 N·m.

Display Functions
18
Shell
RIDE
1. Display name and model
Intelligent LCD display for e-bike; model: YL81C.
2. Specifications
• 36V /48V power supply
• Rated working current 15mA
• Maximum working current 30mA
• Leakage current at power-off <1 uA
• Working current at the supply controller end 50mA
• Working temperature -20-60°C
• Storage temperature -30-70°C
3. Appearance and dimensions

Display Functions
19
Shell
RIDE
4. Function overview and functional area layout
4.1 Function overview
Display YL8 l C provides a variety of functions to meet the riding needs of users, including:
• Battery level indicator
• Assist level adjustment and indication
• Headlight indicator
• Speed indicator (including real-time speed, maximum speed (MAXS) and average speed (AVG))
• Distance indicator (including ODO and trip distance (Trip))
• Error code indicator
• Bluetooth connection indicator (reserved)
• Parameter setting function
4.2 Functional area layout
4.3 Button definitions
There are three buttons on the operating unit of display YL81C, i.e., the on/off (power) button ,
plus button and minus button .

Display Functions
20
Shell
RIDE
5. General operation
5.1 Power on/off
By pressing and holding the power button, the display will start to work and the working power supply of the
controller will be turned on. In the power-on state, by pressing and holding the power button, your e-bike will
be powered off. In the power-off state, the display will no longer use the battery power, and its leakage current
will be less than 1 uA.
• If your e-bike is not used for more than 10 minutes, the display will be automatically powered off.
5.2 Display interface
After the display is turned on, the display will show the real-time speed (km/h) and the trip distance (km) by
default. By pressing the power button, the information displayed will be switched between the trip distance (km),
ODO (km), maximum speed (km/h) and average speed (km/h). When the distance reaches 9999.9 km, it will
be automatically reset to zero.
Table of contents
