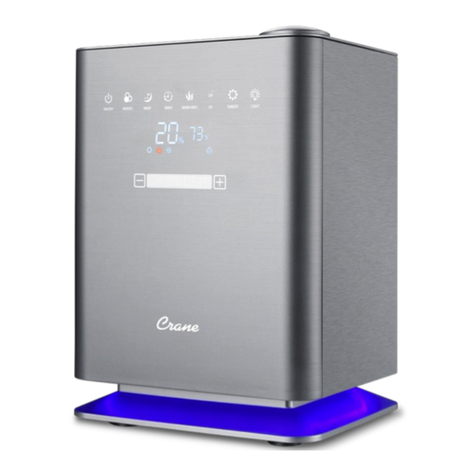
SHENZHEN LIANCHUANG TECHNOLOGY GROUP CO. DF-HU28010 User manual

Cool and Warm Mist Ultrasonic Humidifier
DF-HU28010 User's Manual
Please read the manual carefully before use.

2
IMPORTANT SAFETY INSTRUCTIONS
1. Read all instructions carefully and keep this manual for future reference.
2. This appliance can be used by children aged from 8 years and above and persons
with reduced physical, sensory or mental capabilities or lack of experience and
knowledge if they have been given supervision or instruction concerning use of
the appliance in a safe way and understand the hazards involved. Children shall
not play with the appliance. Cleaning and user maintenance shall not be made by
children without supervision.
3. If the supply cord is damaged, it must be replaced by the manufacturer, its service
agent or similarly qualified persons in order to avoid a hazard.
4. Unplug the appliance during filling and cleaning.
5. Please fix the cord properly to prevent stumbling or breakage of the humidifier.
6. Do not let the appliance touch any hot surface.
7. To avoid electric shock, do not place the cord, the plug or the appliance into water
or other liquids.
8. Remove the plug from the electricity supply before you move the humidifier, fill
water, clean, do maintenance, and when the humidifier is not in use.
9. Do not operate the appliance with a damaged cord or plug or after the appliance
malfunctioned or has been damaged in any manner. Return the appliance to our
customer service center for examination.
10. Please make sure there is water in the tank before turning on the humidifier.
11. Do not let the cord hang over at the edge of a table or counter or touch hot
surfaces. Do not place the appliance on an unsteady or cloth-covered surface.
12. Please check the power cord & the plug first to see if they are normal, and check
the body to see if there are any cracks or damages. If there are any abnormalities,
please call the customer service hotline for assistance.
13. Do not touch the water or the parts in the gutter while the humidifier is working or
else you would be hurt.
14. Never touch the transducer with sharp or hard objects.
15. Do not pour water into the gutter directly.
16. Do not spray any detergent such as bug or mosquito killer into the fan to prevent
damaging the plastic material.
17. The appliance is for household indoors use only. Do not use at outdoors or for any
commercial or industrial purpose.
18. This appliance is not intended for use by people (including children) with reduced
physical, sensory or mental capabilities, or lack of experience and knowledge,
unless they have been given supervision or instruction concerning use of the
appliance by a person responsible for their safety.

3
19. Children should be supervised to ensure that they do not play with the appliance
and packaging materials.
20. Please use pure water for cleaning the humidifier instead of any cleansers.
21. Do not disassemble the humidifier.
22. If long time no use, please unplug the appliances. (Do not need to connect to the
ground)
23. Do not pour the rest water in the gullet with plug in, or it will damage the
energy-changeable appliance.
24. You can use the appliance for 5-6 hours without stop when the water is full. Do
not need to add any water.
25. Do not pour water over 40℃
℃℃
℃into the tank, otherwise the color or shape might be
changed.
26. To make sure the humidifier work well and avoid accidents, please choose
carefully the places where you put the humidifier:
a) It should be plain and firm
b) It should be far from heat sources or sunlight
c) It should be far from furniture, walls, curtains and home appliances,
otherwise they may be affected with damp.
d) It should be with a normal temperature(5℃-40℃), otherwise the humidifier
may be destroyed in the cold environment.
27. Drain water from the gutter and tank when the temperature is under 0 ,℃
otherwise the water will be frozen and the units may be destroyed by ice.
28. Do not let water flow into the main body from airflow outlet. Wipe with dry towel
when there is water on the outside of the main body.
29. Do not put metal, chemical or cleaning mixture into the gutter, otherwise the
atomization may not go well.
30. Do not move when the gutter is full of water, otherwise the water may flow into
the main body which will cause damage to the units.
31. There is potential interference when it is Working. So please keep the device at a
distance with people and some items.
32. This device complies with part 18 of the FCC rules.
PARTS DESCRIPTION

4
Display (see more detail at the end of the files)
Six touch control icon.
ON/OFF HI/LO Humidity setting Timer Warm mist Sleeping Mode
Inside view:
Water tank
Water tank cover
Base
Base cover
Nozzle top-
fill water cover
Front
panel

5
F
EATURES
1. Ultrasonic humidifier,
2. Touch control.
3. Cool and warm mist optional.
4. Humidity setting and display(40% 50% 60% 70% CO).
5. Hi and low modes for mist control.
6. timer(1h~12h).
7. Lack water protection
8. The LED brightness will be 30% dark if there is no operation within 1
min.
9. Automatic humidity control.
10.Sleeping mode
11.Automatic water supply function
HOW TO USE
The installation of water tank:
Install the water tank directly into the body, or take off directly.
Warning: when move humidifier, please make sure use both hands to move products
from bottom of both sides, not only carry the water tank, otherwise the product will be
broke in danger.
Adding water to the tank
Top fill water:
1. Put the humidifier on a horizontal surface. Take the tank out from the
humidifier.
Floater Heating elements Silicone plunger
Transducer Air outlet Brush’s position

6
Note: Do not add water to the base directly.
2. Take away the top-fill water cap, you can add water from it directly.
3. Put the filter and the tank back. There will be “gurgling” sounds and air
bubbles would appear once the tank is placed correctly into the
humidifier. Water in the tank would then pass through the filter to be
purified, sterilized and softened, which would take 1 to 2 minutes. Once
there are no more air bubbles, this indicates that there is sufficient water
in the gutter and is now ready for the humidifier to generate mist.
Warning: Do not use other water except tap water (drinking water) because other
water contains impurities, easily plant bacteria, which is bad for healthy.
Recommended to use purified water.
Operation
(
((
(1)
))
)Put on the power, all LED will lighten for 2 seconds and sound BiBi.
The humidifier will stand by. Except the ON/ OFF icon, other icons are
invalid.
(
((
(2)
))
)ON/OFF:
::
:
①ON:Press the ON/OFF icon, the humidifier will start. All LED will be on for 1
second and off for 0.5 second. Then the screen will display Hi for 1
second and start to detect the water level. After 1 second, if there is
water, it will start to work.(If there is no water, refer to POINT 8.)
The default status:
a) The humidity setting is defaulted as continuous working;
b) Timer OFF;
c) DC fan ON;
d) Cool mist;
e) HI Mode humidifying;
f ) The matrix screen will display the current humidity;

7
②OFF:Press again the ON/OFF icon. The matrix screen will display OFF
for 1 second, the buzzer will sound “Bi—”and then standby:
a) DC fan OFF;
b) PTC OFF;
c) Screen OFF;
(
((
(3)
))
)HI/LO Mode Setting:
::
:
a) Default HI Mode when start;
b) Press once, it changes to Lo mode and the humidity will become
smaller. Display LO;
c) Press again, it changes to Hi mode and the humidity will become
bigger. Display HI
d) The humidity is as below when HI/LO mode:
Mode PWM modulation
degree Humidity( it can change as the
customer’s requirement)
HI 100% 350
ml
LO 60% 200
ml
(
((
(4)
))
)Cool and warm mist:
a) Default Cool mist when start;
b) Press the Cool/warm icon, it shifts to warm mist. PTC ON, Display HOT
c) Press the Cool/warm icon again, it shifts to cool mist. PTC OFF, Display
HOT firstly for 1 second and then display . The middle line will
flicker for 2 seconds.And then return to usual display.
d) Press this icon for three times, it will return to the first status.
(5) Timer (1-12h)
a) Press the timer icon, the time will change from
1h-2h-3h-4h-5h-6h-7h-8h-9h-10h-11h-12h-00h, 00h means no timer. If set
the timer, it will start count down, when the time becomes 0h, the humidifier
OFF (no sound). When counting time, you can add the time by pressing the
icon. Press once, add 1h, max is 12h;
b) time display as shown at the end of the file;
(6) Humidity Setting:
::
:
Default as continuous humidifying. Press the humidity setting icon, it will shift
from 40%, 50%, 60%, 70% and CO (continuous humidifying)
(7) Sleeping mode:
::
:
①Press the sleeping mode once, enter the sleeping mode. Under this
mode, it will display ZZZ for 5 seconds and then display off. The
humidifier will work as Low mode. The other functions keep the same as
setting. There is no sound when lack of water under sleeping mode. If

8
lack of water, the screen will display as POINT 8. Except ON/OFF icon
and sleeping mode icon, other icons are invalid.
②Press this icon twice. Exit sleeping mode. The buzzer on, other functions
keep the same. It will display ZZZ for 1 second and then
display .The middle line will flicker for 2 seconds. And then return
to usual display.
(8) lack water protection:
①After 1 second of turn on, if it detects as lack of water. It will enter the
protection mode.
②When working normally, the lack of water lasts for 6s, It will enter the
protection mode.
③Lack water protection
a) Fan, transducer and PTC off, turn on the automatic water supply function.
b) The screen will display NO! and , shift once every second. After
1min, if it still detect as no water, it will stand by.
c) The buzzer will sound for three times. BI-BI-BI,first one is when detect lack
of water firstly, second one is when lack of water lasts for 30s and third one
is when lack of water lasts for 1min. After 1min, if it still detect as no water, it
will stand by.
d) After turning on the automatic water supply function, detect the water level
every 6 seconds. Within 10 times of detecting water, if there is water, it will start
to work. If no, it will stand by.
④The lack water protection ON, only ON/OFF icon take effect.
(9) automatic water supply function:
::
:
automatic water supply function ON, once water tank is lower than the lowest
water level, ac solenoid valve will automatically add water, once added to
the highest level, the ac electromagnetic valve automatically stop adding
water.
(10) Automatic Humidity control
When the environment humidity is lower than the setting humidity, it will work;
otherwise, it stands by. When setting CO, no matter the environment humidity,
it will work.
Reminder:
This ultrasonic humidifier uses a piece of metal diaphragm to vibrate at an
ultrasonic frequency creates water droplets that silently exit the humidifier
in the form of a cool fog.
The “gurgling” sound is normal, as water would go through the filter to the

9
gutter.
The intensity of the mist would be affect by the relative humidity,
temperature of the area. It would be harder to generate mist if it is cold and
wet.
The water used should be between 4°C to 50°C and should be clean tap
water or distilled water.
MAINTENANCE & WASH
Please unplug the appliance before washing.
Wash the water tank every two or three weeks.
Maintenance for the surface of humidifier
Wipe body surface with a damp cloth, do not pour with water directly.
Maintenance for the water channel (once a week)
1. Take away the water tank
2. If there is dirty in the gullet, rub it with the brush provided then rinse it with
water.
Maintenance for filter
1. Take off the tank, unscrew the cover and take out the tank and the filter.
2. Immerse the filter into clean water. Clean the impurities on the non-woven
fabric and wash the water filter.
3. Fix the water filter.
Maintenance for water tank
1. Take off the tank, drain the left water of the water tank
2. Add on a third of the water to the water tank, and screw the tank cover, shake
up and down, pour out the water. Or put your hand in the water tank, with the
brush or cloth to clean, wash and rinse again,
3. Add clean water to the water tank and put water tank back.
Warnings:
Do not wash it with soapy water. You should wash it with pure water.
When washing the appliance, avoid water from splashing into the inner parts of
the appliance or the spare parts otherwise they will be wet and might cause
problems.
Do not tear down the appliance.
SUGGESTIONS
Humidifying with tap water or distilled water.

10
Clean the transducer, tank, and main body every week.
Replace water frequently.
Do not remove the water tank once it has been properly placed unless a refill of
water is needed.
Whenever you need to pour away water from the water trough, unscrew at the
bottom part of the main body (the outlet) then let the water flow out.
Keep the tank and gutter dry if the humidifier is going to be left unused for a long
time.
Keep all parts of humidifier dry before packing off.
It is forbidden to touch the transducer with hard objects. Clean the transducer
with wet cloth. It is better to clean it with salt water.
COMMON PROBLEMS & SOLUTIONS
Abnormal problems Cause Solution
Power light is off, no wind
and fog
The plug is not in use and
the power is off
Put the plug in socket
correctly and turn it on
Power light is on; wind
exists but no fog.
The automatic humidity
knob is off, lid of the water
level floater is loose.
Make the tank full of
water. Turn the knob
clockwise. Tight up the lid
The odor of the fog New machine or water is
not clean
Open the water tank and
place it in the shade for 12
hours. Wash the tank or
change the water
Fog is little The energy changeable
appliance has scale, water
is dirty or long time no
change
Wash the energy appliance
and replace with clean
water
No fog There might be too much
water in the water trough.
Pour away all the water in
the water trough and put
the tank back properly.
Water is not down Floater is loose or the
inletting water lid is dirty
Tight up the lid of the
floater and wash the lid of
the knob
Environment protection

11
This marking indicates that this product should not be disposed with other
household wastes throughout the EU. To prevent possible harm to the environment or
human health from uncontrolled waste disposal, recycle it responsibly to promote the
sustainable reuse of material resources. To return your used device, please use the
return and collection systems or contact the retailer where the product was purchased.
They can take this product for environmental safe recycling.
