Shenzhen Urion Technology U80R User manual

1
Model: U80R
Instruction Manual
UPPER ARM ELECTRONIC
BLOOD PRESSURE MONITOR

2
Table of Contents
Introduction 3
Safety Information 4
Product Layout 7
Battery Installation 8
Settings 9
Preparing for a Test 11
Fitting the Cuff 12
Proper use of the Unit 13
About Blood Pressure 14
Errors 15
Care and Maintenance 16
Specifications 17
Warranty 18
EMC Declaration 19
Technical 23
3
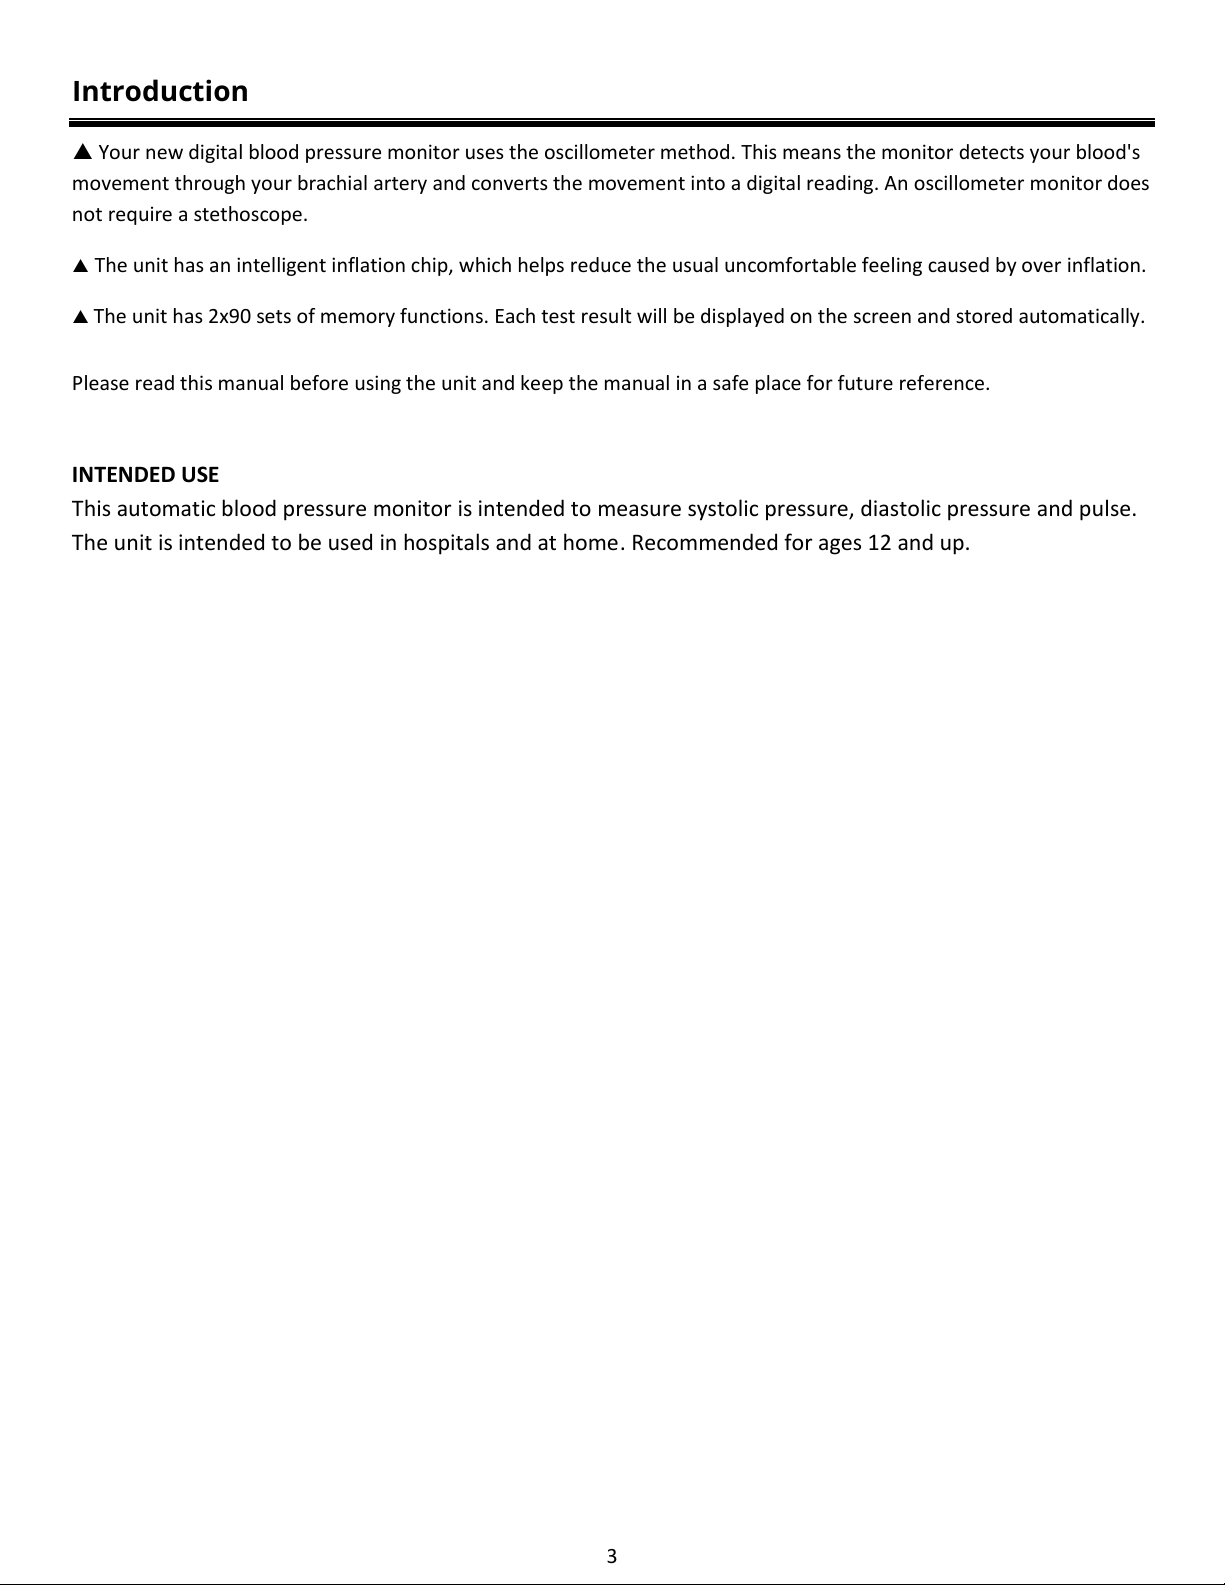
Introduction
Your new digital blood pressure monitor uses the oscillometer method. This means the monitor detects your blood's
movement through your brachial artery and converts the movement into a digital reading. An oscillometer monitor does
not require a stethoscope.
The unit has an intelligent inflation chip, which helps reduce the usual uncomfortable feeling caused by over inflation.
The unit has 2x90 sets of memory functions. Each test result will be displayed on the screen and stored automatically.
Please read this manual before using the unit and keep the manual in a safe place for future reference.
INTENDED USE
This automatic blood pressure monitor is intended to measure systolic pressure, diastolic pressure and pulse.
The unit is intended to be used in hospitals and at home. Recommended for ages 12 and up.
4
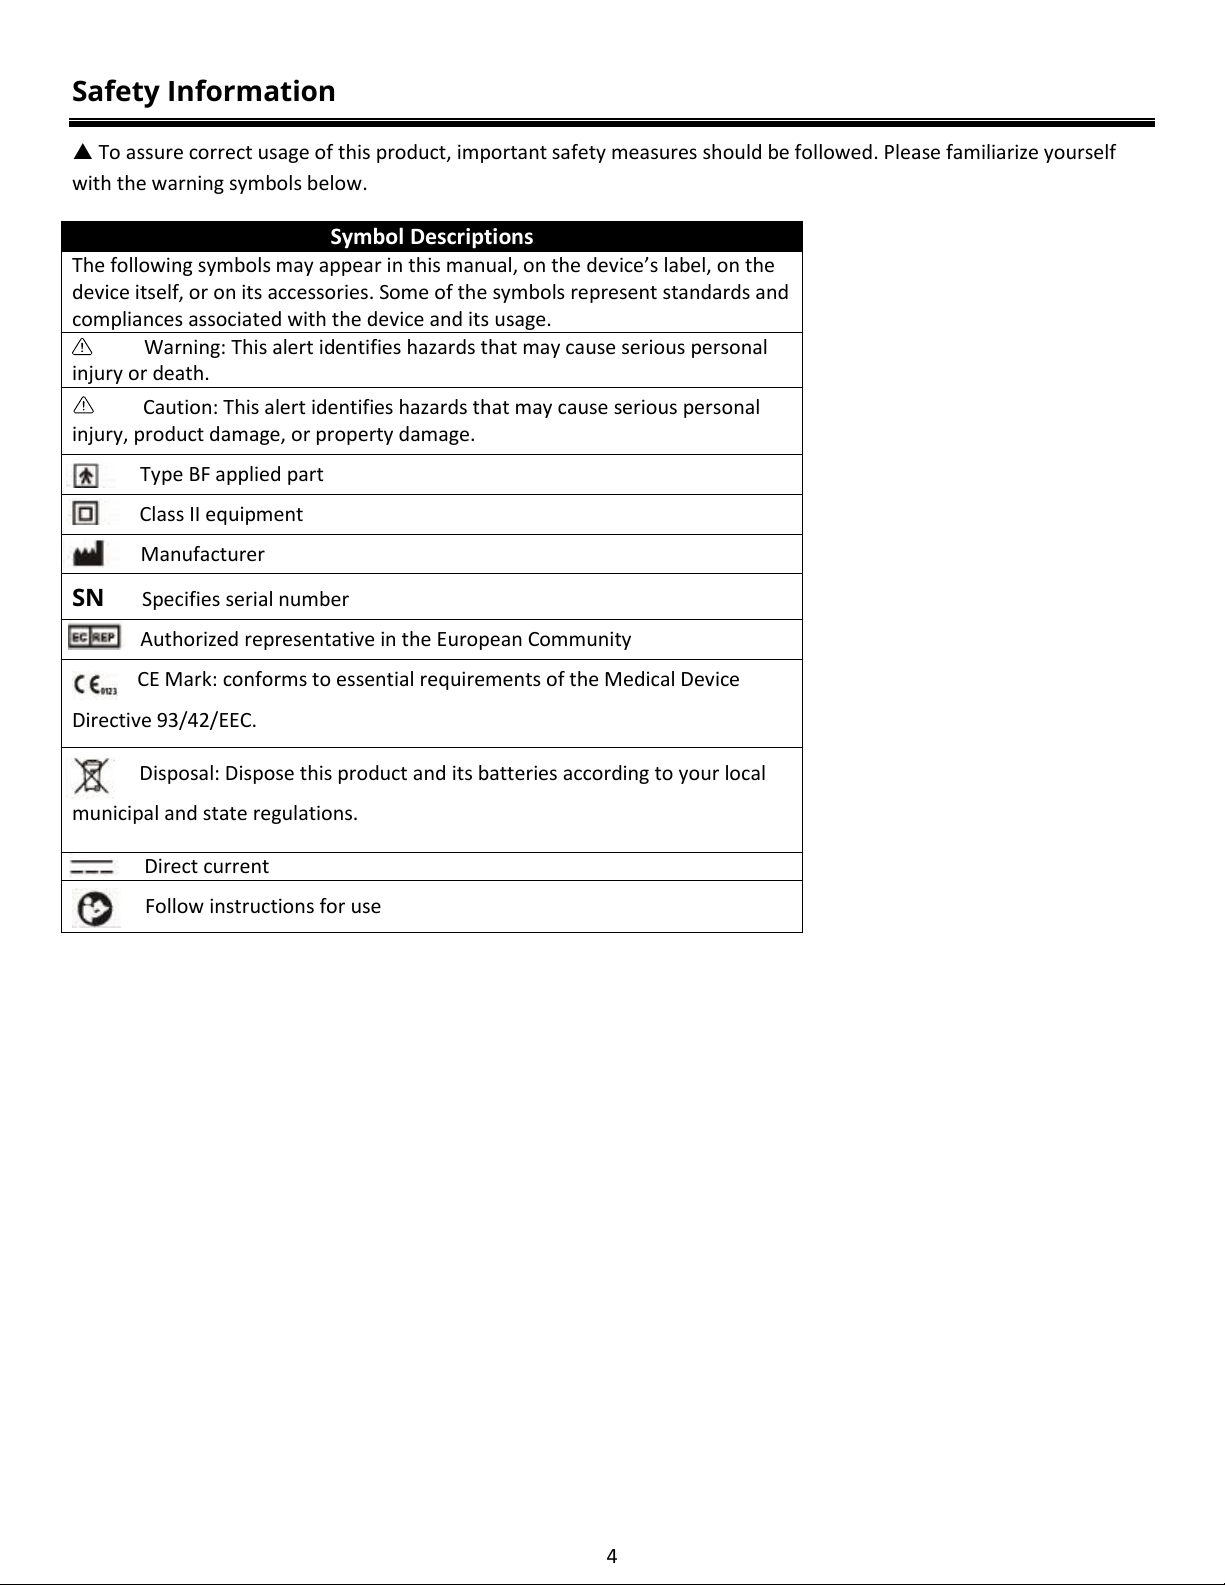
Safety Information
To assure correct usage of this product, important safety measures should be followed. Please familiarize yourself
with the warning symbols below.
Symbol Descriptions
The following symbols may appear in this manual, on the device’s label, on the
device itself, or on its accessories. Some of the symbols represent standards and
compliances associated with the device and its usage.
Warning: This alert identifies hazards that may cause serious personal
injury or death.
Caution: This alert identifies hazards that may cause serious personal
injury, product damage, or property damage.
Type BF applied part
Class II equipment
Manufacturer
SN Specifies serial number
Authorized representative in the European Community
CE Mark: conforms to essential requirements of the Medical Device
Directive 93/42/EEC.
Disposal: Dispose this product and its batteries according to your local
municipal and state regulations.
Direct current
Follow instructions for use
5
Safety Information
People with arrhythmia, diabetes, apoplexy, or blood circulation problems should use this device in addition to
physician’s care.
Contact your physician for specific information about your blood pressure. Self-diagnosis and treatment may be
dangerous. Always follow the instructions of your physician or a licensed healthcare provider.
Always keep this device out of children’s reach.
This product contains small parts. Please keep away from children.
The cuff hose may pose a choking hazard.
Do not attempt to modify this unit.
Clean the unit with a damp rag when necessary.
Do not leave batteries in the unit for an extended period without use, as they may leak and damage the battery
contacts.
Replace the batteries if the unit displays a low battery symbol.
Do not mix old batteries with new ones.

6
Safety Information
Do not use a cellular phone near the unit. It may cause a reading error.
Do not use near flammable gases (such as anaesthetic gas, oxygen or hydrogen) or flammable liquids (such as
alcohol) near the unit.
WARNING:
Do not dispose of electrical appliances as unsorted municipal waste. Use separate collection facilities.
Contact your local government for information regarding the collection systems available. If electrical
appliances are disposed of in landfills or dumps, hazardous substances can leak into groundwater and can
pose future health risks.
Classification
1. Internally powered equipment.
2. Type BF applied part.
3. Protection against ingress of water or particulate matter: IP22.
4. Not category AP/APG equipment.
5. Mode of operation: continuous operation.
The user must ensure that the device is in proper working condition and functions safely prior to use.
7
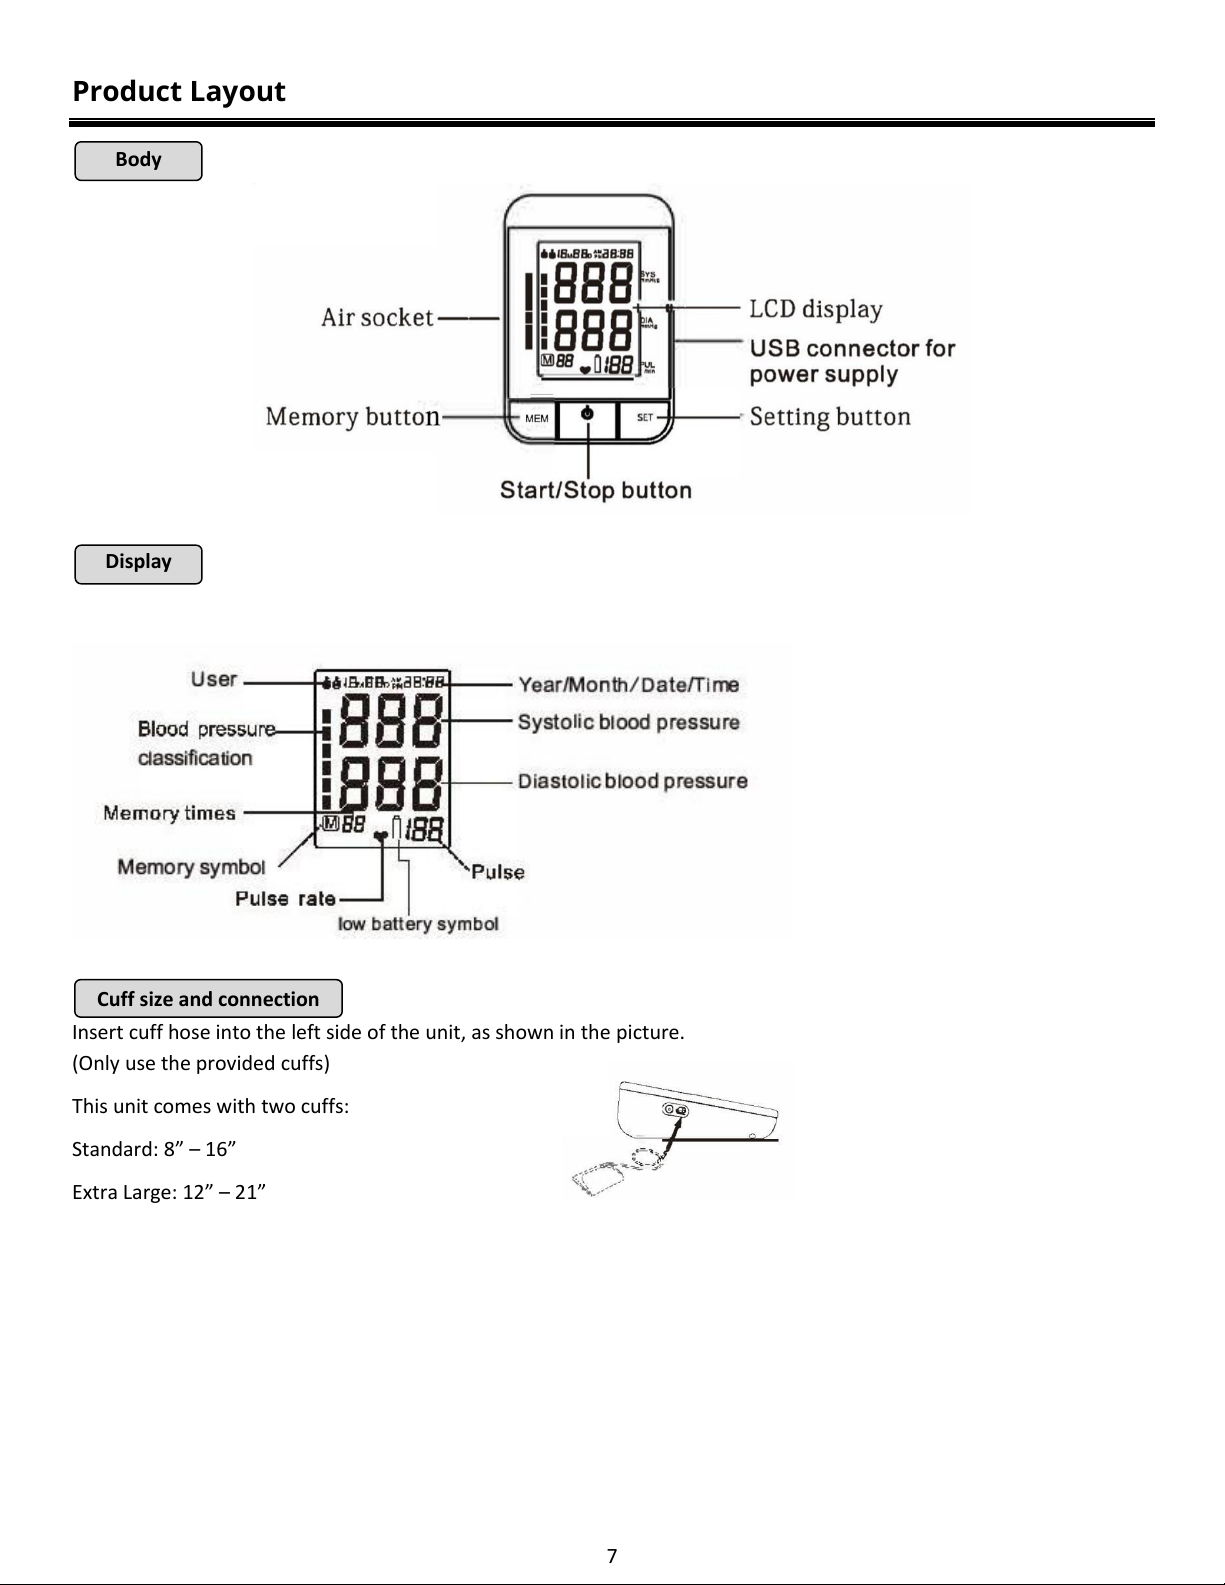
Product Layout
Insert cuff hose into the left side of the unit, as shown in the picture.
(Only use the provided cuffs)
This unit comes with two cuffs:
Standard: 8”–16”
Extra Large: 12”–21”
Body
Display
Cuff size and connection
8
Battery Installation
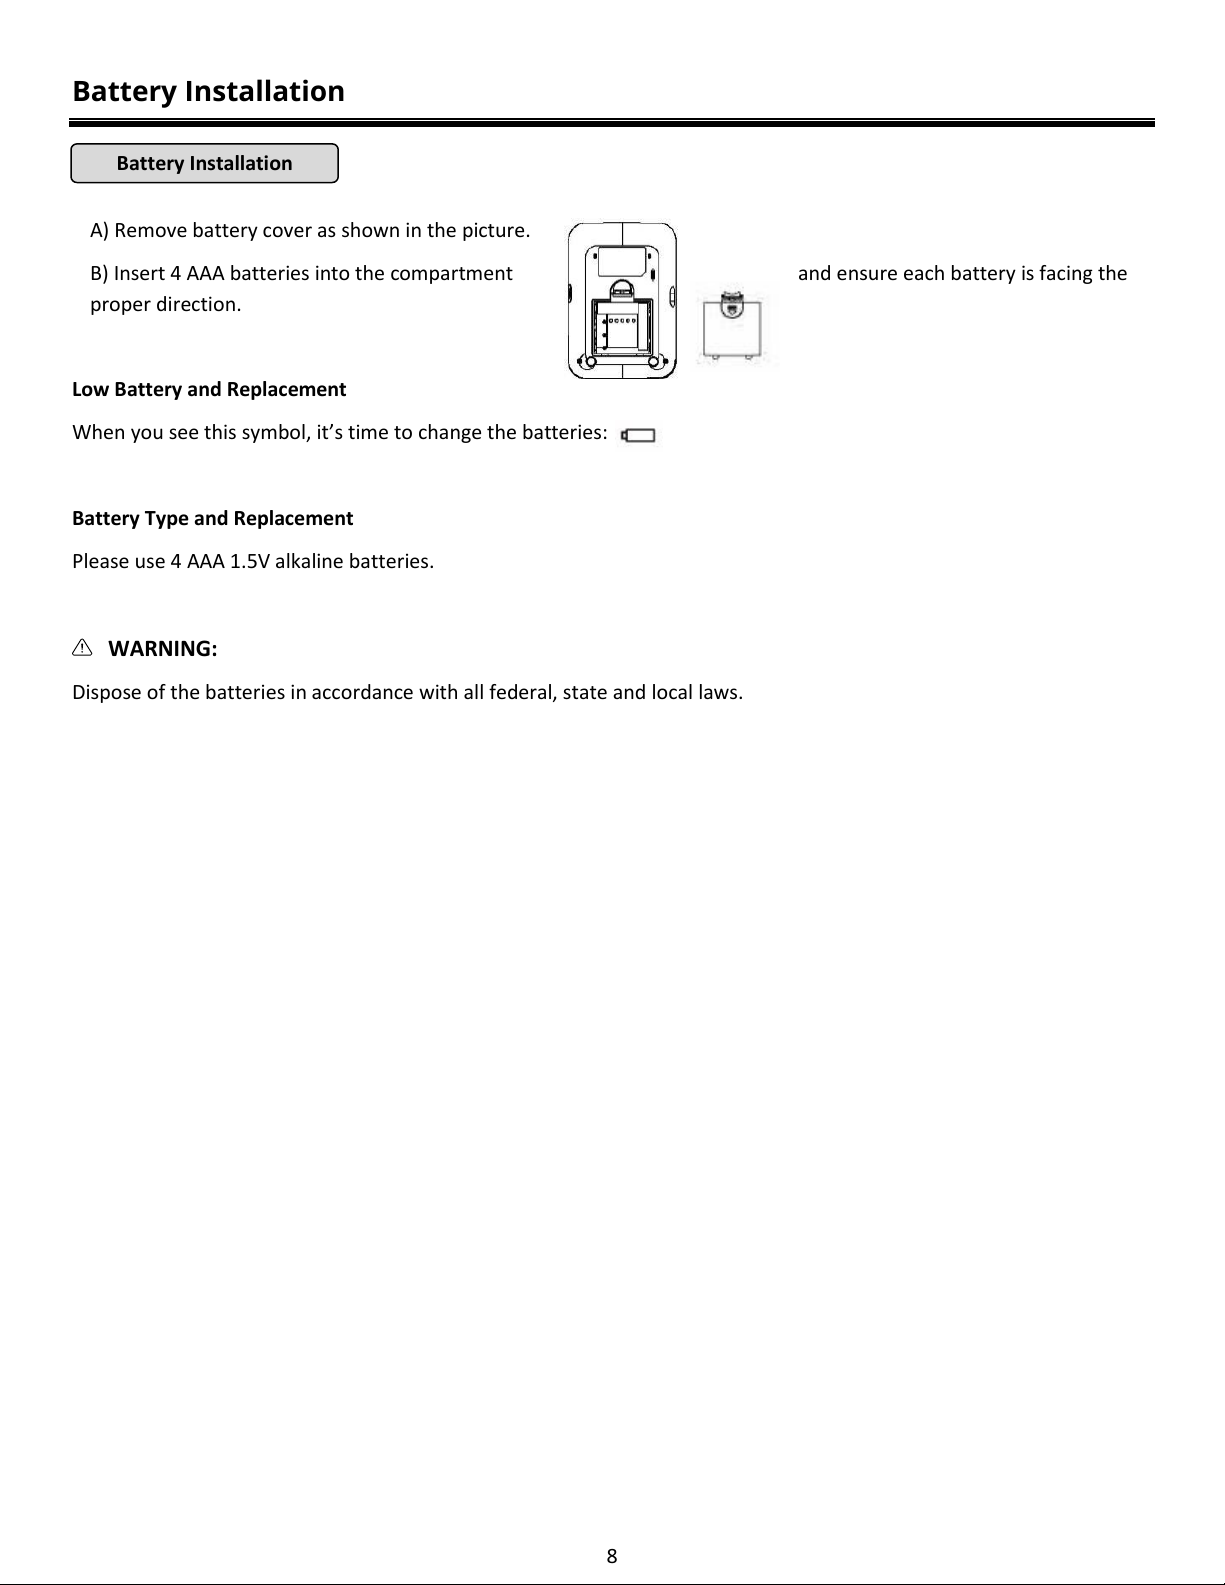
A) Remove battery cover as shown in the picture.
B) Insert 4 AAA batteries into the compartment and ensure each battery is facing the
proper direction.
Low Battery and Replacement
When you see this symbol, it’s time to change the batteries:
Battery Type and Replacement
Please use 4 AAA 1.5V alkaline batteries.
WARNING:
Dispose of the batteries in accordance with all federal, state and local laws.
Battery Installation

9
Settings
Initial Settings:
1. Choose between User A and User B
With unit OFF, press the SET button. The screen will display:
Press the MEM button to switch between User A and User B.
Press the SET button to confirm your choice of user.
The unit will now ask you to set the year.
2. Year Setting:
The screen will display and flash 20XX.
Press the MEM button to advance to the current year.
Press the SET button to confirm your choice of year.
The unit will now ask you to set the month and day.
Year setting
10
Settings
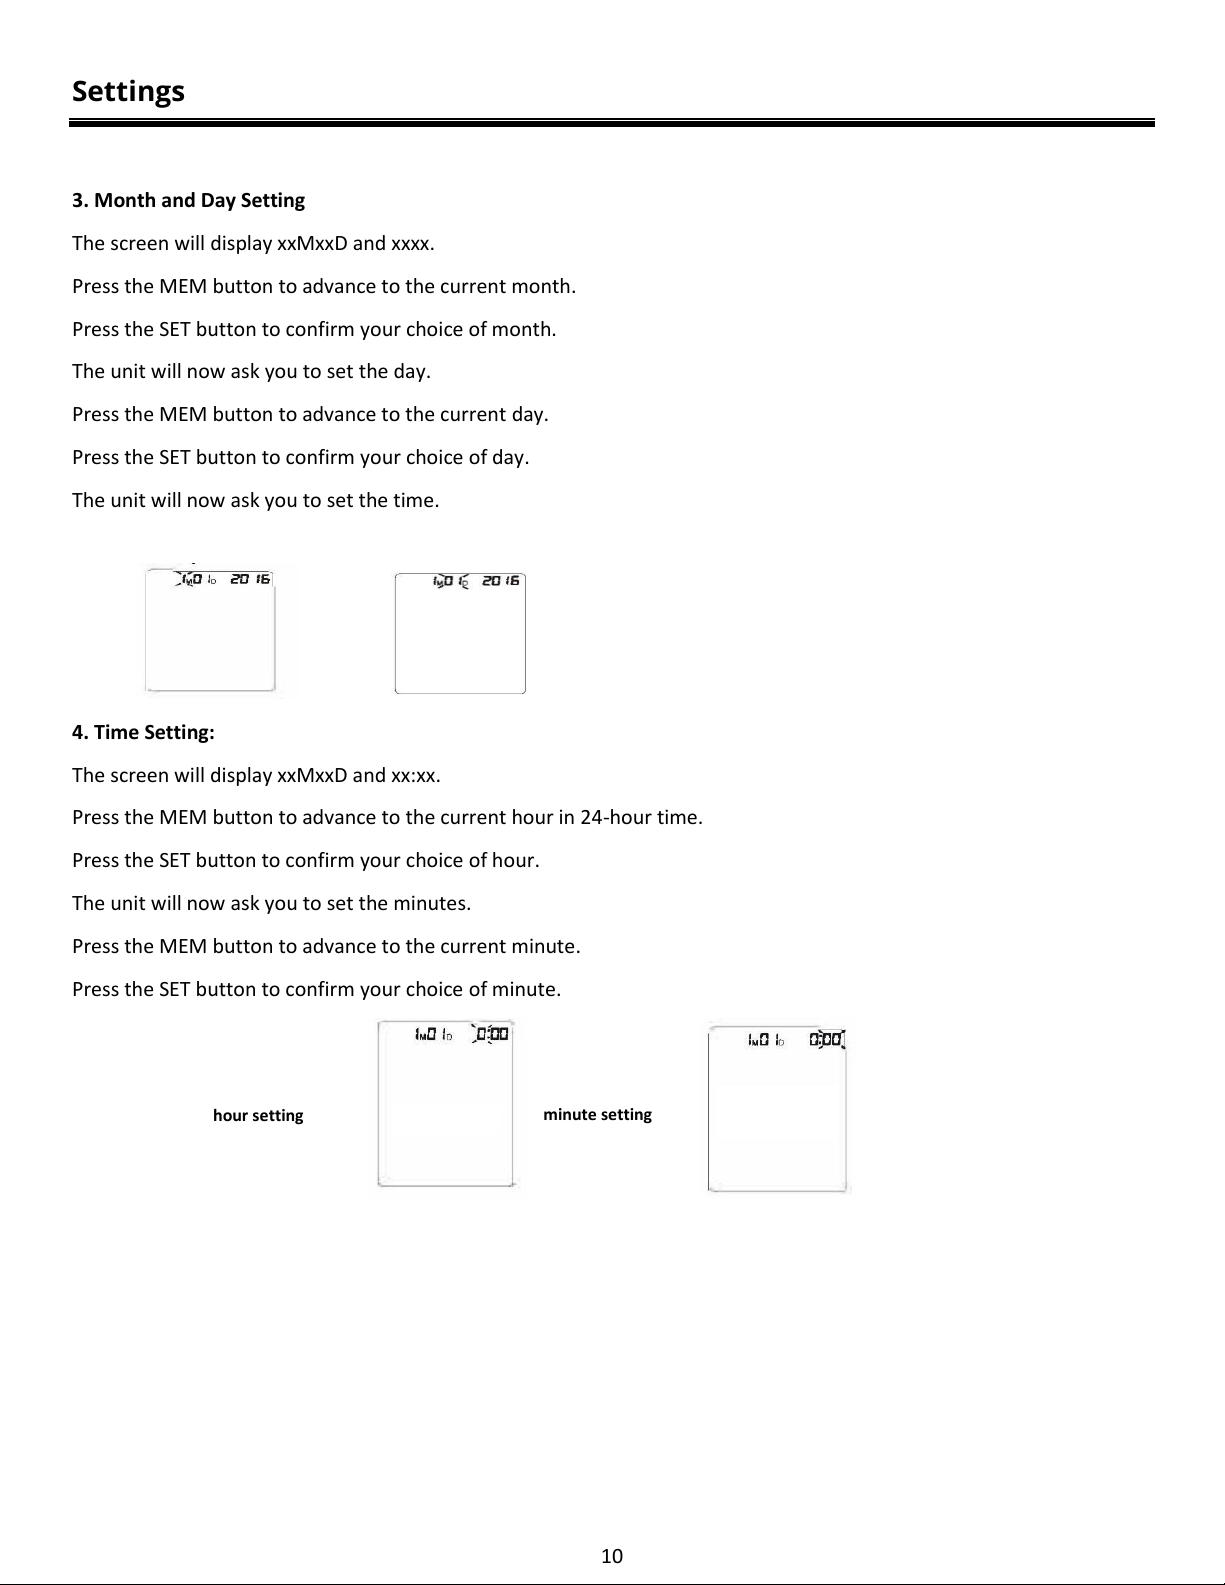
3. Month and Day Setting
The screen will display xxMxxD and xxxx.
Press the MEM button to advance to the current month.
Press the SET button to confirm your choice of month.
The unit will now ask you to set the day.
Press the MEM button to advance to the current day.
Press the SET button to confirm your choice of day.
The unit will now ask you to set the time.
4. Time Setting:
The screen will display xxMxxD and xx:xx.
Press the MEM button to advance to the current hour in 24-hour time.
Press the SET button to confirm your choice of hour.
The unit will now ask you to set the minutes.
Press the MEM button to advance to the current minute.
Press the SET button to confirm your choice of minute.
hour setting
minute setting

11
Preparing for a Test
Relax for five minutes prior to taking a test.
Avoid eating, drinking alcohol, smoking, exercising, and bathing 30 minutes prior to taking a test. Each of these
activities can influence your test results.
Roll up your sleeve to reveal your upper arm.
Always test on the same arm (typically the left arm).
Try to take your blood pressure regularly at the same time of day.
IMPORTANT:
Make sure you are sitting in an upright position.
Slip the arm cuff up your arm until it is about an inch above your elbow.
Make sure your feet are flat on the floor.
Your palm should be facing upwards.
Your stretched-out forearm should be at the same level as your heart.
The tube should be lined up with your middle finger, with your palm up.
Do not speak during the test.
12
Fitting the Cuff
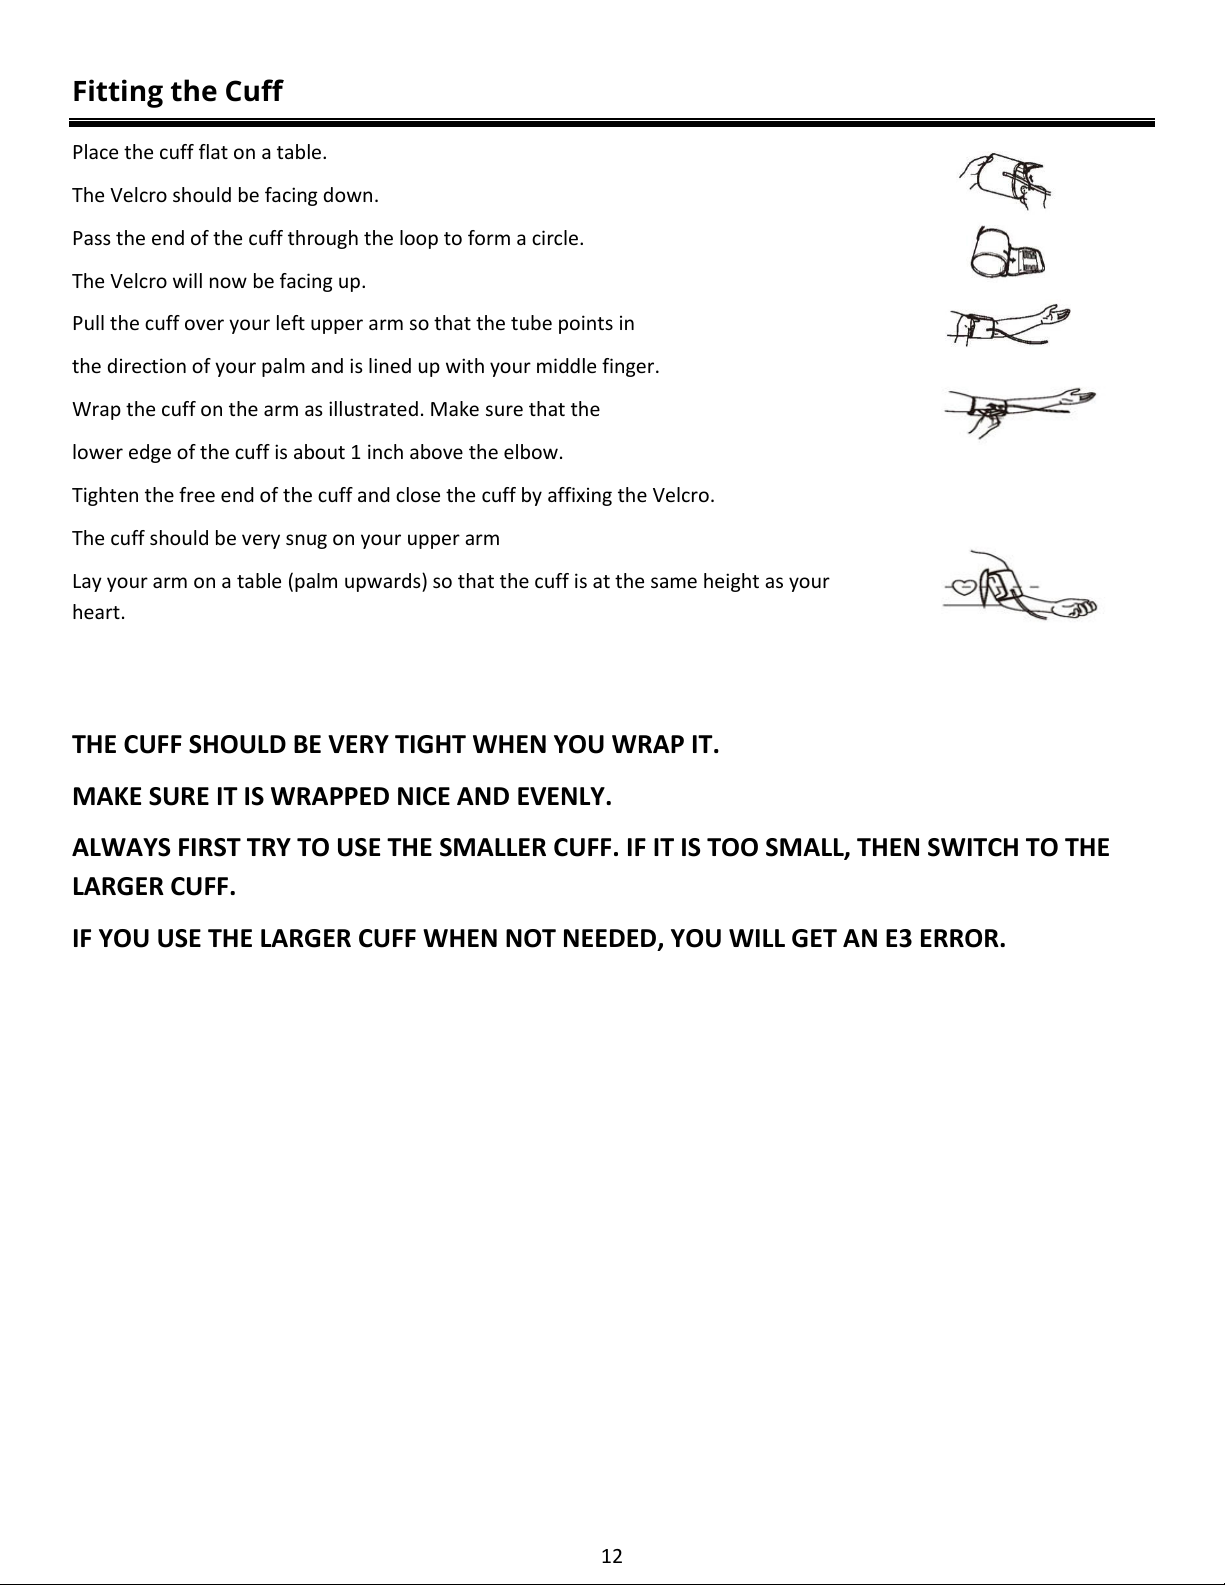
Place the cuff flat on a table.
The Velcro should be facing down.
Pass the end of the cuff through the loop to form a circle.
The Velcro will now be facing up.
Pull the cuff over your left upper arm so that the tube points in
the direction of your palm and is lined up with your middle finger.
Wrap the cuff on the arm as illustrated. Make sure that the
lower edge of the cuff is about 1 inch above the elbow.
Tighten the free end of the cuff and close the cuff by affixing the Velcro.
The cuff should be very snug on your upper arm
Lay your arm on a table (palm upwards) so that the cuff is at the same height as your
heart.
THE CUFF SHOULD BE VERY TIGHT WHEN YOU WRAP IT.
MAKE SURE IT IS WRAPPED NICE AND EVENLY.
ALWAYS FIRST TRY TO USE THE SMALLER CUFF. IF IT IS TOO SMALL, THEN SWITCH TO THE
LARGER CUFF.
IF YOU USE THE LARGER CUFF WHEN NOT NEEDED, YOU WILL GET AN E3 ERROR.

13
Proper use of the Unit
Measuring Procedure:
Once the cuff is propely fitted on your upper arm, you are ready to take a test.
Press the START/STOP button.
All symbols will appear briefly on the display.
The pump will begin to inflate.
After a suitable amount of pressure is achieved, the pump will stop, and the pressure will gradually decrease.
The heart symbol ♥on the display will start to flash.
When the test is complete, your systolic pressure, diastolic pressure and pulse will appear on the display.
Your test results will remain on the display until you switch off the unit. If no button is pressed. the device will
automatically turn off after 3 minutes.
Discontinuing a Measurement
The START/STOP button can be pressed at any time to stop a measurement.
Memory
This blood pressure monitor automatically stores 2x90 sets of results.
When the memory is full, the unit will overwrite the oldest results.
Memory Recall
With the unit OFF, press the MEM button to bring up the last three test results.
Each subsequent press will recall the three previous results.
Erase Memory
With the power OFF, Press the SET button six times. CL will appear.
Press the START/STOP button. CL will flash three times.
The memory is now erased.

14
About Blood Pressure
Blood pressure is the pressure exerted in the arteries.
The systolic blood pressure value represents the blood pressure produced by the contraction of the heart muscle.
The diastolic blood pressure value represents the blood pressure produced by the relaxation of the heart muscle.
15
Errors
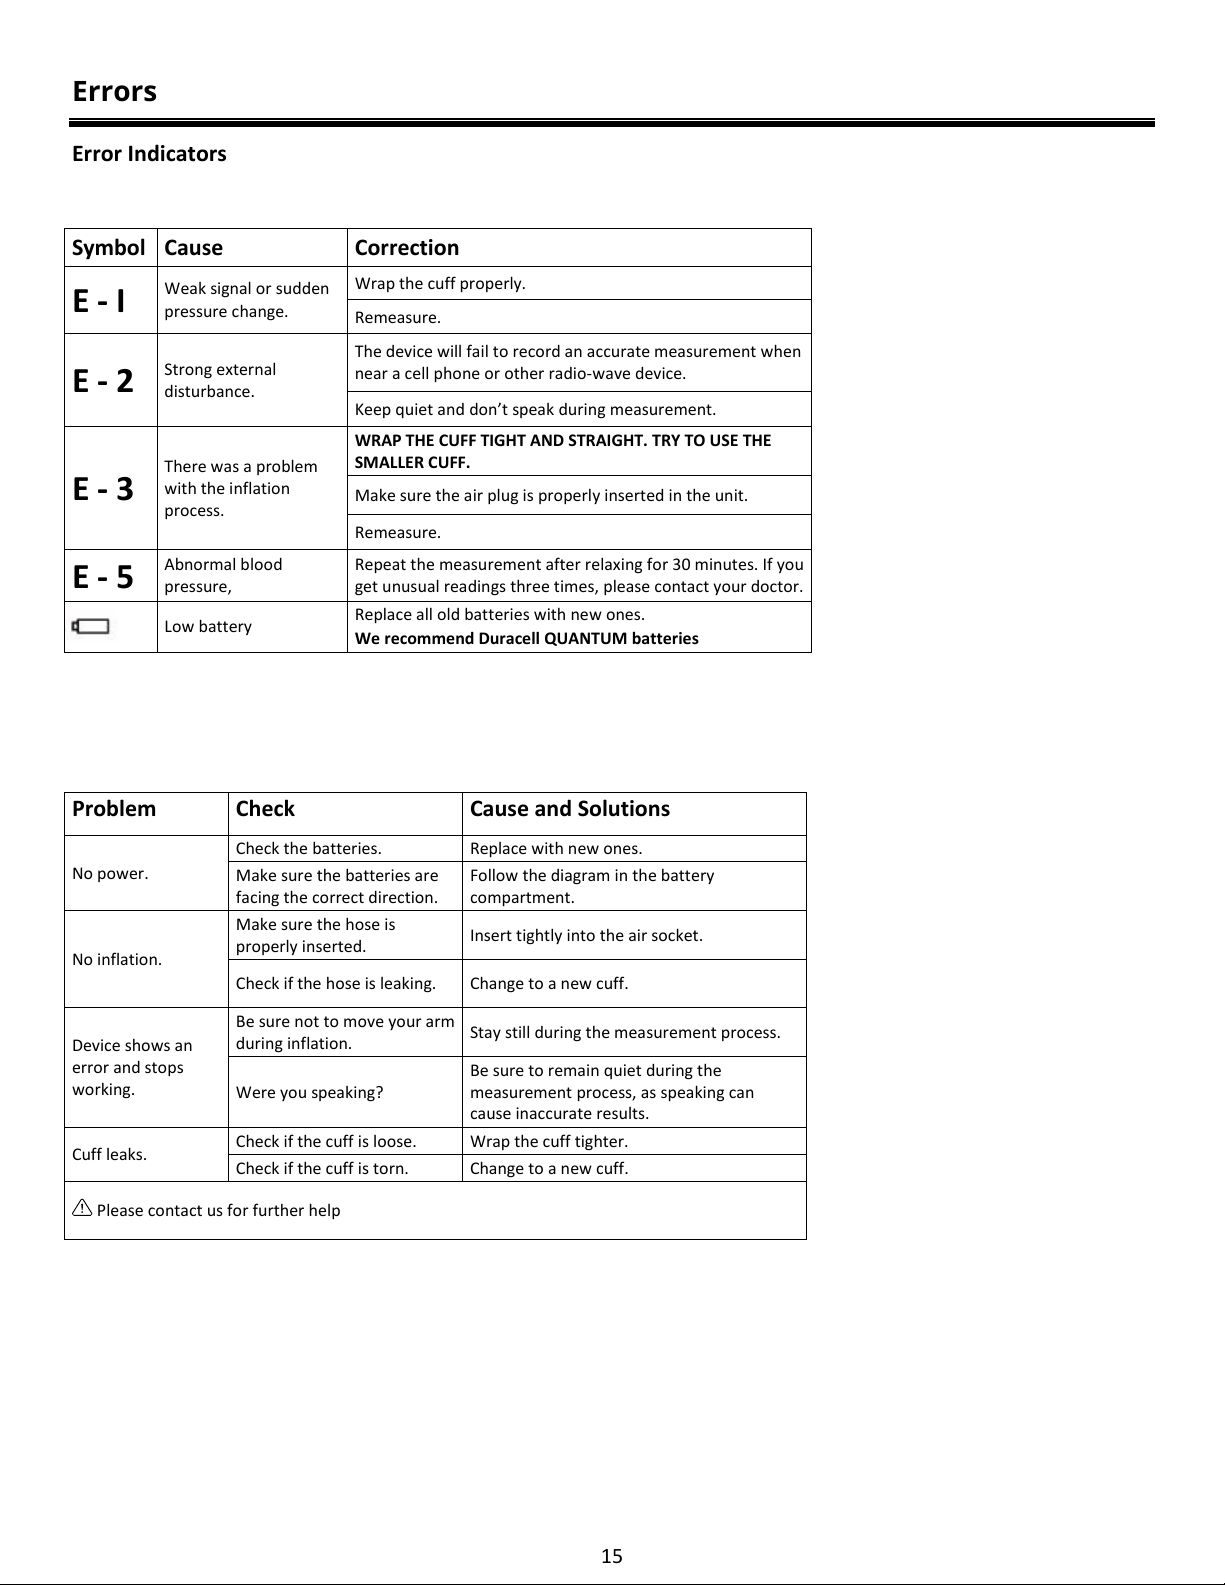
Error Indicators
Symbol
Cause
Correction
E - I
Weak signal or sudden
pressure change.
Wrap the cuff properly.
Remeasure.
E - 2
Strong external
disturbance.
The device will fail to record an accurate measurement when
near a cell phone or other radio-wave device.
Keep quiet and don’t speak during measurement.
E - 3
There was a problem
with the inflation
process.
WRAP THE CUFF TIGHT AND STRAIGHT. TRY TO USE THE
SMALLER CUFF.
Make sure the air plug is properly inserted in the unit.
Remeasure.
E - 5
Abnormal blood
pressure,
Repeat the measurement after relaxing for 30 minutes. If you
get unusual readings three times, please contact your doctor.
Low battery
Replace all old batteries with new ones.
We recommend Duracell QUANTUM batteries
Problem
Check
Cause and Solutions
No power.
Check the batteries.
Replace with new ones.
Make sure the batteries are
facing the correct direction.
Follow the diagram in the battery
compartment.
No inflation.
Make sure the hose is
properly inserted.
Insert tightly into the air socket.
Check if the hose is leaking.
Change to a new cuff.
Device shows an
error and stops
working.
Be sure not to move your arm
during inflation.
Stay still during the measurement process.
Were you speaking?
Be sure to remain quiet during the
measurement process, as speaking can
cause inaccurate results.
Cuff leaks.
Check if the cuff is loose.
Wrap the cuff tighter.
Check if the cuff is torn.
Change to a new cuff.
Please contact us for further help
16
Care and Maintenance
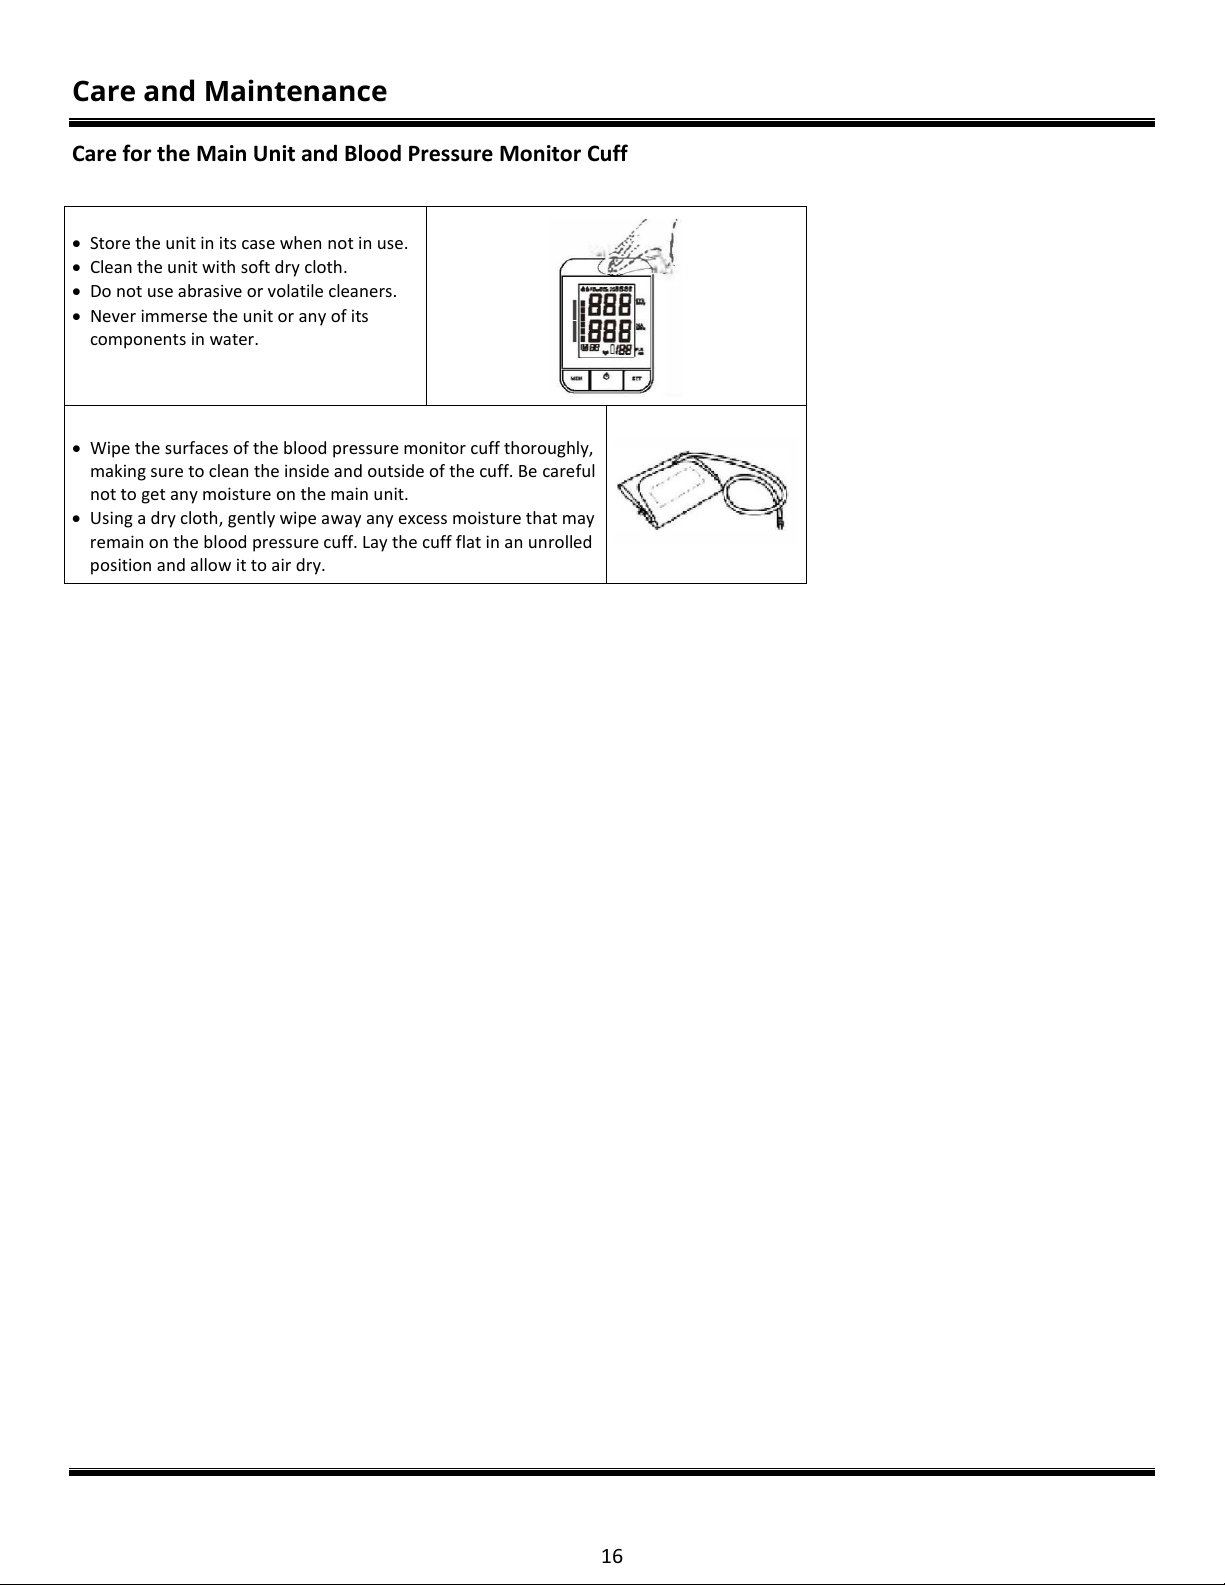
Care for the Main Unit and Blood Pressure Monitor Cuff
Store the unit in its case when not in use.
Clean the unit with soft dry cloth.
Do not use abrasive or volatile cleaners.
Never immerse the unit or any of its
components in water.
Wipe the surfaces of the blood pressure monitor cuff thoroughly,
making sure to clean the inside and outside of the cuff. Be careful
not to get any moisture on the main unit.
Using a dry cloth, gently wipe away any excess moisture that may
remain on the blood pressure cuff. Lay the cuff flat in an unrolled
position and allow it to air dry.
17
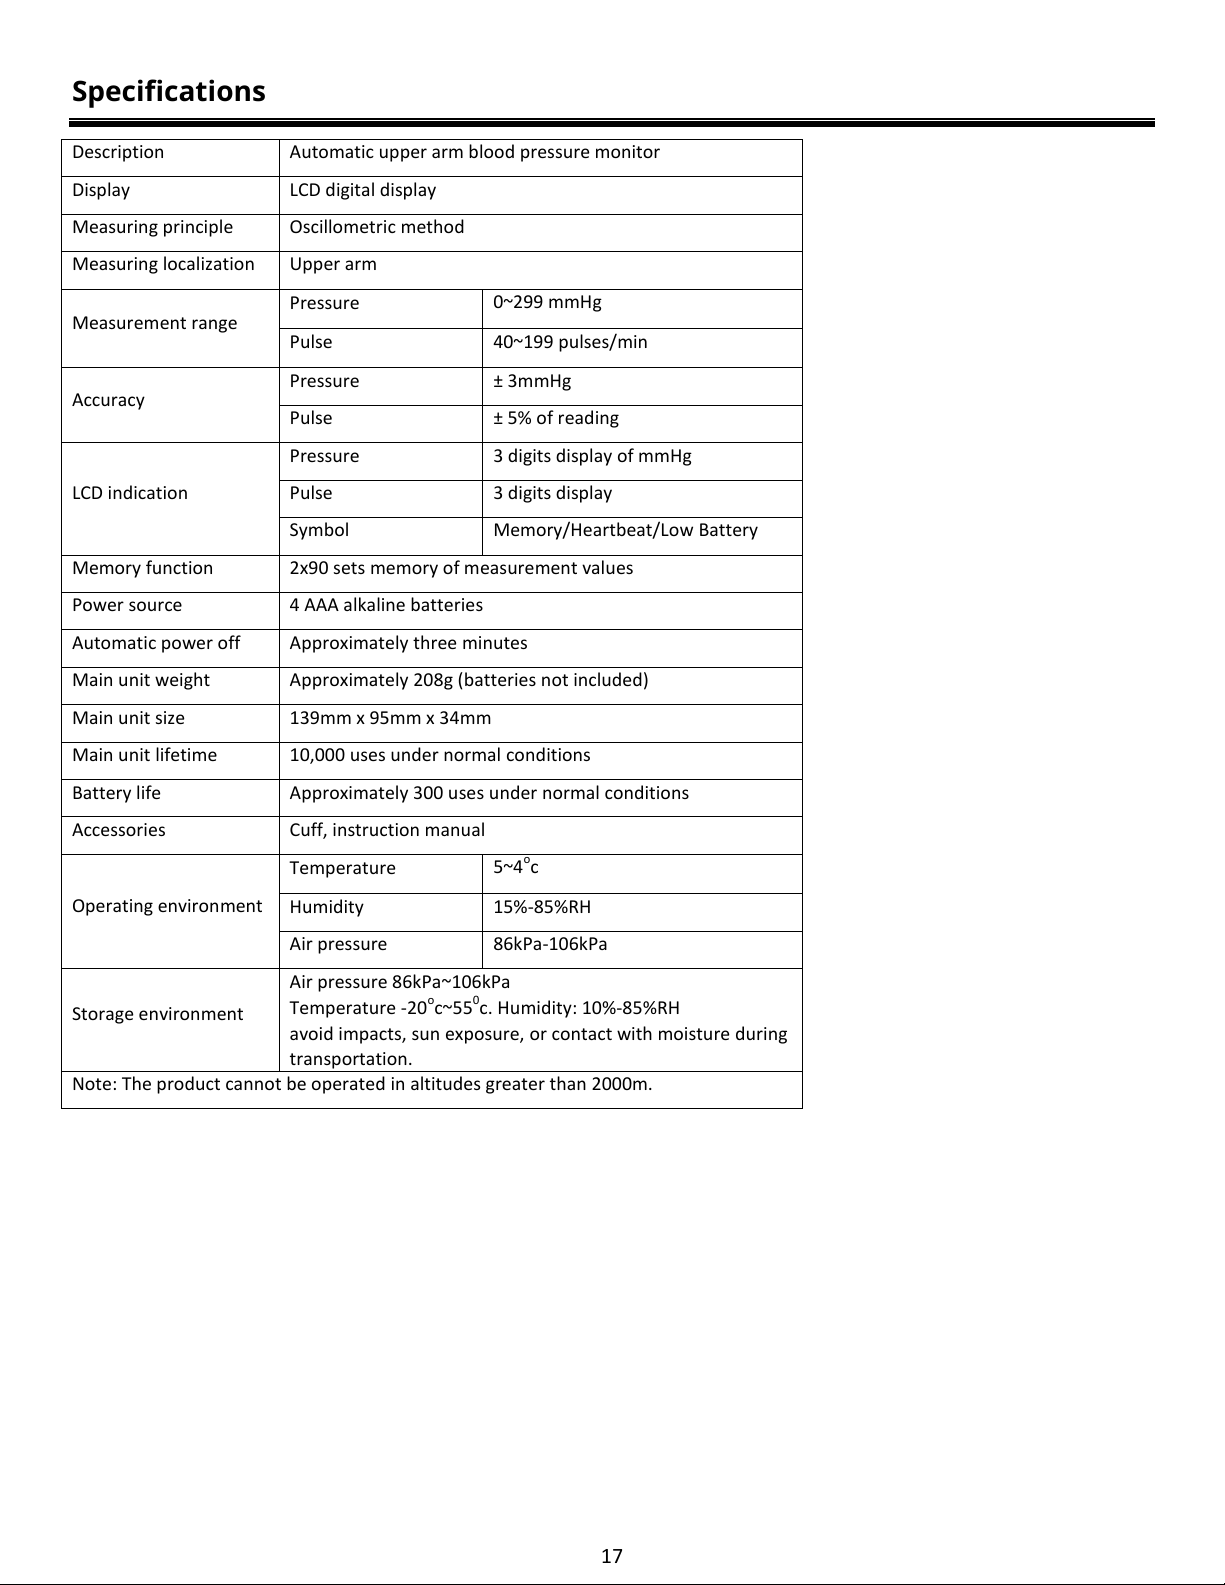
Specifications
Description
Automatic upper arm blood pressure monitor
Display
LCD digital display
Measuring principle
Oscillometric method
Measuring localization
Upper arm
Measurement range
Pressure
0~299 mmHg
Pulse
40~199 pulses/min
Accuracy
Pressure
± 3mmHg
Pulse
± 5% of reading
LCD indication
Pressure
3 digits display of mmHg
Pulse
3 digits display
Symbol
Memory/Heartbeat/Low Battery
Memory function
2x90 sets memory of measurement values
Power source
4 AAA alkaline batteries
Automatic power off
Approximately three minutes
Main unit weight
Approximately 208g (batteries not included)
Main unit size
139mm x 95mm x 34mm
Main unit lifetime
10,000 uses under normal conditions
Battery life
Approximately 300 uses under normal conditions
Accessories
Cuff, instruction manual
Operating environment
Temperature
5~4oc
Humidity
15%-85%RH
Air pressure
86kPa-106kPa
Storage environment
Air pressure 86kPa~106kPa
Temperature -20oc~550c. Humidity: 10%-85%RH
avoid impacts, sun exposure, or contact with moisture during
transportation.
Note: The product cannot be operated in altitudes greater than 2000m.

18
Warranty Information
Statement
■The unit is intended to be used by adults at home, or by a medical center, to measure blood pressure and pulse via the
upper arm.
■The unit satisfies the requirements of EN 1060-1: 1995+A2: 2009 Non-invasive sphygmomanometers, and EN 1060-3:
1997+A2: 2009 Non-invasive sphygmomanometers.
■The blood pressure measurements recorded with this device are equivalent to those obtained by a trained observer
using the cuff/stethoscope auscultatory method, within the limits prescribed by the American National Standard for
manual, electronic or automated sphygmomanometers.
■The risk of patient and user can be lowered to acceptable level.
Warranty
■The unit is guaranteed to be free of defects in workmanship and materials under normal use for a period of two years
from the date of purchase.
■Devices subjected to misuse, abuse, neglect of this manual’s contents, and unauthorized repair or modifications will
be excluded from this warranty.
The device does not require calibration.
The device is not repairable and contains no user-serviceable parts.

19
EMC Declaration
Guidance and Manufacturer's Declaration –Electromagnetic Immunity
This blood pressure monitor is intended for use in the electromagnetic environments specified below. The customer or
the user of this device should ensure that it is used in such an environment.
Immunity Test
IEC 60601 Test
Level
Compliance Level
Electromagnetic
Environment –Guidance
Electrostatic
discharge (ESD) IEC
61000-4-2
±6 kV contact
±8 kV air
±6 kV contact
±8 kV air
Floors should be wood,
concrete or ceramic tile. If
floors are covered with
synthetic material, the
relative humidity should be
at least 30%.
Electrical fast
transient/burst IEC
61000-4-4
±2 kV for power
supply lines
±1 kV for
input/output lines
±2 kV for power
supply lines
±1 kV for
input/output lines
Mains power quality should
be that of a typical
commercial or hospital
environment.
Surge
IEC 61000-4-5
±1 kV differential
mode
±2 kV common
mode
±1 kV differential
mode
±2 kV common
mode
Mains power quality should
be that of a typical
commercial or hospital
environment.
Voltage dips, short
interruptions and
voltage variations
on power supply
input lines
IEC61000-4-11
<5% UT
(>95% dip in UT) for
0.5 cycle
40% UT
(60% dip in UT) for
5 cycles
70% UT
(30% dip in UT) for
25 cycles
<5% UT
(>95% dip in UT) for
5 seconds
<5% UT
(>95 % dip in UT)
for 0.5 cycle
40% UT
(60% dip in UT) for
5 cycles
70% UT
(30% dip in UT) for
25 cycles
<5% UT
(>95% dip in UT) for
5 seconds
Mains power quality should
be that of a typical
commercial or hospital
environment. If the user of
the blood pressure monitor
requires continued
operation during power
mains interruptions, it is
recommended that the
device be powered from an
uninterruptible power
supply or battery.
Power frequency
(50/60 Hz)
magnetic field IEC
61000-4-8
3 A/m
3 A/m
Power frequency magnetic
fields should be at levels
characteristic of a typical
location in a typical
commercial or hospital
environment.
NOTE: UT is the A.C. mains voltage prior to application of the test level.
20
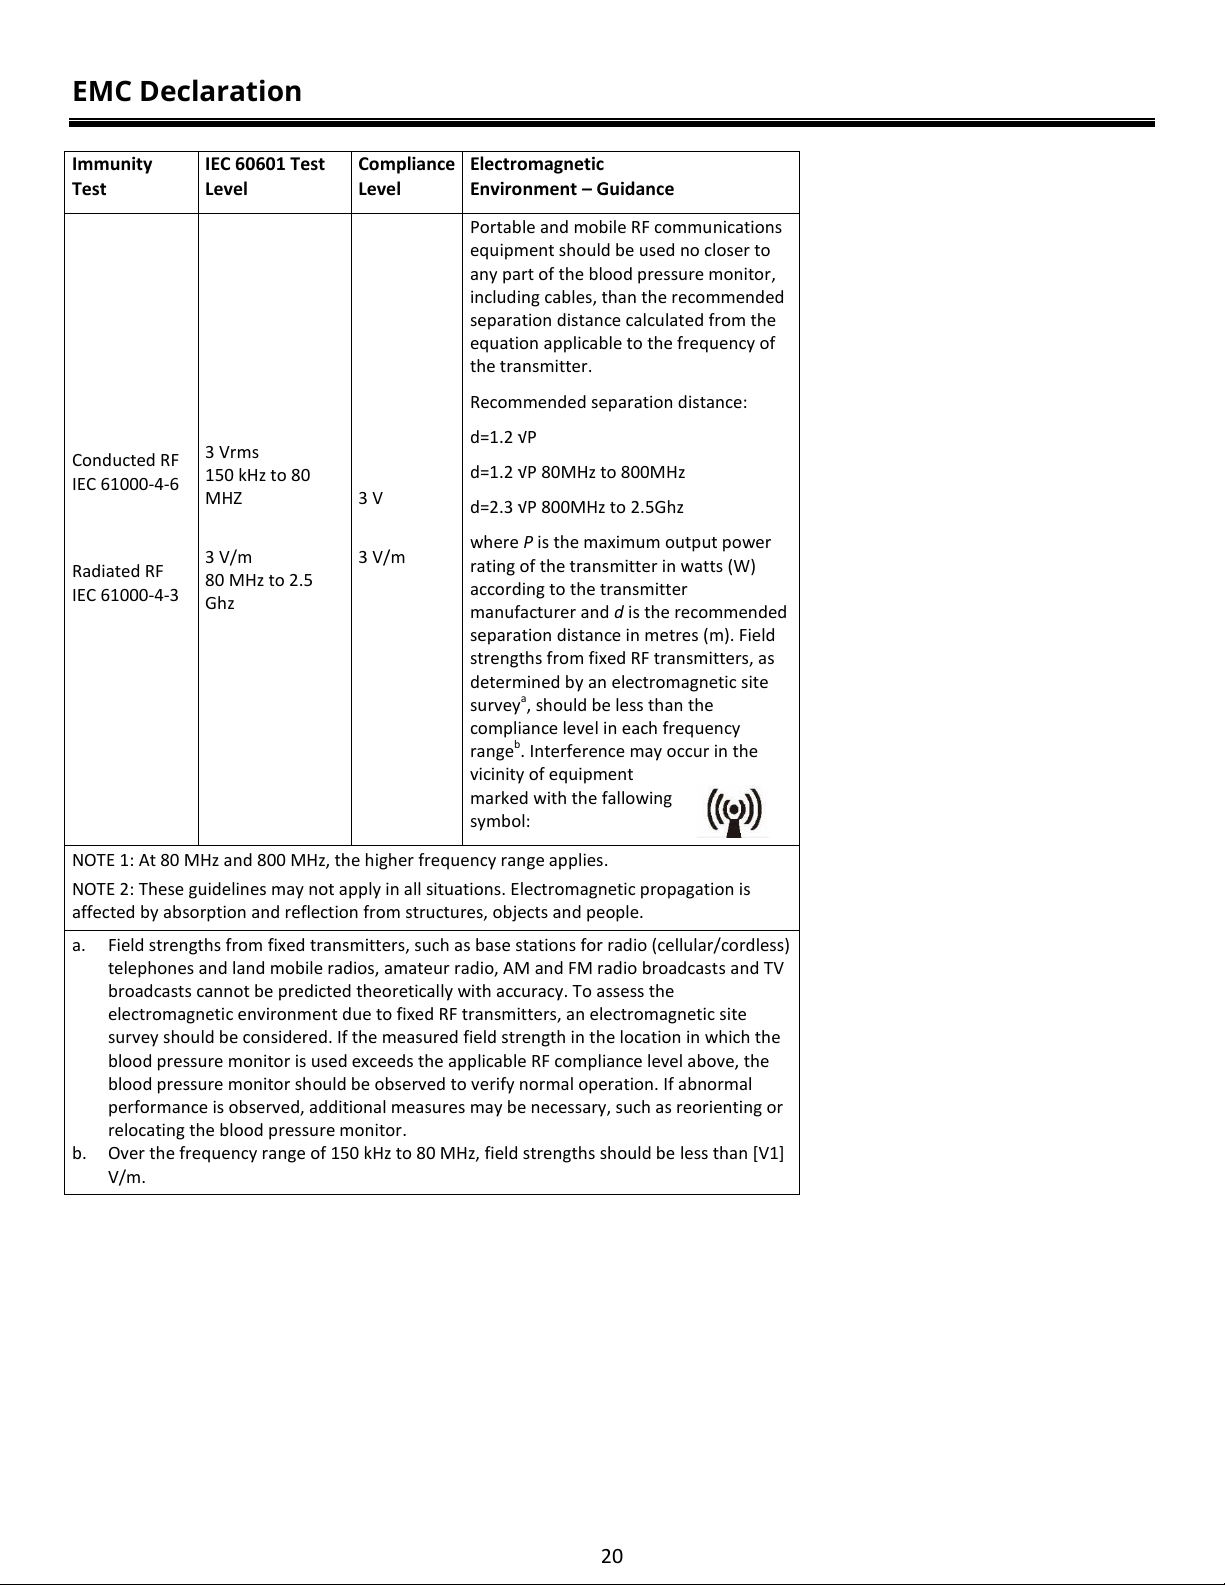
EMC Declaration
Immunity
Test
IEC 60601 Test
Level
Compliance
Level
Electromagnetic
Environment –Guidance
Conducted RF
IEC 61000-4-6
Radiated RF
IEC 61000-4-3
3 Vrms
150 kHz to 80
MHZ
3 V/m
80 MHz to 2.5
Ghz
3 V
3 V/m
Portable and mobile RF communications
equipment should be used no closer to
any part of the blood pressure monitor,
including cables, than the recommended
separation distance calculated from the
equation applicable to the frequency of
the transmitter.
Recommended separation distance:
d=1.2 √P
d=1.2 √P 80MHz to 800MHz
d=2.3 √P 800MHz to 2.5Ghz
where Pis the maximum output power
rating of the transmitter in watts (W)
according to the transmitter
manufacturer and dis the recommended
separation distance in metres (m). Field
strengths from fixed RF transmitters, as
determined by an electromagnetic site
surveya, should be less than the
compliance level in each frequency
rangeb. Interference may occur in the
vicinity of equipment
marked with the fallowing
symbol:
NOTE 1: At 80 MHz and 800 MHz, the higher frequency range applies.
NOTE 2: These guidelines may not apply in all situations. Electromagnetic propagation is
affected by absorption and reflection from structures, objects and people.
a. Field strengths from fixed transmitters, such as base stations for radio (cellular/cordless)
telephones and land mobile radios, amateur radio, AM and FM radio broadcasts and TV
broadcasts cannot be predicted theoretically with accuracy. To assess the
electromagnetic environment due to fixed RF transmitters, an electromagnetic site
survey should be considered. If the measured field strength in the location in which the
blood pressure monitor is used exceeds the applicable RF compliance level above, the
blood pressure monitor should be observed to verify normal operation. If abnormal
performance is observed, additional measures may be necessary, such as reorienting or
relocating the blood pressure monitor.
b. Over the frequency range of 150 kHz to 80 MHz, field strengths should be less than [V1]
V/m.
Table of contents


