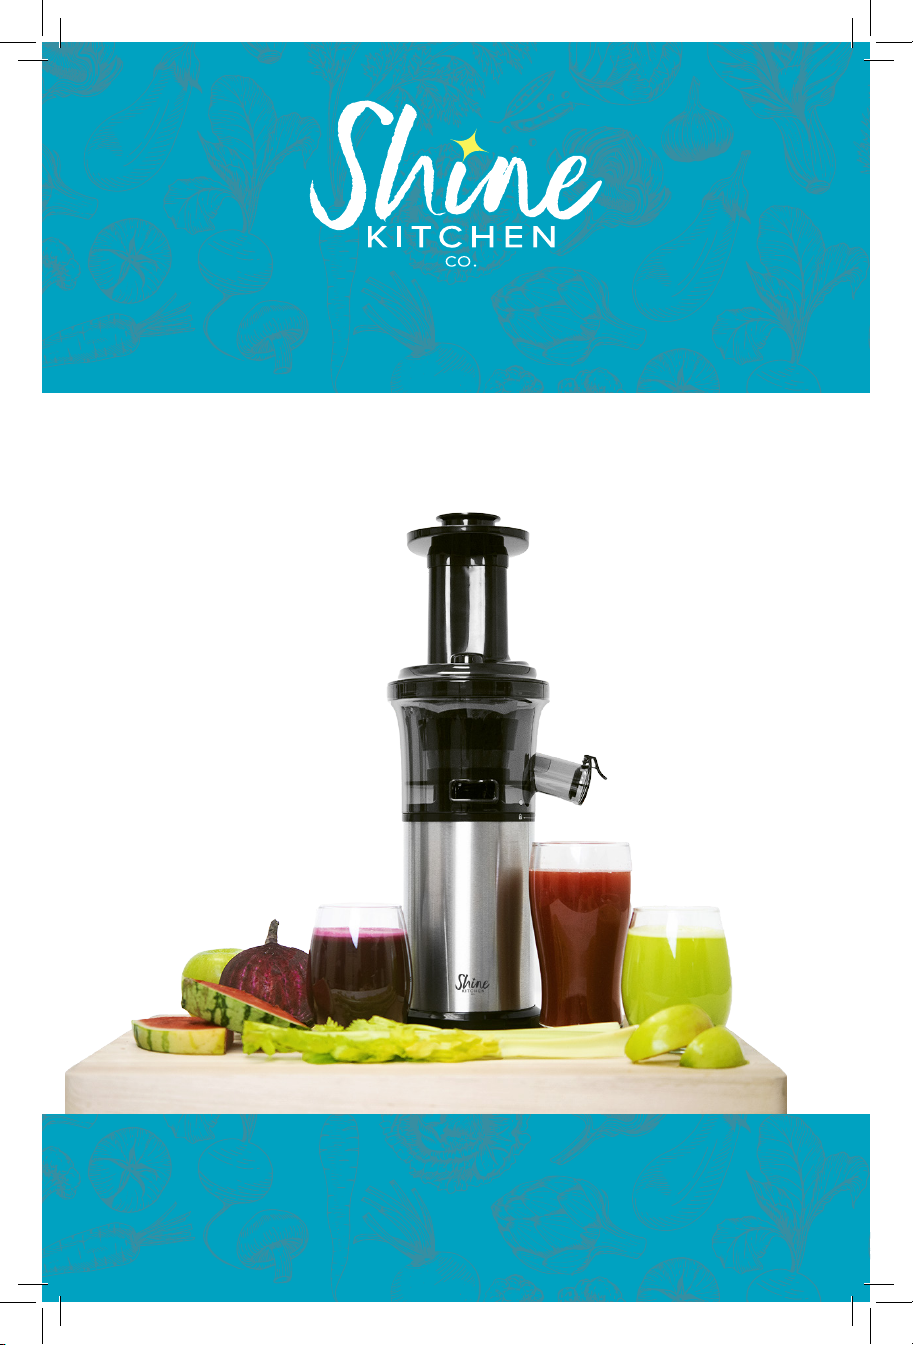
Shine KITCHEN SJV-107 User manual
1
COLD PRESS VERTICAL SLOW JUICER
SJV-107
OPERATION MANUAL / MANUEL DE FONCTIONNEMENT
BEDIENUNGSANLEITUNG / MANUAL DE FUNCIONAMIENTO
Please read this manual carefully before using
Veuillez lire attentivement ce manuel avant utilisation
Bitte lesen Sie diese Anleitung vor der Benutzung sorgfältig durch
Lea atentamente este manual antes del uso

2

3
LANGUAGES
English ....................................................................................................................4
Français ................................................................................................................14
Deutsch .................................................................................................................24
Español .................................................................................................................34

4
TABLE OF CONTENTS
1. General Safety Regulations ...................................................................................5
2. Product Introduction .............................................................................................6
3. Tips & Tricks ........................................................................................................7
4. How to Assemble .................................................................................................8
5. Using the Slow Juicer ..........................................................................................9
6. How to Disassemble ...........................................................................................10
7. Cleaning and Maintenance ..................................................................................11
8. Before Using ......................................................................................................12
9. Troubleshooting .................................................................................................13
Juice. Love. Haine. Repeat.
“Let food be thy medicine,
thy medicine shall be thy food.”
- Hippocrates
Be sure to check out our e-book
for healthy, delicious juicing recipes!
www.shinekitchen.co/pages/juice-recipes-e-book
Follow Us: @shinekitchenco

5
1. GENERAL SAFETY REGULATIONS
Special Notice:
To ensure the safe usage of this machine and to avoid injury and property damage
to you and to others, please read this instruction manual carefully and follow all of
the safety warnings and precautions. Failure to follow the safety warnings may lead to
accidental injury or damage. Do not allow unattended children or persons with
disabilities to use this machine.
Safety Warnings:
• This appliance is for household use only. It is not for commercial use.
• It is strictly prohibited to use this appliance during non-load operation or overloaded
operation.
• Do not touch moving parts during operation or injury may occur.
• Do not use this appliance on a tilted or unstable table or surface.
• Do not use finger, spoons, knives, chopsticks, or other foreign objects to push
produce into the Feeding Chute.
• Do not use damaged or malfunctioning electrical sockets or fire or personal injury
may occur.
• Do not use the appliance near high temperatures or fire or personal injury may occur.
• If the plug, power cord, or other parts are damaged, stop using the appliance
immediately. Contact the service center for repair or replacement before use.
• Before disassembling the appliance, make sure that the power is off and the
appliance is unplugged.
• Damage to the power cord must be repaired or replaced by the manufacturer or its
authorized service center.
• Keep out of the reach of children. Do not let children or disabled persons operate the
appliance unattended.
• Do not use accessories that did not come with this appliance.
• Before using the appliance, please confirm that the power is in accordance with the
specification of this appliance to avoid damage or other risks.
• Ensure that each of the parts are clean and undamaged before using the appliance.
• Clean immediately after use.
• If the appliance does not work, refer to the Troubleshooting section of this guide.
If the appliance still does not function normally, contact your service center for
maintenance or repair. Do not disassemble the appliance by yourself.
• This appliance is not designed to grind dry goods such as rice, dried soybeans,
or grains.
• Keep this appliance at least 12 in. / 30 cm away from other appliances.
EN

6
No Parts Function
qJuicing Screen Separates the juice from the pulp.
wAuger Housing Where all the magic happens.
eMain Body The powerhouse of the juicer.
rPusher
Lets you get pushy with your produce when it does not want to go down.
tFeeding Chute Specially designed to help autofeed your produce into the juicer.
yAuger Hard-edged auger cuts through leafy greens and stringy produce so
you don’t get any jams. Being edgy is good.
uSlicer Lets you slice fruits and vegetables faster than a fruit ninja.
iBrush Multitasking tool that makes cleanup a breeze.
oPulp Container Catches pulp.
aJuice Container Catches juice.
sSealing Ring Makes sure there’s no juice that gets into the motor base.
dPressure Plug Makes it easy to clean the pulp outlet.
Juice Cap Stops the juice from dripping when you are done juicing.
2. PRODUCT INTRODUCTION
q
w
e
r
t
y
u
o
a
i
s
d
Specification:
Model NO Rated Voltage Rated Frequency Rated Power Continuous Working Time
SJV-107 110-120V or 220-240V 50/60Hz 200W up to 10 minutes/use
Parts

7
3. TIPS & TRICKS
EN
We are so happy to welcome you to the #juicetribe!
Please take a moment to read through this quick start guide before you move on to the
assembly instructions so you can enjoy the best operation of your new tool for healthy
living! For the best juicing experience:
• We recommend cutting your fruits and vegetables into 1-2 inch small pieces before
feeding them into the chute. While it seems like more upfront time to chop then juice,
it will save time while juicing and produce a higher volume of juice from your produce.
• Your included apple slicer and cleaning brush are located on the back side of your
packaging insert. Please be sure to flip your packaging over in order to take out these
utensils.
• While juicing, feed in produce then watch for the pulp to extract out of the front of the
machine. Do not force the machine to work faster by overfeeding the machine. You
may feed the juicer continuously, but always ensure the pulp is coming out at the
same rate of your feeding. If the pulp is not coming out at the same rate, pause
your juicing and use the reverse feature to ensure there is no produce blocking the
feeding chute or pulp extraction. After doing this, you may resume juicing at a regular
rate.
• It is simple to clean your machine after juicing by first running water through the
chute with the machine on. This will push out most of the remaining pulp and make
cleaning easier.
• To clean, twist off the entire top portion of your juicer and carry it to the sink. For best
results, rinse each part right away with warm soapy water. This process should
take 3-5 minutes. Your cleaning brush can help you quickly remove any pulp fiber
that is attached to the screen. Take special care to remove the pressure plug from
the bottom of the auger housing to clean it. Then place it back to ensure it does not
become separated from your juicer between uses.
• Your machine is equipped with overheating protection. This machine has a compact
motor that is designed to run for 10 minutes continuously. If your motor starts
to heat up, it will automatically shut off until it cools back down in order to prevent
damage to the motor by overheating. Wait until the machine cools down before
resuming any juicing activity.
• We offer replacement parts and additional juicing accessories at
www.shinekitchen.co. If you need support or special shipping options, please contact
our customer service center at 1-888-254-7336.
• Your juicer will not turn on unless the safety
switch is completely engaged. To do this, please
be sure to follow the assembly instructions on the
following pages completely to ensure the safety
switch is completely engaged.
Safety
switch

8
4. HOW TO ASSEMBLE
1. Attach the Auger
Housing
Align the “•” mark on
the Auger Housing with the
“ ” mark on the Main
Body, then rotate clockwise
so that the “•” mark is
aligned with the “ ” mark.
2. Insert the Juicing
Screen
Insert the Juicing Screen
into the center of the Auger
Housing until it is firmly
in place. The notch that
is visible on the screen
should slide into the front
notch in the top of the
auger housing nearest to
the pulp exit.
#juicetribe inspiration:
Sip & Savor the day!
5. Use the Included
Accessories
Place the Pulp Container in
front of the machine under
the pulp exit. Place the
Juice Container to the right
of the pulp container under
the juice exit. Make sure
the Juice Cap is completely
closed before you begin
juicing. Insert the Pusher
into the Feeding Chute.
4. Attach the Feeding
Chute Housing Lid
Align the “•” mark on the
Feeding Chute with the
“ ” mark on the Auger
Housing, then rotate clock-
wise so that the “•” mark is
aligned with the “ ” mark.
3. Insert the Auger
Insert the Auger into
the center of the
Juicing Screen and
through the silicone
sealing ring of
the Auger Housing.
Firm pressure may be
needed.
Pulp
Container
Juice
Container
9
Please thoroughly clean all non-electrical parts with soap and water before using the
juicer for the first time. Use a damp cloth or sponge to clean the Main Body. Do not
submerge or use running water to clean the Main Body.
The juicer has a built-in safety switch that will prevent the juicer from operating unless
all the parts are assembled correctly.
Automatic Shut Off:
You juicer is equipped with an automatic shut off feature to protect your motor from
burning out. If you overheat your motor during juicing, your machine will automatically
shut off. If this happens, it is recommended to allow you juicer to rest for 20-30
minutes before resuming operations. For additional information see your troubleshooting
guide on page 13.
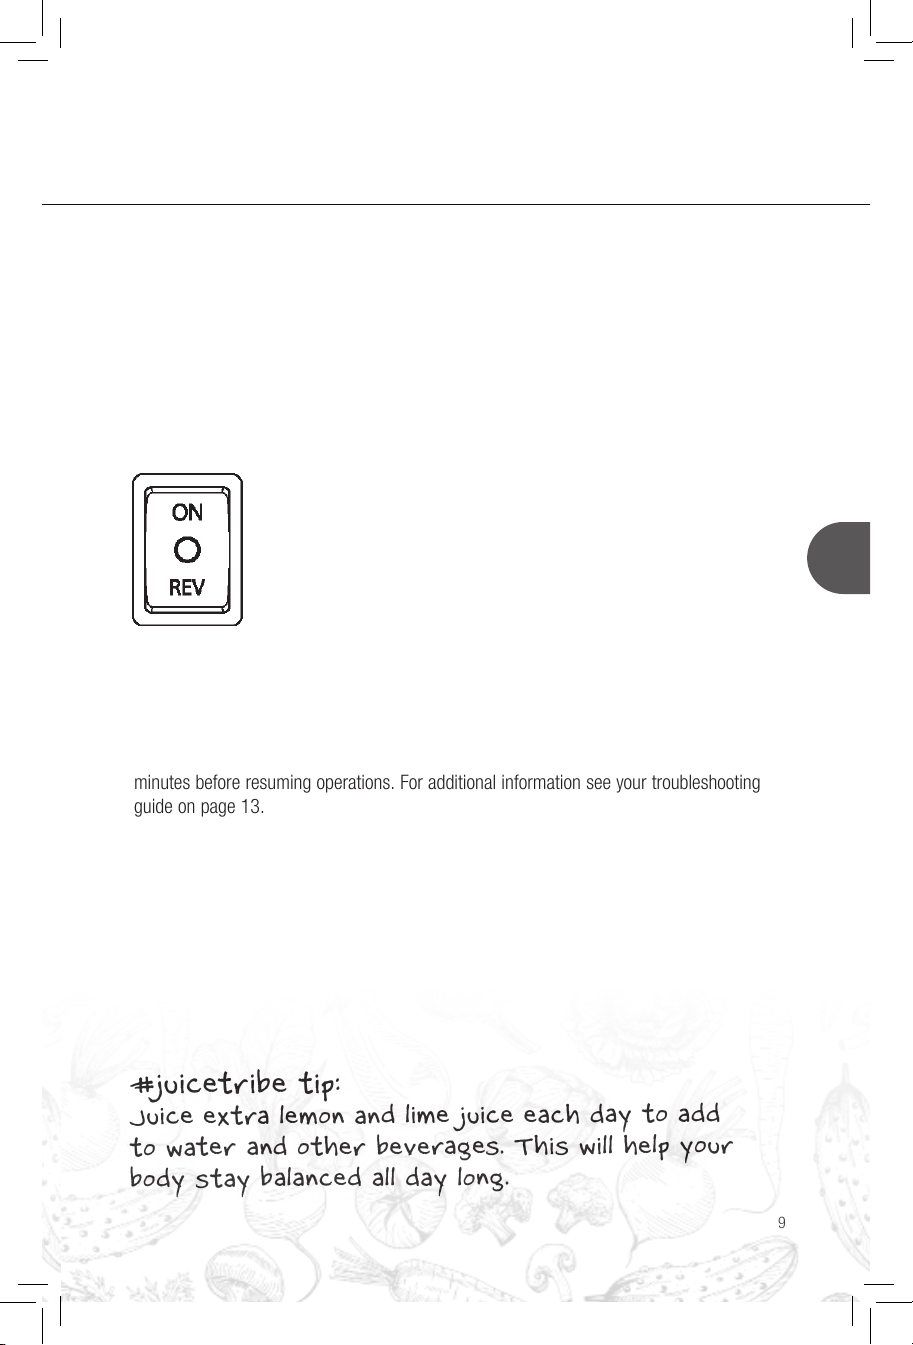
Power Switch:
ON: Press the top portion of the Power Switch to the ON position to
start the motor. Press the bottom portion of the Power Switch to turn
off the motor.
REV: Press and hold the bottom portion of the Power Switch in the
REV position to run the motor in reverse. This is helpful to clear out
any hard produce that may cause the juicer to stop.
#juicetribe tip:
Juice extra lemon and lime juice each day to add
to water and other beverages. This will help your
body stay balanced all day long.
5. USING THE SLOW JUICER
EN

10
6. HOW TO DISASSEMBLE
3. Remove the Juicing
Screen
Pull the Juicing Screen
straight up and out of the
Auger Housing.
4. Remove the Auger
Housing
Rotate the Auger Housing
counterclockwise until the
“•” mark is aligned with the
“ ” mark on the Main
Body. Remove the Auger
Housing by pulling upwards.
1. Remove Feeding
Chute
Rotate the Feeding Chute
counterclockwise until the
“•” mark is aligned with
the “ ” mark.
Remove the Feeding
Chute by pulling upwards.
2. Remove Auger
Pull the Auger straight
up and out of the Juicing
Screen and Auger
Housing.
#juicetribe inspiration:
“Our father taught us a great morning liver flush:
A glass of that a day definitely keeps the doctor away!”
• 1 grapefruit
• 1 lemon
• 1 clove of garlic (optional)
-Ari Meyerowitz, Sprout Brother
#juicetribe member
11
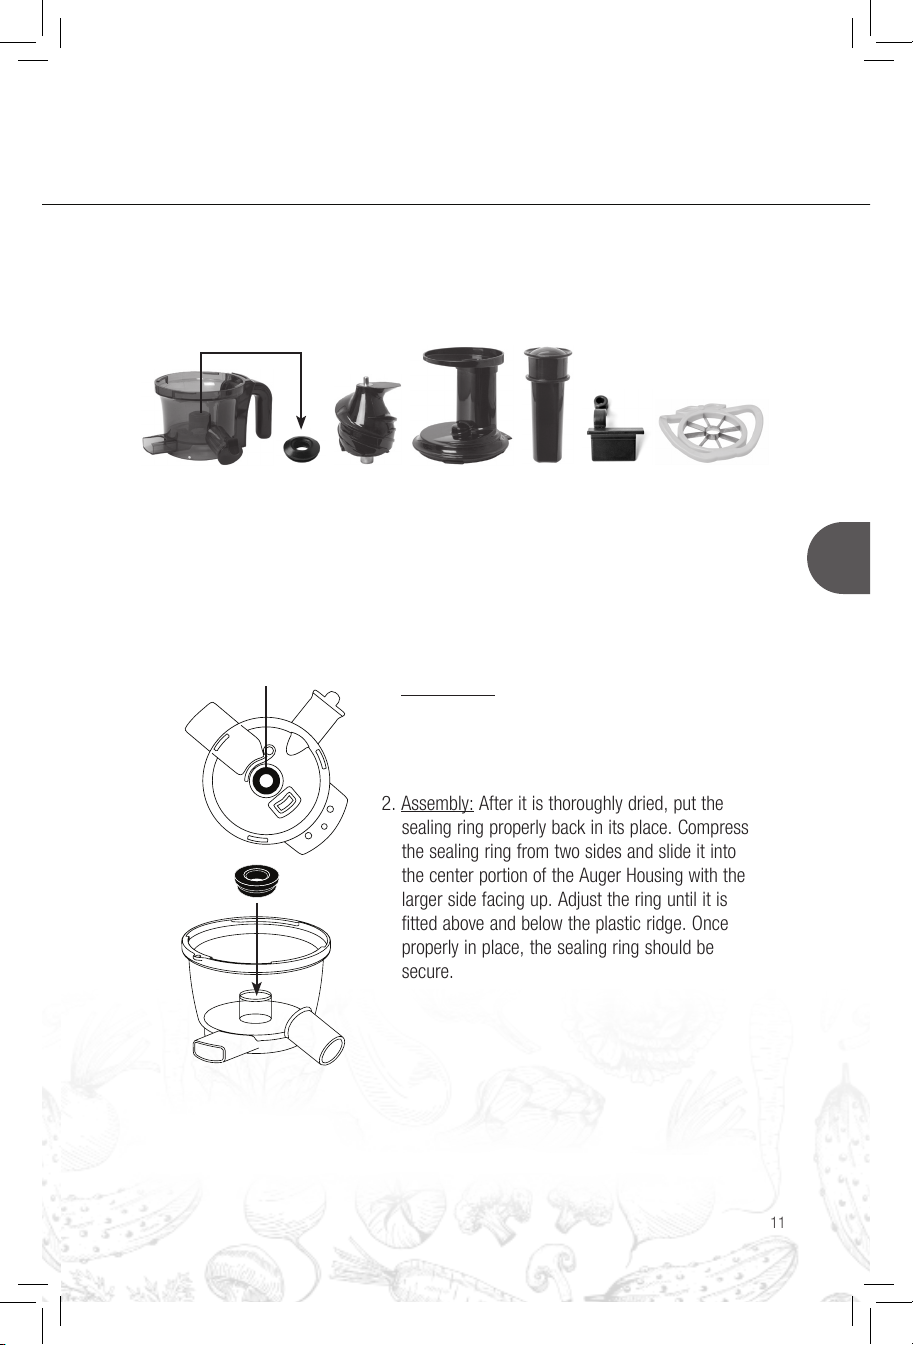
Sealing Ring*
1. Disassembly: Locate the circular, silicone sealing
ring from the bottom of the Auger Housing and
push its outer edge toward the center until it
comes off completely.
2. Assembly: After it is thoroughly dried, put the
sealing ring properly back in its place. Compress
the sealing ring from two sides and slide it into
the center portion of the Auger Housing with the
larger side facing up. Adjust the ring until it is
fitted above and below the plastic ridge. Once
properly in place, the sealing ring should be
secure.
1. Clean the following parts with soap and running water. These parts may be soaked
for easier cleaning. Use both ends of the Brush to thoroughly clean and remove any
left over pulp.
2. Use a damp cloth or sponge to clean the Main Body. Do not submerge or use
running water to clean the Main Body.
7. CLEANING AND MAINTENANCE
EN
#juicetribe tip:
If you like things spicy, try adding a spicy pepper
to your next juicing combination to spice things up!
Auger
Housing Sealing Ring*
See below for
more instructions.
Sealing Ring illustrated
from bottom of the
Auger Housing
Auger Feeding Chute Pusher Pressure
Plug Slicer

12
8. BEFORE USING
Precaution Reason
Do not use ice or frozen fruit. Ice can get harder when it is squeezed and
damage the juicing parts.
Do not use hard or dried food. Certain hard or dried foods can damage the
juicing parts.
Cut fibrous produce into Long and stringy fibers can wrap around the
1-inch pieces. Auger and cause the juicer to stall or damage
to the juicing parts.
Do not put hard pits or seeds Hard pits and seeds can damage the juicing
into the juicer. parts. Please remove pits and seeds from the
produce before juicing.
Only use the included Pusher Other objects such as knives or spoons can
to push food into the Juicer. damage the juicing parts.
Do not operate the juicer for Overusing the juicer can cause the motor to
more than 10 minutes at a time. overheat. Please wait 5-10 minutes between
operations.
Do not put the pulp through Re-juicing the pulp can cause the juicer to
a second time. back up and damage the juicing parts.
Enjoy your juice as soon as possible.
We recommend drinking your juice immediately
for the best taste and nutrition.
Squeaking sounds are normal. It’s from friction as the pulp rubs against the
moving parts of the juicer.
Feed the juicer slowly. Please keep the juice level in the Auger
Housing under the MAX line or the juice may
overflow. Wait for juice and pulp to exit before
adding more produce.
#juicetribe tip:
Fresh juice is a perfect way to boost your
vitamins & minerals, juice a rainbow of colors to
get a full spectrum of benefits!

13
• Check that the power cord is plugged into a working socket.
• Check that all parts have been assembled correctly.
• If your machine may have shut off due to overheating allow
your machine to rest until it has cooled down and then try
restarting operations.
• Contact your customer service center.
• Check whether there is a lot of pulp in the Auger Housing.
If so, turn the juicer on to remove the excess pulp.
• Check whether there is any hard objects stuck in the Feeding
Chute. The REV button may help dislodge it.
• Contact your customer service center.
• Use the REV button to dislodge any stuck pulp or produce.
• Feed the juicer at a slower pace.
• Cut your produce into smaller pieces.
• Contact your customer service center.
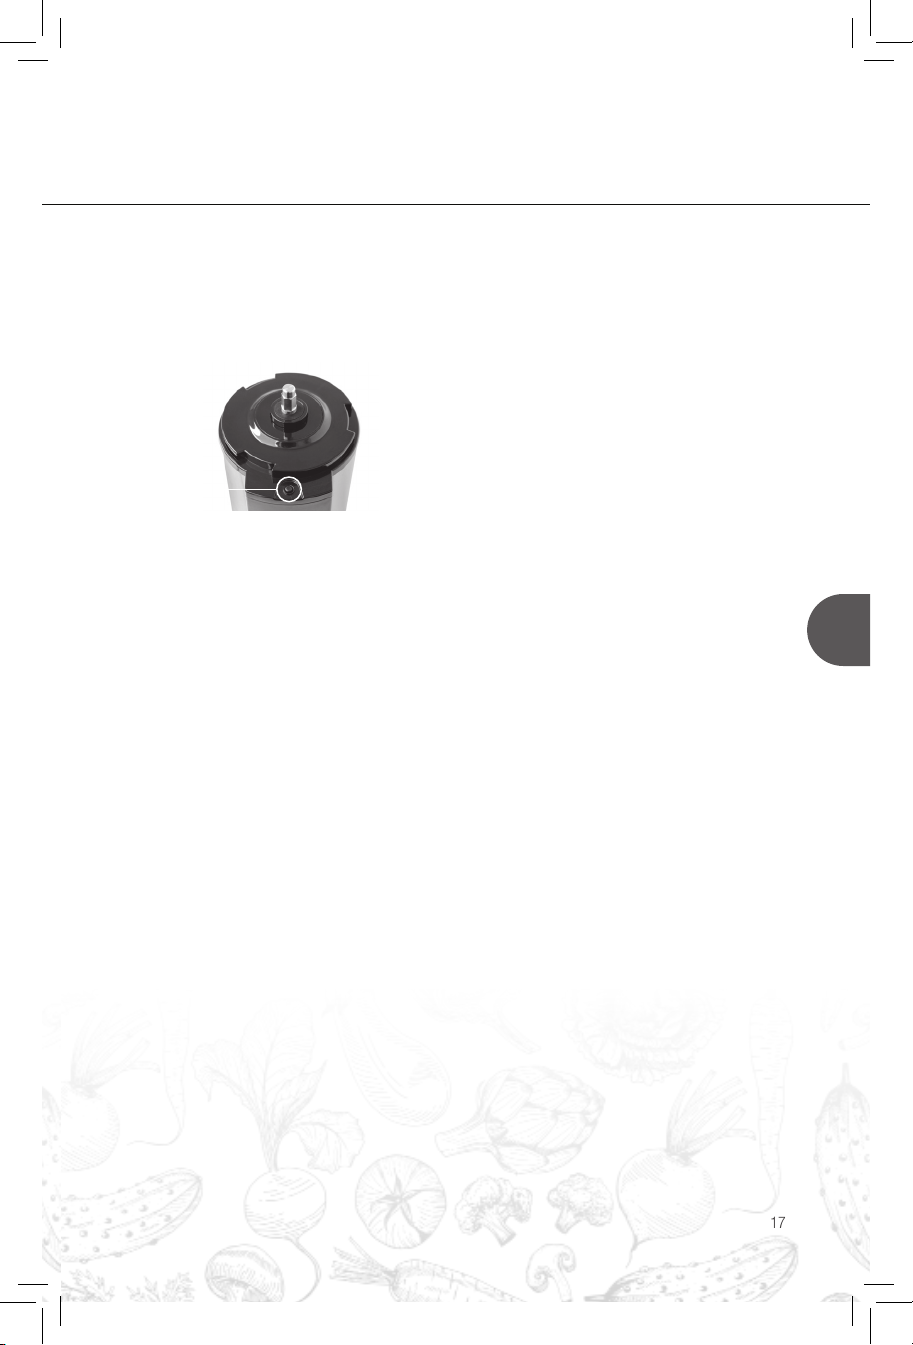
• Check to see if the silicone sealing ring is in place at the
bottom center of the Auger Housing.
• Check to see if there is any damage to the silicone sealing ring.
• Feed the juicer at a slower pace.
• Contact your customer service center.
• This is normal during operation and is designed to reduce strain
on the moving parts.
The motor does
not turn on.
Trouble
removing the
Feeding Chute.
The juicer stops
during operation.
Leak from the
bottom of the
Auger Housing.
The Auger
Housing moves
while juicing.
#juicetribe inspiration:
“My go to juice every morning is celery, ginger,
lemon or grapefruit, lemon, cayenne with a
tablespoon of olive oil.”
-Paige Hernandez
#juicetribe member
EN
9. TROUBLESHOOTING

14
SOMMAIRE
1. Consignes générales de sécurité...........................................................................15
2. Présentation du produit........................................................................................16
3. Conseils et astuces.............................................................................................17
4. Comment l’assembler.........................................................................................18
5. Utilisation du Slow Juicer....................................................................................19
6. Comment le démonter.........................................................................................20
7. Nettoyage et entretien.........................................................................................21
8. Avant utilisation..................................................................................................22
9. Résolution des problèmes ...................................................................................23
Du jus, de l’amour, du bonheur.
On recoence.
« Que ton aliment soit ta seule médecine »
- Hippocrates
Jetez un coup d’œil à l’e-book
« Shine Kitchen Co. Juicing »
www.shinekitchen.co/pages/juice-recipes-e-book
Suivez-nous: @shinekitchenco

15
1. CONSIGNES GÉNÉRALES DE SÉCURITÉ
Avis particulier :
Afin d’assurer une utilisation en toute sécurité de cet appareil et d’éviter toutes
blessures et tous dommages matériels, que ce soit à vous ou à autrui, veuillez lire
attentivement ce manuel d’instructions et respecter toutes les mises en garde et
précautions de sécurité. Le non-respect des consignes de sécurité peut entraîner
des blessures et des dégâts accidentels. Ne laissez pas des personnes inaptes et
des enfants non surveillés utiliser cette machine.
Instructions de sécurité:
• Cet appareil est réservé à un usage domestique. Il n’est pas destiné à un usage
professionnel.
• Il est strictement interdit d’utiliser cet appareil en fonctionnement à vide ou en
surcharge.
• Ne pas toucher les éléments en mouvement pendant le fonctionnement pour
éviter tout risque de blessure.
• Ne pas utiliser cet appareil sur une table ou une surface inclinée ou instable.
• Ne pas utiliser ses doigts, une cuillère, un couteau, une baguette ou tout autre
objet pour pousser les aliments dans la goulotte de chargement.
• Ne pas utiliser une prise de courant endommagée ou défectueuse, car le risque
de provoquer un incendie et des blessures corporelles est réel.
• Ne pas utiliser l’appareil à une température élevée, car cela pourrait provoquer
un incendie ou des blessures corporelles.
• Si la fiche, le câble d’alimentation ou n’importe quel autre élément est
endommagé, cesser immédiatement l’utilisation de l’appareil. Contacter le
centre d’assistance pour le faire réparer ou remplacer.
• Avant de démonter l’appareil, s’assurer qu’il est hors tension et débranché.
• Si le cordon d’alimentation est endommagé, il doit être réparé ou remplacé par
le fabricant ou un centre d’entretien agréé.
• Tenir cet appareil hors de portée des enfants. Ne pas laisser les personnes
inaptes et les enfants utiliser cet appareil sans surveillance.
• Ne pas utiliser d’accessoires qui ne sont pas fournis avec l’appareil.
• Avant d’utiliser cet appareil, s’assurer que l’alimentation électrique est conforme
aux spécifications de cet appareil afin d’éviter tout dommage et tout autre risque.
• S’assurer que chaque élément est propre et en bon état avant d’utiliser l’appareil.
• Nettoyer immédiatement l’appareil après utilisation.
• Si l’appareil ne fonctionne pas, se reporter à la section Résolution des problèmes
de ce guide. Si l’appareil ne fonctionne toujours pas normalement, contacter un
centre d’entretien pour le réviser ou le réparer. Ne jamais démonter l’appareil
soi-même.
• Cet appareil n’est pas conçu pour moudre des aliments secs comme le riz, le
soja sec et les céréales.
• Conserver cet appareil à au moins 30 cm des autres appareils.
FR

16
No Nom Fonction
qFiltre à jus Sépare le jus de la pulpe.
wBoîtier de la lame Là où la magie opère.
eBase La centrale de l’extracteur de jus.
rPoussoir Vous permet de forcer les aliments à rentrer quand ils sont récalcitrants.
tGoulotte de Spécialement conçue pour aider à charger automatiquement vos
chargement aliments dans l’extracteur de jus.
yLame
uTrancheur Vous permet de trancher des fruits et des légumes plus vite que dans Fruit Ninja.
iBrosse Outil polyvalent qui simplifie le nettoyage.
oRécipient à pulpe Récupère la pulpe.
aRécipient à jus Récupère le jus.
sBague d’étanchéité Pour s’assurer que le jus ne pénètre pas dans le compartiment moteur.
dPrise de pression Prise de pression.
Capuchon de jus Empêche le jus de couler lorsque vous avez fini de l’extraire.
2. PRÉSENTATION DU PRODUIT
Nom et fonction des éléments
q
w
e
r
t
y
u
o
a
i
s
d
SJV-107 110-120V or 220-240V 50/60Hz 200W jusqu’à 10 minutes/utilisation
Modèl Tension Fréquence Puissance Durée de fonctionnement
no nominale nominale nominale en continu
Spécifications :
La lame aiguisée coupe les légumes verts feuillus et autres aliments filandreux
pour que l’appareil ne se bloque pas. C’est parfois utile de savoir jouer du couteau.
17
3. CONSEILS ET ASTUCES
FR
• Nous vous recommandons de couper vos fruits et légumes en petits morceaux de 2 à 5 cm
avant de les introduire dans la goulotte de chargement. Vous aurez peut-être l’impression de
perdre du temps en précoupant vos fruits et légumes, mais vous en gagnerez au moment de
les presser. De plus, vous obtiendrez plus de jus, car l’extraction sera plus efficace.
• Le trancheur de pomme et la brosse de nettoyage se trouvent à l’arrière de l’emballage.
Pensez à retourner l’emballage pour retirer ces accessoires.
• Pour extraire le jus d’un aliment, introduisez-le dans l’appareil, puis surveillez la sortie de la
pulpe à l’avant de la machine. Ne forcez pas l’appareil à travailler plus vite en le suralimentant.
Vous pouvez alimenter l’extracteur de jus continuellement, mais surveillez que la pulpe
continue à sortir lorsque vous insérez des aliments. Si la pulpe sort moins vite ou ne sort
plus du tout, arrêtez votre extracteur de jus et utilisez la fonction marche arrière pour vous
assurer qu’aucun aliment ne bloque la goulotte de chargement ou l’orifice de sortie de la
pulpe. Après avoir fait cela, vous pourrez reprendre l’extraction du jus à un rythme normal.
• Le nettoyage de l’appareil est très simple : après la fin de l’extraction, faites couler de l’eau
dans la goulotte de chargement alors que l’appareil est en marche. Cela permet d’évacuer
une grande partie de la pulpe restante et facilite le nettoyage à proprement dit.
• Pour nettoyer l’appareil, faites pivoter la partie supérieure de votre extracteur de jus et
placez-la dans un évier. Pour de meilleurs résultats, rincez immédiatement chaque élément
à l’eau chaude savonneuse. Ce processus devrait durer entre 3 et 5 minutes. Votre brosse
de nettoyage peut vous aider à retirer rapidement toute fibre de pulpe restée dans le filtre à
jus. Prenez soin de retirer la prise de pression située au fond du boîtier de la lame pour la
nettoyer. Remettez-la ensuite en place pour éviter de l’égarer entre deux utilisations.
• Votre appareil est équipé d’une protection antisurchauffe. Cet appareil est doté d’un
moteur compact conçu pour fonctionner 10 minutes en continu. Si le moteur commence
à surchauffer, il s’arrêtera automatiquement jusqu’à ce qu’il se soit refroidi pour éviter tout
dommage dû à la surchauffe. Patientez que l’appareil refroidisse avant de recommencer à
extraire du jus.
• Nous proposons des pièces de rechange et des accessoires supplémentaires pour
l’extraction de jus à l’adresse www.shinekitchen.co. Si vous avez besoin d’assistance
ou d’options d’expédition spéciales, veuillez contacter notre centre de service client au
1-888-254-7336.
Interrupteur
de sécurité
Nous sommes très heureux de vous compter dans la #juicetribe !
Veuillez prendre un moment pour lire ce guide de démarrage rapide avant de passer aux instruc-
tions de montage afin de profiter au mieux de votre nouvel équipement pour une vie plus saine !
Pour une expérience optimale d’extraction de jus :
• Votre extracteur de jus ne se mettra pas en route tant
que l’interrupteur de sécurité n’est pas complètement
enclenché. Pour ce faire, veillez à suivre les instructions
de montage des pages suivantes dans leur intégralité
afin de vous assurer que l’interrupteur de sécurité est
complètement enclenché.

18
4. UTILISATION DU SLOW JUICER
Inspiration #juicetribe :
Sirotez et savourez votre journée !
1. Fixer le Boîtier de
la lame
Aligner le symbole «•»
du Boîtier de la lame avec
le symbole « » » sur
la Base, puis faire tourner
dans le sens des aiguilles
d’une montre pour que le
symbole «•» soit aligné
avec le symbole « » .
2. Insérer le Filtre à jus
Insérer le Filtre à jus
au
centre du Boîtier de la lame
jusqu’à ce qu’il soit bien
installé. Le cran visible sur
le Filtre à jus doit glisser
dans l’encoche située à
l’avant en haut du Boîtier
de la lame, du côté de
l’orifice de sortie de la
pulpe.
3. Insérer la Lame
Insérer la Lame au
centre du Filtre à jus
et à travers la Bague
d’étanchéité du Boîtier
de la lame. Il peut être
nécessaire de presser
fermement.
4. Fixez le couvercle du
logement de la Goulotte
de chargement
Aligner le symbole «•» de
la Goulotte de chargement
avec le symbole « »
du Boîtier de la lame, puis
faire tourner dans le sens
des aiguilles d’une montre
pour que le symbole «•»
soit aligné avec le symbole
« ».
5. Utiliser les accessoires
inclus
Récipient à
pulpe
Récipient
à jus
Placer le Récipient
à pulpe à l’avant
de l’appareil sous
l’orifice de sortie de
la pulpe. Placez le
Récipient à jus sur la
droite du Récipient à
pulpe, sous l’orifice
de sortie du jus.
Assurez-vous que
le bouchon est
complètement fermé
avant de commencer
l’extraction du jus.
Insérez le Poussoir
dans la Goulotte de
chargement.

19
Nettoyer soigneusement toutes les pièces non électriques avec de l’eau et du savon
avant d’utiliser l’extracteur de jus pour la première fois. Utiliser une éponge ou un
chiffon humide pour nettoyer la Base de l’appareil. Ne pas l’immerger et ne pas la
placer sous un filet d’eau courante.
L’extracteur de jus est muni d’un interrupteur de sécurité intégré qui l’empêchera de
fonctionner si tous les éléments ne sont pas correctement assemblés.
Arrêt automatique :
Votre extracteur de jus est équipé d’un dispositif d’arrêt automatique pour protéger
votre moteur de la surchauffe. Si cela arrive, votre appareil s’arrêtera automatiquement.
Dans ce cas, il est recommandé de laisser reposer l’appareil pendant 20 à 30 minutes
avant de s’en servir à nouveau. Pour plus d’informations, consulter le guide de résolu-
tion des problèmes à la page 23.
Interrupteur d’alimentation :
ON : appuyer sur la partie supérieure de l’interrupteur pour
l’amener à la position « ON » pour que le moteur se mette en
marche. Appuyer sur la partie inférieure de l’interrupteur pour
couper l’alimentation du moteur.
REV : appuyer sur la partie inférieure de l’interrupteur
d’alimentation pour l’amener à la position « REV » et la maintenir
enfoncée pour faire fonctionner le moteur en sens inverse. Ceci est
utile pour déplacer et éliminer les morceaux d’aliments durs qui
peuvent bloquer l’extracteur de jus.
Astuce #juicetribe :
Pressez un citron ou un citron vert tous les jours
pour en ajouter dans l’eau et les boissons que vous
buvez. Cela apportera de l’équilibre à votre corps
pour toute la journée.
5. UTILISATION DU SLOW JUICER
FR

20
6. COMMENT LE DÉMONTER
Inspiration #juicetribe :
« Notre père nous a transmis une formidable recette pour
se purifier le foie : Un verre de cette boisson tous les
matins éloignera le médecin pour toujours ! »
• 1 pamplemousse
• 1 citron
• 1 gousse d’ail (facultative)
-Ari Meyerowitz, Sprout Brother
membre #juicetribe
3. Retirer le Filtre à jus
Tirer sur le Filtre à jus vers
le haut pour l’extraire du
Boîtier de la lame.
4. Retirer le Boîtier de la
lame
Faire pivoter le Boîtier de la
lame dans le sens inverse
des aiguilles d’une montre
jusqu’à ce que le symbole
«•»soit aligné avec le
symbole « »sur la Base.
Retirer le Boîtier de la lame
en le tirant vers le haut.
1. Retirer la Goulotte de
chargement
Faire pivoter la Goulotte
de chargement dans le
sens inverse des aiguilles
d’une montre jusqu’à ce
que le symbole «•» soit
aligné avec le symbole
« ». Retirer la Goulotte
de chargement en la tirant
vers le haut.
2. Retirer la Lame
Tirer sur la lame vers le
haut pour l’extraire du
Filtre à jus et du Boîtier de
la lame.
Table of contents
Languages:
Other Shine KITCHEN Juicer manuals


