Shiratech CB-50 User manual

CB-50 basic - Quick startup guide 1.1
CB-50
An Evaluation kit for the Spark-100 SOM
Quick startup guide
Thank you for buying a CB-50 evaluation board and SPARK-100 SOM. More information on
both can be found at www.shiratech.com .
The Shiratech team.
In the box:
The evaluation kit you have just got includes:
SPARK-100 SOM
CB-50 carrier board
Micro USB to USB adapter cable
Power supply

2 | CB-50 basic - Quick startup guide 1.1
The CB-50 base version is equipped with the following interfaces:
Interface
Connector
Processor interface
Remarks
USB OTG
J-11
USB OTG*
USB 2.0 Type-A Host/Device
2xUSB host
J13
USB OTG with build in
hub*
USB 2.0 Type-A Host
10/100/1000
Ethernet
J-19
HPS- RGMII1
RJ-45
VGA interface
J-18
FPGA
Audio
J-14,J16 and J-
17
FPGA
HSMC interface
J1
FPGA
Power inlet
J-6
12 Volt DC
* The Spark ARM processor has a single USB interface which can be configured to either OTG
interface or to 2xHost interfaces (default configuration).
Push buttons and boot source selection:
The carrier board has two reset buttons:
Cold reset - BP1
Warm reset - BP2
Boot sources
The CB-50 has 3 possible boot sources:
1. QSPI NOR memory –a 32MB memory which can include a minimal file system
2. eMMC device –A 4GB eMMC memory, including a full demo version.
3. SD card –an SD card can be plugged into the evaluation board J22 on the lower side
of the board, not supplied with the board. An image for creating an SD card is
available on the Shiratech web site.
3 | CB-50 basic - Quick startup guide 1.1
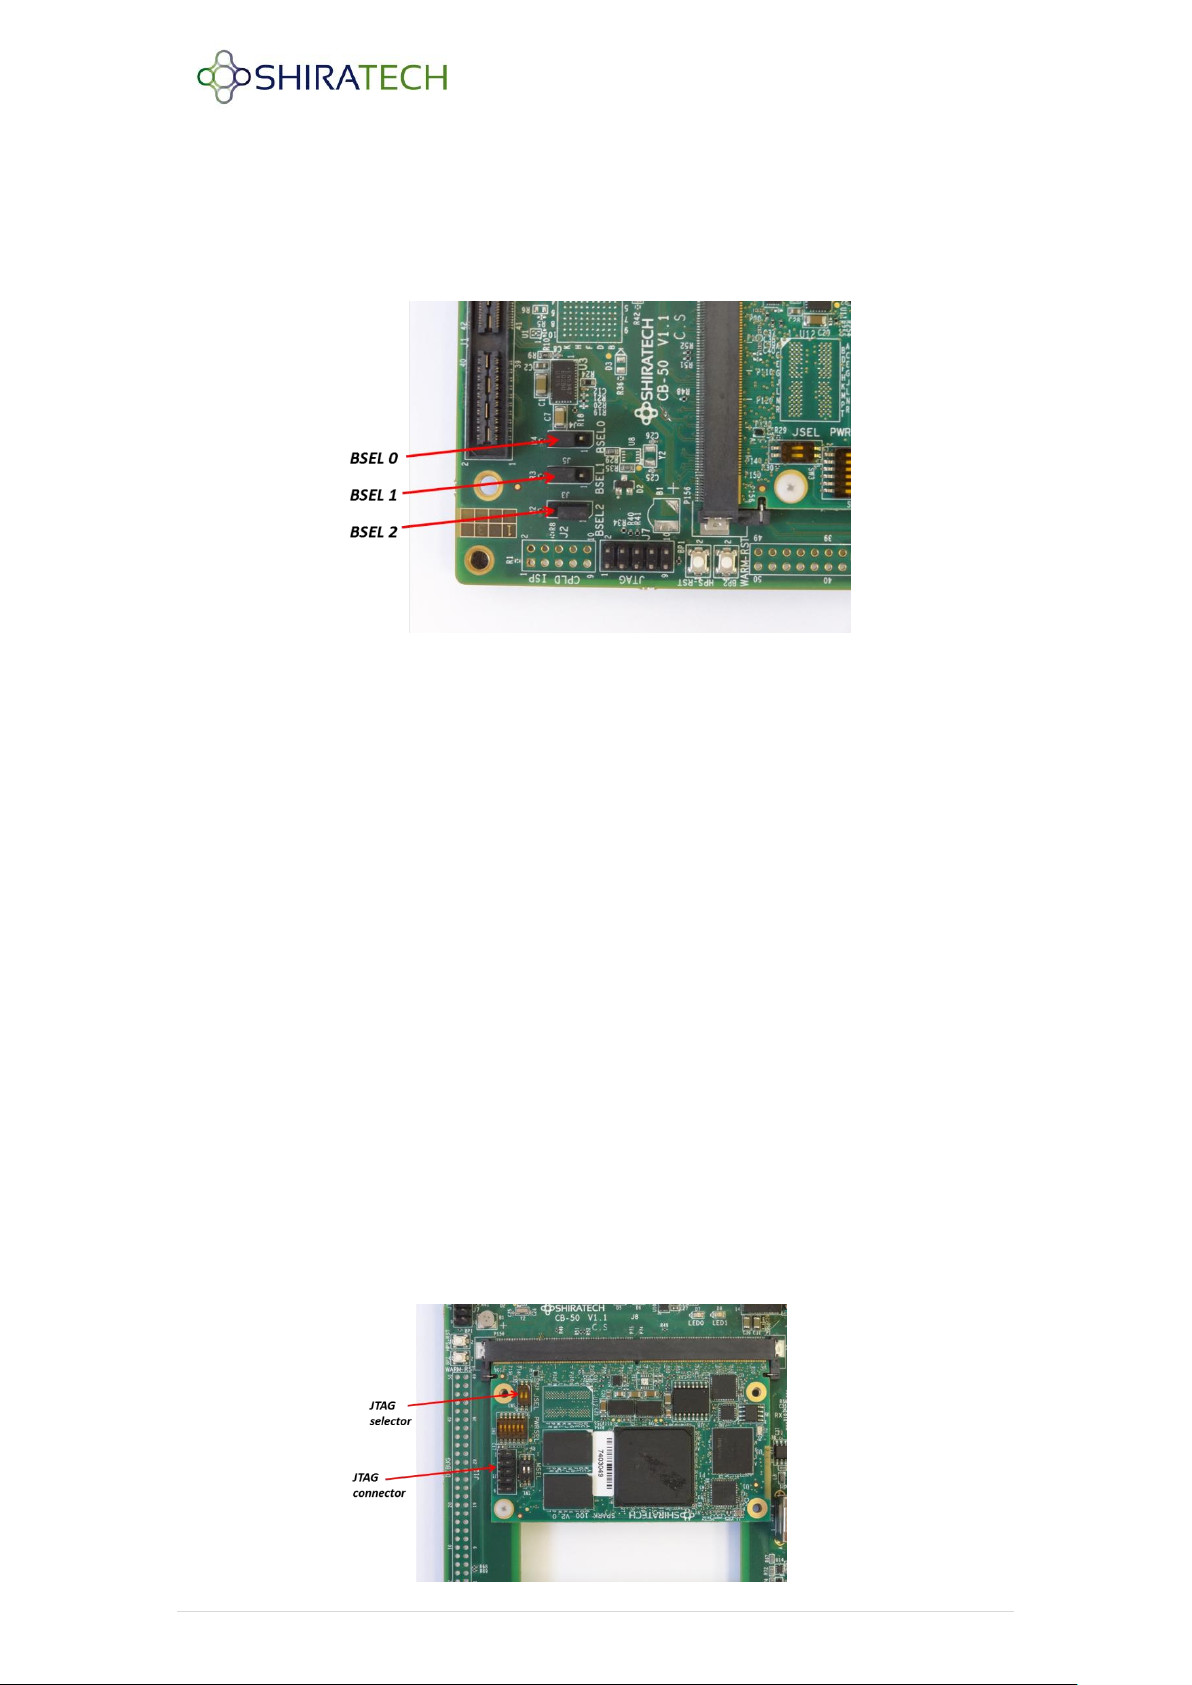
The carrier board has three boot selection jumpers:
BTSEL 0 –Select SDIO device, selects between SD (1-2) and eMMC (2-3)
BTSEL 1 –Selects boot source between QSPI NOR Flash (1-2) and SD/eMMC (2-3)
BTSEL 2 –Unused, should be set to (1-2)
Getting started
In order to operate the evaluation board follows the following steps:
Unpack the evaluation board
Connect the power supply to the power inlet. To activate the board push the power
switch.
Connect the Micro USB to USB cable to the Debug port (J-9)and open a terminal
application on the PC using the following parameters:
Rate - 115,200 Bps, data –8 bits, party –none, stop –1bit and flow control –none.
Note that the virtual com number may differ from PC to PC.
Connect an Ethernet network to the Ethernet port for network or WEB access.
Select the right boot source using BT SL 0 and 1 jumpers. The board is supplied with
a demo version installed in the eMMC device.
For activating the desktop application, a VGA cable should be connected to J-18 (The
VGA is set to 768x1024). USB mouse and keyboard can be connected to J13.
Note: The CB-50 is provided with a full Linux version on the eMMC, and preloader and boot
only on the QSPI Flash.
Byte blaster connectivity
The JTAG connector (J1) on the SOM can be connected to an external byte blaster cable. In
order for the byte blaster to work SW3 should be set to off.
Table of contents
Other Shiratech Motherboard manuals


