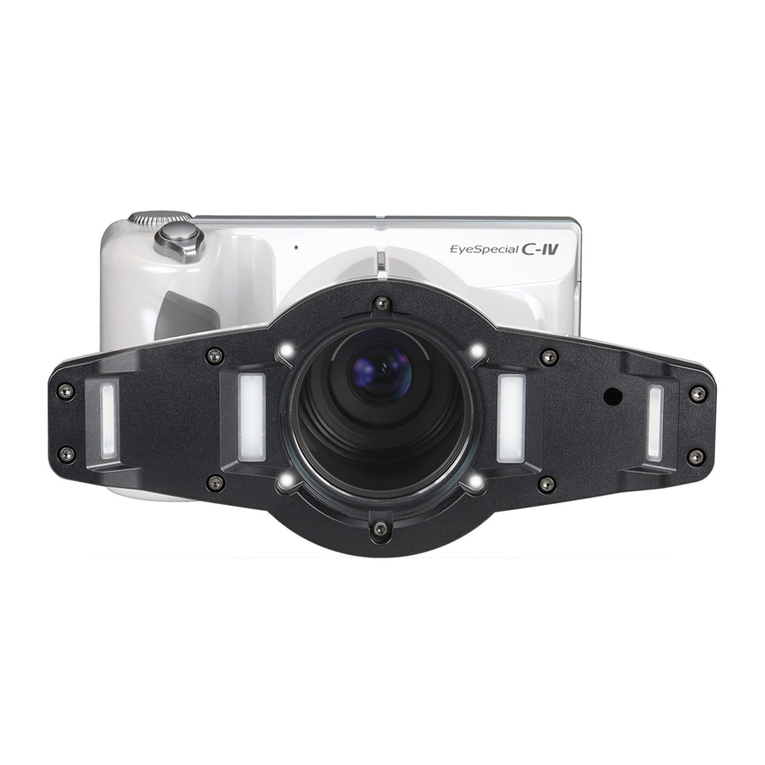
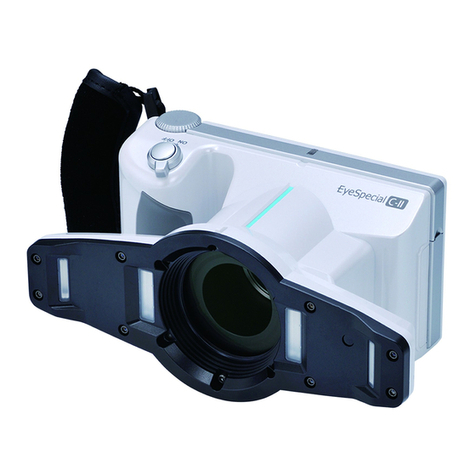
Shofu EyeSpecial C-IV User manual

S m a r t d i g i ta l c a m er a d esi g ned ex c l u si v el y f or d enti str y
User’s Manual
F or th e A d v a nc ed M a nu a l of E y eS p ec i a l C - I V , v i si t ou r w eb si te a t
h ttp : / / w w w . sh of u . c om .
S el ec t th e r eg i on yo u p u r c h a sed th e c a m er a .
Advanced
m a r k i nd i c a tes th a t th e d eta i l ed ex p l a na ti on i s g i v en i n th e “ A d v a nc ed M a nu a l ” .
P l ea se r ef er to th e i nd i c a ted sec ti on i f nec essa r y .
R ea d th r ou g h th e a tta c h ed “ I m p or ta nt S a f ety
I nstr u c ti ons” b ef or e u si ng th i s c a m er a .

ii
Before using your camera
T h a nk yo u f or p u r c h a si ng ou r E y eS p ec i a l C - I V . T h e f ol l ow i ng i nstr u c ti ons p r ov i d e nec es-
sa r y i nf or m a ti on on su c c essf u l op er a ti on, d a i l y m a i ntena nc e a nd sa f e u se of th i s u ni t.
Please read this User’s Manual carefully before use to attain maximum benets and
ensu r e d u r a b i l i ty of th i s u ni t. K i nd l y k eep th i s m a nu a l f or yo u r f u tu r e r ef er enc e.
Intended use
T o ta k e i ntr a or a l p h otos a nd m ov i es f or d oc u m enta ti on of d enta l p r oc ed u r es.
Important precautions
F o r y o u r s a f e t y
● Read through the “Important Safety Instructions” carefully for safe and correct use.
N o t i c e
● No part of this document may be copied or reproduced in any form by any means.
● Some information in this document might become inconsistent with the product due to
p r od u c t sof tw a r e u p d a tes.
● The information in this document is subject to change without prior notice.
● All relevant issues have been considered in the preparation of this document. However,
sh ou l d y ou noti c e a n om i ssi on or a ny q u esti ona b l e i tem i n th i s d oc u m ent, p l ea se f eel
free to notify your SHOFU dealer.
● In case of missing pages or disorder, please contact our local dealer for replacement.
T e s t s h o o t i n g
● Be sure to take some test shots before taking actual clinical photos to make sure that
th e c a m er a i s w or k i ng p r op er l y .
D a t a b a c k - u p
● SD memory card or Multimedia card can be damaged by dropping or strong static elec-
tr i c i ty a nd th e d a ta m a y b e l ost. A l w a y s b a c k - u p a l l i m p or ta nt d a ta i n m u l ti p l e l oc a ti ons,
e.g. to your PC, removable HDD or other back-up medias.

iii
C o p y r i g h t
● Any pictures that you take of existing images may be used for personal use only. Any
u na u th or i z ed c op y i ng , h i r i ng , l end i ng , p u b l i c p er f or m a nc e m i g h t v i ol a te th e c op y r i g h t of
th e r i g h tf u l ow ner .
● Copyright law prohibits the use of pictures without the permissions of the rightful owner.
P r i v a c y p o l i c y
● The information, which can identify specic individuals, might belong to the “Personal
Information” stipulated in the “Act on the Protection of Personal Information”. Handle all
i m a g es p r op er l y i n a c c or d a nc e w i th l oc a l l a w s a nd r eg u l a ti ons.
I n d e m n i t y
● In no event shall SHOFU be liable for any infringement of privacy and damages, includ-
i ng , w i th ou t l i m i ta ti on, d i r ec t, i nd i r ec t, i nc i d enta l , sp ec i a l , c onseq u enti a l , or p u ni ti v e
d a m a g es a r i si ng ou t of th e u se of th e i m a g es ta k en w i th th i s c a m er a .
● SHOFU will repair and replace main body and its system in case of defect within the
w a r r a nty p er i od . W e d o not a ssu m e a ny r esp onsi b i l i ty f or su b seq u ent d a m a g es a r i si ng
f r om th e f a i l u r e of th e u ni t b eyo nd th e w a r r a nty p er i od .
D i s p o s a l
● Do not dispose of this product together with your household waste!
P l ea se r ef er to th e i nf or m a ti on of yo u r l oc a l c om m u ni ty or c onta c t ou r
d ea l er s r eg a r d i ng th e p r op er h a nd l i ng of end - of - l i f e el ec tr i c a nd el ec tr oni c
eq u i p m ent.
R ec y c l i ng of th i s p r od u c t w i l l h el p to c onser v e na tu r a l r esou r c es a nd
p r ev ent p otenti a l neg a ti v e c onseq u enc es f or th e env i r onm ent a nd h u m a n
h ea l th c a u sed b y i na p p r op r i a te w a ste h a nd l i ng .
F or th e l a test i nf or m a ti on of E y eS p ec i a l C - IV, v i si t ou r w eb si te a t
h ttp : / / w w w . sh of u . c om . S el ec t th e r eg i on y ou p u r c h a sed th e c a m er a .
C A U T I O N
E y eS p ec i a l C - I V c onf or m s to th e f ol l ow i ng sta nd a r d f or i nter f er enc e f r om r a d i o f r eq u en-
c i es:
· Class B of the Voluntary Control Council for Interference by Information Technology
E q u i p m ent ( V C C I )
· Part 15 Class B of Federal Communications Commission (FCC)
T h i s p r od u c t m a y c a u se r a d i o i nter f er enc e d u r i ng i ts u se.
I n su c h c a ses, u ser s m a y b e r eq u i r ed to ta k e a p p r op r i a te step s.
· SD, SDHC, and SDXC Logos are trademarks of SD-3C, LLC.
· HDMI Logo and High-Denition Multimedia Interface are trademarks or registered trademarks of
A d m i ni str a tor , I nc .

iv
Contents
Before using your camera................................... i i
I ntend ed u se........................................................ i i
I m p or ta nt p r ec a u ti ons ......................................... i i
1 G e t t i n g t o k n o w y o u r c a m e r a .....................1
Names of parts ....................................................1
F r ont v i ew ......................................................1
Bottom view...................................................1
Back and side views......................................2
F u nc ti on k ey s ................................................2
LCD screen indicator...........................................3
S h ooti ng m od e ..............................................3
P l a y b a c k m od e..............................................4
Operation methods .......................................4
G etti ng sta r ted .....................................................5
A tta c h i ng th e h a nd str a p ...............................5
A tta c h i ng th e l ens c a p str a p ( op ti ona l ) ......... 6
I nsta l l i ng b a tter i es......................................... 7
Inserting SD memory card............................8
Removing SD memory card..........................8
R em ov i ng th e l ens c a p ...............................1 0
T u r ni ng th e c a m er a on ................................1 0
I ni ti a l a c ti v a ti on a nd setu p ..........................1 0
2 T a k i n g p i c t u r e s / m o v i e s ...........................1 3
Before you start taking pictures / movies .........13
P r oc ed u r es ........................................................ 13
S T E P 1 I np u t p a ti ent i nf or m a ti on or
p h otog r a p h p a ti ent r ec or d ( op ti ona l ) ................1 4
E nter nu m b er ............................................... 1 4
S c a nni ng Q R c od e
(feature only available in conjunction with
special patient ID software) ........................1 5
P h otog r a p h p a ti ent r ec or d .......................... 1 6
E r a se p a ti ent i nf or m a ti on............................1 6
Con rm patient information ........................ 1 6
S T E P 2 S el ec t sh ooti ng m od e .........................1 6
P r ei nsta l l ed m od es ..................................... 1 6
C u stom m od es ............................................1 8
S c a nni ng Q R c od e ......................................1 9
STEP 3 Select magni cation rate
( sti l l i m a g es) ......................................................1 9
S T E P 4 S et f oc u s d i sta nc e ( sti l l i m a g es) ..........2 0
S T E P 5 T a k e p i c tu r es ( sti l l i m a g es) ..................2 2
F oc u s a nd ta k e p i c tu r es..............................2 2
S p ec i a l f u nc ti ons of sh ooti ng m od es................2 4
M i r r or m od e.................................................2 4
F a c e m od e...................................................2 4
T el e- m a c r o m od e ........................................2 5
STEP 3 Record movies .....................................2 6
F oc u s a nd r ec or d m ov i es............................2 6
3 P l a y b a c k ......................................................2 7
V i ew i ng y ou r i m a g es ( sti l l i m a g es / m ov i es) ....2 7
S i ng l e f r a m e p l a y b a c k .................................2 7
R ev i ew i ng oth er i m a g es..............................2 8
T h u m b na i l i m a g es.......................................2 8
E r a si ng i m a g es..................................................2 9
E ra seth ed isp la y ed im a g e..........................2 9
E r a se sel ec ted m u l ti p l e i m a g es
si m u l ta neou sl y ............................................2 9
P r otec t i m a g es...................................................30
Playing movies with HDMI cable ................30
F u nc ti ons w h i l e r ev i ew i ng sti l l i m a g es..............32
M a g ni f y / r ed u c e i m a g es.............................32
E d i t i m a g es..................................................33
F u nc ti ons w h i l e r ep l a y i ng m ov i es.....................35
P l a y ..............................................................35
P a u se...........................................................35
R ew i nd / f a st f or w a r d ...................................35
V ol u m e.........................................................35
S top .............................................................35
4 T r a n s f e r r i n g i m a g e s t o y o u r c o m p u t e r . . . 3 6
5 M e n u s ..........................................................3 7
S h ooti ng m od e m enu ........................................37
P l a y b a c k m od e m enu ........................................38
S etu p m enu .......................................................38
6 N o t e s o n u s e ...............................................4 0
Operating temperatures....................................4 0
R ec or d i ng m ed i a ...............................................4 0
LCD screen (with touch panel function)............ 4 1
Degradation of image quality ............................ 4 1
W a ter a nd c h em i c a l r esi sta nc e......................... 4 1
Others ................................................................ 4 1
7 M a i n t e n a n c e a n d s t o r a g e .........................4 2
M a i ntena nc e ......................................................4 2
S tor a g e ..............................................................4 2
8 T r o u b l e s h o o t i n g .........................................4 3
C a m er a p r ob l em s..............................................43
E r r or m essa g es .................................................4 4
F r eq u entl y a sk ed q u esti ons ..............................4 5
9 Specifications ............................................4 6
1 0 A c c e s s o r i e s ................................................4 7
1 1 W a r r a n t y ......................................................4 7

1
G etti ng to k now y ou r c a m er a
1
1
Getting to know your camera
N o . P a r t n a m e N o . P a r t n a m e
1P ow er sw i tc h 5Inside ash
2S h u tter b u tton 6Lens
3P i l ot l a m p 7LED light
4Outside ash 8M i c r op h one
B o t t o m v i e w
N o . P a r t n a m e N o . P a r t n a m e
1S tr a p ey el et 4T r i p od soc k et
2Lock lever 5Name plate
3Battery cover 6S tr a p h ol e
Names of parts
F r o n t v i e w
23
845
6
7
1
1
2
3
4
5
6

2
F u n c t i o n k e y s
F 1 – F 4 k ey s a r e f u nc ti on k ey s w h i c h w i l l c h a ng e d ep end i ng on th e m od e yo u sel ec t. T h ey
a r e d i sp l a y ed on th e l ef t of th e d i sp l a y . Y ou c a n ei th er p r ess th e k ey or d i r ec tl y tou c h th e
sc r een to op er a te th ese f u nc ti ons. Y ou c a n a l so u se th e c ol or b a r s a p p ea r i ng on th e r i g h t
si d e of th e sc r een. C ol or b a r s on th e r i g h t si d e c or r esp ond to th e f u nc ti on k ey s on th e l ef t
si d e of th e sc r een.
I n oth er w or d s, “ P r ess ( F 1 ) ” , c a n b e a c h i ev ed b y d ep r essi ng ei th er th e p h y si c a l “ F 1 ”
k ey , or th e c or r esp ond i ng c ol or b a r ( or ta b ) on th e d i g i ta l d i sp l a y on th e l ef t ( or r i g h t) si d e of
th e sc r een.
N o . P a r t n a m e N o . P a r t n a m e
1
F u nc ti on k ey s 4S E T K ey
1 a : F 1 5MENU Key
1 b : F 2 6S p ea k er
1c:F3 7Liquid crystal display screen (touch panel)
1 d : F 4 8Card slot/HDMI connector cover
2Dial key 9HDMI connector (Micro HDMI)
3S tr a p m ou nt 1 0 SD card slot
B a c k a n d s i d e v i e w s
1 d
2
1
3
4
5
6
7
9
1 0
8
1 d
1 c
1 b
1 a
1 c
1 b
1 a
M o d e
C u s t o m
S t a n d a r d
22-70cm
T
1 / 4 1 / 3
1 / 2 . 5 1 / 1 . 5 1 / 1 . 3
1 / 2
1 . 0
F i n e
1 2 3 4
3 M
4 : 3
3 0 c m
M o d e
C u s t o m
S t a n d a r d
L R
+ 0 . 0
I S O
W B
F M
L E D
M o d e
C u s t o m
S t a n d a r d
22-70cm
T
1 / 4 1 / 3
1 / 2 . 5 1 / 1 . 5 1 / 1 . 3
1 / 2
1 . 0
F i n e
1 2 3 4
3 M
4 : 3
3 0 c m
F u nc ti on k ey s C ol or b a r sC ol or ta b s

3
G etti ng to k now y ou r c a m er a
1
LCD screen indicator
Information described on the LCD screen for shooting mode and playback mode, respec-
ti v el y , i s a s f ol l ow s;
S h o o t i n g m o d e
N o . P a r t n a m e
R e f e r e n c e
N o . P a r t n a m e
R e f e r e n c e
F u nc ti on ta b s 9I m a g e q u a l i ty P. 3 8 , 3 9
1 a : P r ei nsta l l ed m od es P . 1 6 1 0 C ol or b a r s P . 2
11 b : C u stom m od es P . 1 8 1 1 S tor a g e c a p a b i l i ty 9
1c: Edit patient ID information P . 1 4 1 2 P a ti ent i nf or m a ti on
P . 1 4 to 1 6
1 d : P l a y b a c k m od e P . 2 7 1 3 I nsta nt m essa g e -
2A c ti v e sh ooti ng m od e P . 1 6 1 4 A F F r a m e P. 2 2 , 2 3
3C a r d i nd i c a tor - 1 5 F oc u s m od e P. 2 3
4P ossi b l e d i sta nc e r a ng e P . 2 0 1 6 W h i te b a l a nc e P. 3 7
5Optimal distance (before focusing) P . 2 0 , 2 2 1 7 A u to E x p osu r e ( A E ) M od e P. 3 7
A c tu a l d i sta nc e ( a f ter f oc u si ng ) -1 8 ISO speed P. 3 7
6Current magni cation rate P . 1 9 1 9 LED light mode P. 3 7
7A u to- c r op p i ng P . 2 4 2 0 Brightness compensation P. 3 7
8I m a g e si z e P. 3 8 , 3 9 2 1 F l a sh m od e P. 3 7
* Other information might appear on the screen.
Advanced
P.4 “LCD screen indicator”
1 a
2
1
1 7
1 6
1 5
1 8
1 9
43 5 6
9
8
1 1
1 0
1 2
1 31 4
7
2 1
1 b
1 c
2 0
1 d

4
P l a y b a c k m o d e
O p e r a t i o n m e t h o d s
T h er e a r e tw o w a y s to op er a te th i s c a m er a .
●D i r e c t s c r e e n t o u c h
T ou c h one f u nc ti on ta b yo u w a nt to sel ec t.
N o . P a r t n a m e
R e f e r e n c e
F u nc ti on ta b s
1 a : S h ooti ng m od e P.13
11 b : E nl a r g e i m a g e P. 3 2
1 c : T h u m b na i l i nd ex P . 2 8
1 d : E r a se i m a g e P . 2 9
2S el ec ted sh ooti ng m od e P . 1 7
3Picture No./Total number of
p i c tu r es ta k en -
4Date & time of the picture -
5Selected magni cation rate P . 1 9
6I m a g e si z e P. 3 8 , 3 9
7I m a g e q u a l i ty P. 3 8 , 3 9
8P a ti ent i nf or m a ti on
P . 1 4 to 1 6
9Folder No.-File No. -
●Touchpanelfunctionof
E y e S p e c i a l C - I V
S c r een k ey s c a n b e op er a ted w i th or w i th -
ou t g l ov es, or b y u si ng th e ti p of a sty l u s.
However, securely pressing with nger is
recommended. Note that the screen does
not r esp ond to m u l ti - tou c h or sw i p e m o-
ti ons.
Tips
●P r e s s k e y s
P r ess F 2 or F3 key or rotate the d i a l k ey to sel ec t th e f u nc ti on yo u w ou l d l i k e to
p er f or m . T h en, p r ess S E T k ey to d eter m i ne.
F or th e d eta i l s of th e f u nc ti on k ey s ( F 1 - F 4 ) , r ef er to P . 2 “ F u nc ti on k ey s” i n th i s User ’ s
M a nu a l .
Face Low glare
Shade take
1 a
1 b
1 c
1 d
21 4
5
6
7
89
3

5
G etti ng to k now y ou r c a m er a
1
Getting started
P er f or m th e f ol l ow i ng p r ep a r a ti on b ef or e yo u sta r t ta k i ng p i c tu r es.
A t t a c h i n g t h e h a n d s t r a p
A tta c h one end of th e str a p to th e str a p m ou nt on th e l a ter a l si d e of th e c a m er a a nd a noth er
to th e ey el et on th e b ottom of th e c a m er a .
Attention
●A l w a y s u se th e str a p to a v oi d d r op p i ng th e c a m er a a c c i d enta l l y . T h i s m i g h t c a u se
injuries.
1 Opentheapandpullthebeltoutofthe2adjusters.
12
3
4
4
Lower
Up p er
N o . N a m e N o . N a m e
1F l a p 3Belt
2Slide adjuster 4R eta i ner c l i p
2A t t a c h o n e e n d o f t h e s t r a p t o t h e s t r a p m o u n t o n t h e u p p e r l a t e r a l s i d e o f t h e
cameraandadjustthebeltlength.
A p p r ox . 5 - 8 c m
(2-3 inches)
S tr a p m ou nt

6
3P uttheotherendofthestrapthroughthestrapeyelet.Adjustthestrapwhile
holdingthecamerauntiltheoptimalfitisobtained.
4 Feedthestrapendthroughtheslideadjustertofix.
· I nser t th e str a p i nto th e b u c k l e a s p i c tu r ed b el ow .
A t t a c h i n g t h e l e n s c a p s t r a p ( o p t i o n a l )
1L o o p t h e l e n s c a p s t r a p t o t h e s t r a p h o l e . T a k e t h e l e n s c a p i t s e l f a n d p u s h i t
t h r o u g h t h e l o o p t h a t i s s t i c k i n g o u t .
I f yo u d o not need th e l ens str a p , c u t i t of f w i th sc i ssor s etc .
I n f o

7
G etti ng to k now y ou r c a m er a
1
I n s t a l l i n g b a t t e r i e s
T h e b a tter y sl ot i s on th e b ottom si d e of th e c a m er a . G entl y tu r n th e c a m er a u p si d e d ow n to
i nsta l l th e b a tter i es.
1T u r n t h e l o c k l e v e r t o t h e p o s i t i o n o f “ U N -
L O C K ” . T h e n , s l i d e t h e b a t t e r y c o v e r t o t h e
f r o n t s i d e o f t h e c a m e r a .
2F l i p u p t h e b a t t e r y c o v e r a n d i n s e r t 4 a l k a l i n e o r r e c h a r g e a b l e A A n i c k e l m e t a l h y -
d r i d e ( N i M H ) b a t t e r i e s .
3C l o s e a n d s l i d e b a c k t h e b a t t e r y c o v e r t o t h e
o r i g i n a l p o s i t i o n a n d r o t a t e t h e l o c k l e v e r t o
t h e “ L O C K ” p o s i t i o n .
· M a k e s u r e t o r o t a t e t h e l o c k l e v e r t o t h e
“ L O C K ” p o s i t i o n t o a v o i d d r o p p i n g t h e
b a t t e r i e s .
· U s e o n l y n i c k e l m e t a l h y d r i d e ( N i M H ) b a t -
t e r i e s o r a l k a l i n e b a t t e r i e s . N e v e r u s e
m a n g a n e s e b a t t e r i e s o r n i c k e l c a d m i u m
b a t t e r i e s .
· N e v e r u s e b a t t e r i e s o f d i f f e r e n t t y p e s o r
differentmanufacturestogetherormixold
a n d n e w b a t t e r i e s .
· Rechargeable nickel metal hydride (NiMH) batteries may be inert and consequently
th ey m i g h t not su p p l y p ow er i m m ed i a tel y a f ter p u r c h a se or i f th ey a r e l ef t u nu sed f or
a long period of time. Recharge and discharge the batteries fully about 2-3 times to
r estor e th e f u l l f u nc ti on of th e b a tter i es.
· P er f or m a nc e ti m e of a l k a l i ne b a tter i es m i g h t b ec om e sh or ter i f th ey h a v e b een l ef t
u nu sed f or a l ong p er i od of ti m e si nc e th ei r m a nu f a c tu r i ng d a te.
· A v oi d u si ng b a tter i es i n ex tr em el y c ol d env i r onm ent a s l ow tem p er a tu r es d r a m a ti c a l l y
r ed u c e th e nu m b er of p i c tu r es y ou c a n ta k e.
Slide back the battery cover
while pressing here.
N o t e
I n f o

8
I n s e r t i n g S D m e m o r y c a r d
1O p e n t h e C a r d s l o t / H D M I c o n n e c t o r c o v e r a n d i n s e r t t h e S D m e m o r y c a r d .
Up to 2 G B 4to 3 2 G B 64 to 5 1 2 G B
T h e c a r d l a b el i s f a c i ng th e
f r ont si d e of th e c a m er a .
· M a k e s u r e t h e c a r d i s f a c i n g t h e r i g h t d i r e c t i o n . F o r c i n g t h e c a r d m a y d a m a g e t h e
c a m e r a o r c a r d .
2C l o s e t h e c a r d s l o t / H D M I c o n n e c t o r c o v e r s e c u r e l y .
If you want to use SureFile software, your SD memory card must rst be formatted by
th e E y eS p ec i a l C - I V c a m er a .
P.36 “Transferring images to your computer”
R e m o v i n g S D m e m o r y c a r d
1O p e n t h e c a r d c o v e r . P r e s s l i g h t l y o n t h e e d g e o f t h e m e m o r y c a r d u n t i l y o u h e a r a
clicksoundanditwilleject.
D o n o t i n s e r t o r r e m o v e t h e m e m o r y c a r d w h e n t h e p i l o t
l a m p i s b l i n k i n g i n o r a n g e . D o i n g s o m a y d a m a g e y o u r
p i c t u r e s , c a r d o r c a m e r a .
N o t e
Tips
N o t e

9
G etti ng to k now y ou r c a m er a
1
● S t o r a g e c a p a c i t i e s ( n u m b e r o f p i c t u r e s )
Approximately 350 shots can be taken on a fully charged rechargeable nickel metal
hydride battery (NiMH; cell capacity 1,900mAh). Approximately 250 shots can be taken
w h en u si ng new a l k a l i ne b a tter i es. ( b a sed on i n- h ou se test r esu l ts)
The numbers above are just rough estimates and your results may vary. Extensive
op er a ti on of th e c a m er a setti ng s or r ev i ew i ng p h otog r a p h s m a y c a u se th e nu m b er of
sh ots to b e r ed u c ed .
●NoteforWi-FiSDmemorycards
Use rechargeable nickel metal hydride (NiMH) batteries for the camera when using a
Wi-Fi SD memory card. Alkaline batteries might not be able to supply enough energy
to operate the camera properly. Also, Wi-Fi SD memory cards consume more energy
to op er a te th a n r eg u l a r m em or y c a r d s. T h e nu m b er of p i c tu r es th a t c a n b e ta k en a nd
stor ed a r e l ess th a n th e a b ov e m enti oned nu m b er .
●Write-protectiontab
The SD memory card has a write-protection tab. Slide
d ow n th e ta b to p r ev ent v a l u a b l e d a ta f r om b ei ng a c -
c i d enta l l y er a sed f r om th e m em or y c a r d . T o sa v e, ed i t
or erase data on a SD memory card, unlock the card.
●Storagecapacityofamemorycard
T h e nu m b er of p h otos yo u c a n stor e i n th e p r ov i d ed m em or y c a r d i s a p p r ox i m a tel y
9 , 9 9 9 . A f ter ex c eed i ng 5 , 0 0 0 sh ots, th e m essa g e “ T oo m a ny i m a g es i n m em or y c a r d .
P l ea se er a se som e i m a g es” a p p ea r s on th e sc r een w h en sw i tc h i ng on th e c a m er a .
When reaching 9,999 shots, the message “Number of images reached the limit. Cannot
sa v e a ny m or e” a p p ea r s a nd yo u c a n no l ong er ta k e p h otos w i th th e m em or y c a r d w i th
no remaining capacity. Thus, when you nd the rst message above, transfer and back-
up the stored data to other storage media and erase the data stored in the SD memory
c a r d i n u se.
M essa g e a f ter ex c eed i ng 5 , 0 0 0 sh ots M essa g e w h en r ea c h i ng 9 , 9 9 9 sh ots
The number of photos you can store in the provided 16GB SDHC memory card with a variety of condi-
ti ons a r e sh ow n b el ow f or y ou r r ef er enc e.
Still image (Image mode : Fine Pixels : 3M) : 9,680 shots
Movie : 340 min *Maximum time duration to record one movie is 10 minutes.
· T h e n u m b e r o f p i c t u r e s y o u c a n t a k e w i t h o n e m e m o r y c a r d v a r i e s d e p e n d i n g o n t h e
i m a g e s i z e a n d q u a l i t y y o u s e l e c t e d . T h e n u m b e r s p r o v i d e d a b o v e a r e f o r y o u r r e f e r -
e n c e .
Tips
w r i ta b l e sta te
w r i te- p r otec ted
N o t e

10
R e m o v i n g t h e l e n s c a p
1P i n c h t h e n o t c h e s o n t h e l e n s c a p a n d p u l l i t o f f .
· R ea tta c h th e l ens c a p b y p i nc h i ng th e notc h es.
· A l w a y s a tta c h th e c a p w h en th e c a m er a i s not i n u se.
T u r n i n g t h e c a m e r a o n
1R o t a t e t h e p o w e r s w i t c h t o t u r n t h e c a m e r a o n .
· T o tu r n th e c a m er a of f , r ota te th e p ow er sw i tc h
with the dial notch to the OFF position.
· T h i s c a m er a h a s p ow er - sa v i ng f u nc ti on a nd
a u to- p ow er of f f u nc ti on. W h en th e c a m er a i s l ef t
u nu sed f or a c er ta i n p er i od of ti m e, th e c a m er a
a u tom a ti c a l l y sh i f ts i nto th e p ow er sa v e m od e.
W h en th e c a m er a i s l ef t u nu sed f u r th er , i t w i l l sh u t
of f a u tom a ti c a l l y to c onser v e b a tter y p ow er .
I n i t i a l a c t i v a t i o n a n d s e t u p
When you turn the camera on for the rst time, you may need to set the language, time zone,
d a te, ti m e a nd u ni t.
1L a n g u a g e s e l e c t i o n
S el ec t one f r om th e f ol l ow i ng l a ng u a g es:
J a p a nese, E ng l i sh , G er m a n or F r enc h .
O N
O FF

11
G etti ng to k now y ou r c a m er a
1
2S e t t i n g t h e t i m e z o n e
S el ec t one ti m e z one.
3C h o o s i n g t h e d a t e d i s p l a y s t y l e
S el ec t one d a te f or m a t.
4S e t t i n g t h e d a t e a n d t i m e
R ota te th e d i a l k ey or tou c h th e
screen to move to the next item eld.
P r ess F 2 or F3 key to increase or
d ec r ea se th e v a l u e f or ea c h op ti on.
5S e l e c t i n g u n i t d i s p l a y
Y ou c a n c h oose f r om m etr i c a nd i m p er i a l
u ni t d i sp l a y .
T h ese i tem s c a n b e c h a ng ed l a ter i n th e setu p m od e.
I n f o

12
●What’spowersavemode?
I f no k ey op er a ti on i s p er f or m ed f or th e set p er i od of ti m e ( th e i ni ti a l setti ng i s 1 m i nu te) ,
the display on the LCD screen will turn off. The pilot lamp blinks when the power save
mode is on. Press any button or touch the LCD screen to turn the display back on.
T h e sta nd - b y ti m e f or th e p ow er sa v e m od e c a n b e c h a ng ed i n th e setu p m enu .
( P. 3 8)
●EnergysupplytotheSDmemorycardslotduringpowersavemode
Energy is supplied to the SD memory card slot while power save mode is on. When
using a Wi-Fi SD memory card, data transfer continues even if the camera shifts to the
p ow er sa v e m od e.
●What’sauto-poweroff?
This camera automatically turns off if no operation is performed for 30 minutes (default
setti ng ) a f ter th e p ow er sa v e m od e sta r ts w or k i ng . T o c onti nu e u si ng th e c a m er a a f ter
a u to- p ow er of f , sw i tc h of f th e c a m er a a nd r ea c ti v a te i t b y tu r ni ng th e p ow er on.
When the camera turns off with auto-power off, the entered non stored patient ID
nu m b er a nd i nf or m a ti on a r e er a sed .
●Howdoyouconfirmthebatterylevel?
W h en th e c a m er a i s tu r ned on, th e b a tter y i nd i c a tor w i l l a p p ea r on th e d i sp l a y .
I nd i c a tor R em a i ni ng b a tter y l ev el
( G r een)
(appears only for 3 sec)
T h er e i s a m p l e b a tter y c h a r g e.
(Orange) T h e b a tter y i s a l m ost h a l f c h a r g ed .
( R ed )
The battery will soon run out. Have new or charged bat-
ter i es r ea d y .
Battery exhausted
( er r or m essa g e)
T h e b a tter i es a r e d ep l eted . T h e d i sp l a y w i l l g o b l a nk
sh or tl y a f ter th i s m essa g e a p p ea r s a nd th e c a m er a w i l l
stop w or k i ng . R ep l a c e or r ec h a r g e th e b a tter i es.
● S l o w r e s p o n s e o f t h e c a m e r a
E y eS p ec i a l C - I V som eti m es d oes not r esp ond to yo u r c om m a nd i m m ed i a tel y w h en
oth er op er a ti ons a r e i n p r og r ess; f or ex a m p l e, i m m ed i a tel y a f ter yo u r ota te th e d i a l to
change the magni cation rate and then press the shutter half-way to focus or just after
yo u h a v e ta k en a p i c tu r e etc . F or op ti m u m p er f or m a nc e w a i t u nti l ong oi ng p r oc esses
h a v e c onc l u d ed b ef or e op er a ti ng .
Tips

13
G etti ng to k now y ou r c a m er a / T a k i ng p i c tu r es
2
1
2
Taking pictures / movies
● F ol l ow th e sa f ety i nf or m a ti on i nd i c a ted i n th e a tta c h ed “ I m p or ta nt S a f ety I nstr u c ti ons” .
Before you start taking pictures / movies
E y eS p ec i a l C - I V i s d esi g ned ex c l u si v el y f or d enti str y , w h i c h i s d i f f er ent f r om g ener a l d i g i ta l
cameras that allow pictures at any distance from the subject. In order to take intraoral photos
under optimal conditions, the distance from the subject has to be within a certain range.
● General digital camera ● EyeSpecial C-IV
[ A d v a nta g es]
· C a n ta k e p h otos a t a ny d i sta nc e
* C a nnot ta k e c l ea r p i c tu r es f r om
c l ose d i sta nc es.
[Disadvantages]
· The subject doesn’t always
a p p ea r i n th e sa m e si z e i n th e
p h otos.
· Light distribution is uneven.
[ A d v a nta g es]
· Subjects always appear in the
sa m e si z e i n th e p h otos.
· Light distribution is even.
[Disadvantages]
· Distance has to be within the
l i m i ted r a ng e.
Procedures
STEP1
STEP2
STEP3
STEP3
STEP4
STEP5
I np u t p a ti ent i nf or m a ti on or
p h otog r a p h p a ti ent r ec or d
( op ti ona l )
S el ec t sh ooti ng m od e
Select magni cation rate
S t i l l i m a g e s
M o v i e s
S et f oc u s d i sta nc e
T a k e p i c tu r e R ec or d m ov i e
· E nter nu m b er P . 1 4
· S c a n Q R c od e P . 1 5
· P h otog r a p h p a ti ent r ec or d P . 1 6
· P r ei nsta l l ed m od es P . 1 6 , 1 7
· C u stom m od es P . 1 8
P . 1 9
P . 2 0 , 2 1
P. 2 2 , 2 3 P . 2 6

14
STEP 1 Input patient information or photograph patient record (optional)
Y ou c a n c h oose one i m a g e m a na g em ent m eth od f r om th e f ol l ow i ng 2 m eth od s;
· G i v e p a ti ent i nf or m a ti on to ea c h i m a g e.
· P h otog r a p h p a ti ent r ec or d .
T h i s p r oc ed u r e i s op ti ona l a nd c a n b e sk i p p ed .
P r ess F3 key in the shooting mode, the following message appears on the screen. You
c a n enter a new p a ti ent nu m b er or ed i t a nd er a se stor ed i nf or m a ti on.
… E nter nu m b er ( m a x i m u m 2 0 d i g i ts i nc l u d i ng u nd er -
sc or e, h y p h en a nd sp a c e)
… Read patient’s name and ID No. by scanning QR
C od e
. . . P h otog r a p h p a ti ent r ec or d
. . . E r a se stor ed i nf or m a ti on
E n t e r n u m b e r
W h en yo u sel ec t “ E nter nu m b er ” , nu m b er k ey s a p -
p ea r on th e d i sp l a y . Y ou c a n enter m a x i m u m of 2 0
d i g i ts nu m b er ( i nc l u d i ng u nd er sc or e, h y p h en a nd
sp a c e w h en u sed ) .
E y eS p ec i a l C - I V h a s a f u nc ti on th a t m a k es r ec or d i ng
p a ti ent i nf or m a ti on m a nd a tor y . W h en th i s f u nc ti on i s
a c ti v a ted , y ou c a nnot ta k e p h otos u nl ess yo u r ec or d
p a ti ent i nf or m a ti on.
Advanced
P . 9 6 “ Q R c od es to m a k e r ec or d i ng p a ti ent i nf or m a ti on m a nd a tor y ”
E r a se l a st c h a r a c ter
F i ni sh th e i np u t
Tips

15
T a k i ng p i c tu r es
2
Scanning QR code (feature only available in conjunction with
s p e c i a l p a t i e n t I D s o f t w a r e )
Patient’s name and ID number can be stored by
sc a nni ng a Q R c od e ex c l u si v e to th i s c a m er a .
W h en yo u sel ec t “ S c a n Q R C od e” , th e f ol l ow i ng
display appears on the screen. Hold the camera over
th e c od e i n su c h a w a y th a t th e w h i te sq u a r e on th e
screen is centered over the QR code. Half press the
sh u tter b u tton to sta r t sc a nni ng .
W h en sc a nned su c c essf u l l y , th e m essa g e sh ow n on
the right will appear on the screen. Press OK to store
th e i nf or m a ti on.
Patient ID number will be displayed on the screen and stored as follows;
1 . I n th e sh ooti ng m od e
Patient ID number is displayed on the lower right of the
sc r een a nd r ec or d ed on th e i m a g e ta k en.
2 . I n th e p l a y b a c k m od e
Patient ID number is displayed on the lower right of the
sc r een.
3. P a ti ent i nf or m a ti on i m a g e
W h en p a ti ent i nf or m a ti on i s r ec or d ed , a n i m a g e sh ow n
b el ow i s c r ea ted .
Tips
Date
T i m e
ID
* P a ti ent’ s na m e d oes not
a p p ea r .

16
P h o t o g r a p h p a t i e n t r e c o r d
P a ti ent’ s na m e c a n b e r ec or d ed b y ta k i ng a p i c tu r e of h i s/ h er m ed i c a l r ec or d .
Advanced
P . 2 1 “ P h otog r a p h p a ti ent’ s r ec or d ”
E r a s e p a t i e n t i n f o r m a t i o n
W h en yo u sel ec t “ E r a se i nf or m a ti on” , th e m essa g e p i c tu r ed
in the right photo appears. Press OK to erase the data.
P a ti ent i nf or m a ti on c a n a l so b e er a sed w h en th e
c a m er a i s tu r ned of f .
Confirmpatientinformation
T ou c h p a ti ent i nf or m a ti on on th e
l ow er r i g h t of th e sc r een to d i sp l a y th e
patient’s ID number along with his/her
na m e.
STEP 2 Select shooting mode
P r e i n s t a l l e d m o d e s
P r ess F 1 k ey to d i sp l a y a l l th e m od es p r ei nsta l l ed .
Nine different modes are preinstalled. Select one optimal mode for each purpose.
Blue frame : Selected mode
Back to previous display...
Up …
Down…
C h a ng e to ov er v i ew of m od es…
I n f o
Other manuals for EyeSpecial C-IV
3
Table of contents
Other Shofu Digital Camera manuals
Popular Digital Camera manuals by other brands
Johnson Controls
Johnson Controls Tyco Illustra PRO Body Worn Camera Configuration guide

Sony
Sony DSC-P31M Service manual
Pentax
Pentax Optio 33LF operating manual

Better Light
Better Light Panoramic Camera System Specification sheet
NITEforce
NITEforce Mini instruction manual
VOLTCRAFT
VOLTCRAFT WBS-220 App instruction manual
