SHUOYING PA0702 User manual

1
PA0702 User Guide
SHUOYING INDUSTRIAL(SHENZHEN)CO.,LTD
shuoying Road,Hebei IndustryArea,Dalang,LongHua
Town,Baoan,Shenzhen,China
Attention:
This handbook contains important security measures and the correct use of the
product information, in order to avoid accidents. Please make sure to reading the
manual carefully before use the device.
Please don’t be in high temperature, moisture or very dust place
Please don’t be in high temperature, especially in summer don't put the
device in the car when Windows closed.
Maximum operating environment
temperature is 40 °C.
Avoid fall or Violent collision of the device, don’t make the TFT display
screen were violent tremor, This could cause TFT display screen abnormal
or damage.
Please choose the appropriate volume, Use headphones should not be
too big volume, If feel tinnitus, Lower the volume or stop using it
please charge In the following condition,
A、
The battery power ICONS shows have no power
B、
The system automatically shut off, startup after power off soon
C、
Operation buttons no response
D、
The machine that the top right corner show red icons
When the device in the format or ongoing upload and download file,
please don't suddenly disconnect, This could cause application error.
For those who because of damage to the product, repair, or other causes

2
of erased the memory, The company shall not be liable for any
responsibility, please follow the user manual for the standardized
operation to use the device.
Don’t disassemble the product, don’t use alcohol、Thinner or benzene to
scrubbing products
Don't use the device one of the place of prohibit to use electronic
equipment in regional (such as the plane)
Please don't using the Tablet PC when you in driving or walking down the
street,
USB just only be used for data transmission
The company reserves the right to improve product, products specification and
design have any change, The information is subject to changes without prior
notice.
(This tablet is no waterproof function)
【Remark】All pictures in this manual is just for your reference. products
specification and design have any change, The information is subject to changes
without prior notice.
3
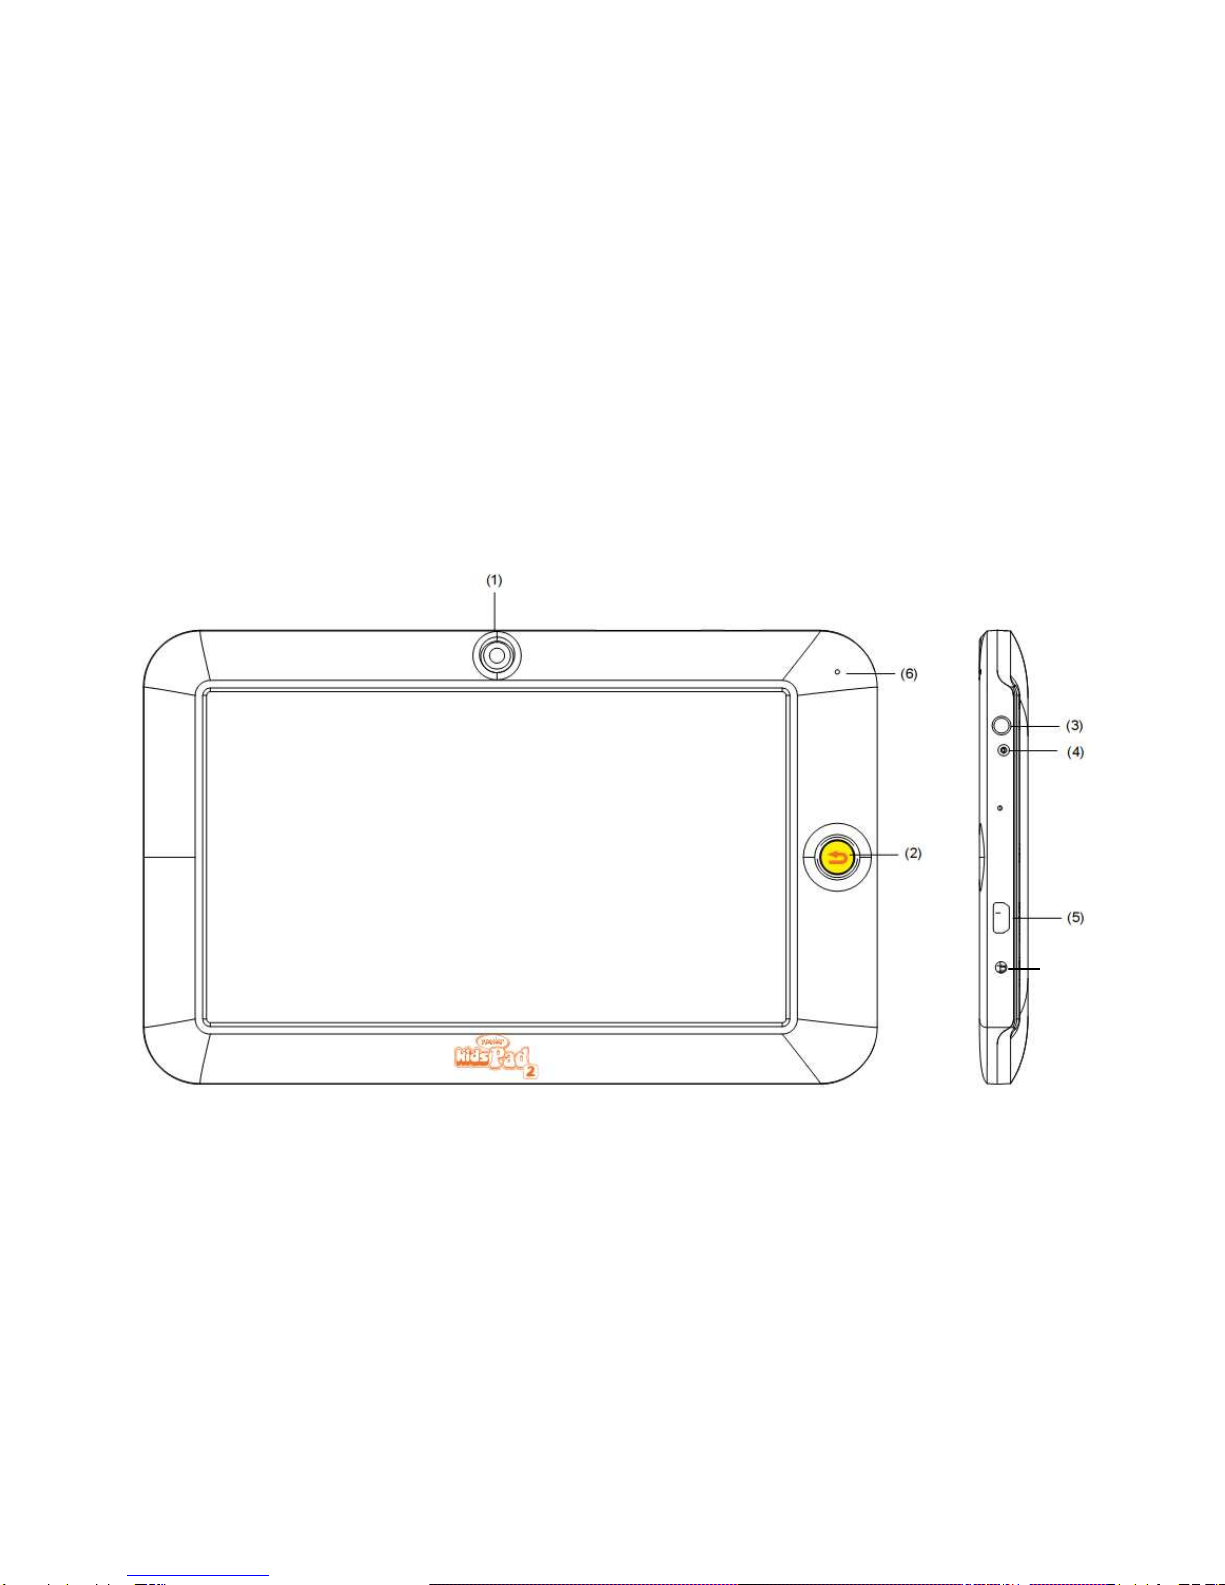
1. Appearance and button:
(11)

4
(1) Camera (2) Return button (3) MIC (4) earphone jack
(5) USB (6) Charging indicator light (7) Micro SD card slot
(8) Volume- (9) Volume + (10) Power (11) DC jack
1.1 Touch panel
7” Capacitive touch panel: In the Operation, to click, dragging on the touch
panel
1.2 POWER
startup: Long Press and hold the power button, the system will enter the main
interface
shutdown: In the main menu interface, Press the power button about 5 second

5
to shutdown, The system can hint "power off" option, Click ”ok”. You can safely
shut down.
Lock screen: Short press Power button to lock screen or unlock screen.
Remark 1.When power is empty, system will shut down automatically.
2. Illegal turn off the device, restart will scan and restore the disk, it
may take longer time to enter into system
1.3 Home
Short Press Home button will return the last interface; long Press Home
button will return the main interface
1.4 Volume +, Volume-
The buttons on top Volume +, Volume-achieve changes in the volume.
1.5 earphone jack
3.5 mm standard earphone jack
1.6 TF card
TF-CARD slot: external T-FLASH card
1.7 Micro USB
Micro USB jack: you can use it to connect the computer for data transmission,
charging and external connection USB flash drive
2. First use
2.1 Battery management and charge
Before first use, please set the device's battery is fully charged
Just need to connect the adaptor or USB interface, then you can charge
The first two times charging please keep about 6 hours, after that you just
need 4 hours to charge.
【Remark】: This tablet using Built-in type polymer battery, Charge must be to
choose standard adaptor (Input: AC110~240V 50/60Hz Max:180MA.. Output:
DC5.0~5.5V/2.5A), During the charging, the battery icon will scroll
When finished charging, battery icon will become green and stop rolling

6
In order to prolong the service life of the machine, suggest use out battery power
before charge it
【Remark】: 1. If you long time doesn’t to use this Tablet, in order to avoid power
consumption caused damage, please charge/play the battery once a month.
2、After low battery shut down, connect DC adaptor, device will remind low
battery, charging, need to wait some time until the battery is enough power to
enter into main menu.
3. Device charging should be in standby status for reach normal charging
time. Because with device and screen consumption, it may cause longer
charging time.
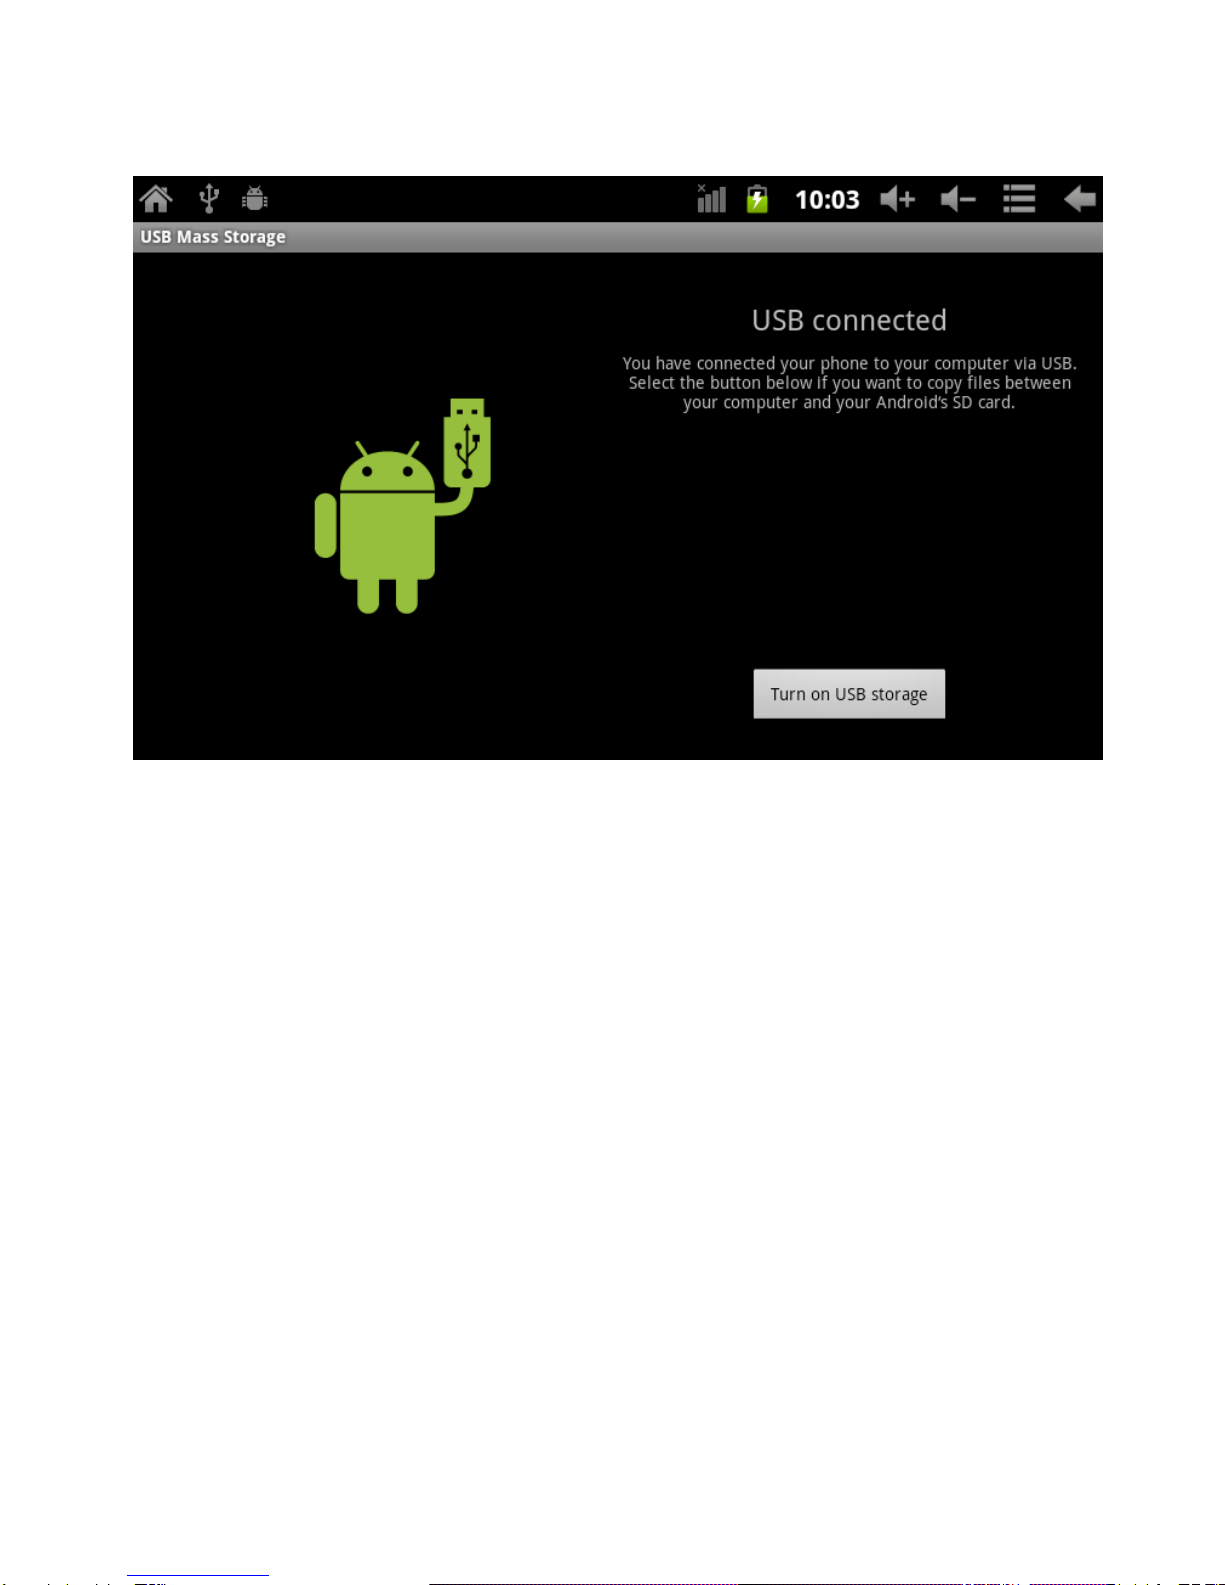
2.2 Connection with PC
Use USB cable to connect device to PC, device will pop up the USB
connection window, click Turn on USB storage to connect to PC
7
Into the load mode, you can copy; delete the file on the device and the file on the
memory card.
3. Equipment operation interface
3.1 Unlock Interface
After starting up, the Locking interface will be shown firstly, just as the following:

8
It is only available to conduct operation after unlocking.
Unlocking method: touch the right Lock icon by hands, and drag it next to a lock
at the right, then release hands. The system will be unlocked, and enter the main
interface. If drag it to the left, the system will enter the Camera mode.
3.2 Main interface describe
The main interface of the handheld tablet includes two modes: the small tools
on the desktop mode and the icons of application programs mode, both of which
can be switched between each other via the button at the top right corner.
The mode of small tools on the desktop is shown as follows:

9
Tap button on the shortcut bar to enter the interface of icon modes for
application programs, which is shown as follows:

10
Tap button to enter the desktop interface.
3.3 Shortcut Mode
Under the interface of the mode of small tools on the desktop, after pressing
Menu key, the Shortcut menu will popup at the bottom of the screen, shown as
follows:

11
3.4 Usage of Small Tools on Desktop
Users can add, delete or install the small tools on the desktop, as well as add or
delete icons of application programs or adjust the positions of icons; the icons
can be dragged within the working zone, or between the working zone and the
shortcut bar. Users can also add or delete the icons.
Under the interface of the mode of small tools on the desktop, press and hold the
icons of small tools, a check will popup on the interface, and a sign of trash bin
will popup in the central of the shortcut bar. At that time, it is able to drag the icon
anywhere on the desktop, or drag it directly to the trash bin to delete it.

12
4. Browse Webpage
Users can connect to the Internet via the browser:
Tap the browser icon on the desktop to open the network
browser, and then the interface below will popup:

13
5. Introduction to Typical Application
5.1 E-mails
Tap the E-mail icon to enter E-mails. Do the following:
1. Set E-mail accounts
2. Setup new E-mails.
3. Receive/send E-mails
4. Download or open attachments.
Note: The Shortcut menu will popup via pressing Menu key.
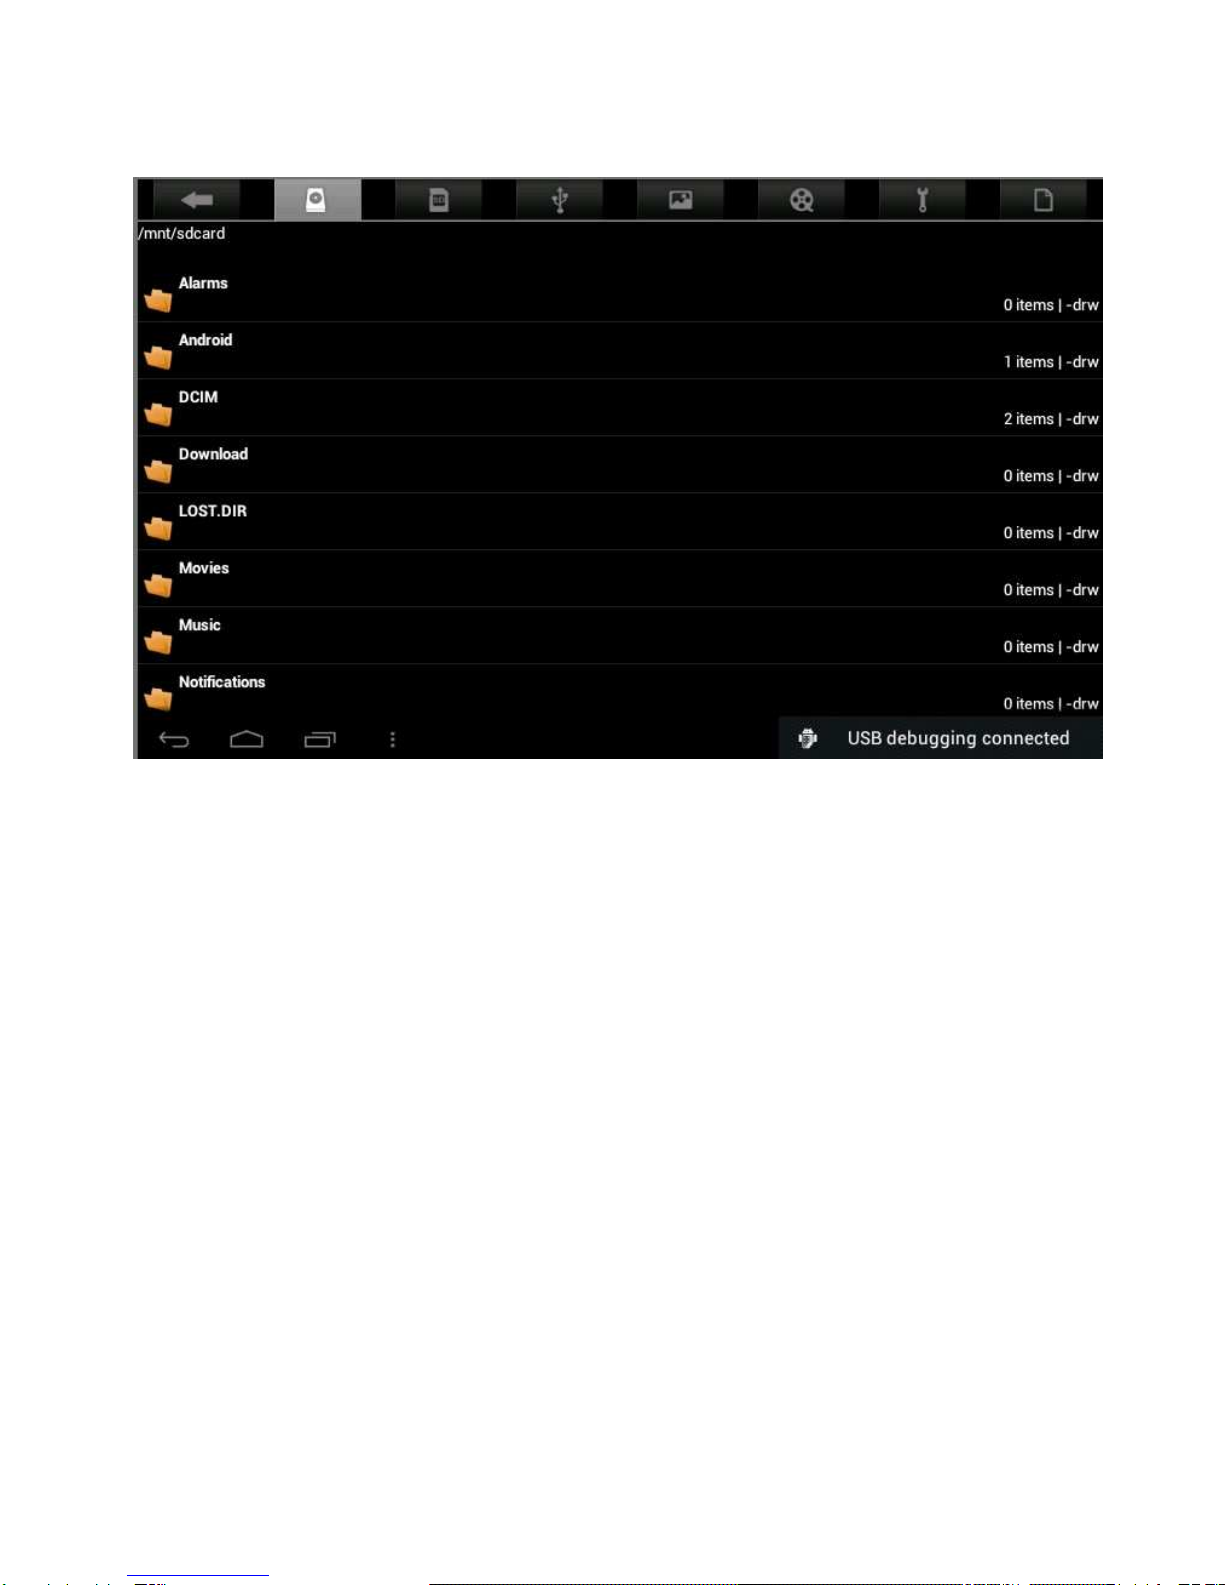
5.2 Browse Files
Tap the My Pad icon to enter the interface of Browse file
14
After entering the interface of Browse file, it is able to copy, cut, paste, new,
rename, or delete the LOCAL, SD1 or U disk.
Install Files
To install files in the file browser, tap the installation file with extension name as
APK, a installation window will popup. Select “Installing” to install the software on
the tablet.
15
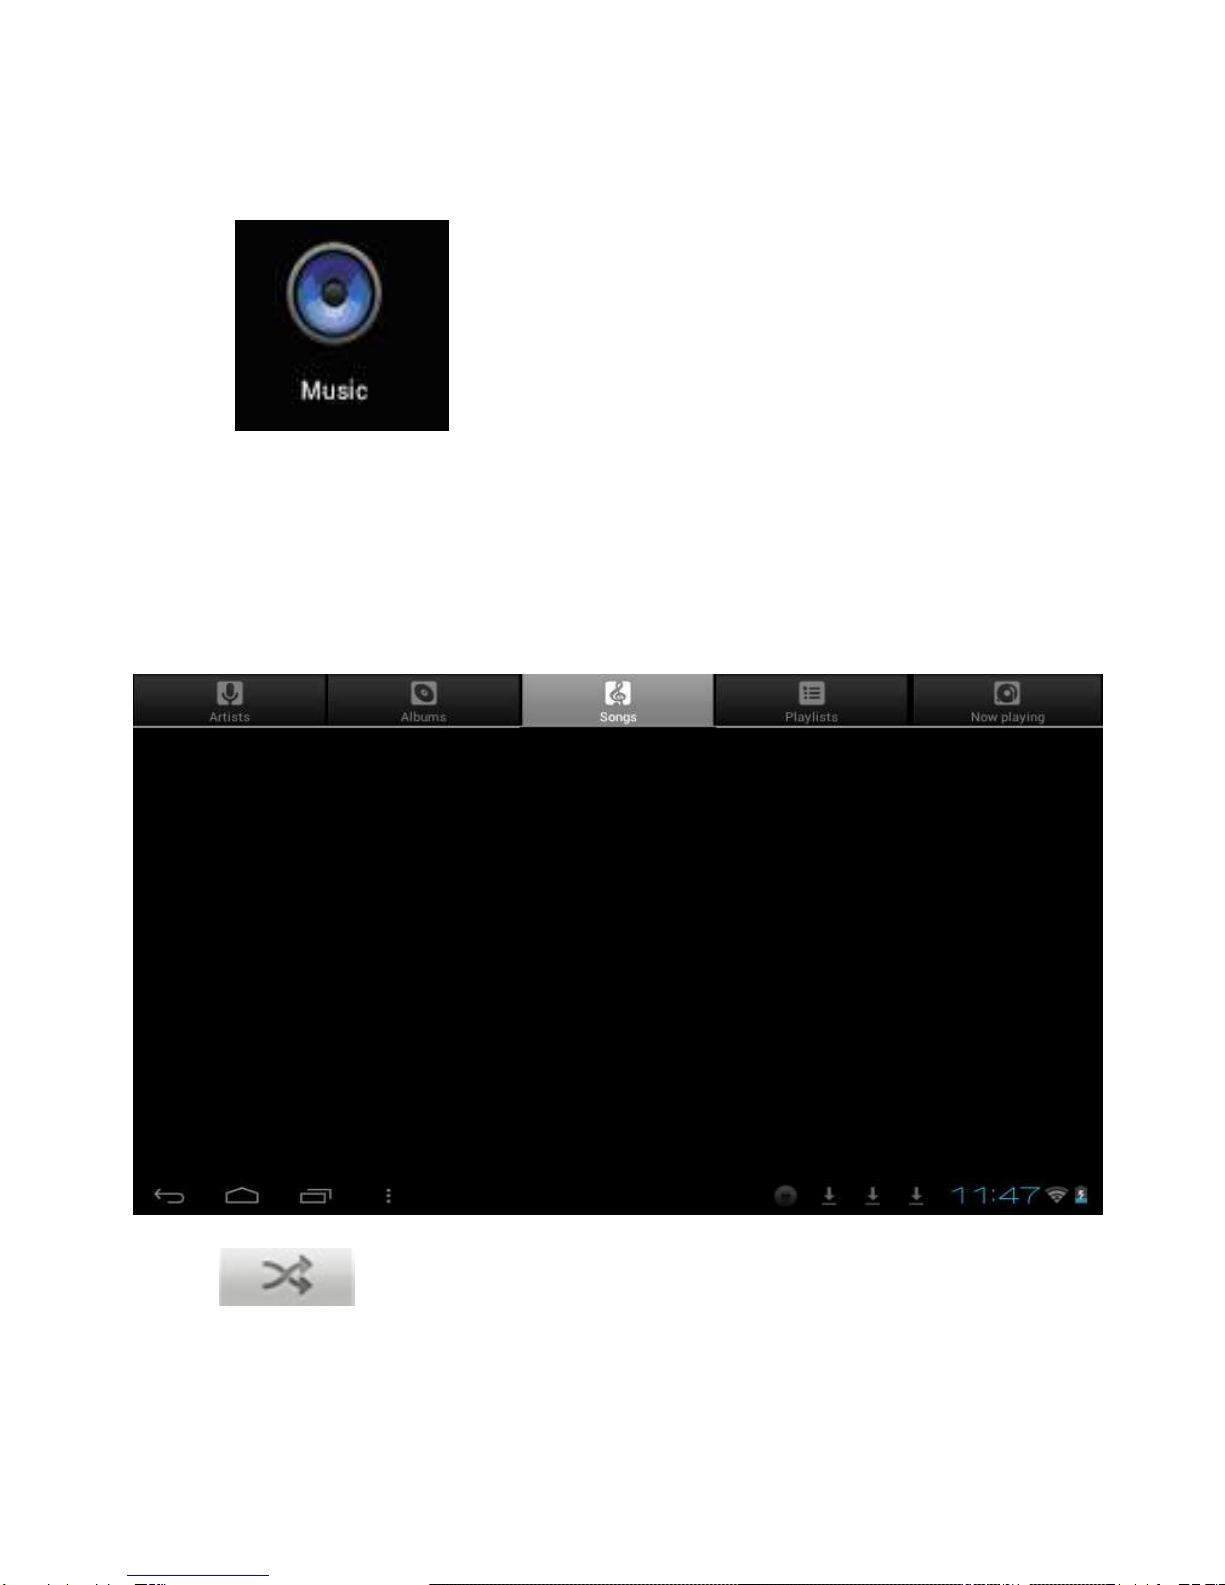
5.3 Music
Tap the icon to enter the interface of Music.
Tap the menu to popup the following shortcut menus, including Media gallery,
Music,
My favorite and my list.
Tap Music to enter the playing interface
1. Tap icon to enter the mode of random playing.

16
2. Tap icon to switch between the mode of loop for all and the mode
of single song playing.
6.4 Calendar
Tap icon to check date and time, as well as add
memorandums. Please set the calendar before using. Do the followings:
1. Firstly, connect the network. Then, open the Calendar to add Exchange
account, E-mail address, and password into the popup dialog box. Then
tap Next step.

17
2. After setting the server, take the next step according to the tips. Note: in the
step of server setting, it may fail to be connected for one time. If so, try
several times until be successful.
3. After completion of setting, the system will exit from this interface automatically.
Return to the main interface, and then enter Calendar interface to set date,
time and memos. (Note: the E-mail set for the first time can not be deleted;
the second time setting can be deleted. It is able to add new E-mail address.
To delete E-mail addresses, restore the factory-setting.
4. Tap Menu key to popup the following menus, including options of 1day,
7weeks, 31months, itinerary, today, more, etc. for the corresponding
operations.

18
5.5 Calculator
Tap icon to conduct calculation, shown as follows:
5.6 Sound Recorder
Tap icon to enter the interface of Sound record.

19
1. Tap icon to start recording.
2. During recording, tap icon to stop, one dialog box will
popup, indicating “Use this record or give up”.
3. Tap icon to listen to the current recording.

20
5.7 Clock
Tap icon to enter the interface of Table clock, providing
functions of alarm clock, checking images, playing music and exiting, shown as
follows:
Other SHUOYING Tablet manuals


