Shurco E2c Operating instructions

How to use
The Shure E2c, E3c, E1c, and E5c earphones are ideally suited for use with CD,MP3, and
DVD players,as well as any other listening device that has a 3.5 mm (1/8-inch) stereo jack.
To enjoy their superior isolation and rich, full-frequency sound, it is important to fit your
earphones properly into your ears. We recommend taking some time to experiment with your
Fit Kit to find out what works best for you.
Left and right
Note the difference between the right and left earphones:
• E1c and E5c: earphone with blue dot = left ear; earphone with red dot = right ear
• E2c: clear earphone = left ear; clear-and-black earphone = right ear
• E3c: earphone with L = left ear; earphone with R = right ear
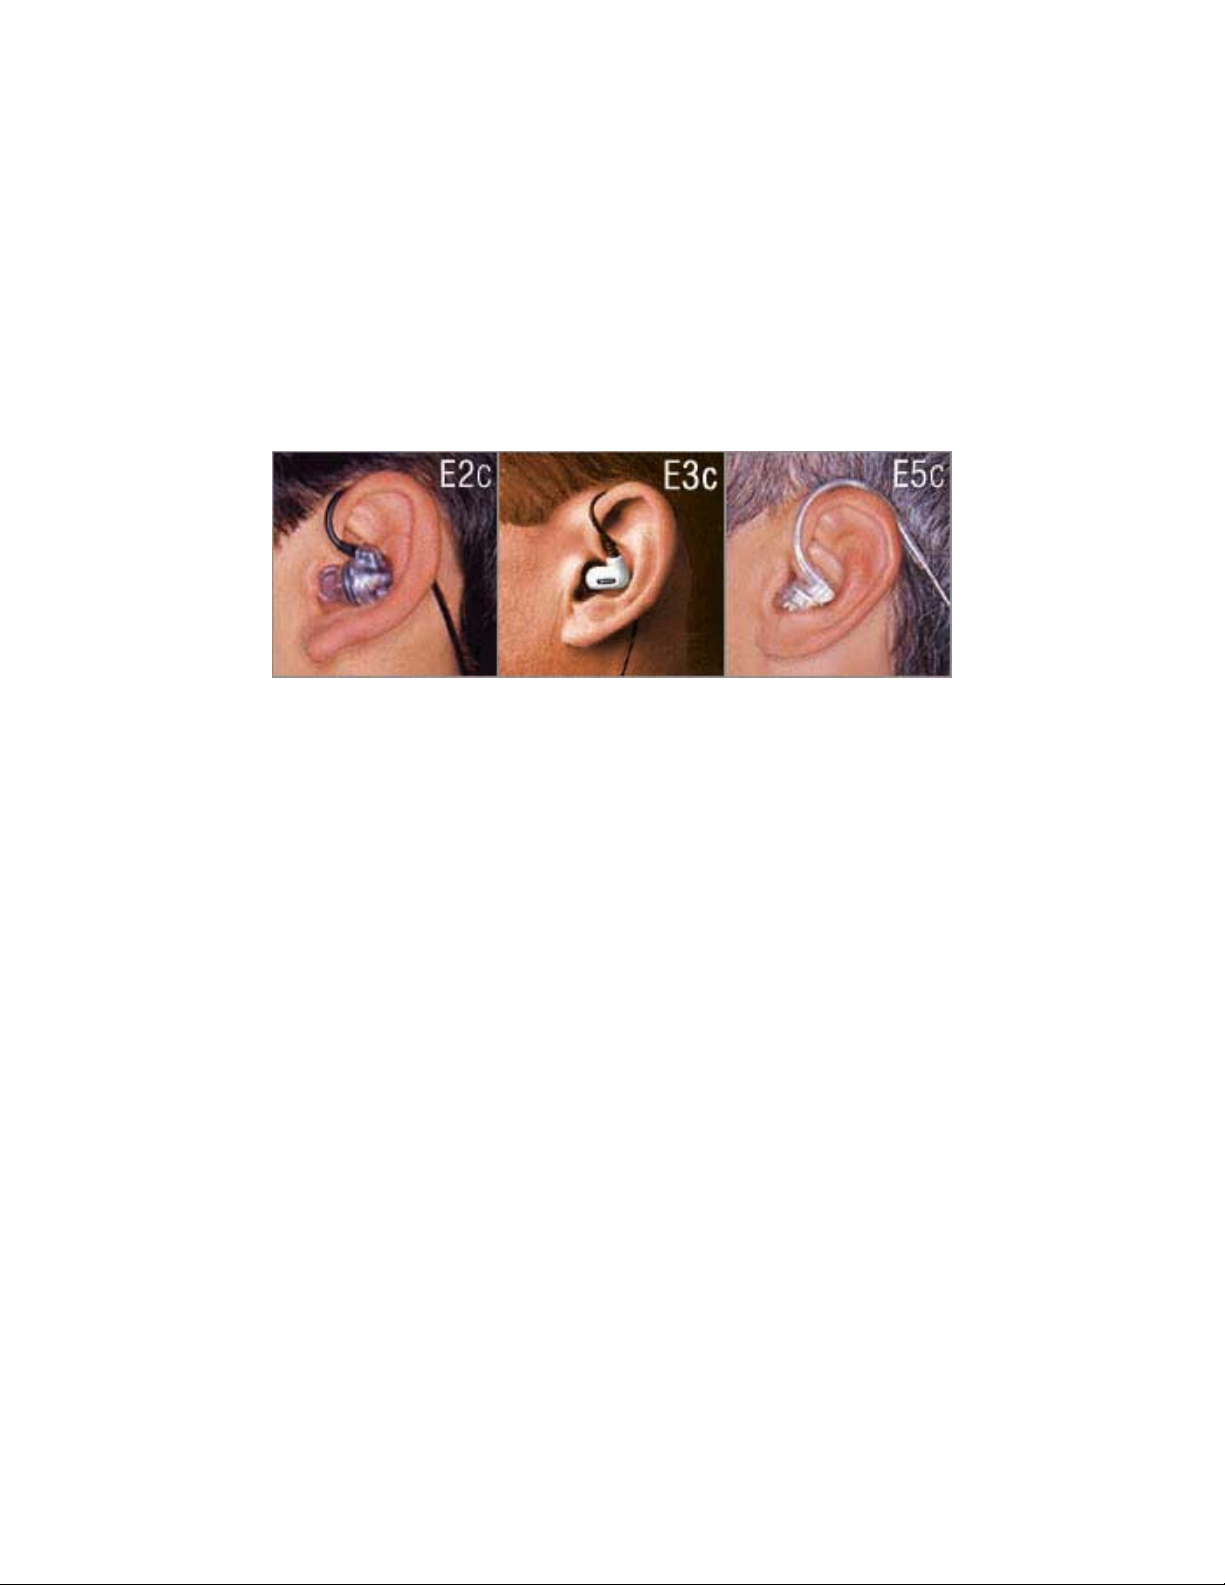
Situating the cables around your ears
• E2c, E1c, and E3c: wrap the earphone cord over the top and down the back of the ear.
• E5c: wrap the form-fitted wire over the top and down the back of the ear.
• Use the adjustment tube to secure the cables comfortably behind your head.
Inserting the earphones
To insert the earphone, pull the ear upward and outward to
straighten out the ear canal. With the cable coming over your
ear, compress the sleeve with your fingers and insert the
earphone into your ear.
Creating your personal fit
The quality of the frequency response and sound isolation depends on how well the sleeves
seal. If the earphone seems to be lacking in low frequency response, insert the earphone
deeper into the ear canal to obtain a better seal, or try one of the other sleeve options.
Flex and ultra-soft flex sleeves: Try the different sizes to determine the best fit for
comfort and isolation.
Foam sleeves: Compress the foam sleeve at the end of the earphone by rolling it
between your thumb and forefinger before inserting it. Hold the earphone in place for
about 10 seconds while the foam expands and creates a tight seal.
Connecting to a listening device
Shure E Series Earphones are suited for any listening device that has a 3.5 mm (1/8-inch)
stereo jack, including (but not limited to): Apple iPods, portable CD players, MP3 players,
MiniDiscs, DAT, DVD, cassette players, notebook computers, in-flight entertainment systems,
and exercise equipment fitted with gym entertainment systems. When connecting your
earphones, be sure to follow these instructions:
1. Turn down the volume of your listening device.
2. Connect the mini-plug from your earphones into the device's output jack.
3. Insert earphones into your ears.
4. Slowly raise the volume to a comfortable listening level.
Important safety information:
• Never wear earphones while operating a motor vehicle. It may create a hazard and
is illegal in many areas.
• Use caution when wearing earphones while walking, jogging, cycling, etc.
• Avoid using earphones at high volume levels. Shure earphones are designed to
provide increased listening enjoyment at lower levels. Prolonged exposure to high
sound pressure levels may impair hearing. See our information on hearing
conservation at http://www.shure.com/hearing/default.asp to learn more.
Warning: Always turn the volume down before plugging the earphones into a sound source.
Warning: Excessive exposure to loud sounds can cause hearing damage. Check out our
information on hearing conservation.

Keeping it clean
To ensure continuing superior sound from your E Series earphones, we recommend that you
follow these simple tips:
• Avoid getting moisture in the nozzle, as this can adversely affect sound quality.
• Avoid striking or dropping the unit. Extreme shock can damage the earphones.
• E1c, E3c, and E5c: Whenever buildup is observed, clean the nozzles using the supplied
wax removal tool (see Figure 1).
Figure 1: E1c/E3c/E5c Wax Removal
Wax buildup around each earphone nozzle should be
removed using the Wax Removal Loop as shown.
• E2c: When new, install the supplied wax guards on the earphone nozzles. Routinely
check the wax guard on the tips of the nozzles. If the wax guards appear to be clogged,
replace them (see Figure 2).
Figure 2: E2c Wax Guards
To prevent wax buildup, E2c earphones
come with Wax Guards. These protective
rings are found on adhesive strips in the Fit
Kit. To install, peel off backing and apply
one wax guard to the end of each nozzle.
Earphone nozzles should be clean and dry
prior to application of wax guards.
• Clean your sleeves regularly with a mild antiseptic or soapy water. Always remove the
sleeve from the earphone nozzle before cleaning.
• Flex, Ultra-soft flex, and Triple-flange sleeves should be cleaned with an antiseptic
routinely and when sharing.
• Foam sleeves should be disposed of and replaced when they get dirty.
• Wipe down the earphone housing and cable with an antiseptic routinely.
• Stop using the earphones if they are causing you discomfort.
NOTE: Nozzles can collect cerumen (earwax), which can clog the earphone and lower the
sound quality. If you experience sound loss, check the nozzles for clogging before sending the
product in for service. There is a service charge for removing wax.
CAUTION: Shure earphones are not immersible. Make sure flanges are completely dry
before reattaching to earphone nozzles.
This manual suits for next models
3
Table of contents


