Sicunet SNR-3000 Series User manual

1
QuickGuide Information
SNR-3000 NVR Series
Sicunet Inc.
3001 Red Hill Ave. Suite 2-205
Costa Mesa, CA 92626
www.sicunet.com

2
This QuickGuide provide how to setup IP NVR System for connecting with the Internet via network in case
of using a PC, Mobile or Tablet Computer.
Before your begin, ensure that you have between A Router & High Speed Internet Access and The NVR
connected to a router on the network, using an Ethernet cable
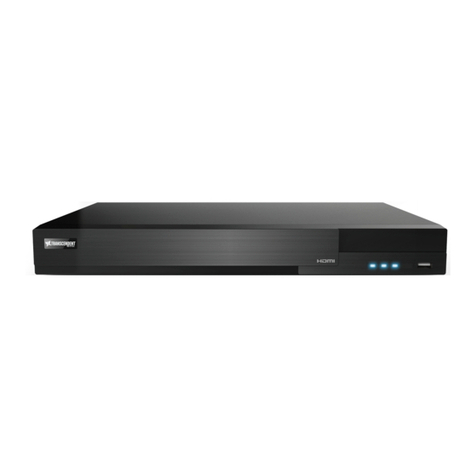
IP NVR SNR-3000 Series
PoE Built-in Series
16CH SNR-3016P(16PoE)
8CH SNR-3008P (8PoE)
4CH SNR-3004P (4PoE)
Without PoE Built-in Series
32/16CH SNR-3032 / 3016
8CH SNR-3008
4CH SNR-3004
SNR-3000 NVR
Internet / Remote Network Surveillance
Computer
Mobile Phone
Router
IP Camera

Local Network Setup – Network DDNS / Cloud
01
3
How to setup for DDNS, Cloud at NVR System
1) Congure the network setting as either Fixed IP manually or DHCP automatically.
2) Ensure that NVR can connected to the LAN or WAN.
3) Choose Cloud or DDNS Option in Network – Other Settings, and clicking
checkbox to enable for DDNS and Cloud, and input the required data.
Router Port Mapping Setup for DDNS.
- HTTP Port : 80
- Server Port : 5000
- User can use Fixed IP or DHCP Mode
as left image. Input the IP Address as
required columns.
- DDNS Site : www.vmddns.com
- Input user name/pw, host domain and
updating time period. And then nally
get the success test.
- uPnP : Checkbox
- Cloud : Input User name & PW for easy
network connection.
IP NVR SNR-3000 Series

How to setup IPC with NVR via Network
02
4
- After success network setup of NVR System, user need to register IP Camera via private or OnVIF Protocol
by clicking “Discovery” & searching camera list.
- User can easily connect IP Cameras as you can see the above image.
Private Protocol : 5000, OnVIF Protocol : 12001. NVR User name & PW.
- For camera resolution/fps/bitrate setup, you can setup at Main Stream/ SUB Stream menu easily.
IP NVR SNR-3000 Series

Router Port Mapping with NVR ddns
03
Port Range
Application Start End Protocol IP Address Enabled
HTTP 80 to 80 Both 192.168.1.108
TCP 5000 to 5000 Both 192.168.1.108
No Name Private address External Port Internal Port
1 a 192.168.1.59 57000 5000~5000
2 b 192.168.1.59 57000 5000~5000
5
Guide for DDNS Port Mapping :
PC Windows – Search - input “ cmd “.
For Router connection to get gateway adddress, after input “ipcong” and enter.
After nd out basic gateway address, please input gateway address : http://192.168.1.1:80, and then user
can go into web setup menu for router in order to setup DDNS Additionally.
From NVR WEB Port(80), TCP/UDP server Port(5000). Port forwarding as above table.
To gure out public IP Address in my PC, myipaddress.com, then show your using Public IP Address in your
PC.
Map the TCP port to be 5000
Map the HTTP port to be 80
IP NVR SNR-3000 Series
How to setup Router Port Mapping
1
2

How to setup record / record schedule
04
6
- Key Notice :
Enable IP Camera record or not.
If not selected at checkbox per camera, the
camera do not record anymore. Please make sure
to check this checkbox for recording.
For recording User should install HDD
necessarily. When HDD Data is full, if user want
to write data continuously, please select this
checkbox of Overwrite.
When user want to record by schedule, user can
congure this schedule record mode.
For setup schedule mode, user need to double
click on schedule table, then mode into schedule
setting mode.
Pleaser select ADD Button.
When user want to record by Motion schedule,
user can congure this Motion schedule record
mode.
For setup motion schedule mode, user need to
double click on schedule table, then mode into
schedule setting mode.
Pleaser select ADD Button.
additionally need to setup motion setting per
individual camera as the left below image.
IP NVR SNR-3000 Series

7
For detail motion setting as the following process :
(1) Event / Action
(2) Motion
(3) Motion – Trigger
(4) Motion Area
User can setup motion area by mouse drag with motion sensitivity or delete.
IP NVR SNR-3000 Series

How to access WEB Viewer via Network
05
Default IP Address http://192.168.0.200
NVR Server Port 5000
WEB Access IP Address for NVR http://192.168.0.200:5000
ID admin
Password 1111
8
IP NVR SNR-3000 Series
(1) First of all, user should install JAVA Update at user PC and also
need to add the using IP Address at JAVA Security session as the
left below image.
(2) User input NVR IP Address as above, and then when it comes
login screen, input ID/PW.
(3) Finally, user can see live mode of WEB Viewer.
WEB Login
WEB Live

NVR, IPC Setup at CMS by Cloud Network
06
How to register NVR by Cloud connection at CMS
9
Even though user do not know
network IP address of NVR, IPC,
User can easily connect by
cloud solution.
IP NVR SNR-3000 Series
CMS Install & CMS Login Register device
By Basic Network
Register device
By Cloud solution
111
222
3
4
3
4
5
3
4
5

How to remote playback
07
10
- After success of NVR,IPC registration,
User can connect registered devices
as it can see the 1st left image.
- Please select 2nd toggle button for search
and playback. At left bottom of Calendar, can
see the recorded date and select the date for
playback.
Live Display
Search
IP NVR SNR-3000 Series
E-map Rotation Screen Edit
Expand & Merge

How to setup Mobile – Cloud, Network
08
Andorid App Download smartvision
iOS App Download smartvision1
SmartVision
11
- After installation of downloaded app, user need to register
local NVR or IP Camera as following menu.
(1) Click Menu and then select Device List of 2nd button, and
then click plus(+), then user can see Add Manual / IP Installer.
Please select Add Manual, then you can see setup mode.
(2) Please input Site Name, IP/Host(address), and Port
Number(5000)
(3) Finally input the registered User Name and PW of NVR
System, and then click “Done”
(1) Please input SITE ID & PW at registered Cloud Setting at NVR System.
(2) At Device MAC, please click Search button after input the registered user ID & PW at NVR System, Then
can see MAC Address of NVR.
(3) And then nally click “Done”. User succeed to register NVR System at Mobile of Android / i-OS App.
IP NVR SNR-3000 Series
How to setup Mobile by Cloud connection

Mobile Access – WiFi, 3G/LTE(Public), 3G/LTE(ddns)
Warning Notice-Technical Service Contact
09
10
12
(1) In case of WIFI Network, how to access by private IP address :
- Site Name / IP/Host(ex, using IP Address at NVR) : 192.168.10.59, Port : 5000
- Input Account-User Name/Password (admin / 1111)
(2) In case of 3G/LTE Network, how to access by public IP address :
- Site Name / IP/HOST(Example): 123.98.180.207
- Port : 57000 ( example, 57000, Port Mapping at router by user dened )
- Input Account-User Name / Password (admin / 1111)
(3) In case of 3G/LTE Network with DDNS setting : Sicunet DDNS Server (vmddns.com)
(ex) 2015sicu – HOST NAME)
- Port : 57000( (example), internal 5000 port number to 57000 external port number )
- Input Account-User Name / Password (admin / 1111)
(1) Please do not lay on the heavy materials on top of the system.
(2) Please install system on the plate surface place and also keep the proper temperature. In case of
installing into an enclosed space or area without air circulation or near water & moisture area, it may
cause the reason of re, thus.
It keep the proper operating temperature (0° ~40°)
(3) Before completing installation, please do not input power code of the system.
(4) When running system, please do not plug off power cable forcibly. It may cause the reason of system
malfunction or damage of HDD.
(5) When installing SATA HDD, user must format SATA HDD based on FAT32 FORMAT.
(6) Use only with the supplied power converters. The Ethernet connection is not intended to be connected
to an exposed network.
(7) There is a risk of explosion if the battery is replaced by an incorrected type.
Dispose of used batteries in accordance to local laws.
(8) Installing & servicing should be performed only by qualied and experienced technicians to conform to
all local codes and to maintain your warranty.
(9) Situate away from items that produce heat or are heat sources such as radiators, heat registers, stoves,
or other products (including ampliers)
(10) Do not replace parts without any written permission or conrmation from manufacturer, it may cause
malfunction or system error or no working.
TEL : +82-70-8286-2808
E-mail : [email protected]
IP NVR SNR-3000 Series
How to access Mobile for Android / i-OS app.
Important System cautions & warning information when using system
Technical Contact
Other Sicunet DVR manuals
Popular DVR manuals by other brands
EverFocus
EverFocus ECOR264-4F1 user manual
Mitsubishi Electric
Mitsubishi Electric DX-NT400E Specification sheet

Veilux
Veilux Premium?series user manual
Swann
Swann DIGITAL GUARDIAN DVR4-NET installation guide
Gatekeeper Systems
Gatekeeper Systems Fleet Safety, Security and Tracking Solutions... User manual & installation guide
Avermedia
Avermedia AVerDiGi EB1304 MPEG4+ Operation manual
