SIGURO SGR-AD-E200W Operating instructions

SGR-AD-E200W
SGR-AD-E201B
Aroma Diffuser
Aroma Diffuser
Aroma Diffuser
Aroma difuzér
Aróma difuzér
Aroma diffúzor
EN Translation of the operating instructions from the original language.
DE Übersetzung der Bedienungsanleitung aus der Originalsprache.
CZ Návodkpoužitívoriginálnímjazyce.
SK Prekladnávodunapoužitiezoriginálnehojazyka.
HU Ahasználatiutasításfordításaeredetinyelvről.

ENGLISH 4
DEUTSCH 14
ČESKY 26
SLOVENSKY 38
MAGYAR 48

1
7
4
6
2
3
5
8
9

EN
4
Thank you for purchasing a SIGURO appliance. We are grateful for
your trust and are pleased to introduce the device to you on the
following pages and introduce you to all its functions and uses.
We believe in a fair and responsible company, and therefore we only
work with suppliers who meet our strict criteria to protect the inter-
ests of employees, prevent their abuse and fair working conditions.
If you need help with extensive maintenance or repair of the product
that requires intervention in its internal parts, our authorized service
is available to you at the e-mail address siguro@alza.cz or the oper-
ator on the vendor's helpline. For your convenience, in solving any
problems with the product, we have unied these contact points
and the above contacts can be used in case of any complaints or
post-warranty service.
SAFETY INFORMATION
Please read this manual carefully be-
fore use and keep it for future refer-
ence.
1. This appliance is intended for use by children 8 years of age and
older and persons with reduced physical, sensory or mental
capabilities, or lack of experience and knowledge, provided they
have been given supervision or instruction concerning use of the
appliance in a safe manner and understand the potential hazards.
2. Children must not play with the device.
ENGLISH

4 5
EN
3. Cleaning and user maintenance must not be performed by
children without supervision.
4. Before connecting the appliance to the mains, make sure that
the mains voltage corresponds to the values on the type plate of
the product. Only connect the appliance to a properly grounded
outlet.
5. If the power cord, plug, or any other part of the product
malfunctions, or if any part of the product has been dropped or
otherwise damaged, repair may only be performed by a qualied
electrician. Improper repairs can put users at risk of injury.
6. To reduce the risk of electric shock, do not immerse the cord, plug
or body of the appliance in water or any other liquid. Do not wash
the appliance in the sink or dishwasher.
7. Always unplug the appliance when not in use, when lling and/or
when cleaning.
8. The appliance is intended for domestic use only. It is not intended
for commercial purposes.
9. Use the appliance only for its intended purpose.
10. Do not place the appliance on window sills, counter drip tray or
on unstable surfaces. Always place it on a stable, level and dry
surface.
11. Do not place the appliance near a washbasin or sink, on
appliances and equipment that are a source of heat or close to
them.
12. Do not cover the air inlets or the outlets.
13. Do not touch the device with wet or damp hands.
14. Never use the appliance in a damp place.
15. Never use the appliance close the a source of heat.
EN
6
16. Never place anything on or in the appliance.
17. Do not use the appliance near ammable objects or products
(curtains, aerosols, solvents, etc.).
18. Switch off and disconnect the appliance before moving, during
installation and cleaning.
19. When using, leave at least 30 cm of free space on the back and
sides of the product and at least 50 cm of free space above the
product.
20. Always make sure that the appliance and power cable are in good
condition before use. Do not pull on the power cord or appliance,
even when unplugging the adapter (not included).
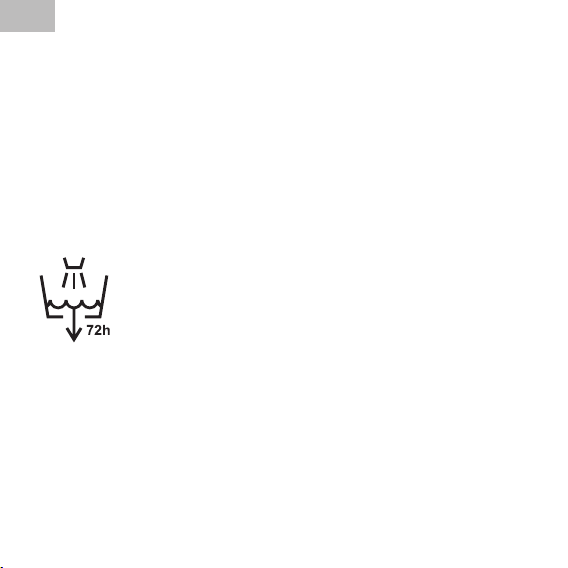
21. Pay attention because the appliance produces water vapor.
Clean the water tank every 3 days.
6 7
EN
1 Outer cover
2 Controls
3 Silicone pad
4 Base
5 Power cable connection socket
6 Backlight
7 Steam outlet opening
8 Water tank with MAX line
9 Air outlet
10 Power cable (not shown)
3
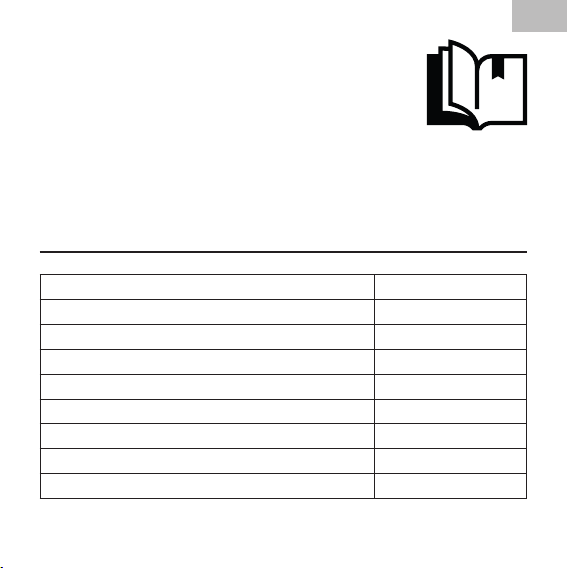
Power 5 W
Humidication capacity 10–25 ml/h
Noise level <30 dB
Recommended room area 10–30 m2
Water tank capacity 100 ml
Working time (full tank, minimum power) 5–8 hours
Power cable length 100 cm
Dimensions 127 × 87 × 87 mm
Weight 217 g

EN
8
USE
Before rst use
Remove the aroma diffuser from the box and remove all protective
foils and packaging materials. Check it is not damaged. Before dis-
posing of the packaging, be sure to remove all components.
Filling the water tank
1. Remove the outer cover.
2. Pour enough clean water (water must not exceed the MAX line).
3. Add approximately 5 drops of essential oil to the water as desired.
4. Attach the outer cover on the base and make sure it is tight.
Use
1. Place the aroma diffuser on a at, stable surface and plug the
cable connector into the socket at the aroma diffuser. Plug the
adapter into the grounded socket (the adapter is not included in
the package).
2. Press the control button once briey and the aroma diffuser will
switch on.
3. Repeatedly press the control button briey to change the
backlight.
4. A short double press of the control button turns the backlight on
or off.
5. Long press the control button to switch off the aroma diffuser.
6. When you need to rell the water tank, turn the aroma diffuser
off rst and then then unplug the cable. Then you can pour water.

8 9
EN
Follow the instruction in the part “Filling the water tank”.
Warning:
Do not pour water through the air outlet.
7. When you do not use the aroma diffuser, press repeatedly the
switch button off the aroma diffuser, and unplug the cable.
Unplug the adapter from the socket. Steam stops forming. Clean
the aroma diffuser according to the instruction in part “Cleaning
and maintenance”.
Note:
The aroma diffuser switches off if it detects an empty water
tank.
Warning:
Do not shake, move, or add water to the aroma diffus-
er while in operation. Do not block the steam and air
outputs.
Tipping over
If the aroma diffuser is tipped over, follow the steps below.
1. Unplug the aroma diffuser from the power source and remove
the cover carefully.
2. Pour out any remaining water from the water tank.
3. Shake the diffuser gently to drain any water from inside.
4. Allow 24 hours for the aroma diffuser to dry thoroughly.
EN
10
CLEANING AND MAINTENANCE
Before cleaning or any maintenance, always turn the aroma diffuser
off, unplug the connecting cable and let it cool down completely.
Warning:
Never immerse the aroma diffuser, or the power cable in
water or any other liquid.
Do not use plastic or metal scrapers, harsh cleaners, chemicals,
petrol, solvents, or other similar substances to clean any parts of the
appliance. The surface nish could be seriously damaged.
Use only a soft, slightly dampened sponge to clean the outer surface.
Wipe dry with a clean cloth.
Carefully rinse the water tank and wipe dry.
Regularly remove the limescale deposits. That can negatively affect
the operation of the aroma diffuser. Use a solution of white vinegar
and water in the 1: 3 ratio and leave on for a few minutes. Then pour
out the water tank content, carefully rinse with clean water and wipe
dry.
If your water is hard, or very hard, it is recommended to use distilled
water.
Regularly clean the ultrasonic transducer (inside the aroma diffuser)
with a soft sponge, slightly moistened in warm water with a little de-
tergent. Use a lukewarm solution with citric acid or vinegar to remove
limescale from the ultrasonic transducer. If you use the appliance
frequently, we recommend cleaning it at least once a week. Note that
a clogged ultrasonic transducer will not function properly!

10 11
EN
Storage
Make sure that the appliance is cool and clean before storing.
Keep it in a dry and well-ventilated place out of the reach of children
or pets. Do not place any objects on it.
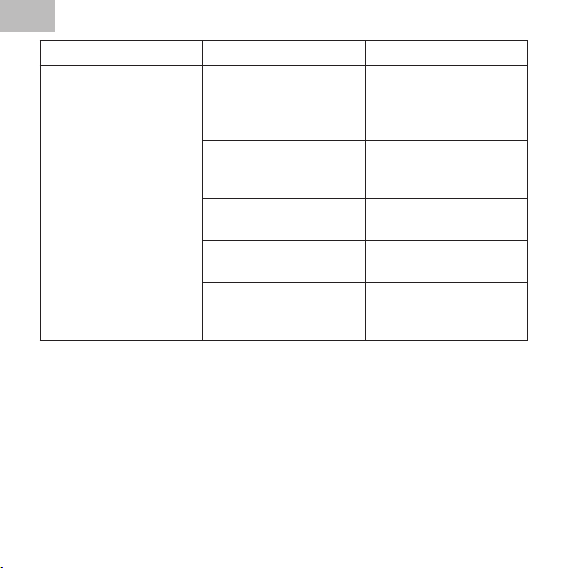
TROUBLESHOOTING
Problem Cause Solution
The aroma diffus-
er switched off
automatically shortly
after switching on.
There is an insuf-
cient amount of
water in the water
tank.
Fill the tank with
water up to the max
line. Be careful not to
exceed the max line.
The cable is not con-
nected properly.
Disconnect the cable
and reconnect it.
EN
12
Problem Cause Solution
The aroma diffuser
does not produce
mist, or mist volume
is very low.
There is an insuf-
cient amount of
water in the water
tank.
Fill the tank with
water up to the max
line. Be careful not to
exceed the max line.
The water level in
the tank is above the
maximum level.
Pour off the excess
water.
The outer cover is
inserted incorrectly.
Check the t of the
outer cover.
The ultrasonic trans-
ducer is dirty.
Clean the ultrasonic
transducer.
The entrance holes
at the bottom are
dusty.
Clean the inlet open-
ings.

12 13
EN
Problem Cause Solution
Water is leaking from
the aroma diffuser.
The outer cover is
inserted incorrectly.
Check the t of the
outer cover.
When the water was
poured, the water
passed through the
air outlet.
Follow the chap-
ter “Tipping over”.
Do not pour water
through the air
outlet.
The temperature is
low or there is high
humidity.
Under these condi-
tions, the mist may
condense quickly
into water droplets.
If the problem is not listed in the table above or if the problem per-
sists, switch off the appliance, disconnect the plug from the electrical
outlet and contact an authorized service center.

DE
14
Vielen Dank, dass Sie sich für ein Gerät der Marke SIGURO ent-
schieden haben. Wir sind dankbar für Ihr Vertrauen und freuen
uns, Ihnen das Gerät auf den folgenden Seiten vorzustellen und
Sie mit all seinen Funktionen und Verwendungszwecken vertraut
zu machen.
Wir glauben an ein faires und verantwortungsvolles Unternehmen
und arbeiten daher nur mit Lieferanten zusammen, die unsere stren-
gen Kriterien zum Schutz der Interessen der Mitarbeiter, zur Verhin-
derung von Missbrauch und fairen Arbeitsbedingungen erfüllen.
Wenn Sie Hilfe bei der umfassenden Wartung oder Reparatur des
Produkts benötigen, die einen Eingriff in die Innenteile erfordert,
stehen Ihnen unser autorisierter Kundendienst unter der E-Mail-Ad-
resse siguro@alza.cz oder die Hotline des Verkäufers zur Verfügung.
Bei der Lösung von Problemen mit dem Produkt haben wir diese
Kontaktstellen vereinheitlicht. Die oben genannten Kontakte können
auch bei Beschwerden oder Nachgarantieservice genutzt werden.
SICHERHEITSHINWEISE
Lesen Sie vor der Anwendung sorg-
fältig dieses Benutzerhandbuch
durch und bewahren Sie es für den
künftigen Gebrauch auf.
1. Dieses Gerät kann von Kindern ab 8 Jahren und von Personen
mit verminderten physischen, sensorischen und mentalen
DEUTSCH

14 15
DE
Fähigkeiten oder mangelnden Erfahrungen und Kenntnissen
benutzt werden, sofern sie beaufsichtigt werden oder über die
Anwendung des Geräts auf eine sichere Weise belehrt wurden
und eventuelle Gefahren verstehen.
2. Kinder dürfen nicht mit dem Gerät spielen.
3. Kinder dürfen keine Reinigungs- und Wartungsarbeiten
vornehmen, falls diese nicht beaufsichtigt sind.
4. Vergewissern Sie sich vor dem Anschließen des Geräts an das
Stromnetz, dass die Netzspannung mit den Werten auf dem
Typenschild des Produkts übereinstimmt. Schließen Sie das Gerät
nur an eine ordnungsgemäß geerdete Steckdose an.
5. Sind Stromkabel, Stecker oder ein anderer Teil des Produkts
defekt, zu Boden gestürzt oder anderswie beschädigt, lassen Sie
diese ausschließlich durch einen qualizierten Elektromonteur
reparieren. Eine falsche Reparatur kann zur Verletzung des
Anwenders führen.
6. Tauchen Sie Netzkabel, Stecker und Gerätekörper nicht in Wasser
oder andere Flüssigkeiten, um einen Stromunfall zu vermeiden.
Waschen Sie das Gerät nicht im Waschbecken oder einer
Geschirrspülmaschine.
7. Trennen Sie das Gerät bei Nichtgebrauch, beim Nachfüllen und/
oder während der Reinigung immer vom Stromnetz.
8. Das Gerät ist ausschließlich für den Haushaltsgebrauch bestimmt.
Es ist nicht für kommerzielle Zwecke bestimmt.
9. Verwenden Sie das Gerät nur für den Zweck, für den er bestimmt
ist.
10. Stellen Sie das Gerät nicht an Fensterbretter, Abtropfächen von
Spülbecken oder nicht stabile Oberächen. Stellen Sie das Gerät

DE
16
immer an eine stabile, gerade und trockene Oberäche.
11. Stellen Sie das Gerät nicht in der Nähe eines Wasch- oder
Spülbeckens, auf oder in der Nähe von Geräten und Anlagen auf,
die eine Wärmequelle darstellen.
12. Verdecken Sie nicht die Luftein- und -austrittsöffnungen.
13. Berühren Sie das Gerät nicht mit einer feuchten oder nassen
Hand.
14. Verwenden Sie das Gerät niemals an einem feuchten Ort.
15. Benutzen Sie das Gerät nicht in der Nähe von Wärmequellen.
16. Stellen Sie niemals etwas auf das Gerät und stecken Sie auch
nichts in das Geräteinnere.
17. Benutzen Sie das Gerät nicht in der Nähe von brennbaren
Gegenständen oder Produkten (z.B. Gardinen, Aerosole,
Lösungsmittel).
18. Falls Sie das Gerät umstellen möchten oder eine Montage oder
Reinigung beabsichtigen, schalten Sie diesen aus und trennen
vom Stromnetz.
19. Gewährleisten Sie während der Verwendung auf der Rückseite
und den Seiten des Produktes mindestens 30 cm Freiraum und
mindestens 50 cm Freiraum über dem Produkt.
20. Vergewissern Sie sich vor jeder Anwendung, dass Gerät und
Netzkabel in einem guten Zustand sind. Ziehen Sie nicht am
Netzkabel oder am Gerät, auch nicht beim Herausziehen des
Adapters aus der Steckdose (der Adapter ist nicht Teil des
Lieferumfangs).
21. Seien Sie vorsichtig, denn das Produkt erzeugt Wasserdampf.
16 17
DE
Reinigen Sie den Wassertank alle 3 Tage.
DE
18
1 Äußere Abdeckung
2 Bedientaste
3 Silikon-Unterlage
4 Basis
5 Anschlussbuchse für das Netzkabel
6 Hintergrundbeleuchtung
7 Dampfaustrittsöffnung
8 Wassertank mit MAX-Markierung
9 Luftausgang
10 Netzkabel (nicht abgebildet)
3
Stromversorgung 5 W
Befeuchtungskapazität 10–25 ml/h
Geräuschpegel <30 dB
Empfohlene Raumäche 10–30 m2
Fassungsvermögen des Wassertanks 100 ml
Betriebsdauer (voller Wassertank, minimale
Leistung)
5–8 Stunden
Länge des Netzkabels 100 cm
Abmessungen 127 × 87 × 87 mm
Gewicht 217 g

18 19
DE
VERWENDUNG
Vor der Erstverwendung
Nehmen Sie den Aromadiffusor aus der Kiste und entfernen Sie alle
Schutzfolien und sämtliches Verpackungsmaterial. Überprüfen Sie
ihn auf Schäden. Vergewissern Sie sich, dass alle Komponenten ent-
fernt wurden, bevor Sie das Verpackungsmaterial entsorgen.
Befüllen des Wassertanks
1. Nehmen Sie die äußere Abdeckung ab.
2. Gießen Sie eine ausreichende Menge sauberes Wasser in den
Wassertank (der Wasserstand darf die MAX-Markierung nicht
überschreiten).
3. Geben Sie etwa 5 Tropfen des ätherischen Öls Ihrer Wahl in das
Wasser.
4. Setzen Sie erneut die äußere Abdeckung auf die Basis auf und
vergewissern Sie sich, dass diese gut abdichtet.
Verwendung
1. Stellen Sie den Aromadiffusor auf eine gerade, stabile Oberäche
und stecken Sie das Ende des Netzkabels in die Buchse des
Aromadiffusors. Stecken Sie den Stecker des Adapters in eine
ordnungsgemäß geerdete Steckdose (der Adapter ist nicht Teil
des Lieferumfangs).
2. Drücken Sie einmal kurz die Bedientaste, um den Aromadiffusor
einzuschalten.
3. Drücken Sie wiederholt kurz die Bedientaste, um die
DE
20
Hintergrundbeleuchtung zu ändern.
4. Drücken Sie kurz zweimal die Bedientaste, um die
Hintergrundbeleuchtung ein- oder auszuschalten.
5. Drücken Sie lange die Bedientaste, um den Aromadiffusor
auszuschalten.
6. Wenn Sie den Wassertank nachfüllen müssen, schalten Sie den
Aromadiffusor aus und ziehen Sie den Stecker des Netzkabels
heraus. Erst dann können Sie das Wasser nachfüllen. Befolgen Sie
die Anweisungen im Abschnitt „Befüllen des Wassertanks“.
Warnung:
Füllen Sie das Wasser nicht über den Dampfausgang nach.
7. Wenn Sie den Aromadiffusor nicht benutzen, schalten Sie ihn
aus und trennen Sie das Endstück des Netzkabels. Ziehen Sie
den Adapterstecker aus der Steckdose. Die Dampfbildung
wird eingestellt. Reinigen Sie den Aromadiffusor gemäß den
Anweisungen im Abschnitt „Reinigung und Wartung“.
Bemerkung:
Der Aromadiffusor schaltet sich aus, sobald er einen leeren
Wassertank feststellt.
Warnung:
Schütteln Sie nicht mit dem Aromadiffusor, stellen Sie
ihn nicht um und füllen Sie auch kein Wasser nach, wenn
er eingeschaltet ist. Blockieren Sie niemals die Luft- oder
Dampfaustritte.
This manual suits for next models
1
Table of contents
Languages:
Other SIGURO Spa Accessories manuals


Popular Spa Accessories manuals by other brands


Strategic Scents
Strategic Scents Showroom Setup guide

Hayward
Hayward Spa Blower owner's manual

Leisure Concepts
Leisure Concepts Smartop Series installation instructions

Kohler
Kohler K-1491T installation instructions

Silvercrest
Silvercrest SAD 12 C2 operating instructions

Leisure Concepts
Leisure Concepts Smartop Upright 3.0 DeckMount installation instructions
