Silent Witness SW012 User manual

1
This is a digital HD (high definition) three video camera recorder with the
most advanced technology; this device is a common HD video camera as well
as a professional driving recorder. It can record the high resolution image with
the pixel as high as 1920X1080P FULL HD and take the picture of 5 mega
pixels. Using TF card as the storage device, compact size, low power
consumption, HD camcorder can record more detailed perfect video image.
Three cameras videos at the same time
Video also can be transferred by HDMI transmission wire directly to the high
quality LED TV (HDMI) for high resolution displaying.
Enjoy true high-definition lift by using this product.
Sw012

2
Product features:
◎1920x1080P FULL HD high quality resolution
◎120 degree ultra wide angle lens
◎Advanced H.264 video compression technology
◎5 mega pixels
◎1.5 inch high resolution LCD, can watch while shooting.
◎Matching LED for supplementing light at night.
◎Support HDMI high quality video transmission
◎3 resolution forms can be changed for video recording.
◎30 frames per second for smooth video flow.
◎Equipped with special auto suction cup holder. Conveniently fix and use.
◎Powerful document protection, even in the recording process, the occurrence of sudden
power outages, machine damage, etc., video files will be intact.
◎Seamless continuous recording; will not miss any data.
◎Adopt auto cigarette lighter power supply, to make the video recording while driving.
◎To start the auto automatic off; to start the video recording function.
◎Automatic circulating video recording, being able to set the record time for each file.
◎Watch video while make video recording in driving. Support on-spot play back.
◎Improve time & date display, no need reset when re-start.
◎Set the video recording time, stop recording when the setting time is up..
◎To charge through USB.
◎Human orientated operation interface.
◎Maximum 32GB micro SD card
Feature
3
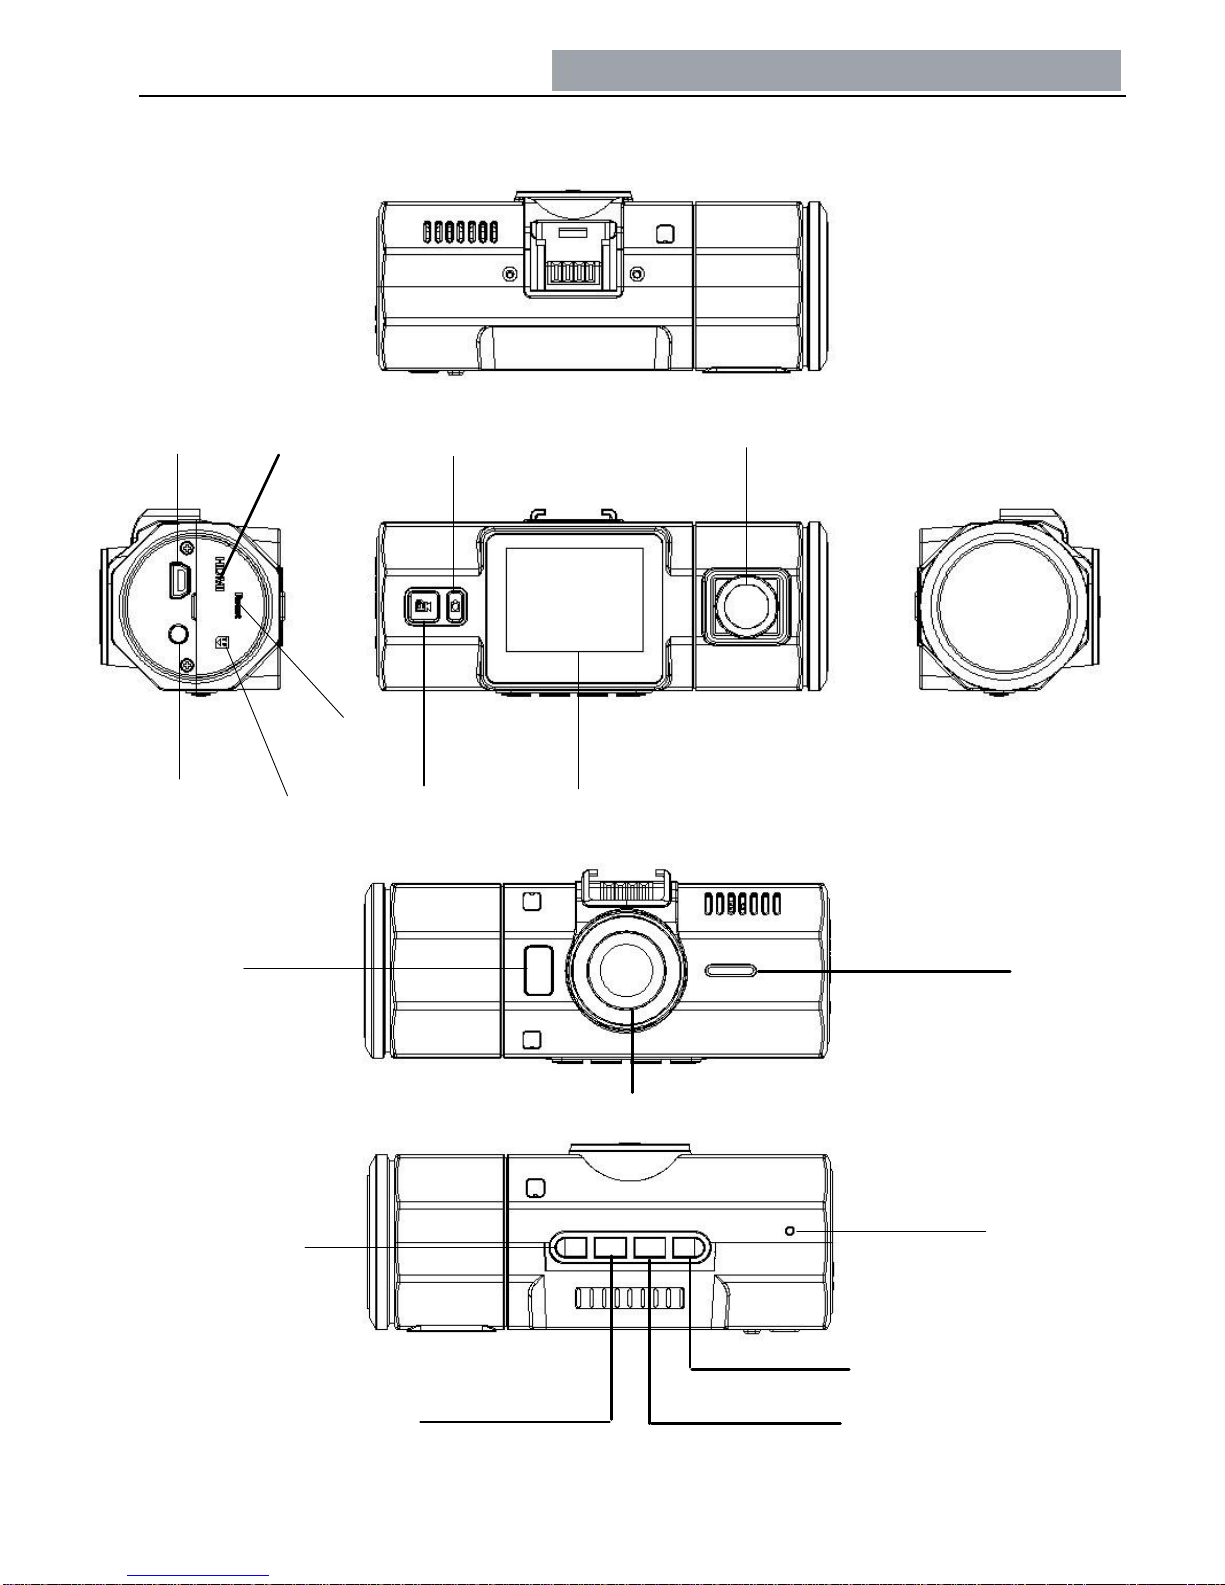
Structure
Back lens
OK /Rec
Snap/Del
LCD
HDMI out
USB out
TF slot
AV out
LED
Power/Flash light
Front lens
MIC
Speaker
left/Rewind/Volume+
Right//Forward/Volume-
Reset
Model/Lock
4
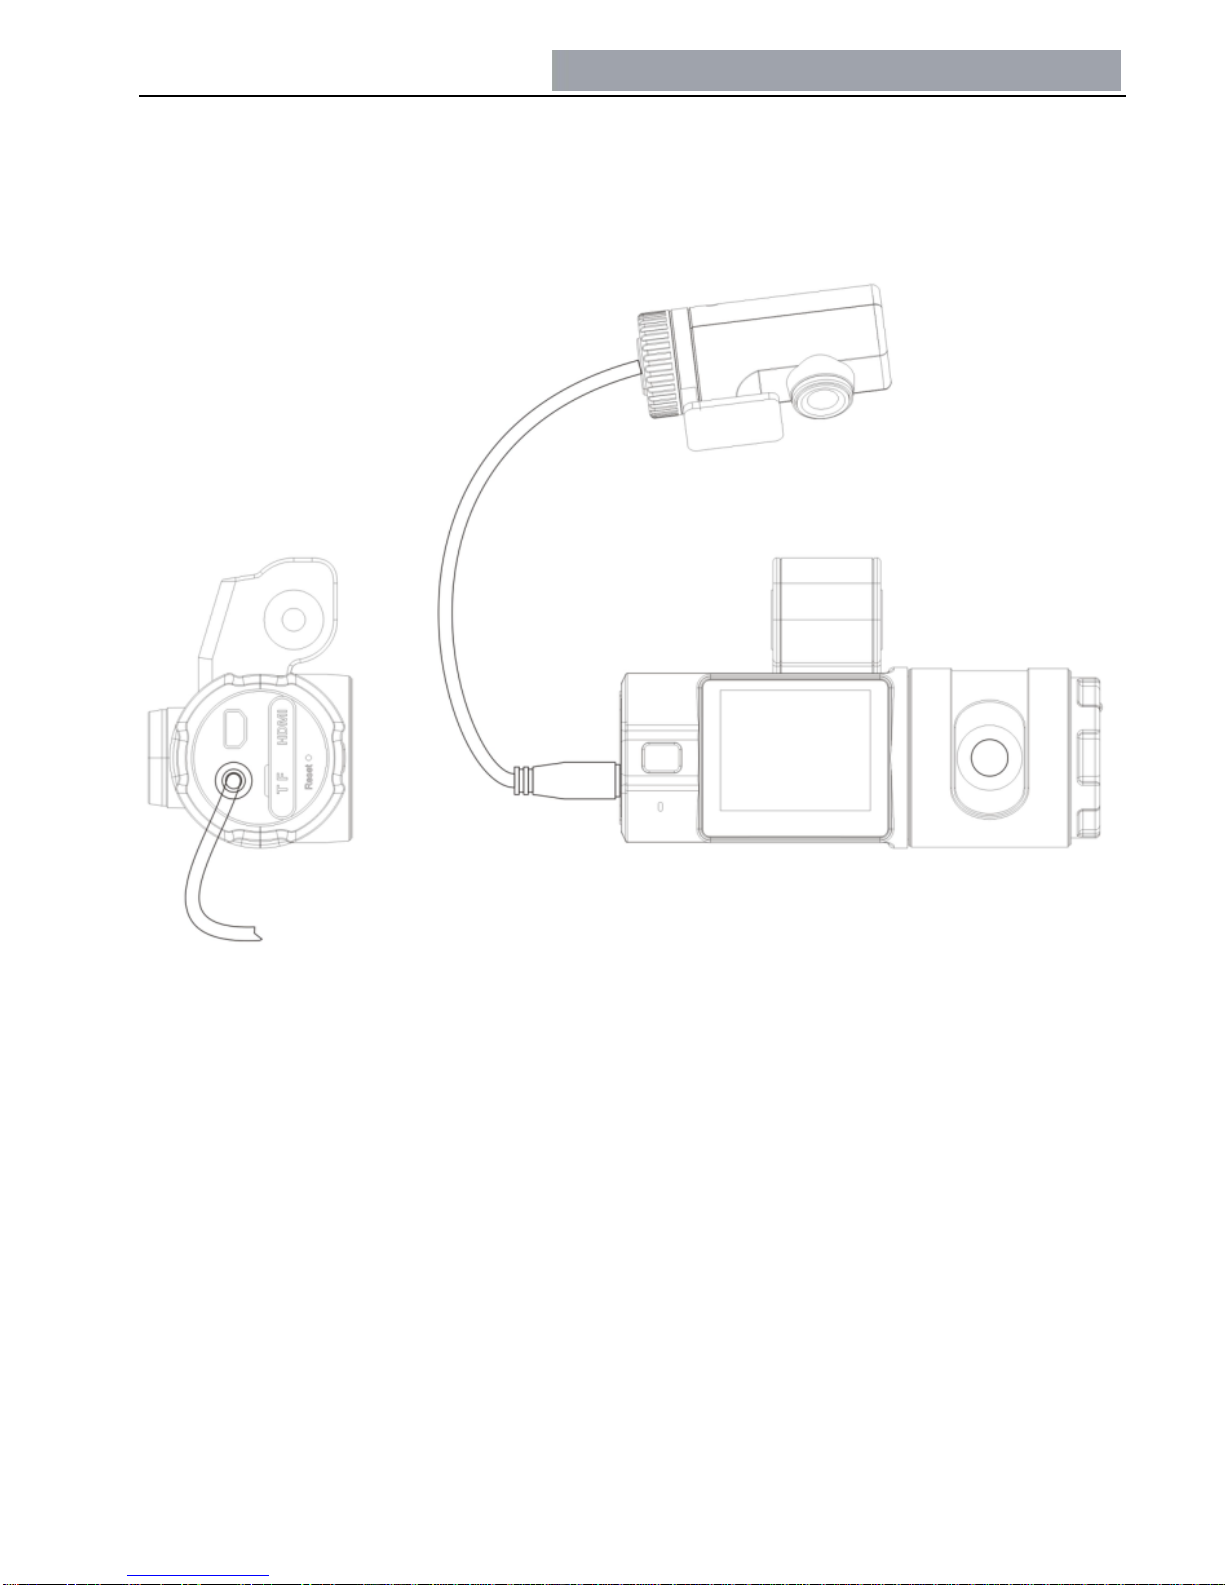
How to connect device with third Camera
Note:
When connecting the 3rd camera, the DVR need be connecting with the power supply.
Otherwise, the 3rd camera will not able to work.

5
Slide rail + card buckle:
Install: position the DVR and the
sliding rail of the GPS, sliding
inside until you hearing a sound.
USB port connecting to car charger
External GPS connection

6
MODE Shift Key: to shift video recording, photographing and review mode, system
settings.
Capture Key:In the video recording mode, press the capture key, you can capture the
current video resolution size of the pictures in preview mode, press the capture key, turn to
photographic mode, can take the set resolution photos, and then automatically return to the
video recording mode.
Up/Down Key:In Menu mode, used for menu selection; the menu state used to select the
menu items. In the reviewing condition, for browsing images, adjust the volume.
Power key: Short press power on, press for 2 seconds power off. In the camcorder mode,
short press, light flash switching. At six-images mode, short pressing can lock or unlock the
current file.
REC/OK Key:During photographic mode, used to make the screenshot of the video; in the
menu state, used to set menu; during video replay, used to start, pause playback.

7
Load and unload the battery
1. Battery indicators as below:
Full Half Low Empty
Battery Recharge
2. This device can be charged through connecting the USB terminal of computer as well as
connecting charger.
Connect to 12V/24V car charger as driving recorder
When used as driving recorder, it is required to turn on the Circulating Video Recording
and Automatic Video Recording Upon Start On, at the same time, connect it with the car
charger, when the vehicle engine is on, It will start video recording automatically; when the
vehicle engine is off, the data will be saved, and the device will shutdown automatically.
Note:
Only the car charger with the output of 5V can be used for the power supply, or the
device could be damaged by the charger of other voltages.
Insert in and take out the memory card.
1. Confirm the inserting direction of TF card, wrong inserting direction could damage the
camcorder and TF card;
2. Use the SDHC specification conforming high speed TF card, this TF card has the marking
of C6 or C10.
3. In the event of the storage card format cannot be compatible with the device, the device
could not read the card, and it is required to formalize the TF card.
Turn on / off and auto off of video recorder
1. Press the power key for 1 second to turn on/off the device.
2. For saving the power capacity of battery, to set the automatic off time in the menu, the
device will turn off automatically when not any operation on the video recorder.
Operation

8
Camcorder Mode
1. Press REC button to start the video recording, and then press REC button to stop the
video recording. During the process, red icon will flash on the screen.
2. Select flashlight:
Choose the mode of flashlight in the status of video recording by pressing right key. The
sequencing will be forced flash , 、automatic flash 、and no flash . When the
battery is less than , the flash not able to turn on.
3. Digital zoom: Focus the camera on the subject; press the key Up and Down to make the
digital zoom.
Revise the following content in the Menu mode:
Video recording quality: to choose the resolution of video recording: 1920x1080P30,
1440x1080P30,1280x720P30,848x480P60,848x480P30.
Circulating video recording: to set or shut the circulating video recording, in the status of
circulating video recording, when the capacity of TF card is full, the previous content shall
be covered automatically.
Automatic video recording upon start on: when connecting car charger, the device will
start the video recording automatically 3 seconds after start on.
Power on delay: When connection with car charger, select the car ignition, the delay start
time is the last set time.
Inner Camera:ON/OFF
Back Camera:ON/OFF
Flip:ON/OFF Flip function
Sound recording: select to open or close the microphone.
Language:set language.
TV out:NTSC/PAL.
Auto off:set idle time to power off the device.
Operation
Operation

9
Format:Format the TF card.
Stamp: Video recording/pictures whether add into the time and date.
Date:Use up or down key to change the digits and press OK to go to next item.
Auto LCD off Time: set the time auto turn off the LCD screen; press any key to wake up
the LCD screen.
Reset system: to set the system parameter as the default value.
Night Mode: if the light is dim, night mode can significantly improve the ability to capture
the light, enhancing effect of night photography.
Light source frequency: to choose the frequency of electric wire, in the event of selecting
the wrong frequency, the horizontal lines interruption will show on the image.
Version: to check the version number of video recorder.

10
Sensor
Front camera:5M CMOS Sensor,1/2.5" light-sensing
surface area
Inner Camera: VGA CMOS Sensor
Back Camera: CMOS Camera
Lens
5 fixed focus Lens, aperture 2.0, focus 3.4mm
LCD display
1.5 inches 4:3 TFT LCD
Video output
Picture
Video recording
Audio
Microphone and speaker (AAC) Equipped
Memorizer
Memory: 128M (for firmware use only)
External media: SDHC (support 32G max, TF card)
Shutter
Electronic shutter
Flashlight
Automatic electronic video supplement lamp (LED)
Battery
130mAh 3.7V Polymer Li-ion battery
High definition TV terminal interface: HDMI signal output.
Max 1920X1080i50 or 1920X1080i60
JPG file format Maximum output pixel: 5.0 mega pixels
H.264 compressed format 1920 x 1080, 30 frame/sec
1440 x 1080, 30 frame/sec 1280 x 720, 30 frame/sec
848x480, 60 frame/sec 848x480, 30 frame/sec
Specifications

11
Warning Notice
Cannot take pictures or video clips.
Check the TF card whether it’s locked or has insufficient space.
Stop recording half way.
Please check whether your TF card supports high-speed transmission (marked with C6
or C10).
“File error”pops up in playback mode.
Please format the TF card.
No image on TVscreen.
Make sure AV or HDMI cable is correctly connected. Make sure TV is switched to
correct mode.
Video or pictures are blurry.
Please clean up the lens.
Flashlights cannot be used.
The battery might be low.
Horizontal lines interruption in the image
This is caused by the light source is wrongly set, please set as 50Hz or 60Hz according
to the local power supply frequency.
FAQ
Other manuals for SW012
1
Table of contents


