SILESTONE INTEGRITY DUE L Instruction sheet

Installation
INTEGRITY
BY SILESTONE
1 Guia de instalación
2 Installation guidelines
3 Guia de instalação
4 Einbauanleitung
5 Guida d’Installazione
6 Monteringsanvisningar
7 Guide d’installation
8 Installatierichtlijnen

Instalación Recomendada
por Cosentino:
Siga rigurosamente estas instrucciones, los pasos
que a continuación se detallan, son imprescindibles
para la integración total del fregadero con la
encimera y el buen resultado final.
Cosentino, S.A. no se hace responsable de posibles
incidencias generadas por instalaciones que no
hayan seguido los pasos aquí explicados, u otro tipo
de instalación que no sean las que aquí se exponen.
La opción que se detalla continuación es la
recomendada por Cosentino, S.A. por las siguientes
razones:
Se trata de una instalación sencilla que no requiere
de herramientas especiales.
Si por cualquier causa usted desea cambiar el
fregadero no seria necesario cambiar su encimera
ya que se puede retirar el fregadero con facilidad
sin que la encimera sufra ningún desperfecto.
El fregadero puede instalarse bajo encimeras de
cualquier material.
Evita las pequeñas diferencias de tono que puedan
surgir entre fregadero y encimera por el hecho de
corresponder a distintos lotes de producción.
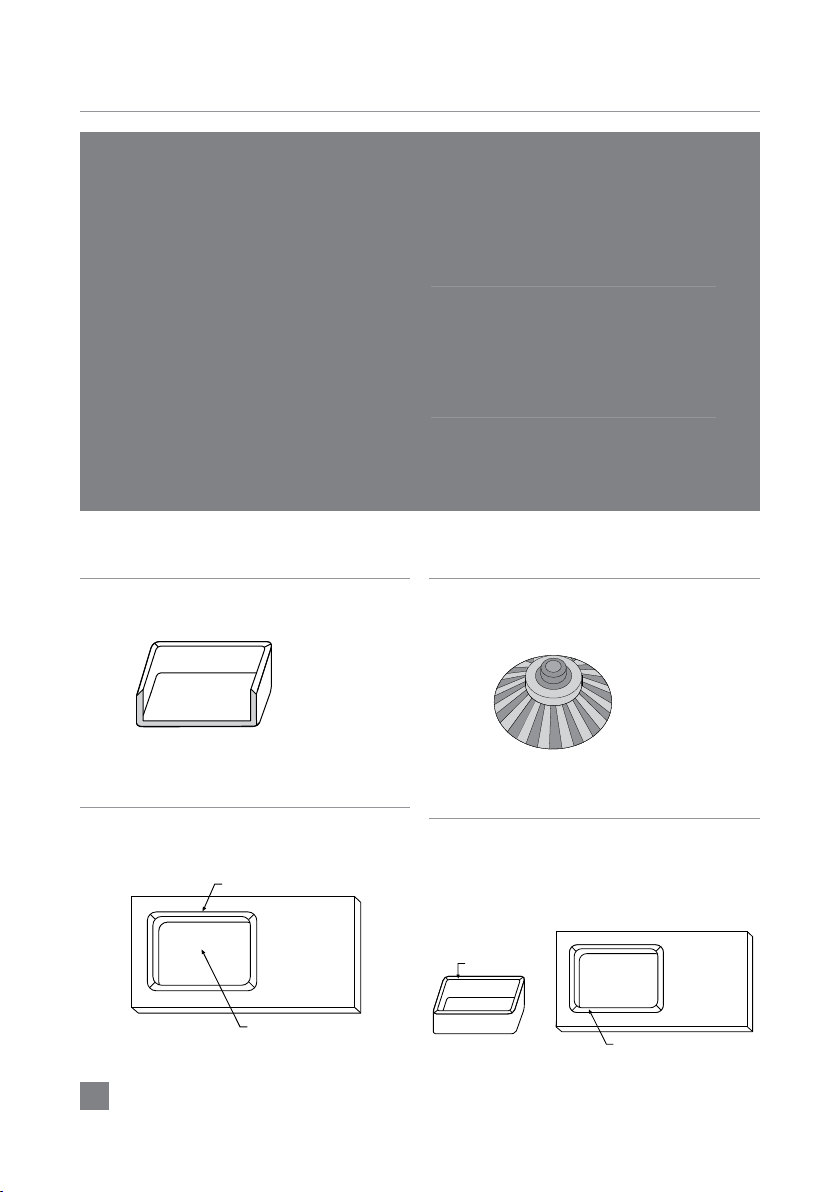
Modelos de fregaderos
Integrity
ONE: 51x41cm
DUE S: 34x37cm
DUE L: 51x37cm
DUE XL: 67x43,5cm
Instrucciones para
la instalación manual
del fregadero Silestone
bajo encimera
Manual de instalación Integrity by Silestone®
1
Formas de instalación:
- Fregadero bajo encimera
- Fregadero Integrado
- Fregadero Ingletado
Kits de anclaje:
a) Cinturones de sujeción
b) Barras telescópicas

3
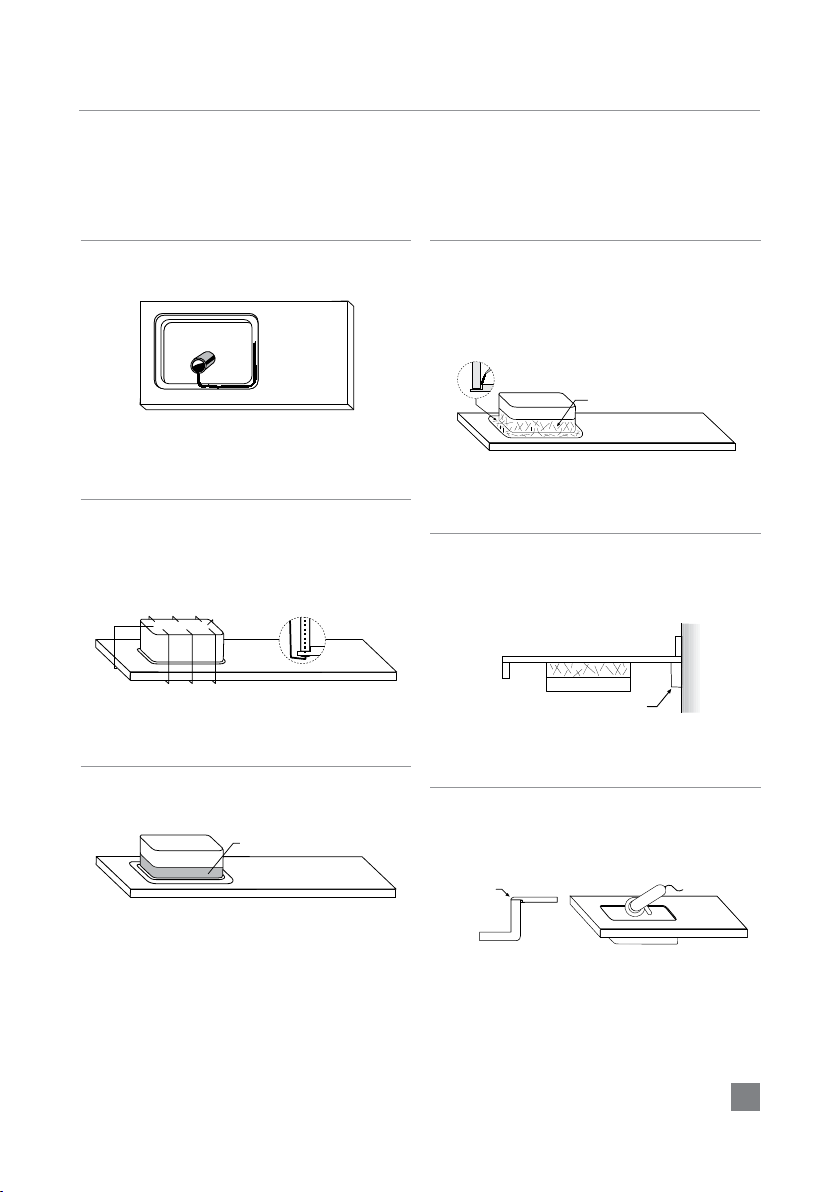
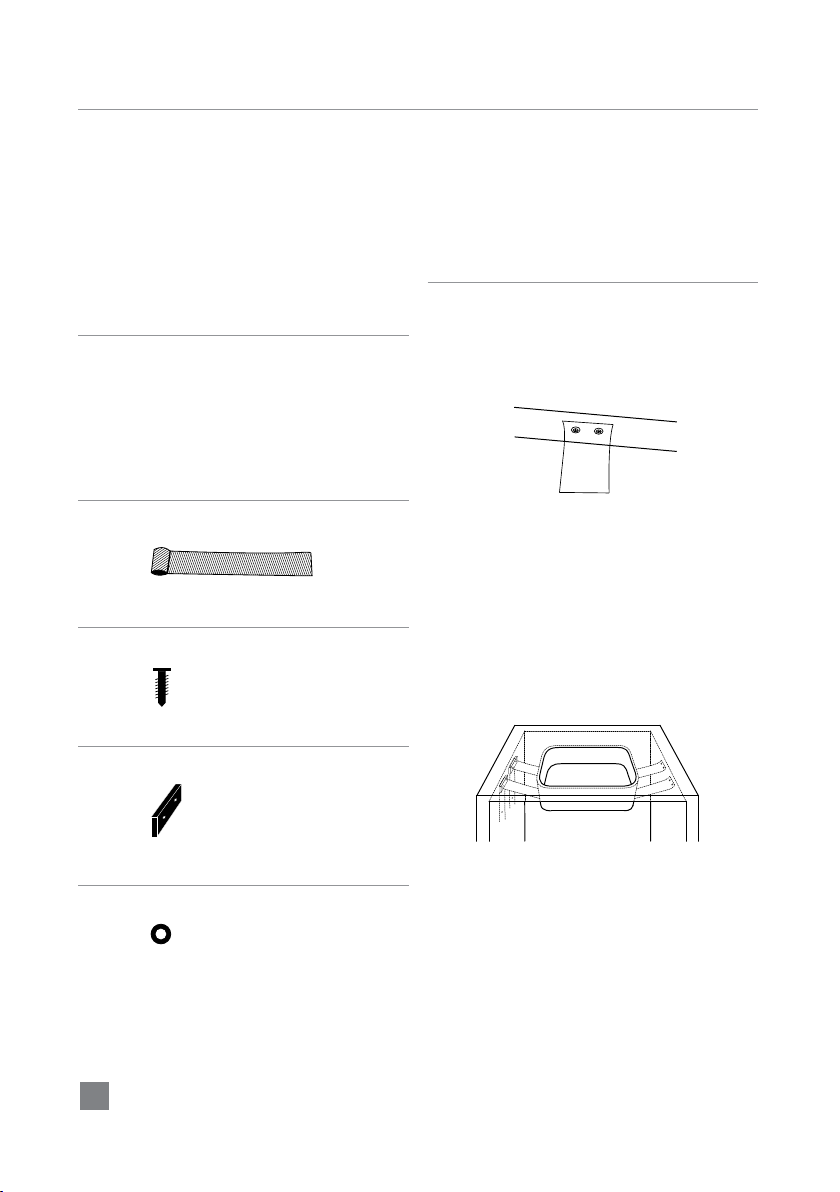
1. Realización Hueco Encimera.
Hueco Abierto
Tamaño fregadero
El hueco de la encimera debe ser 2mm inferior por cada lado, a las dimensiones
interiores del fregadero. En caso de disponer de CNC el hueco debe realizarse
según plantilla incluida en el embalaje con el fregadero.
2. Repaso Parte Inferior De La
Encimera.
Zona a calibrar 2-3 cm
Se debe repasar la zona inferior de la encimera que va a tener contacto con el
fregadero para eliminar posibles imperfecciones que puedan evitar el contacto
total entre encimera y fregadero, para ello utilizaremos una maquina radial
manual.
También se debe realizar un bisel de 2-3 mm en la arista de la parte inferior del
hueco de la encimera que sirva de línea de unión con el fregadero, evitando así
que se aprecie la junta de unión.
Cara trasera
Detalle
Bisel 2-3 mm
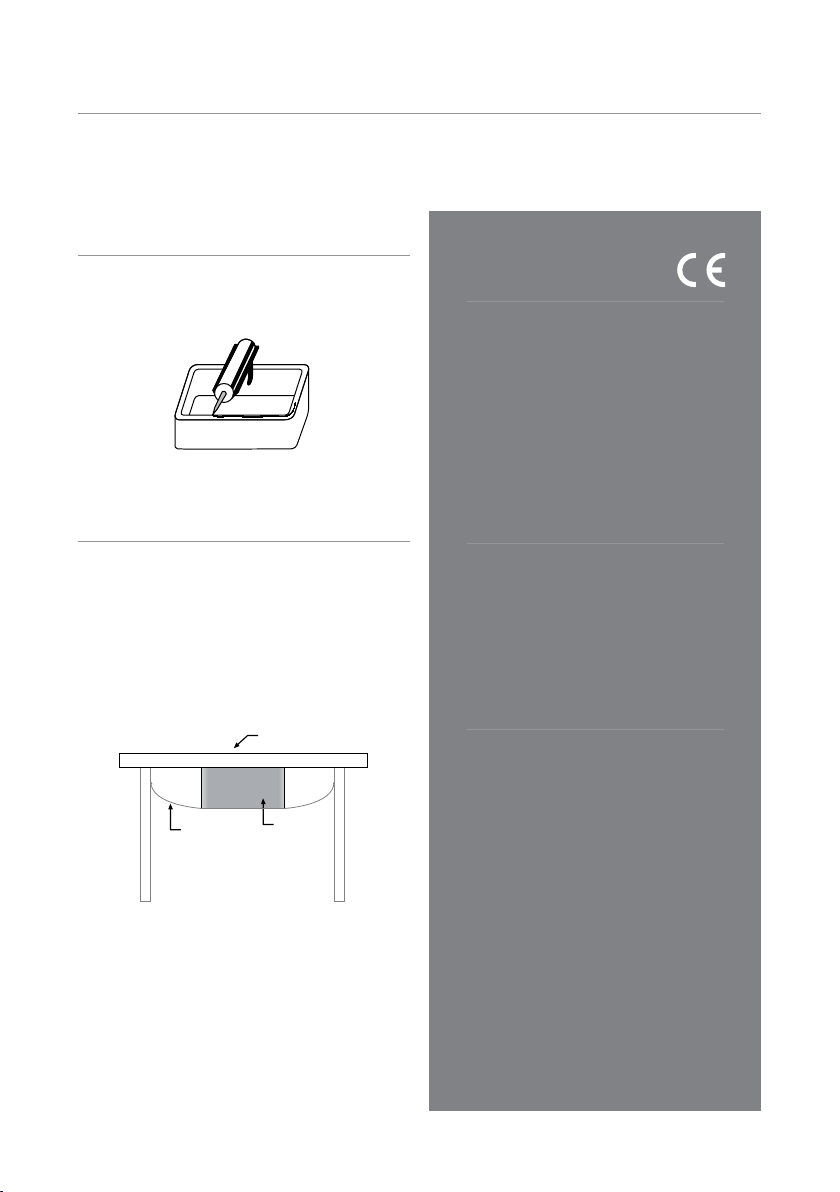
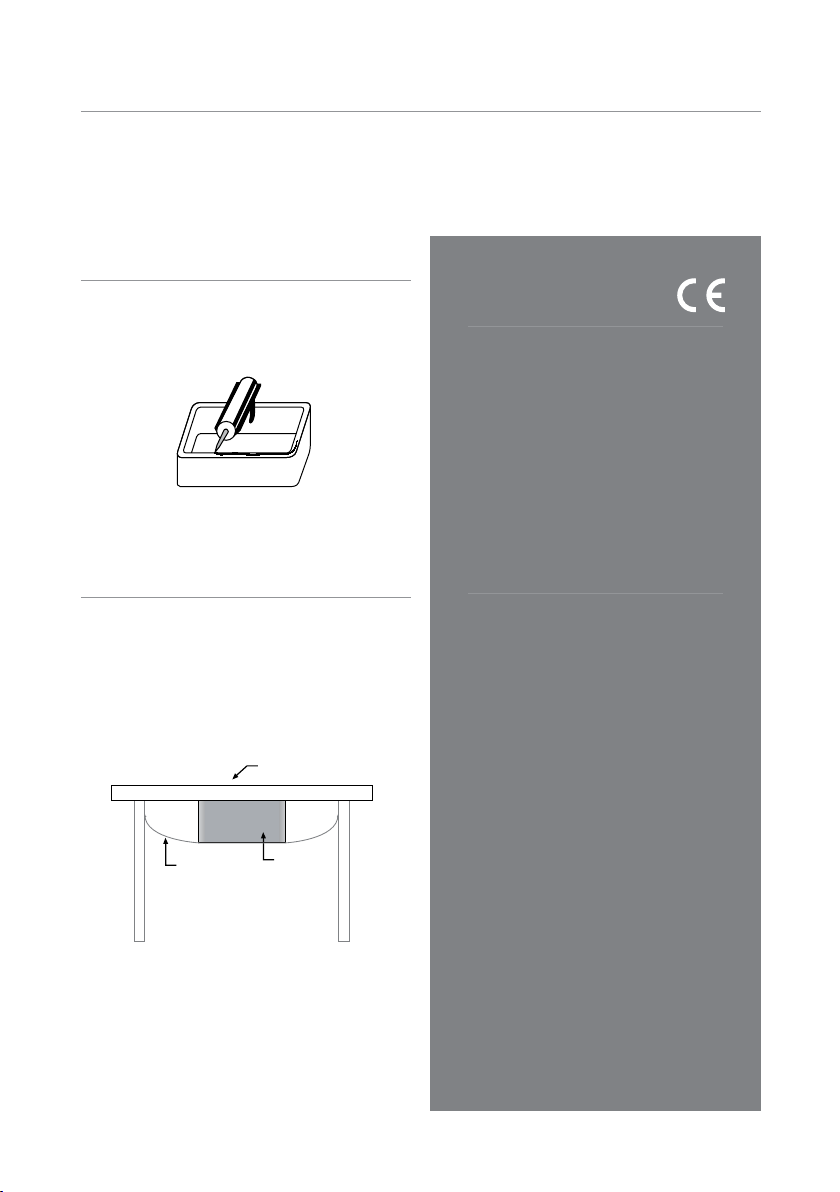
3. Limpieza De Las Partes A Pegar.
Antes de aplicar la silicona se debe limpiar con disolventes o alcohol las dos
partes a pegar: la encimera y el canto del fregadero, si no lo hacemos, la silicona
se mezclara con los residuos que pudieran quedar en dichas partes provocando
que la encimera y el fregadero no tengan un sellado total y además resulte una
junta de otro color que no corresponde con el de la encimera y fregadero.
Zona a limpiar
Zona a limpiar
Zona a limpiar
Zona a limpiar
Trabajo previo a la instalación
Manual de instalación Integrity by Silestone®1

4
Instrucciones para la
Instalación Manual del
Fregadero Silestone Integrado
Si no se dispone de las herramientas adecuadas o de la habilidad necesaria para este tipo de instalación,
Cosentino no recomienda realizarla. Utilizar en ese caso la primera opción.
El fregadero Silestone debe instalarse con una encimera del mismo material.
1. Realización Hueco Encimera.
Inicialmente el hueco de la encimera debe tener unas dimensiones 3mm
inferiores a las dimensiones interiores del fregadero aunque eso es a criterio
del especialista ya que cuanto menos pestaña se deje, menos tendrá luego
para desbastar.
Hueco Abierto
Tamaño fregadero
2. Realización de Rebaje.
Se debe realizar un rebaje de unos 23 mm de ancho a todo el perímetro del
hueco de forma que nos queden 5 mm de grosor del material en la superficie
de la encimera.
23mm
5mm
Rebaje
Hueco abierto
3. Limpieza de Partes a Pegar.
Antes de aplicar la silicona se debe limpiar con disolventes o alcohol las dos
partes a pegar: la encimera y el canto del fregadero, si no lo hacemos, la
silicona se mezclara con los residuos que pudieran quedar en dichas partes
provocando que la encimera y el fregadero no tengan un sellado total y además
resulte una junta de otro color que no corresponde con el de la encimera y
fregadero.
Zona a limpiar
Zona a limpiar
Manual de instalación Integrity by Silestone®
1
5
4. Aplicar Solumastic.
Aplicar Solumastic sobre el borde del hueco.
5. Apretar Fregadero
contra Encimera.
Después de aplicar la resina se colocaran sargentos, gatos o torniquetes para
apretar el fregadero contra la encimera. Se deben apretar hasta que expulsen
toda la resina posible, ya que toda resina que pudiera quedar sería junta visible.
Este pegado se parece bastante a cuando se quiere hacer un 2+2 o un pegado
a inglete y queremos esconder la unión entre piezas.
6. Limpieza Partes Pegadas.
Limpiar con alcohol o disolventes 10 cm de la pared exterior del fregadero y
de la encimera.
Zona a limpiar
7. Rellenar Hueco entre Piezas.
Hay que rellenar con resina el hueco que queda entre el fregadero y la
encimera. Si no se rellena este hueco podríamos tener problemas de rotura
de la encimera en el contorno del fregadero. También hay que colocar la malla
de fibra de vidrio por todo el perímetro para reforzar la unión del fregadero
a la encimera. No colocar la malla de fibra de vidrio cubriendo el agujero del
rebosadero.
Malla de fibra de vidrio
8. Refuerzo Encimera.
Para evitar futuras roturas en la encimera y reforzarla, colocaremos una tira en
la parte inferior-posterior de la encimera a la altura del copete, de una longitud
tal como nos permita el ancho del hueco del mueble.
Tira de refuerzo
Encimera
Fregadero
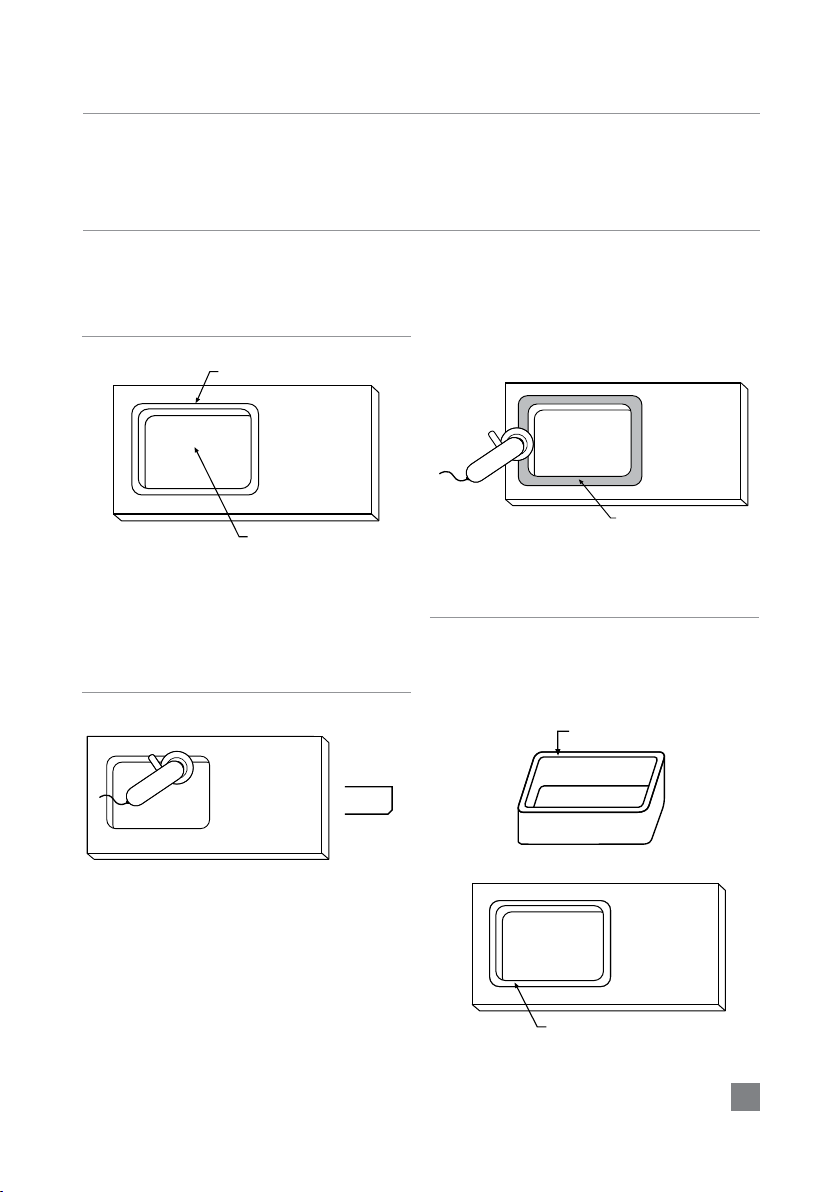
9. Realización de Bisel.
Una vez esta pegado el fregadero a la encimera debemos desbastar el canto
sobrante hasta hacer el bisel a todo el contorno de forma que la parte inferior
del bisel coincida con la junta del fregadero.
Acabado final Encimera
Fregadero
Manual de instalación Integrity by Silestone®1
6
Siga rigurosamente estas instrucciones, los pasos que a
continuación se detallan, son imprescindibles para la integración
total del fregadero con la encimera y el buen resultado final.
Cosentino, S.A. no se hace responsable de posibles incidencias
generadas por instalaciones que no hayan seguido los pasos aquí
explicados, u otro tipo de instalación que no sean las que aquí se
exponen.
Evita las pequeñas diferencias de tono que puedan surgir entre
fregadero y encimera por el hecho de corresponder a distintos lotes
de producción.
El fregadero Silestone debe instalarse con una encimera del mismo
material.
Modelos de fregaderos
Integrity
ONE: 51x41cm
DUE S: 34x37cm
DUE L: 51x37cm
DUE XL: 67x43,5cm
1. Fregadero Ingletado.
El fregadero integrity se puede solicitar con el canto ingletado, para ello
póngase en contacto con su center COSENTINO más cercano
2. Realización Hueco.
El hueco de la encimera debe ser 2mm inferior por cada lado a las dimensiones
según plantilla incluida en el embalaje con el fregadero.
Hueco Abierto
Tamaño fregadero
3. Realización del Inglete.
Tanto el mecanizado del perímetro del hueco como el mecanizado del
fregadero se deben realizar en CNC. Se debe utilizar un juego de muelas
de diamante apropiado para corte ingletado.
4. Limpieza de Partes a Pegar.
Antes de aplicar la silicona se debe limpiar con disolventes o alcohol las dos
partes a pegar: la encimera y el canto del fregadero, si no lo hacemos, la
silicona se mezclara con los residuos que pudieran quedar en dichas partes
provocando que la encimera y el fregadero no tengan un sellado total y
además resulte una junta de otro color que no corresponde con el de la
encimera y fregadero.
Zona a limpiar
Zona a limpiar
Instrucciones para la Instalación
de Fregadero Silestone Ingletado
Manual de instalación Integrity by Silestone®
1

7
5. Aplicar Solumastic.
Aplicar Solumastic sobre el borde del hueco
6. Apretar Fregadero
contra Encimera.
Después de aplicar la resina se colocaran sargentos, gatos o torniquetes para
apretar el fregadero contra la encimera. Se deben apretar hasta que expulsen
toda la resina posible, ya que toda resina que pudiera quedar sería junta visible
7. Limpieza Partes Pegadas.
Limpiar con alcohol o disolventes 10 cm de la pared exterior del fregadero y
de la encimera
Zona a limpiar
8. Rellenar Hueco entre Piezas.
Hay que rellenar con resina el hueco que queda entre el fregadero y la
encimera. Si no se rellena este hueco podríamos tener problemas de rotura
de la encimera en el contorno del fregadero. También hay que colocar la malla
de fibra de vidrio por todo el perímetro para reforzar la unión del fregadero
a la encimera. No colocar la malla de fibra de vidrio cubriendo el agujero del
rebosadero.
Malla de fibra de vidrio
9. Refuerzo Encimera.
Para evitar futuras roturas en la encimera y reforzarla, colocaremos una tira en
la parte inferior-posterior de la encimera a la altura del copete, de una longitud
tal como nos permita el ancho del hueco del mueble.
Tira de refuerzo
Encimera
Fregadero
10. Realización de Bisel.
Una vez esta pegado el fregadero a la encimera debemos desbastar el canto
sobrante hasta hacer el bisel a todo el contorno.
Acabado final Encimera
Fregadero
Manual de instalación Integrity by Silestone®1

8
Instalación Kits de Anclaje
Opción A.
Cinturones de sujeción.
El fregadero Silestone contiene dos cinturones de fijación y seguridad que nos
ayudarán a asegurar el fregadero.
1. El kit se compone de los
siguientes elementos:
2 CINTURONES DE SUJECIÓN
8 TORNILLOS
2 HEBILLAS DE MADERA
4 ARANDELAS
2. Colocación cinturones
de sujeción:
Los cinturones se fijan mediante tornillos en un lateral del mueble de cocina.
Antes de fijar los cinturones, es necesario hacer 2 perforaciones en cada
extremo para introducir los tornillos.
En el otro lateral del mueble atornillamos las hebillas de madera con dos
tornillos y dos arandelas para cada hebilla.
Pasamos los cinturones por las hebillas y colocamos el fregadero sobre los
cinturones.
Tensamos los cinturones y atornillamos en la parte inferior de este lateral.
Los cinturones deben fijarse de manera que ejerzan la máxima tensión posible
sobre el fregadero.
x8
x2
x4
x2
Manual de instalación Integrity by Silestone®
1
9
3. Aplicar Silicona Al Fregadero.
Aplicar silicona sobre el canto del fregadero. Usar silicona COLORSIL del mismo
color que el fregadero y la encimera. (COLORSIL se suministra con el fregadero).
4. Unir Fregadero Con Encimera.
Una vez colocada la silicona al fregadero se debe unir este con la encimera
utilizando el kit de anclaje como superficie de apoyo de la parte inferior del
fregadero para que apriete y ajuste el fregadero a la encimera, se deben utilizar
los pernos para nivelar los cinturones de seguridad y que estos aprieten el
fregadero contra la encimera.
Retirar el exceso de silicona antes de que endurezca. Cosentino recomienda
para eliminar el exceso de Silicona el producto CLEANCOLORSIL. En cualquier
caso no utilizar productos que contengan DICLOROMETANO.
Declaracion de
Conformidad CE
Declaración de conformidad a las directrices de la Unión
Europea
Cosentino S.A declara bajo su exclusiva responsabilidad la
conformidad del producto:
Tipo : Fregadero de Silestone.
Nombre: ONE y DUE
Utilización: Uso domestico. al que se refiere esta declaración,
con las normas u otros documentos normativos: UNE-EN
13310: Fregaderos de cocina. Requisitos funcionales y
métodos de ensayo y que se haya en conformidad con la
Directiva del Consejo 89/109/CEE de diciembre de 1988,
relativa a la aproximación de las legislaciones de los Estados
Miembros sobre los materiales y objetos destinados a entrar
en contacto con productos alimenticios.
Nota
COSENTINO S.A recomienda el uso del kit de anclaje en todos
los modelos de la gama de fregaderos Silestone Integrity para
garantizar una sujeción más firme y segura.
COSENTINO S.A declara necesario, y por lo tanto obligatorio,
el uso del kit de anclaje en el caso del modelo de fregadero
Integrity XL. Los daños y perjuicios causados por la incorrecta
instalación del fregadero serán asumidos por el instalador y
no por COSENTINO S.A.
Manual de instalación Integrity by Silestone®1
Encimera
Fregadero
Cinturones
de sujeción

10
Opción B.
Barras telescópicas.
Bajo pedido, consultar con su COSENTINO CENTER más cercano
1. El kit está compuesto
por dos partes:
PERFILES DE APOYO
BARRAS DE SUJECIÓN TELESCÓPICA
2. Colocación perles de apoyo:
Estos perfiles se fijan mediante tornillos en los laterales del mueble de cocina
(uno en cada lateral). La base del perfil debe quedar a 21 cm de la parte inferior
de la encimera.
3. Barras de sujeción telescópica:
Se trata de dos barras telescópicas que pueden ampliar o disminuir su longitud
en función de la medida del mueble, tienen un mínimo de 80 cm y un máximo
de 120 cm de longitud. Se colocan transversalmente apoyando sus cabezas en
los anclajes de los perfiles de apoyo, una vez colocados transversalmente se
pueden nivelar mediante unos pernos para que queden exactamente alineados
y el fregadero pueda apoyar sobre ellos en toda su superficie.
Zona a limpiar
Perfiles de apoyo
Barras de sujeción
Pernos
Manual de instalación Integrity by Silestone®
1

11
4. Aplicar Silicona Al Fregadero.
Aplicar silicona sobre el canto del fregadero. Usar silicona COLORSIL del mismo
color que el fregadero y la encimera. (COLORSIL se suministra con el fregadero).
5. Unir Fregadero Con Encimera.
Una vez colocada la silicona al fregadero se debe unir este con la encimera
utilizando el kit de anclaje como superficie de apoyo de la parte inferior del
fregadero para que apriete y ajuste el fregadero a la encimera, se deben utilizar
los pernos para nivelar la barra telescópica y que esta apriete el fregadero
contra la encimera.
Retirar el exceso de silicona antes de que endurezca. Cosentino recomienda
para eliminar el exceso de Silicona el producto CLEANCOLORSIL. En cualquier
caso no utilizar productos que contengan DICLOROMETANO.
Declaracion de
Conformidad CE
Declaración de conformidad a las directrices de la Unión
Europea
Cosentino S.A declara bajo su exclusiva responsabilidad la
conformidad del producto:
Tipo : Fregadero de Silestone.
Nombre: ONE y DUE
Utilización: Uso domestico. al que se refiere esta declaración,
con las normas u otros documentos normativos: UNE-EN
13310: Fregaderos de cocina. Requisitos funcionales y
métodos de ensayo y que se haya en conformidad con la
Directiva del Consejo 89/109/CEE de diciembre de 1988,
relativa a la aproximación de las legislaciones de los Estados
Miembros sobre los materiales y objetos destinados a entrar
en contacto con productos alimenticios.
Nota
COSENTINO S.A recomienda el uso del kit de anclaje en todos
los modelos de la gama de fregaderos Silestone Integrity para
garantizar una sujeción más firme y segura.
COSENTINO S.A declara necesario, y por lo tanto obligatorio,
el uso del kit de anclaje en el caso del modelo de fregadero
Integrity XL. Los daños y perjuicios causados por la incorrecta
instalación del fregadero serán asumidos por el instalador y
no por COSENTINO S.A.
Manual de instalación Integrity by Silestone®1
Encimera
Fregadero
Barra
Telescópica

12
Installation Guidelines
by Cosentino:
Please pay special attention to the following
guidelines.
The steps described are vital in the correct
installation of the Silestone sink into the
countertop.
Cosentino S.A. is not responsible for any errors
resulting from not following the guidelines
provided.
Cosentino S.A. recommends this procedure for the
following reasons:
It is a very straightforward installation and does not
require special tools.
If for any reason you would like to change an
installed Silestone sink, there will be no need to
change the countertop since the sink can be easily
removed without damage.
The sink can be undermounted in any material.
Cosentino S.A. cannot be liable for shade variations
between the sink and countertop when they have
been manufactured separately.
Integrity
Sink Models
ONE: 51x41cm
DUE S: 34x37cm
DUE L: 51x37cm
DUE XL: 67x43,5cm
How to x the
Silestone undermounted
sink to the countertop
Installation Guidelines Integrity by Silestone®
2
Installation type:
- Undermounted sink
- Integrated sink
- Mitered sink
Anchoring kits:
a) Fastening belts
b) Telescopic rod
13
1. Making The Sink Cut-Out In
The Countertop.
Sink size
Cut hole
The cut-out made in the countertop should be 2mm. smaller all round than
the inner size of the sink. For CNC operation the hole must be made in
accordance with the template included in the sink packaging.
2. Polishing The Sink Cut-Out.
Rear dimension
Detail
Bevel 2-3 mm
Cleaning the interior of the countertop with a hand radial drilling machine
is ideal to enable the operator to check for any flaws which may hinder any
direct contact between the countertop and the sink.
A bevel of 2-3mm. must be made in the underside of the countertop to
serve as a bonding line with the sink and make the joint appear less
noticeable.
Area to be gauged: 2-3 cm
3. Cleaning The Parts To Be
Bonded.
The two parts which are to be bonded (worktop and the sink) should be
thoroughly cleaned with solvents or alcohol before applying the silicone;
otherwise the silicone will not bond correctly and the countertop and sink
will not be sealed properly. Make sure that the silicone is colour coordinated
where possible.
Area to be cleaned
Area to be cleaned
Area to be cleaned
Area to be cleaned
Before Installation
Installation Guidelines Integrity by Silestone®2

14
Installation Guide
of Silestone Built-In Sink
If you don’t have the suitable tools or the expertise needed to install this type of installation, Cosentino do not
recommend you to do it. In this case use the previous option.
Silestone sinks must be installed in a countertop from the same material.
1.
Making The Countertop Cut-Out.
The countertop cut-out should be 3mm. smaller than the sink’s inner size
although this will depend on the technician’s criteria since the smaller the
flange is, a lesser amount of finishing will be required.
Sink size
Cut hole
2.
Rebating Surface.
A rebate of 23mm. width around the cut-out to allow 5mm of material
thickness must be made. This process will be by CNC application.
23mm
5mm
Rebate
Cut hole
3.
Cleaning Parts To Be Bonded.
The two parts which are to be bonded (worktop and the sink) should be
thoroughly cleaned with solvents or alcohol before applying the silicone;
otherwise the silicone will not bond correctly and the countertop and sink
will not be sealed properly. Make sure that the silicone is colour coordinated
where possible.
Zona a limpiar
Zona a limpiar
Installation Guidelines Integrity by Silestone
®
2

15
4. Using Solumastic.
The Solumastic must be applied to entire edge.
5. Tightening Sink
Into Countertop.
Once the resin has been applied, clamps and jacks must be used to secure the
sink into the countertop until it absorbs as much resin as possible. The non-
absorbed resin will turn into a noticeable joint. This adhesive system is quite
similar to a 2+2 procedure or if we make edge mitres the intention should be
to hide the joint between the two pieces.
6. Cleaning Bonded Parts.
Clean with alcohol or solvents to 10cm. around all of the areas to be bonded.
Area to be cleaned
7.
Filling In The Gap Between The
Sink And Countertop.
The gap between the sink and countertop must be filled in with resin; otherwise
the countertop could be damaged. It is also advisable to glue small pieces
of Silestone to the countertop and sink so as to strengthen their bond. It is
important to make sure that the sink waste and overflow components are not
obstructed by the sink installation kit or reinforcement pieces when installing.
Fiberglass mesh
8. Reinforcing The Countertop.
In order to reinforce the sink and countertop structure, it is advisable to fix
strips onto the underside of the countertop covering the processed area to the
full width of the kitchen base unit.
Reinforce strip
Countertop
Sink
9. Cutting The Bevel.
Once the sink is fastened to the countertop, it is advisable to polish the inner
edges and create a bevel to allow a neat joint between the countertop and
the sink.
Final touch Countertop
Sink
Installation Guidelines Integrity by Silestone
®
2

16
Guidelines for the installation of
Silestone integrated sinks
Installation Guidelines Integrity by Silestone
®
2
1. Mitered Sink.
The Integrity sink can be installed with a mitered joint. Please, contact your
closest Cosentino center for more information.
2. Making the cut-out.
The cut-out in the countertop must be 2mm smaller in all sides of the sink size
according to the template included in the package.
Sink size
Cut hole
3. Making the miter Joint.
Both the cut-out perimeter and the sink must be made with a CNC. You must
use a diamond tooth kit suitable for mitering.
4. Cleaning the parts to be bonded.
The two parts which are to be bonded (worktop and the sink) should be
thoroughly cleaned with solvents or alcohol before applying the silicone;
otherwise the silicone will not bond correctly and the countertop and sink will
not be sealed properly and might result into color variations between the joint
and the bonded pieces.
Area to be cleaned
Area to be cleaned
Please pay special attention to the following guidelines.
The steps described are vital in the correct installation of the
Silestone sink into the countertop.
Cosentino S.A. is not responsible for any errors resulting from not
following the guidelines provided.
Avoid shade variations between the sink and the countertop caused
from using different product batches.
Silestone sinks must be installed in a countertop from the same
material.
Integrity
Sink Models
ONE: 51x41cm
DUE S: 34x37cm
DUE L: 51x37cm
DUE XL: 67x43,5cm

17
5. Using Solumastic.
The Solumastic must be applied to entire edge.
6. Tightening Sink
Into Countertop.
Once the resin has been applied, clamps and jacks must be used to secure the
sink into the countertop until it absorbs as much resin as possible. The non-
absorbed resin will turn into a noticeable joint. This adhesive system is quite
similar to a 2+2 procedure or if we make edge mitres the intention should be
to hide the joint between the two pieces.
7. Cleaning Bonded Parts.
Clean with alcohol or solvents to 10cm. around all of the areas to be bonded.
Area to be cleaned
8.
Filling In The Gap Between The
Sink And Countertop.
The gap between the sink and countertop must be filled in with resin; otherwise
the countertop could be damaged. It is also advisable to glue small pieces
of Silestone to the countertop and sink so as to strengthen their bond. It is
important to make sure that the sink waste and overflow components are not
obstructed by the sink installation kit or reinforcement pieces when installing.
Fiberglass mesh
9. Reinforcing The Countertop.
In order to reinforce the sink and countertop structure, it is advisable to fix
strips onto the underside of the countertop covering the processed area to the
full width of the kitchen base unit.
Reinforce strip
Countertop
Sink
10. Cutting The Bevel.
Once the sink is fastened to the countertop, it is advisable to polish the inner
edges and create a bevel to allow a neat joint between the countertop and
the sink.
Final touch Countertop
Sink
Installation Guidelines Integrity by Silestone
®
2
18
Anchoring kits installation
Option A.
Fastening Belts.
The Silestone sink contains two fastening and security belts. They help us to
support the sink.
1. The kit is composed of the
following items:
2 FASTENING BELTS
8 SCREWS
2 WOOD BACKLES
4 WASHERS
2. Arrangement of fastening belts:
The belts are fixed with screws in one side of the kitchen furniture.
Before fixing the belts, it will be necessary to make 2 boreholes on each end in
order to add the screws.
On the other side of the furniture screw the wood buckles with two screws and
two washers for each buckle.
Cross the belts through the buckles and place the sink on the belts.
Stretch belts and screw in the lower part of this side.
Belts should be fixed to have the maximum possible tension for the sink
Installation Guidelines Integrity by Silestone®
2
x8
x2
x4
x2
19
3. Applying Silicone Onto The Sink.
Apply the silicone onto the sink edge. You must use the correct colour
COLORSIL silicone to bond the sink and countertop (COLORSIL is provided
together with the sink).
4. Fitting The Sink To The
Underside Of The Countertop.
Once the silicone has been applied. The sink should be offered up to the
countertop by using the anchorage system and adjusting the support bolts.
Level the sink to ensure a good silicone bond between the countertop and the
sink is achieved.
Care must be taken to ensure a perfect bond and not to over-tighten the bolts.
Clean off any excess silicone before it dries. Cosentino recommends using
CLEANCOLORSIL. Do not use any products containing METHYLINE CHLORIDE.
Declaration of
Conformity CE
Declaration of conformity to the European Union directives.
Cosentino S.A,in A-334 road, km 59 (04850) Cantoria Almería,
declare under exclusive responsibility the conformity of the
product:
Type : Silestone Sink
Name: ONE and DUE
Use: Domestic use.
To which this declaration is referred, with the norms or
another normative documents: UNE-EN 13310: Kitchen sinks.
Functional requirements and test methods.
And that it is conform with COUNCIL DIRECTIVE of 21
December 1988 on the approximation of the laws of the
Member States relating to materials and articles intended to
come into contact with foodstuffs (89/109/EEC).
Note
COSENTINO S.A recommends the use of anchorage kit in all
models of Integrity sinks in order to guarantee a safer and
firmer fastening.
COSENTINO S.A states that the use of moorings kit with
the XL Integrity model is needed and for this reason it is
obligatory with this model. Damages due to an incorrect
sink installation will be assumed by the fitter and not by
COSENTINO S.A
Installation Guidelines Integrity by Silestone®2
Countertop
Sink
Fastening
Belts

20
Option B.
Telescopic Rod
The Silestone sink includes a metal anchorage kit which will help to hold and
bond the sink when offering it up to the countertop.
1. This kit is made up of two parts:
A CLAMPING PROFILE SYSTEM
TELESCOPIC CLAMPING
2. Fitting the clamping prole
system:
This system will be fastened by screws placed both sides of the kitchen
cupboard interior (one on each side), and will be fixed at a distance of 21 cm
below the worktop to allow a correct installation.
3. Telescopic clamping bars:
Minimum dimension of 80cm. to a maximum dimension of 120cm according to
the size of the kitchen base unit. They should be placed crosswise by locating
the heads on the clamping profile anchorage and then levelled to be perfectly
aligned and to evenly support the entire sink.
Countertop
Clamping profile system
Clamping bars
Bolts
Installation Guidelines Integrity by Silestone®
2
This manual suits for next models
3
Table of contents
Languages:
Popular Plumbing Product manuals by other brands


Grohe
Grohe 27 018 instruction manual

Laufen
Laufen LFM-IV300 quick start guide

JADO
JADO Savina 845/485 Series installation instructions

Hans Grohe
Hans Grohe Talis Care 32036000 Instructions for use/assembly instructions

Hans Grohe
Hans Grohe Talis 32130000 Instructions for use/assembly instructions

TLV
TLV SJ3V-X instruction manual

Claybrook
Claybrook BOURNBROOK BASIN TAP Installation

newform
newform 63420 instructions

Koy
Koy 04-K71 product manual

American Standard
American Standard Silhouette 7196.011 Specification sheet

T&S
T&S B-1255 Installation and maintenance instructions

Anzzi
Anzzi L-AZ 901 Series Installation & operation manual