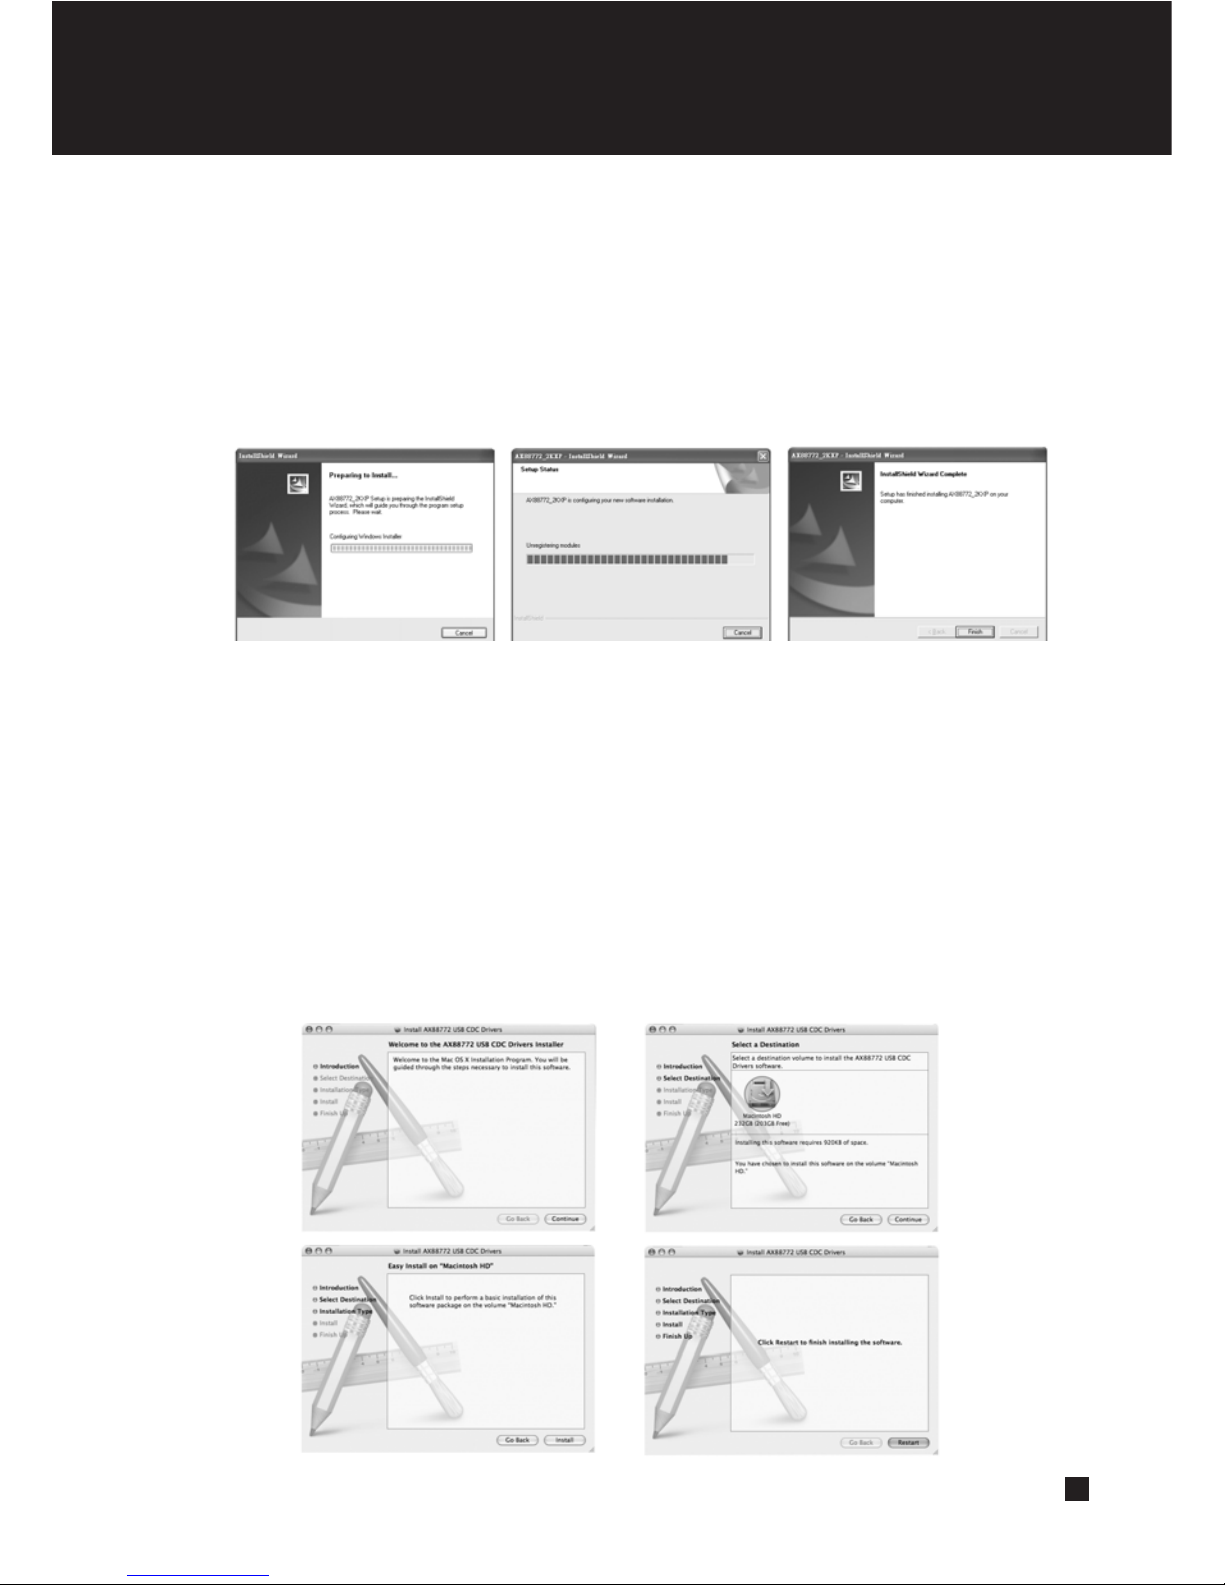
5.1 Anschluss an einen Windows-PC
A]. Eine neue Hardware wird von Windows automatisch erkannt (beenden Sie jetzt bitte alle
anderen Anwendungen)
B]. Hat das Betriebssystem Ihres Computers die neue Hardware erkannt, legen Sie die
beigefügte Treiber-CD ein, um die Installation zu starten. Ist die Installation abgeschlossen,
klicken Sie auf Finish (Fertig stellen).
5.2 Anschluss an einen Macintosh-Computer (nur für Versionen Mac OS X 10.3 und 10.4)
A]. Legen Sie die beigefügte Treiber-CD in das optische Laufwerk (CD/DVD), warten Sie,
bis das CD-Symbol auf dem Desktop angezeigt wird und klicken Sie es dann doppelt
an, um den Inhalt der CD zu durchsuchen.
B]. Öffnen Sie den Ordner entsprechend der in Ihrem Besitz befindlichen OS X-Version,
um die Treiberinstallation auszuführen. Benutzer der Version Mac OS X 10.3 müssen
den Treiber manuell installieren. Diesbezügliche Informationen sind in der Datei Readme.txt
angegeben, die sich im Dateiordner befindet. Benutzer der Version Mac OS X 10.4
brauchen nur die Installer-Datei doppelt anzuklicken, um die Treiberinstallation zu starten.
4
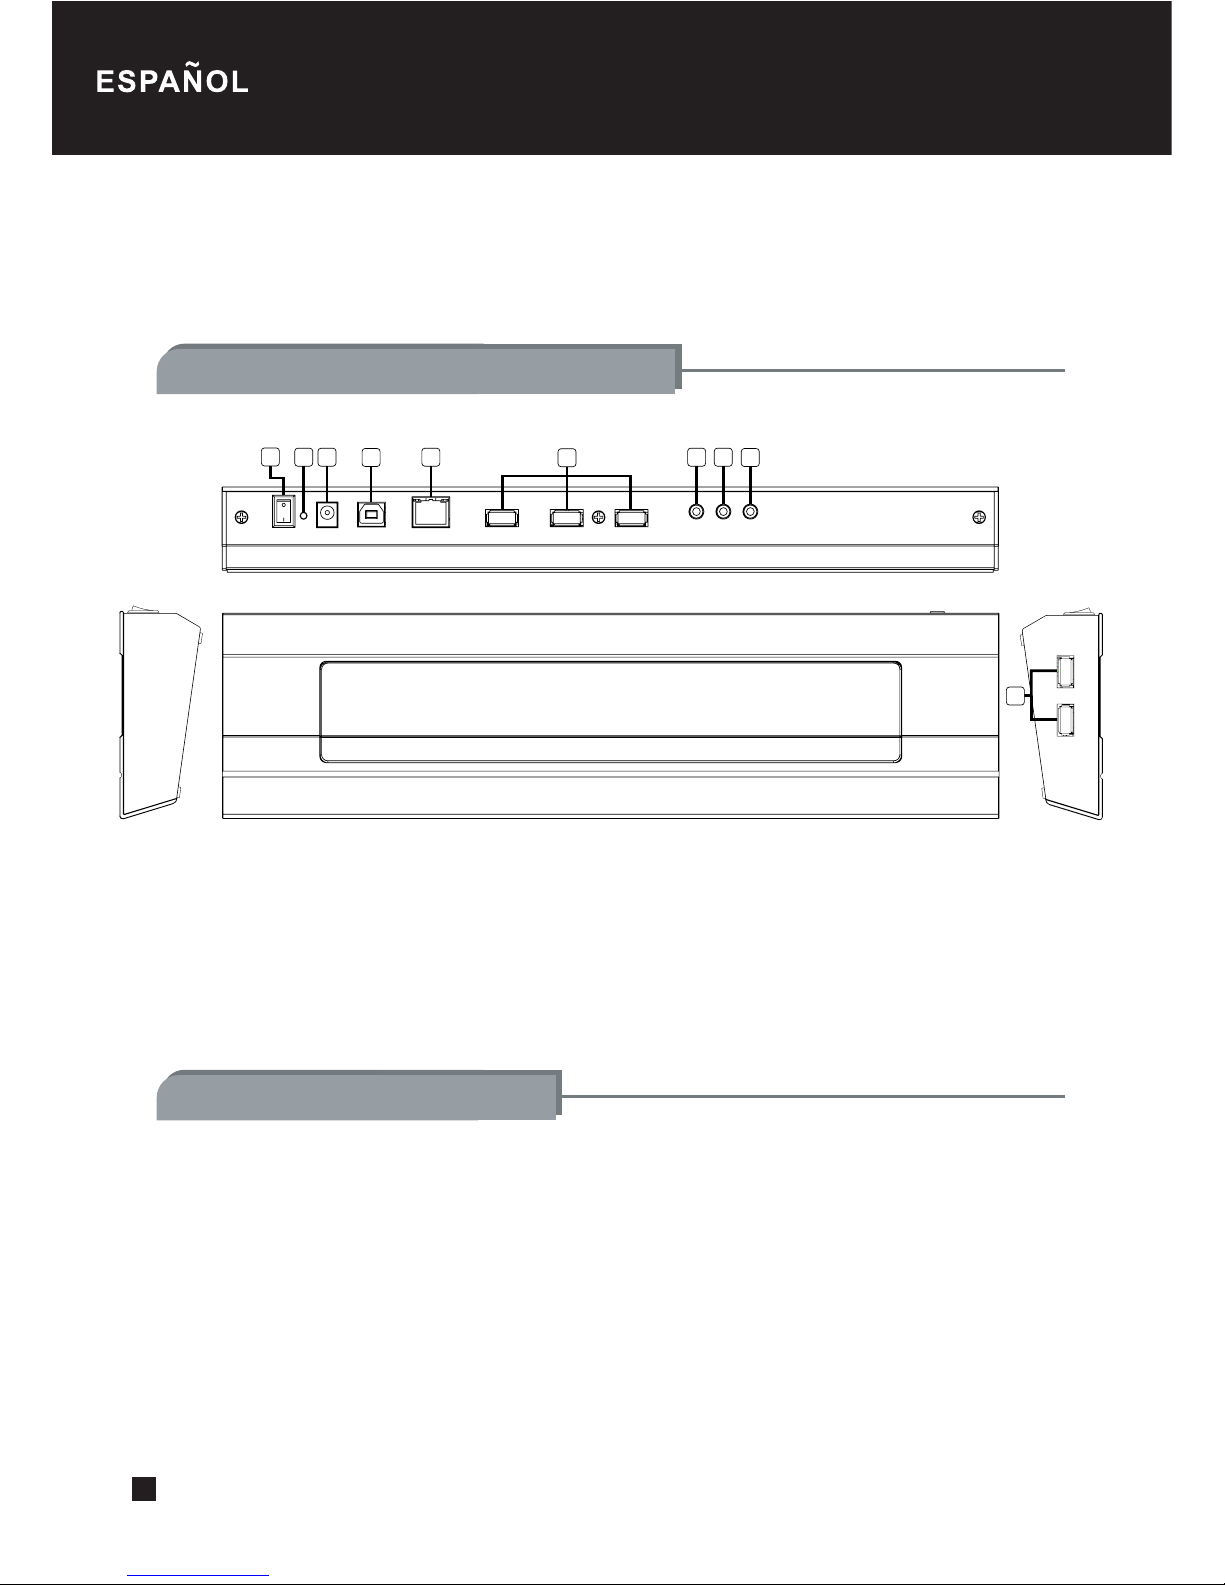
Noble Breeze series NB02B
1. 2.
3. 4.