SIM dtc5612 User manual


Main Features
Advanced QAM demodulation and MPEG-II decoding technologies, which is
able to receive and decode all digital cable TV programs compatible by
DVB/MPEG II. It is a high performance digital cable decoder characteristic of
fast program switching, automatic search for frequency and encoding rate,
password locking, conditional access, friendly user interface and ease of use.
²Support QAM16, 32, 64, 128 and 256 modulation systems
²Select Televising pattern automatically
²Friendly user interface
²Super-clear screen and hi-fi digital stereophonic output
²Conditional access system (CA)
²Electronic program guide (EPG)
²OTA Support
Packing list
Your Set-Top-Box also includes the following items:
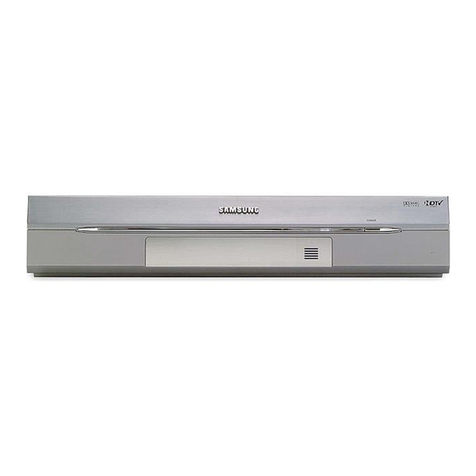
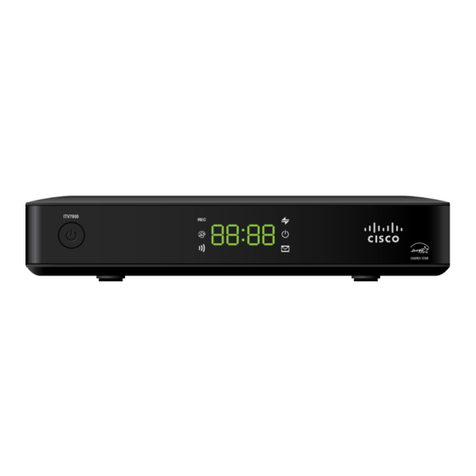
ď1Đ1 Pcs Digital cable STB (Set-Top-Box)
ď2Đ1 Pcs AV cable 1.5M
ď3Đ1 Pcs Remote control unit (RCU)
ď4Đ2Pcs battery
ď5Đ1 Pcs User's manual
Contents
1. Safety Instructions------------------------------------------------------------1
2. Guide for user's manual ----------------------------------------------------2
3. Description of the Receiver ------------------------------------------------3
1) Front panel------------------------------------------------------------------------------- 3
2) Rear panel ------------------------------------------------------------------------------- 4
3) Connection------------------------------------------------------------------------------- 5
4) Remote control Unit (RCU) ----------------------------------------------------------7
4. Function Introduce -----------------------------------------------------------9
5. TV and Radio ----------------------------------------------------------------- 10
1) Switch TV/ Radio program--------------------------------------------------------- 10
2) Play the previous channel viewed ----------------------------------------------- 10
3) Select program ----------------------------------------------------------------------- 10
4) Volume control ------------------------------------------------------------------------ 11
5) EPG ------------------------------------------------------------------------------------- 12
6) Other function------------------------------------------------------------------------- 12
6. Installation--------------------------------------------------------------------- 13
1) Automatic Scan----------------------------------------------------------------------- 13
2) Manual Scan -------------------------------------------------------------------------- 14
3) Factory Reset ------------------------------------------------------------------------- 14
7. Edit------------------------------------------------------------------------------- 15
8. System-------------------------------------------------------------------------- 16
1) System Configuration --------------------------------------------------------------- 16
2) Output Setting------------------------------------------------------------------------- 17
3) Parental Control ---------------------------------------------------------------------- 17
4) System Information------------------------------------------------------------------ 18
5) Time Setting --------------------------------------------------------------------------- 18
) Timer ------------------------------------------------------------------------------------ 19
9. Utility ---------------------------------------------------------------------------- 19
10. CAS ---------------------------------------------------------------------------- 20
11. Software upgrade---------------------------------------------------------- 21
12. Troubleshooting ----------------------------------------------------------- 22
13. Specifications--------------------------------------------------------------- 23

1
1. Safety Instructions
Please read this
user's manual
carefully before
using.
Do not allow the
Receiver to be
exposed to
extreme heat,
cold or humid
conditions.
Do not remote the
cover to prevent
electrical shock or
damage.
Do not put any
heavy object over
the Receiver.
If the Receiver
remains unused
for a long time
please unplug
power cord to
prevent from fire or
electrical shock.
Do not use a
damaged power
cord.
When the
Receiver is
moved to another
place with a sharp
temperature
difference, please
don't turn on the
Receiver
immediately until
1-2 hours later.
Never allow
liquids, spray or
other materials to
come into insider
of the Receiver.
Use a soft and
dry cloth to clean
casing. Prior to
clearing, please
pull off the power
cord.
Please place the
Receiver
horizontally to
prevent damaged.
Non-professional
personnel are
forbidden to open
the Receiver,
which may result
in electrical
shock.
2
2. Guide for user's manual
This user's manual covers the main features of your Receiver and the
necessary step to operate various features.
Initial users should read this chapter to understand special symbols and
designations used in this manual.
Key
Symbol<name of key>is used to indicate functional key on the front panel of
set-top box (or remote control unit), e.g. < Menu >
Menu
SymbolǏMENUǐis used to indicate the menu displayed. e.g. ǏMENUǐ
Column in the menu
Symbol [menu item] is used to indicate column in the menu. e.g. [TV
program].
Other symbols
Remarks: Contains additional information concerning function/column.
Shortcut: Indicates shortcut operation of a certain function.

3
3. Description of the Receiver
1) Front panel
1kStandby key 2 kProgram -/+
3kVolume -/+ 4 kSmart card slot
4
2) Rear panel
1kVideo output
2kRight & Left-channel audio output
3kRF Out
4kRF In
5kCABLE IN
6kLOOP OUT
7kDC power input

5
3) Connection
1. Connection of conditional access
Insert smart card
with the marked surface
upwards into the upper
slot horizontally
according to the
indication of the arrow
(As the screen on
the right).
Warning: Don’t insert or draw out the smart card when it is working.
2. Connection of rear panel
A. Choose the correct RF cable, connecting the Terminal of cable input to
receiver with RF cable. (As follow screen)
B. Connect the TV (Video) to Receiver “CVBS "using the AV cables (Yellow
color).
Connect the TV (L/R Audio) to Receiver “L/R" using the AV cables (Red/
White color).
If there's only one Audio terminal on the TV set, please connect L/R Audio
anyone from the Receiver to TV. (As follow screen)
6
&Connecting the Terminal of receiver to TV set with RF cable for Analog
program. For digital Program needn’t do this connect.
D. Connect power cord to DC 12V/1.0A.

7
4) Remote control Unit (RCU)
8
1. POWER Turn on/off the Receiver by RCU
2 0-9 Directly selects a channel or changes a parameter
3
Ÿ/ ź
Within a menu, moves to the next higher or lower item
In TV or Radio mode, moves to the next higher or
lower channel
4Ż/ Ź
Within a menu, moves to the left or right item in the
menu
In TV or Radio mode
,
ad
j
usts the volume
5EXIT Returns to the previous menu or escapes out of the
menu
6CH+/- Change the channels
7. Mutes the sound
8 FAV Display the favorite channel list
9 VOL+/- Adjusts the volume
10 GUIDE Display the Electronic Program Guide
11 MENU Display main menu
12 OK Executes the selected item or displays the list of
channels
13. INFO Display information about the current channel
14 TV/RADIO Switch between TV mode and Radio mode
15. RED /GREEN
/YELLOW
/BLUE key
Functions are decided by specific applications
16
TV: VOL+/-/
Power/AV
Learning key. For control TV directly after your setting.

9
4. Function Introduce
After connections are completed, press down the <POWER> switch (rear panel)
to switch on the Receiver. The
screen displays the main menu.
(As the screen on the right)
Notes: First time power on,
Receiver will automatically
scan for programs.
It includes the following menus:
[Installation]: Manual or Auto scan for TV/Radio programs.
[Edit]: This menu is for edit channels.
[System]: In this menu. Users can set the working environment of the receiver
according to the actual needs.
[Utility]: Users can check calendar and play games.
[CAS]: Users can check CA status and Smartcard status.
10
5. TV and Radio
Remark
ġ
TV program and Radio program have the same operation, the
following will set TV program as sample.
In main menu, press <Ÿ> <ź> key to select <TV>, then press <OK>keyto
display TV program. Or select <RADIO> press <OK> key to display radio
program. If any program is not stored, do automatic search first.
Shortcut: Users can also press <TV> key in Receiver’s RCU to display TV
program.
When a TV program is being played, you can do follow operation.
1) Switch TV/ Radio program
Press <TV> or <Radio> key on Receiver’s RCU to switch between TV/Radio
programs.
2) Play the previous channel viewed
Press<RECALL> key on RCU to return back the previous channel.
3) Select program
Method 1: In the normal state
of TV program, press<OK> key,
a TV program list will be
displayed on the screen, press
<Page UP> and <Page Down>
to turn over pages, press <Ÿ>
<ź> keys to select programs in
the list, press<OK> key to
confirm.
Press <Ż> <Ź> keys can
display different program list.

11
Method 2: In the normal state of TV program, press the numeric keys of
<0>~<9> on RCU continuously to select program.
Method 3: In the normal state of TV program, press <Ÿ> <ź> keys on RCU or
front panel of Receiver, increase or decrease channel numbers to select preset
channel.
4) Volume control
Volume control
Increase or decrease volume
by pressing <Ż> <Ź> keys
on the RCU. Press <MUTE>
key mutes the sound. To
bring back the normal sound,
press this key once again.
(As the screen on the right)
Audio channel control
Press <Audio> key on the
RCU; select an appropriate
audio channel in left, right
and stereo. (As the screen on
the right)
As Audio is fixed in best
condition, it is not necessary
to do any adjustment.
12
5) EPG
In TV mode, press <EPG>
key, you can display
electrical program guide.
Follow instruction at the
bottom to check current
playing program and
upcoming program; also
switch between week
days to check follow days’
program list.
6) Other function
To view Teletext in OSD
mode, press the RED key in
TV mode.
Press <II> in TV mode to
pause the screen.
To view Subtitle press the YELLOW key in TV mode,

13
6. Installation
ǏInstallationǐIn this menu, users can install the program.
Press <MENU> to display main
menu. Use <Ż> <Ź> keys to
select [Installation], then press
<OK> key for confirm.
[Installation] includes [Automatic
Scan], [Manual scan], [Factory
Reset].
1) Automatic Scan
In ǏInstallationǐ, use <Ÿ> <ź>
keys to select [Automatic Scan]
and press <OK> key for confirm
Input start frequency and end
frequency, input symbol rate by
RCU, select other option, then
press <OK> key to go on to scan.
During scan process, press
<Exit> key to stop and exit scan.
*You may be required to enter PIN code (default is “0000”) once you enter any
sub-menu under INSTALLATION
14
2) Manual Scan
In ǏInstallationǐ, use <Ÿ>
<ź> keys to select [Manual
Scan] and press <OK> key for
confirm.
Need to input parameters for
[manual Scan], when you
select [manual Scan]. The
page on the right will appear;
users need to input the Freq
(MHz), Symbol Rate, QAM
Mode and other options, then press <OK> key to scan immediately.
3) Factory Reset
In ǏInstallationǐ, use <Ÿ> <ź> keys to select [Factory Reset] and press
<OK> key for confirm.
If you want to reset your
receiver, press <Yes> to
confirm, if not move to <No> to
cannel. (As screen on the
right).
*You may be required to enter
PIN code (default is “0000”)
once you enter any sub-menu
under INSTALLATION
Warning:
Be careful to use the operation of [Factory Reset] for you will lose all of the data
that has been installed on your Receiver (channels, lists of favorites, etc.)

15
7. Edit
Enter <Main Menu> and move to <Edit>, Press <Ÿ> <ź> to select <Edit
Channel>, follow the hot key at the right to Sort/Edit//Delete/Move on the
current highlighted channel.
1. You can sort by
Name/CAS/LCN, then if want to
cancel former sorting, press
green button to Restore.
2. You can Lock/Skip/Add.
After editing, press <Exit> to
save and back.
Select <Edit Favorite> to enlist
target channels as favorite
programs to view frequently.
There are 8 groups of favorite
you can keep, News/Drama&
Movie/Sport/Children/Culture/
Music/Show&Game/ETC, You
can rename the list as follow
hot key instructions. Press OK
to select into favorite list or to
cancel from favorite list.
When in TV mode, press <OK> to display the TV list, then press <FAV> to go
to the favorite list, press again to switch favorite list, select the channel and
press <OK> to view.
16
8. System
ǏSystemǐIn this menu, users can set the working environment of the
receiver according to the actual needs.
Press <MENU> to display main
menu. Use <Ż> <Ź> keys to
select [System], then press
<OK> key for confirm.
[System] includes [System
Configuration],[Output
Setting], [Parental Control],
[System Information], [Time
Setting] and [Timer].
1) System Configuration
In ǏSystem ǐmenu, press
<Ÿ> <ź> key select [System
Configuration] and press
<OK> for confirm.
Press <Ÿ> <ź> key to select
OSD Language, Audio, Subtitle
Language, Banner duration,
OSD Transparency and interval
mode when zapping channels;
Press <Ż> <Ź> key to
configure.

17
2) Output Setting
In ǏSystem ǐmenu, press
<Ÿ> <ź> key select [Output
Setting] and press <OK> for
confirm.
Press <Ÿ> <ź> key to select
TV type, Screen mode, Output
type, RF type, RF channel,
Brightness, Contrast,
Saturation; press <Ż> <Ź>
key to configure.
3) Parental Control
In ǏSystem ǐmenu, press
<Ÿ> <ź> key select [Parental
Control], press <OK> for
confirm.
*you may be required to enter
PIN code for this menu.
Press <Ÿ> <ź> key to select
Rate status, channel lock, lock
on/off, or to set new password˗
Press <Ż> <Ź> key to configure.
18
4) System Information
In ǏSystem ǐmenu, press
<Ÿ> <ź> key select [System
Information] and press <OK>
for confirm and view the STB
system information.
5) Time Setting
In ǏSystem ǐmenu, press
<Ÿ> <ź> key select [Time
Setting] and press <OK> for
confirm.
Press <Ÿ> <ź> to select GMT
on/off, set time zone as offset.
and to manual set time. Press
<Ż> <Ź> key to configure.

19
) Timer
In ǏSystem ǐmenu, press
<Ÿ> <ź> key select [Timer]
and press <OK> for confirm.
There are 7 timers you can
configure as No.1~8
Select target timer and active or
deactivate. Set active mode as
Wakeup/Standy/Duration, so
STB can sleep, wake up, or go
standby at your designated time. All timers can be set as
ONCE/DAILY/WEEKLY timer.
9. Utility
In ǏUtilityǐmenu, there are
Calendar and Software Update,
press <Ÿ> <ź> key select
games and press <OK> for
confirm.
20
10. CAS
In ǏCASǐmenu, there are
Subscription/Event/Token
status to be check and review.
Press <Ÿ> <ź> to select
ǏSubscription Statusǐand
press <OK> to enter to view
your subscription status, move
up and down to check particular
channel subscription. Move to
ǏEventǐand enter to check
what’s event history and status.
Move to ǏToken Statusǐ, enter and follow hot key to check debit/credit status.
ǏChange CA PINǐis for change the CA password in smartcard.
ǏMaturity Ratingǐis to check age level of current program.
ǏAbout Conax CAǐis to check CA software status.

21
11. Software upgrade
This Receiver has
automatically searching
upgrade function. In normal
view mode, system will detect
and download the upgrade
information automatically.
Once relevant upgrade
information is detected, system
will appear a message box as
the screen on the right.
The update process will take a
time; during process don’t cut the power.
Once the upgrade process complete, the receiver will return back standby or
play TV.
22
12. Troubleshooting
In case of failures which are not necessarily breakdowns of the receiver. Before
they are sent for repair, please check as per the following table:
Failure Possible cause Troubleshooting method
After startup, there’s
nothing display on
the front panel.
Power plug is not
connected.
Insert the plug into the
socket firmly.
“No TV signal”
displayed on the
screen
Signal cable is not
connected properly.
Connect RF input cable
properly.
The parameter is not set
correctly.
Check and set parameters
correctly.
No voice in the
speaker properly
Audio cable is not
connected.
Connect the cable
according to wiring
diagram again.
Voice is closed. Turn on voice and adjust
volume louder.
Output voice channel is
not correct.
Enter System Setup to try
other audio channels.
There’s just voice,
no image on the TV
screen
Video cable is not
connected properly.
Connect the cable
according to wiring
diagram again.
Radio program is tuned in
to.
Press <TV> key to switch
to TV program.
Remote controller
can’t be operated
Power of battery is
running out. Replace battery.
Remote controller is not
aimed at properly or is too
far away.
Aim at the remote
controller and shorten the
distance.
There’s halt or
mosaic phenomena
on the images
Signals are too weak Measures should be taken
to strengthen signals.

23
13. Specifications
LNB/ Tuner
Input frequency 87~862MHz
Input signal level -20dBmV~+20dBmV
Intermediate frequency bandwidth 6MHz
Demodulation mode QAM(16 32 64 128 256)
Encoding rate 3.6~6.952MS/S
Video frequency
Output system NTSC/PAL automatic selection
Decoding format MPEG2 MP@ML
Output port RCA S-terminal (Optional)
Output level 1.0Vp-p 75
Audio frequency
Decoding format MPEG2 layer 1&2
Frequency Response 20Hz~20 KHz
Sampling mode 32KHz/44.1KHz/48Khz automatic sampling
Audio frequency output 0.775Vrms high resistance
Power source
Working voltage: AC 100~240V 50/60Hz
Power : 12W (Max.)
Working temperature: 0 ~ + 50

1
Principais Características
Avançados QAM demodulação e decodificação MPEG-II tecnologias,
que é capaz de receber e decodificar todos os programas de TV a cabo
digital compatível com DVB / MPEG II. É um decodificacor de TV a
cabo digital com alto desempenho, é caracterizada por comutação de
programa de pesquisa rápida e automática de frequência e taxa de
codificação, bloqueio de senha, de acesso condicional, interface
amigável e facilidade de uso.
ƔSuporte QAM16, 32, 64, 128 e 256 sistemas de modulação
ƔSeleccione padrão televisivo automaticamente
ƔInterface de usuário amigável
ƔTela Super-claro e oi-fi saída digital stereophonic
Ɣsistema de acesso condicional (CA)
ƔGuia electrónico de programação (EPG)
ƔSuporte OTA
Lista de embalagem
Seu Set-Top-Box também inclui os seguintes itens:
(1) 1 Pcs Cabo digital STB (Set-Top-Box)
(2) 1 Pcs cabo AV 1.5M
(3) 1 Pcs Unidade de controle remoto (RCU)
(4) 2 Pcs da bateria
(5) 1 Pcs Usuário manual
2
Conteúdo
1. Instruções de Segurança ---------------------------------------------------3
2. Guia para o manual de usuário -------------------------------------------4
3. Descrição do Receptor ------------------------------------------------------5
1) do painel frontal ------------------------------------------------------------------------ 5
2) do painel traseiro----------------------------------------------------------------------- 6
3) Conexão---------------------------------------------------------------------------------- 7
4) Unidade de controle remoto (RCU) ----------------------------------------------- 9
4. Função de introduzir ------------------------------------------------------- 11
5. TV e Rádio --------------------------------------------------------------------- 12
1) Alternar programa de TV / Radio------------------------------------------------- 12
2) Jogue o canal anterior -------------------------------------------------------------- 12
3) Selecione programa ----------------------------------------------------------------- 12
4) controle de volume ------------------------------------------------------------------ 13
5) EPG ------------------------------------------------------------------------------------- 14
6) Outras funções ----------------------------------------------------------------------- 14
6. Instalação ---------------------------------------------------------------------- 15
1) Automático Digitalização ----------------------------------------------------------- 15
2) Manual de digitalização ------------------------------------------------------------ 16
3) Ajustes de fábrica -------------------------------------------------------------------- 16
7. Editar ---------------------------------------------------------------------------- 17
8. Sistema -------------------------------------------------------------------------------- 18
1) Configuração do Sistema ---------------------------------------------------------- 18
2) Definição de saída------------------------------------------------------------------- 19
3) Controle Parental -------------------------------------------------------------------- 19
4) Sistema de Informação------------------------------------------------------------- 20
5) Ajuste de Horário--------------------------------------------------------------------- 20
6) Cronômetro ---------------------------------------------------------------------------- 21
9. Utilidade------------------------------------------------------------------------ 21
10. CAS ---------------------------------------------------------------------------- 22
11. Atualização de software ------------------------------------------------- 23
12. Solução de problemas --------------------------------------------------- 24
13. Especificações ------------------------------------------------------------- 25

3
1. Instruções de Segurança
Por favor, leia
atentamente este
manual antes de
usar.
Não permita que
o receptor para
ser exposto ao
calor extremo,
frio ou úmido.
Naõ retire a
tampa para evitar
choque elétrico ou
danos.
Naõ coloque
qualquer objeto
pesado sobre o
receptor.
Se o receptor
permanece sem
uso por um longo
tempo, por favor,
desconecte o
cabo de
alimentação para
prevenir incêndio
ou choque
elétrico. Não
utilize um cabo
danificado.
Quando o
receptor é
deslocado para
outro lugar com
uma deferença
acentuada de
temperatura, por
favor, não ligar o
receptor
imediatamente
até 1-2 horas
mais tarde.
Nunca permita
que líquidos ou
outros materiales
a entrar em insider
do receptor.
Use um pano
macio e seco
para limpar caixa.
Antes de
limpeza, por
favor, retire o
cabo de
alimentação.
Por favor coloque
o receptor na
horizontal para
evitar danos.
Não-profissional
de pessoal são
proibidos para
abrir o receptor, o
que pode resultar
em choque
elétrico.
4
2. Guia para o manual de usuário
Este manual cobre as principais características de seu receptor e os
passos necessários para operar vários recursos.
Usuários iniciais deve ler este capítulo para compreender os símbolos
e denominações especiais usados neste manual.
Chave
Símbolo <nome do key> é usado para indicar funcionais chave no
painel frontal de set-top box (ou unidade de controle remoto), por
exemplo, <Menu>
Menu
Símbolo
Ǐ
MENU
ǐ
é usado para indicar o menu exibido. por exemplo,
Ǐ
MENU
ǐ
Coluna no menu
Símbolo [item de menu] é usado para indicar coluna no menu. por
exemplo, [Programa de TV].
Outros símbolos
Observações: Contém informações adicionais sobre a função / coluna.
Atalho: Indica operação de atalho de uma determinada função.

5
3. Descrição do Receptor
1) do painel frontal
1 —Espera chave 2 —Programa -/+
3 —Volume -/+ 4 —Slot para o cartão inteligente
6
2) do painel traseiro
1 - A saída de vídeo
2 - saída direita e esquerda do canal de áudio
3 - RF OUT
4 - RF IN
5 - CABO EM
6 - LOOP OUT
7 - entrada de alimentação DC

7
3) Conexão
1. Conexão de acesso condicional
Insira o cartão inteligente com a superfície marcada para
cima na ranhura superior horizontalmente de acordo com
aindicação da seta
(Como a tela à direita).
Atenção: Não inserir ou tirar o cartão inteligente quando se está
trabalhando.
2. Conexão de painel traseiro
A. Escolha o cabo RF correta, ligando o Terminal de entrada de cabo
para o receptor com cabo RF. (Tela como a seguir)
B. Ligue a TV (Vídeo) para Receptor "CVBS" usando os cabos AV (cor
amarela).
Ligue o TV (L / R Audio) para Receptor "L / R" utilizando os cabos AV
(cor vermelho / branco).
Se há apenas um terminal de áudio do televisor, ligue L / R qualquer
áudio do Receptor para TV. (Tela como a seguir)
8
C. Conectando o Terminal de receptor para TV com cabo RF para o
programa analógico. Programa para digital não precisa fazer isso se
conectar.
D. cabo de alimentação Conecte-se DC 12V/1.0A.

9
4) Unidade de controle remoto (RCU)
10
1. PODER Ligar / desligar o receptor por RCU.
20-9 Diretamente seleciona um canal ou mudaum
parãmetro.
3
Ÿ/ ź
Dentro de um menu, move-se para o próximo item
maior ou menor
No modo TV ou rádio, desloca-se para o próximo
canal maior ou menor.
4
Ż/ Ź
Dentro de um menu, move-se para o item para a
esquerda ou direita no menu
No modo TV ou Rádio, ajusta o volume
5EXIT Retorna ao menu anterior ou escapa para fora do
menu
6CH+/- Alterar os canais
7. Silencia o som
8 FAV Mostrar a lista de canais favoritos
9 VOL+/- Ajusta o vulume.
10 GUIDE Mostrar a Electronic Program Guide
11 MENU Display menu principal
12 OK Executa o item selecionado ou exibe a lista de canais
13. INFO Mostrar informações sobre o canal atual
14 TV/RADIO Interruptor entre o modo TV e modo de Rádio
15. RED /GREEN
/YELLOW
/BLUE key
Funções são decididas por aplicações específicas
16
TV: VOL+/-/
Power/AV
Chave de aprendizagem. Para controlar diretamente
após sua definição

11
4. Função de introduzir
Depois de ligações, pressione a chave de <POWER> (painel traseiro)
para ligar o receptor. A tela
exibe o menu principal.
(Como a tela à direita)
Notas: Primeira vez no
poder, Receptor vai verificar
automaticamente para os
programas.
Ela inclui os seguintes menus:
[Instalação]: Manual ou Auto scan para TV / Rádio programas.
[Edit]: Este menu é para os canais de edição.
[System]: Neste menu. Os usuários podem definir o ambiente de
trabalho do receptor de acordo com as necessidades reais.
[Utility]: Os usuários podem verificar o calendário e jogar jogos.
[CAS]: Os usuários podem verificar CA status e status de Smartcard.
12
5. TV e Rádio
Observação: programa de TV e programa de rádio têm a mesma
operação, o seguinte conjunto de programas de TV como amostra. No
menu principal, pressione <Ÿ> <ź> para selecionar <TV>, em
seguida, pressione <OK> para exibir programa de TV. Ou selecione
<RADIO> pressione <OK> para exibir programa de rádio. Se algum
programa não estiver armazenado, fazer busca automática em
primeiro lugar.
Atalho: Os usuários também podem pressionar <TV> em RCU de
Receptor para exibir programa de TV.
Quando um programa de TV está sendo jogado, você pode fazer
operação de seguir.
1) Alternar programa de TV / Radio
Pressione <TV> ou chave <Radio> na RCU de Receptor para alternar
entre TV / Rádio programas.
2) Jogue o canal anterior
Pressione <RECALL> chave no RCU para retornar ao canal anterior.
3) Selecione
programa
Método 1: No estado
normal do programa de TV,
pressione a tecla <OK>,
uma lista de programa de
TV será exibido na tela,
pressione <Page Up> e
Table of contents
Languages:
