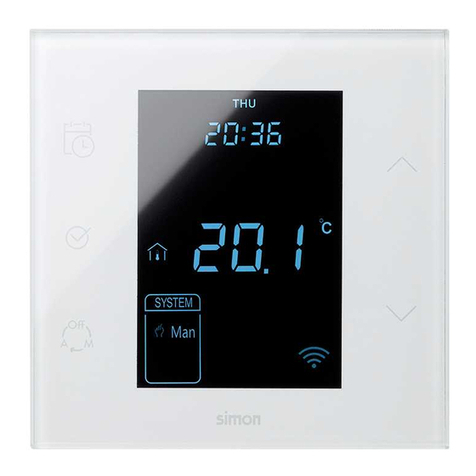
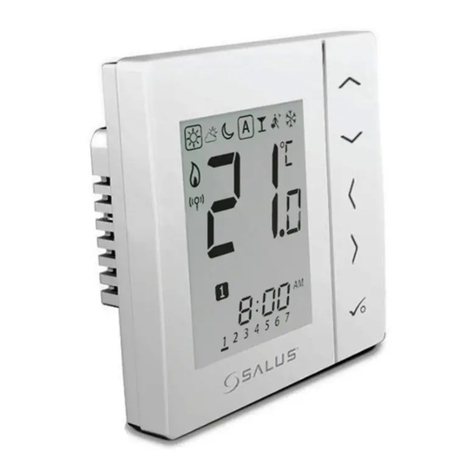
Simon S100 User manual

TERMOSTATO S100
THERMOSTAT S100
Caracteristicas Técnicas
Data sheet
10000810-13X
0-90%
127-230V~
10A

1,5m
L
N
COM
L
N
Valve
NC
NO
1,5mm2
L
N
COM
L
N
NC
NO
INSTALACIÓN /
INSTALLATION
MONTAJE /
ASSEMBLY
3
1
4
2
1
Instalación centralizada para caldera/bomba de calor /
Centralized installation for boiler/ heat pump
*Para suelo radiante eléctrico se recomienda el uso de un contactor de 20A (Art.
68803-31)
For electrical underfloor heating using a 20A contactor (Art. 68803-31) is
recommended
Instalación zonificada a 230V con contacto Normalmente Abierto /
230V installation with Normally Open contact *
L
N
COM
L
N
NC
NO
L
N
COM
L
N
NC
NO

2
PROGRAMACIÓN CON /
PROGRAMMING WITH
SIMON iO APP
3 Seg.
Añadir dispositivo Resumen
12
3
5
4
6

3
P1
P2
P4
P5
P3
PROGRAMACIÓN SIN SIMON iO APP
Entrar modo programación y
cambiar día de la semana
Permite cambiar la consigna
de temperatura y modificar
valores de consigna y horarios
en modo programación
Permite cambiar la consigna
de temperatura y modificar
valores de consigna y horarios
en modo programación
Permite confirmar y
seleccionar modo ahorro
Permite cambiar entre
modo manual, auto y OFF
Día de la semana
Reloj
Franja horaria (modo Auto)
Ajustes
Temp. Actual
Temp. Interior
Manual
Apagado
Auto
Hora
Unidad Temp.
Bloqueo Teclado
Emisión
Indicador de red
Modo Vacaciones
SUCESO ACCIÓN
TECLADO FEEDBACKESTADO DEL EQUPO ACTUACIÓN DEL EQUIPO
Pulsar
tecla P1
Pulsar
tecla P2
Pulsar
tecla P3
Pulsar
tecla P4
Pulsar
tecla P5
Pulsar
tecla P5
Pulsación
larga P5
2s<t<10s
Pulsación
corta t<2s
Pulsación
corta t<2s
Tecla
pulsada
No
presionado
Sin vincular a APP Simon 100iO a
una red Z-Wave. Indicador de red realiza intermitencia.
El display muestra el estado del dispositivo
con la intensidad definida en el parámetro 13.
Aparece la ventana de modos disponibles con el
modo en el que el termostato quedará funcionando
El SetPoint se pone en modo intermitente
El SetPoint se pone en modo intermitente
Indicador de red realiza intermitencia lenta.
Se incrementa el Setpoint
Se decrementa el Setpoint
Vinculado a APP Simon 100 iO o a
una red Z-Wave.
Termostato en modo manual o auto-
mático. Sin Vincular a APP Simon 100
Estableciendo algún parámetro, con-
figuración horaria o cambiando modo
Termostato ON
Termostato ON
Termostato OFF
Termostato en modo Manual o Automático
Parámetros horarios parpadean. Se gestionan las programaciones horarias
cambiando de día con cada pulsación de P1.
Con cada pulsación de P3 se cambia el
modo de trabajo del dispositivo
Incluir / asociaro eliminar de la red Z-Wave
Alsoltar, se envíaunNode Info y el termostato
iniciauna maniobrade inclusióna una red Z-Wave.
Se aceptan los cambios realizados.
USO DE TECLADO Y RESPUESTAS
* Algunas de las funciones o respuestas pueden cambiar en función de los parámetros de configuración.
Temperatura detectada < temperatura establecida -0,5 ºC, la emisión de calor se activa, y se muestra en pantalla el icono de emisión.
Temperatura detectada ≥ temperatura establecida +0,5 ºC, la emisión de calor se desactiva, y desaparece el icono de emisión de la pantalla.
Con el dispositivo en funcionamiento normal, pulse P4 o P5 para acceder a la interfaz de ajuste de temperatura. El rango de regulación
de
la temperatura es 5-37 ºC (41-99 ºF) A continuación, pulse P4 o P5 para ajustar el valor. Pulse P3 o espere 2 segundos sin realizar nin-
guna acción para que se guarden los cambios y se vuelva a mostrar la interfaz principal. Modo automático: El valor
seleccionado se aplicará
en el
actual periodo de tiempo en el que se haga la modificación y no afectará al valor preestablecido en el dispositivo. Modo manual: El
valor seleccionado se aplicará hasta que se vuelva a ajustar. Modo vacaciones: El valor seleccionado se aplicará en el actual periodo de
tiempo en el que se haga la modificación y no afectará al valor preestablecido en el dispositivo.
Pulsando la tecla P3 en la interfaz principal se cambia de modo Manual a modo Automático. Elija el modo que quiera establecer y pulse
P2 para guardar los cambios. Modo automático: El dispositivo se guiará por los periodos de tiempo y temperaturas preestablecidas
para controlar el sistema de calentamiento automáticamente. Modo manual: El dispositivo se guiará por la temperatura establecida
de forma manual para controlar el sistema de calentamiento.
FUNCIÓN
Especificaciones
de Control
Encendido/
Apagado
Ajuste de
temperatura
Ajuste del
modo manual
/automático
/O
PARÁMETRO
Cuando se activa la corriente eléctrica, aparece en pantalla “OFF” y se fuerza el apagado de la emisión de calor. Pulse la tecla P3 para
cambiar el modo a manual (Man), apagado (OFF) o automático (Auto). Después, pulse P2 para confirmar la selección y continuar con los
ajustes de encendido/apagado. Al ponerlo en marcha, el dispositivo muestra en pantalla el día actual, la hora local, el
modo de funcionamiento, la temperatura actual, el estado de emisión de calor, etc.
Nota: Cuando la retroiluminación se apague,
pulse una vez la tecla deseada para volver a iluminar la pantalla primero y después pulse de nuevo la tecla para ejecutar la acción.
Pulse P1 en la interfaz principal para acceder a la interfaz de ajuste de periodos de tiempo. Se pueden establecer cuatro periodos de
tiempo para cada día de la semana. Pulsando P2 se cambia entre Horas, Minutos y Valor de temperatura. Pulse P4 o P5 para ajustar el
valor. Una vez se hayan terminado de ajustar los periodos de tiempo del lunes, pulse P1 y repita el mismo procedimiento para fijar el res-
to de días. Una vez se hayan establecido todos, pulse P1 para que se guarden los cambios y se vuelva a la pantalla principal. El dispositivo
funcionará de acuerdo a los ajustes fijados.
Ajuste de pará-
metros de peri-
odos de tiempo
en modo
automático

4
CONFIGURACIÓN DEL TERMOSTATO SIN Z-WAVE
El termostato permite realizar algunas configuraciones como sus parámetros horarios mediante el pulsador P1 de horario. Y una serie de configuraciones
mediante un menú accesible desde los pulsadores del termostato. Para acceder al menú de configuraciones situe el termostato en Modo OFF y a
continuación pulse P3 + P5 durante más de 2 segundos. El código de acceso al menú es 1234. Mediante P4, P5 situe los valores y con P3 desplace entre
dígitos. Las configuraciones accesibles desde este menú son:
MENÚ CONFIGURACIÓN
P01
P09
P05
P02
P10
P06
P03
P11
P07
P04
P12
P08
Setpoint máximo posible
Ajuste de temperatura
Diferencia de temperatura para activar calefacción
Setpoint mínimo posible
Sonido del teclado
Temperatura anti helada
Formato de hora
Nivel de luz en reposo
Estado del equipo al alimentarlo
Diferencia de temperatura para desactivar calefacción
Temperatura en Celsius o Fahrenheit
Tiempo de lectura de temperatura
VALORES POR DEFECTO
37.0
0
0.5
5.0
3
5
24
2
OFF
0.5
C
2
PARÁMETRO ASOCIADO
35
37
-
36
-
-
-
3
17
-
30
-
Ajustes del
día y hora
local*
Mostrar nivel
de humedad
en pantalla
Ajuste
del modo
vacaciones
Indicador
de red
Valores
de fábrica
Funciónde
protección
antihelada
Mantenga pulsada la tecla P1 en la interfaz principal para acceder a la interfaz de ajuste de hora local. En la interfaz de ajuste de hora local, pulse P4 o
P5 para establecer los parámetros Día, Hora yMinutos; podrá acceder a cada uno de los parámetros pulsando P1. Una vez establecida la hora local,
pulse P1 o espere 2 segundos sin realizarninguna acción para que se guarden los cambios y se vuelva a la pantalla principal.
En la interfaz de apagado: Cuando el sensor interno de temperatura detecte una temperatura de ≤5 ºC, el dispositivo activará la protección
antihelada, se forzará el encendido de la calefacción eléctrica, y se mostrará en pantalla el icono de protección antihelada. Cuando el sensor
interno de temperatura detecte una temperatura de >8 ºC, se desactivará la protección antihelada, el correspondiente icono desaparecerá
y el dispositivo volverá a funcionar con normalidad.
Si el modo vacaciones no está activado en la interfaz principal, mantenga pulsada la tecla P2 para acceder a los ajustes del modo vacaciones.
La temperatura establecida por defecto es de 10 ºC; puede regularse de 5-37 ºC (41-98 ºF). Pulse P4 o P5 para ajustar el valor y después pulse
P3 para guardar los cambios y volver a la interfaz principal. De este modo, se mostrará el icono de vacaciones y el dispositivo funcionará
de acuerdo a esa configuración. Si mantiene pulsada de nuevo la tecla P2 se desactivará el modo vacaciones, el icono desaparecerá de la
pantalla y el dispositivo volverá a funcionar con normalidad.
Mantenga pulsadas las teclas P1+P5 en la interfaz principal para acceder a la interfaz que muestra en pantalla el nivel de humedad.
Vuelva a pulsar P1+P5 para volver a la interfaz principal.
Para eliminar la intermitencia del indicador de red, se ha de pulsar P5 durante 10 seg.
Para resetear a valores de fábrica se ha de pulsar P5 durante 30 seg. El termostato se apagará y se encenderá de nuevo con los valores de fábrica.
(*) En caso de disponer de Enchufe HUB iO Simon, la hora y el día de la semana se actualizará automáticamente al darlo de alta en la red iO Simon.
CONFORMIDAD CON PROTOCOLO Z-WAVE
Este producto se puede incluir y gestionar en una red Z-Wave, trabajando con dispositivos y aplicaciones certificados Z-Wave de otros fabricantes. Todos
los dispositivos que no vayan a baterías actúan como repetidores dentro de la red Z-Wave con el fin de incrementar la fiabilidad de la red. Este producto
cumple con los estándares de seguridad Z-Wave Plus con seguridad S2.
CC BASIC MAPEADO DE VALORES
ESPECIFICACIÓN DEL DISPOSITIVO Z-WAVE
CC THERMOSTAT MODE MODOS ADMITIDOS
Basic Set
THERMOSTAT_MODE_OFF
Device Type
THERMOSTAT_MODE_HEAT
Generic Device Type
THERMOSTAT_MODE_AUTO
Specific Device Type
THERMOSTAT_MODE_
AWAY_HEATING
Role Type
Basic Report
0x00 -> El equipo se pone en modo OFF
El equipo está en paro y no funciona
Thermostat - HVAC
0xFF -> Establece el modo calor en AUTO
El equipo está activo funcionando con
el Setpoint establecido para calor
GENERIC_TYPE_THERMOSTAT
0x00 -> Indica que el equipo está en modo OFF
El equipo está activo funcionando según
parámetros horarios
SPECIFIC_TYPE_THERMOSTAT_GENERAL_V2
0xFF -> Indica que el equipo está en un modo distinto a OFF
El equipo está activo funcionando
en modo bajo consumo con una
temperatura SetPoint reducida
ROLE_TYPE_SLAVE_ALWAYS_ON
COMMAND CLASSES SOPORTADAS
CC_ASSOCIATION_GRP_INFO_V3
IU: Incluido de forma no segura
UonS: Solicitud no segura cuando incluido de forma segura
SonS: Solicitud segura cuando incluido de forma segura
IU, SonS
IU, UonS
IU, SonS
IU, SonS
IU, SonS
IU, SonS
IU, SonS
IU, SonS
IU, SonS
IU, SonS
IU, SonS
IU, SonS
IU, SonS
IU, UonS
IU, SonS
IU, SonS
IU, SonS
IU, SonS
IU, UonS
CC_DEVICE_RESET_LOCALLY_V1
CC_THERMOSTAT_MODE_V2
CC_TIME_V1
CC_ASSOCIATION_V2
CC_SECURITY_S2
CC_FIRMWARE_UPDATE_MD_4
CC_THERMOSTAT_OPERATING_STATE_V1
CC_TRANSPORT_SERVICE_V2
CC_BASIC_V1
CC_SENSOR_MULTILEVEL_V5
CC_MANUFACTURER_SPECIFIC_V2
CC_THERMOSTAT_SETPOINT_V3
CC_VERSION_V2
CC_CONFIGURATION_V2
CC_SUPERVISION
CC_POWERLEVEL_V1
CC_TIME_PARAMETERSV1
CC_ZWAVEPLUS_INFO_V2

5
36
4
4
4
4
Condición horaria
4 para Lunes
Condición horaria
2 para Lunes
Condición horaria
3 para Lunes
Condición horaria
1 para Lunes B0 Hora // B1 Minuto // B2,B3 Temperatura en ºC con 0,1º de resolucion
B0 Hora // B1 Minuto // B2,B3 Temperatura en ºC con 0,1º de resolución
Parámetros Horarios -> Las condiciones horarias del termostato se forman de estructuras con 4 configuraciones donde cada configuración establece
una de las 4 posibles condiciones horarias para cada dia de la semana. Estas estructuras se repiten para cada dia de la semana
B0 Hora // B1 Minuto // B2,B3 Temperatura en ºC con 0,1º de resolución
B0 Hora // B1 Minuto // B2,B3 Temperatura en ºC con 0,1º de resolución
Las configuraciones con únicos valores disponibles 0x00 y 0xFF aceptan la escritura de cualquier valor; estableciéndose como 0xFF cualquier valor
escrito distinto de 0x00. Estas configuraciones no son restablecidas a los valores por defecto cuando el dispositivo es eliminado de la red. Únicamente
COMMAND_CLASS_DEVICE_RESET_LOCALLY -> DEVICE_RESET_LOCALLY_NOTIFICATION será enviado para informar que el nodo ha sido
eliminado de la red, pero mantendrá las configuraciones establecidas. Para restaurar las configuraciones realice una de las siguientes acciones:
-Command CONFIGURATION SET con default bit a 1 al escribir cada configuración.
-Realice una pulsación larga de 30 segundos o envíe un CONFIGURATION SET con el parámetro 15 y el valor adecuado.
0x00 no hay reports automaticos 0x01 Reportar únicamente cuando se cumplan las condiciones de diferencia
0x02 Reportar únicamente cuando se cumplan las condiciones de tiempo
0x03 (Valor por Defecto) Reportar cuando se cumplan las condiciones de diferencia o tiempo
CONFIGURACIONES
NNOMBRE VALOR
TAMAÑO
3
13
15
17
27
29
30
31
32
33
34
1
1
2
1
1
1
1
1
2
1
1
Bloquear
Programación Manual
Celsius /
Fahrenheit
Diferencia de tempe-
ratura para reportar
Diferencia de tiempo
para reportar
Diferencia de hume-
dad para reportar
Reports automáticos
de temperatura y
humedad
Bloquear
Pulsación Larga
Estado
PostReset
Bloquear
entrada
Brillo de la pan-
talla en reposo
Restaurar valores
(Solo escritura)
0x00-0x63 (1-100%) -> Establece la intensidad de la pantalla en reposo. 20 (Valor por defecto)
0x00 -> (Valor por defecto) Desbloquea la actuación sobre la carga.
0xFF -> Bloquea el teclado del termostato
0x9867 -> Parámetros, Grupos y estado Z-Wave se restauran a los valores por defecto.
0x4312 -> Los parámetros, a excepción del Bloquear Pulsación Larga se restauran a los valores por defecto.
0x00 -> (Valor por Defecto) Después de un reset la carga inicia desactivada
0x01 -> Después de un reset la carga inicia activada 0xFF -> Después de un reset, la carga recupera el estado.
0x00 ->(Valor por defecto) la programación horaria puede realizarse mediante la pulsación manual.
0xFF ->La programación horaria únicamente puede realizarse mediante los parámetros de configuración adecuados.
0x00 ->(Valor por defecto) la temperatura se gestiona, visualiza y reporta en Celsius.
0x01 ->la temperatura se gestiona, visualiza en Fahrenheit. (las configuraciones se gestionan siempre en ºCelsius)
3…100 -> Diferencia de temperatura necesaria para reportar al controlador. Los valores se dan con una precisión
de 0.1ºC. 5 (Valor por defecto)
10…1000 -> Diferencia de tiempo máxima en segundos entre reportes de temperatura y humedad. 60 (valor por
defecto)
2…100 -> Diferencia de humedad en % necesaria para reportar al controlador. 3 (Valor por defecto)
0x00 ->(Valor por defecto) La pulsación larga funciona según lo descrito en la tabla uso de teclado y respuestas.
0xFF ->La pulsación de 2s<t<10s no envía Node Info. La pulsación de t>30s Si la tecla está bloqueada se envía un Node
Info. Si la tecla no está bloqueada (Config13) el envío del Node Info solo se realiza cuando el Termostato está ON.
COMMAND_CLASS_SENSOR_MULTILEVEL SENSOR_MULTILEVEL_REPORT. Reportados temperatura y Humedad cuando se
cumplen las condiciones establecidas por el usuario mediante las configuraciones 30, 31, 32, 33.
COMMAND_CLASS_THERMOSTAT_MODE.THERMOSTAT_MODE_REPORT
Transmitido cuando el modo de trabajo cambia debido a una actuación local o mediante el controlador de la Red.
COMMAND_CLASS_THERMOSTAT_OPERATING_STATE.THERMOSTAT_OPERATING_STATE_REPORT
Transmitido cuando el dispositivo cambia el estado de la gestión del sistema de clima.
COMMAND_CLASS_THERMOSTAT_SETPOINT.THERMOSTAT_SETPOINT_REPORT
Transmitido cuando la temperatura consigna cambia ya sea por actuación local, por el controlador de la Red o por condiciones horarias.
COMMAND_CLASS_DEVICE_RESET_LOCALLY_NOTIFICATION
Se manda a los nodos asociados cuando se elimina el dispositivo de la red Z-Wave
GRUPOS DE ASOCIACIÓN
Grupo
Número de dispositivos
Reports Automáticos
Grupo 1 (Lifeline) -> Nombre “lifeline”
1
Temperatura (ºC) Temperatura Mínima: 0…500 Temperaura Setpoint mínima. Temperaturas por debajo se descartan.
(50 -> 5ºC Valor por defecto)
Oset de temperatura: -10...10 Oset que se aplica al sensor de temperatura interno con resolución de 0,1ºC.
(0 -> 0ºC Valor por defecto)
2
Temperatura Máxima: 0…500 Temperaura Setpoint máxima. Temperaturas por encima se descartan.
(370 -> 37ºC Valor por defecto)
40
41
42
43
44-47 Condiciones horarias para Martes
48-51 Condiciones horarias para Miércoles
52-55 Condiciones horarias para Jueves
56-59 Condiciones horarias para Viernes
60-63 Condiciones horarias para Sábado
64-67 Condiciones horarias para Domingo
35
Temperatura (ºC) 2
37
Temperatura (ºC) 2

6
EVENT KEYBOARD
ACTION FEEDBACKSYSTEM STATUS SYSTEM ACTION
Press
key
P1
Press
key P2
Press key
P3
Press key
P4
Press
key P5
Press
key P5
Long press
P5 2s<t<10s
Short press
t<2s
Short press
t <2s
Pressed key
Not pressed
Without being linked to APP Simon
iO or to other Z-Wave network. Network indicator flashes.
The display shows the status of the device
with the intensity defined in parameter 13.
The window of available modes appears with the
mode in which the thermostat will be working
The SetPoint goes into intermittent mode
The SetPoint goes into intermittent mode
Network indicator performs slow flashing.
The Setpoint incremented
The Setpoint is decremented
Linked to APP Simon 100 iO or to
a Z-Wave network.
Thermostat in manual or
automatic mode. No Link to APP
Simon 100
Setting some parameter, time
setting or changing mode
Thermostat ON
Thermostat ON
Thermostat OFF
Thermostat in Manual or Automatic
mode
Hour parameters flash. Time schedules are managed by
changing day with each press of P1.
With each press of P3 the working
mode of the device is changed
Include / associate or remove from the
Z-Wave network
Upon release, a Node Info is sent and
the thermostat initiates an inclusion
maneuver to a Z-Wave network.
The changes made are accepted.
KEYBOARD USES AND ANSWERS
* Some of the functions or responses may change depending on the configuration parameters.
P1
P2
P4
P5
P3
PROGRAMMING WITHOUT SIMON iO APP
Enter programming mode and
change day of the week
It allows changing the temperature
setpoint and modifying setpoints
and schedules in programming
mode
It allows changing the temperature
setpoint and modifying setpoints
and schedules in programming
mode
Confirm and select
saving mode
Allows to switch between
manual, auto and OFF mode
Day of the week
Clock
Time zone (Auto mode)
Setting
Current Tep
Indoor Tep
Man
O
Auto
Hour
Temp Unit
Keypad Lock
Output
Network indicator
Vacation mode

7
Detection temperature < setting temperature - 0.5°C, output turns on, and output icon displays.
Detection temperature ≥ setting temperature + 0.5°C, output turns o, and output icon disappears.
In normal working status, press P4 or P5 button will enter into temperature setting interface. The setting range is 5-37 °C(41-99°F).
Then press P4 or P5 can adjust the value. Press P3 or wait 25 seconds without any key operation will save the setting and return back
to the normal operation interface. Auto Mode: The changed value only valid in the current time period for this time, and the device will
not eect the preset time period value . Manual Mode: The changed value will be valid until next setting. Vacation Mode: The changed
value will be valid until next setting.
In normal display interface, touch P3 button can switch between Manual and Auto mode. Choose the mode you may need and press
P2 button to save the setting. Auto Mode: Device will follow the preset time periods and temperature to control heating system
automatically. Manual Mode: Device will follow the manual setting temperature to control the heating system.
In normal display interface, touch P3 button can switch between Manual and Auto mode. Choose the mode you may need. In normal
working interface, short press P1 to enter into time periods setting. Four time periods can be set for each day of the whole week.
Press P2 can switch among “Hours, Minutes, Temperature value”. Press P4 or P5 can change the value. After finished the setting of
4 time periods on Monday, press P1 and follow the same way to set periods of next days. After all periods set, press P1 will save the
setting and return to normal display. Device will operate in accordance with the new setting.
FUNCTION
Control
Specifications
On/O
Operation
Temperature
Setting
Manual/Auto
mode setting
Auto mode
time periods
parameter
setting
PARAMETER
When power on, thermostat displays “OFF” all outputs are forced o. Touch P3 button to switch (manual/o/auto) mode, then press
P2 to confirm and proceed power on/o setting. After power on, device displays current week, local time, working mode, current
temperature, output status etc. Note: After the backlit goes out, please press the button to light up the backlit first, then press the
button again for corresponding operation.
Local time
setting*
Humidity
display
operation
Vacation
mode setting
Network
indicator
Factory
values
Antifreeze
protection
function
In normal working interface, long press P1 to enter into local time setting interface. In local time setting interface, press P4 or P5 but-
ton to set the “week, hour & minute” parameter, and press P1 button can switch among the “week, hour & minute”. After finish the local
time setting, press P1 or wait 25 seconds without any key operation will save the setting and return to normal play.
In shutdown interface: When the built-in temperature sensor detect the temperature value ≤5°C, device will open antifreeze protec-
tion, electric heating will be forced open, and antifreeze protection icon displays. When the built-in temperature sensor detect the
temperature value>8 °C, device will turn o antifreeze protection and return to normal work, antifreeze icon disappears.
In normal working interface, if vocation mode is not activated, long press P2 button to enter vacation mode temperature setting. The
default temperature is 10 °C, and setting range is 5-37 °C(41-98°F). Press P4 or P5 to adjust the value, then press P3 to save the setting
and return to the normal working interface. In this time vacation mode icon displays, and device will follow the setting. Long press P2
again will end vacation mode and resume to normal work, vacation mode icon will be disappeared.
In normal working interface, long press P1+P5 buttons and enter into humidity display interface, when press P1+P5 buttons again, it will
back to the normal interface.
To delete the network indicator intermittency you have to press P5 for 10 seconds.
To reset the factory values, press P5 for 30 sec. The thermostat will turn o and on again with the factory values.
(*) In case of having a HUB iO Simon socket, the time and the day of the week will be updated automatically when you sign up on the iO Simon network.
THERMOSTAT CONFIGURATION WITHOUT Z-WAVE
The thermostat allows you to make some settings as your time parameters through the time push button. And a series of configurations through a menu
accessible from the thermostat buttons. To access the settings menu, set the thermostat to OFF Mode and then press P3 + P5 for more than 2 seconds.
Mediate P4, P5 locate the values and with P3 move between digits. The access code to the menu is 1234. The configurations accessible from this menu are:
MENU WHAT DOES IT SET ASSOCIATED PARAMETER DEFAULT VALUES
P01
P09
P05
P02
P10
P06
P03
P11
P07
P04
P12
P08
35
37
-
36
-
-
-
3
17
-
30
-
37.0
0
0.5
5.0
3
5
24
2
OFF
0.5
C
2
Setpoint maximum possible
Temperature setting
Temperature dierence to activate heating
Setpoint minimum possible
Keyboard sound
Anti frost temperature
Time format
Light level at rest
Equipment status when feeding
Temperature dierence to deactivate heating
Temperature in Celsius or Fahrenheit
Temperature reading time

8
COMPLIANCE WITH Z-WAVE PROTOCOL
This product can be included and managed in a Z-Wave network, working with Z-Wave certified devices and applications from other manufacturers. All
non-battery devices act as repeaters within the Z-Wave network in order to increase the reliability of the network. This product and meets the Z-Wave
Plus safety standards with S2 safety.
CC BASIC MAPPING OF VALUES
SPECIFICATION OF THE DEVICE Z-WAVE
Basic Set
Device Type
Generic Device Type
Specific Device Type
Role Type
Basic Report
0x00 -> The device turns into mode OFF
Thermostat - HVAC
0xFF -> Set the heat mode to AUTO
GENERIC_TYPE_THERMOSTAT
0x00 -> Indicates that the device is in mode OFF
SPECIFIC_TYPE_THERMOSTAT_GENERAL_V2
0xFF -> Indicates that the device is in a mode other than OFF
ROLE_TYPE_SLAVE_ALWAYS_ON
CC THERMOSTAT MODE ADMITTED
THERMOSTAT_MODE_OFF
THERMOSTAT_MODE_HEAT
THERMOSTAT_MODE_AUTO
THERMOSTAT_MODE_
AWAY_HEATING
The device is stopped and does not work
The device is active working with the
Setpoint set for heat
The device is active working according
to schedule parameters
The device is active working in low
power mode with a reduced SetPoint
temperature
COMMAND CLASSES SUPPORTED
CC_ASSOCIATION_GRP_INFO_V3
IU: Included in an unsecured way
UonS: Unsecured request when included securely
SonS: Secure request when included securely
IU, SonS
IU, UonS
IU, SonS
IU, SonS
IU, SonS
IU, SonS
IU, SonS
IU, SonS
IU, SonS
IU, SonS
IU, SonS
IU, SonS
IU, SonS
IU, UonS
IU, SonS
IU, SonS
IU, SonS
IU, SonS
IU, UonS
CC_DEVICE_RESET_LOCALLY_V1
CC_THERMOSTAT_MODE_V2
CC_TIME_V1
CC_ASSOCIATION_V2
CC_SECURITY_S2
CC_FIRMWARE_UPDATE_MD_4
CC_THERMOSTAT_OPERATING_STATE_V1
CC_TRANSPORT_SERVICE_V2
CC_BASIC_V1
CC_SENSOR_MULTILEVEL_V5
CC_MANUFACTURER_SPECIFIC_V2
CC_THERMOSTAT_SETPOINT_V3
CC_VERSION_V2
CC_CONFIGURATION_V2
CC_SUPERVISION
CC_POWERLEVEL_V1
CC_TIME_PARAMETERSV1
CC_ZWAVEPLUS_INFO_V2
COMMAND_CLASS_SENSOR_MULTILEVEL SENSOR_MULTILEVEL_REPORT. Reported temperature and humidity when the
conditions established by the user are met through the configurations 30, 31, 32, 33.
COMMAND_CLASS_THERMOSTAT_MODE.THERMOSTAT_MODE_REPORT
Transmitted when the work mode changes due to a local action or through the Network controller.
COMMAND_CLASS_THERMOSTAT_OPERATING_STATE.THERMOSTAT_OPERATING_STATE_REPORT
Transmitted when the device changes the status of the climate system management.
COMMAND_CLASS_THERMOSTAT_SETPOINT.THERMOSTAT_SETPOINT_REPORT
Transmitted when the setpoint temperature changes either by local action, by the controller of the Network or bytime conditions.
COMMAND_CLASS_DEVICE_RESET_LOCALLY_NOTIFICATION
It is sent to the associated nodes when the device is removed from the Z-Wave network.
ASSOCIATION GROUPS
Group
Slides number
Automatic Reports
Group 1 (Lifeline) -> Name “lifeline”
1

9
36
37
35
40
41
42
43
4
4
4
4
Time Condition 4
for Monday
Time Condition 2
for Monday
Time Condition 3
for Monday
Time Condition 1
for Monday
Temperature (ºC)
Temperature (ºC)
Temperature (ºC)
Minimum temperature: 0…500 Minimum Setpoint temperature. Temperatures below are discarded.
(50 -> 5ºC Default value)
Oset temperature: -10...10 Oset applied to the internal temperature sensor with an accuracy of 0.1ºC.
(0 -> 0ºC Default value)
B0 Hour // B1 Minute // B2,B3 Temperature in ºC with 0,1º resolution
B0 Hour // B1 Minute // B2,B3 Temperature in ºC with 0,1º resolution
Parameters Hours -> The thermostat’s time conditions are formed by structures with 4 configurations where each configuration establishes one of the
4 possible time conditions for each day of the week. These structures are repeated for each day of the week.
44-47 Time Condition for Tuesday
48-51 Time Condition for Wednesday
52-55 Time Condition for Thursday
56-59 Time Condition for Friday
60-63 Time Condition for Saturday
64-67 Time Condition for Sunday
B0 Hour // B1 Minute // B2,B3 Temperature in ºC with 0,1º resolution
B0 Hour // B1 Minute // B2,B3 Temperature in ºC with 0,1º resolution
Configurations with only available values 0x00 and 0xFF accept the writing of any value; set to 0xFF any written value other than 0x00. These settings
are not restored to the default values when the device is removed from the network. Only COMMAND_CLASS_DEVICE_RESET_LOCALLY -> DEVICE_
RESET_LOCALLY_NOTIFICATION will be sent to report that the node has been removed from the network, but will maintain the set configurations. To
restore the settings, perform one of the following actions:
-Command CONFIGURATION SET with default bit a 1 when writing each configuration.
-Make a long press of 30 seconds or send a CONFIGURATION SET with parameter 15 and the appropriate value.
0x00 no automatic reports 0x01 Report only when the dierence conditions are met
0x02 Report only when the time conditions are met
0x03 (Default Value) Report when the dierence or time conditions are met
CONFIGURATIONS
N
NAME VALUE
SIZE
3
13
15
17
27
29
30
31
32
33
34
1
1
2
1
1
1
1
1
2
1
1
2
2
2
Block Manual
Programming
Celsius /
Fahrenheit
Temperature
dierence to report
Time dierence
to report
Humity dierence
to report
Automatic reports
of temperature and
humidity
Block Long
Pulsation
PostReset
Status
Block entry
Screen brightness
at rest
Restore values
(Only writing)
0x00-0x63 (1-100%) -> Set the intensity of the screen at rest. (20 is the default)
0x00 -> (Default value) Unlock the action on the load.
0xFF -> Blocks the local action on the load (when pressing LED1, it will make 3 intermittings in red)
0x9867 -> Parameters, Groups and Z-Wave status are restored to the default values.
0x4312 -> The parameters, with the exception of the Long Pulse Block, are restored to the default values.
0x00 ->(Default value) the time schedule can be done by pressing it manually.
0xFF -> Time programming can only be carried out using the appropriate configuration parameters.
0x00 ->(Default value) the temperature is managed, visualized and reported in Celsius.
0x01 -> the temperature is managed, displayed in Fahrenheit. (configurations are always managed in ºCelsius)
3…100 -> Dierence of temperature necessary to report to the controller. The values are given with an accuracy
of 0.1ºC. 5 (Default value)
10…1000 -> Maximum time dierence in seconds between temperature and humidity reports. 60 (default value)
2…100 -> Humidity dierence in% needed to report to the controller. 3 (Default value)
Maximum temperature: 0…500 Maximum Setpoint temperature. Temperatures above are discarded.
(370 -> 37ºC Default value)
0x00 ->(Default value) The long press works as described in the table using keyboard and answers.
0xFF -> Pressing 2s <t <10s does not send Node Info. Pressing t> 30s If the key is locked, a Node Info is sent. If the key
is not blocked (Config13) the sending of the Info Node is only carried out when the Thermostat is on.
0x00 -> (Default value) After a reset the load starts disabled
0x01 -> After a reset the load starts activated 0xFF -> After a reset, the load recovers the state.

10
ADVERTENCIAS /
CAUTION
LIMPIEZA /
CLEANING ADVICES
Para más información consulte la hoja de instrucciones en www.simonelectric.com /
For more information see the instruction sheet in www.simonelectric.com

A991153 22-12-2017
SIMON, S.A. Diputación, 390-392 / 08013 Barcelona Atención Técnica al Cliente -Customer Technical Support: [email protected] Tel: 902109700
www.simon.es
Other manuals for S100
1
This manual suits for next models
4
Table of contents
Languages:
Other Simon Thermostat manuals
