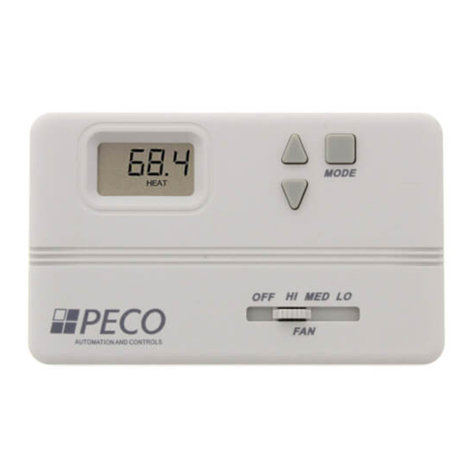
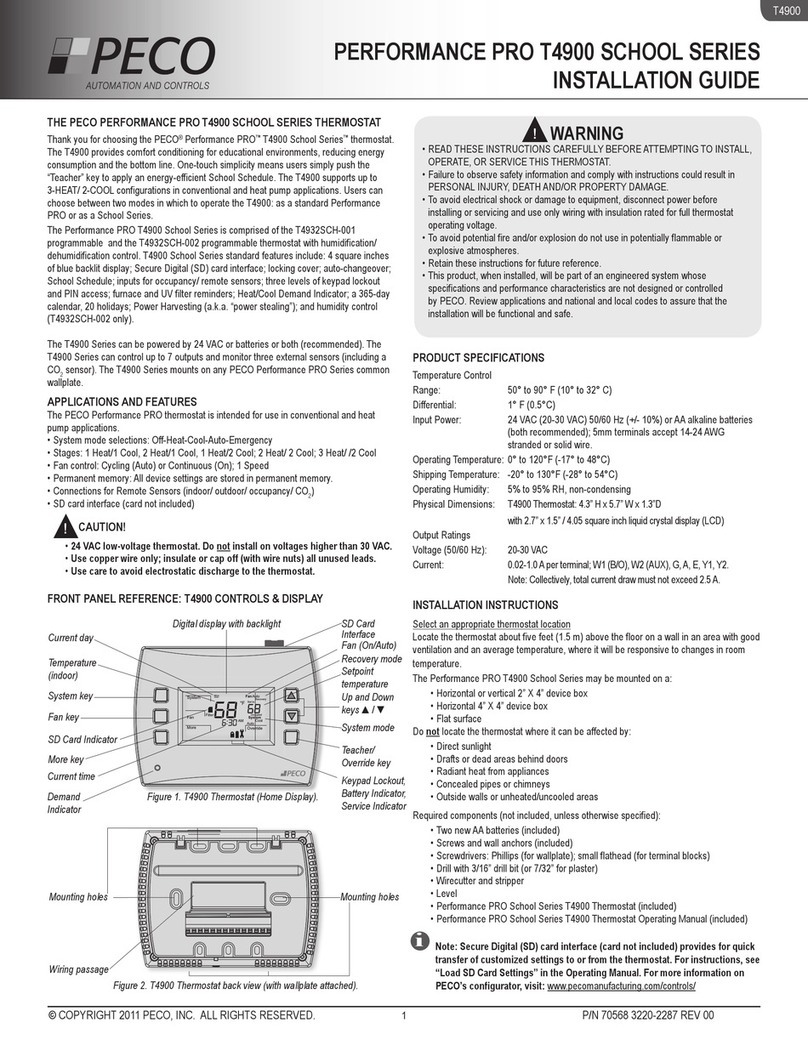
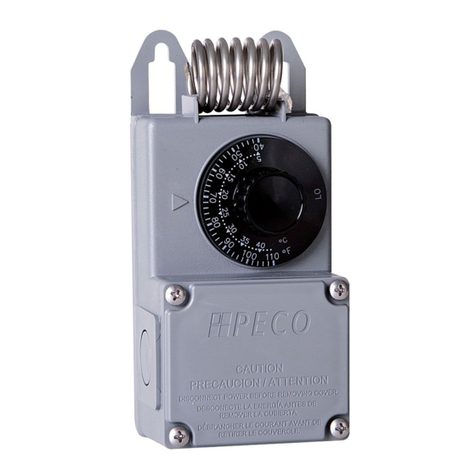
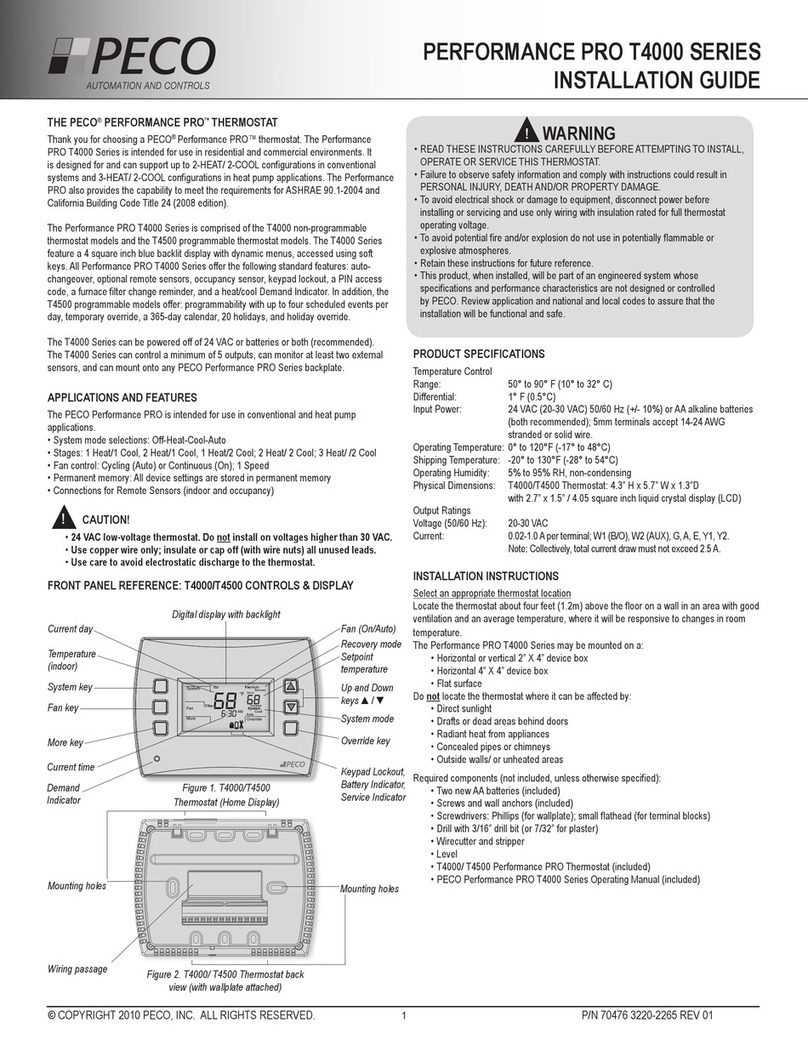
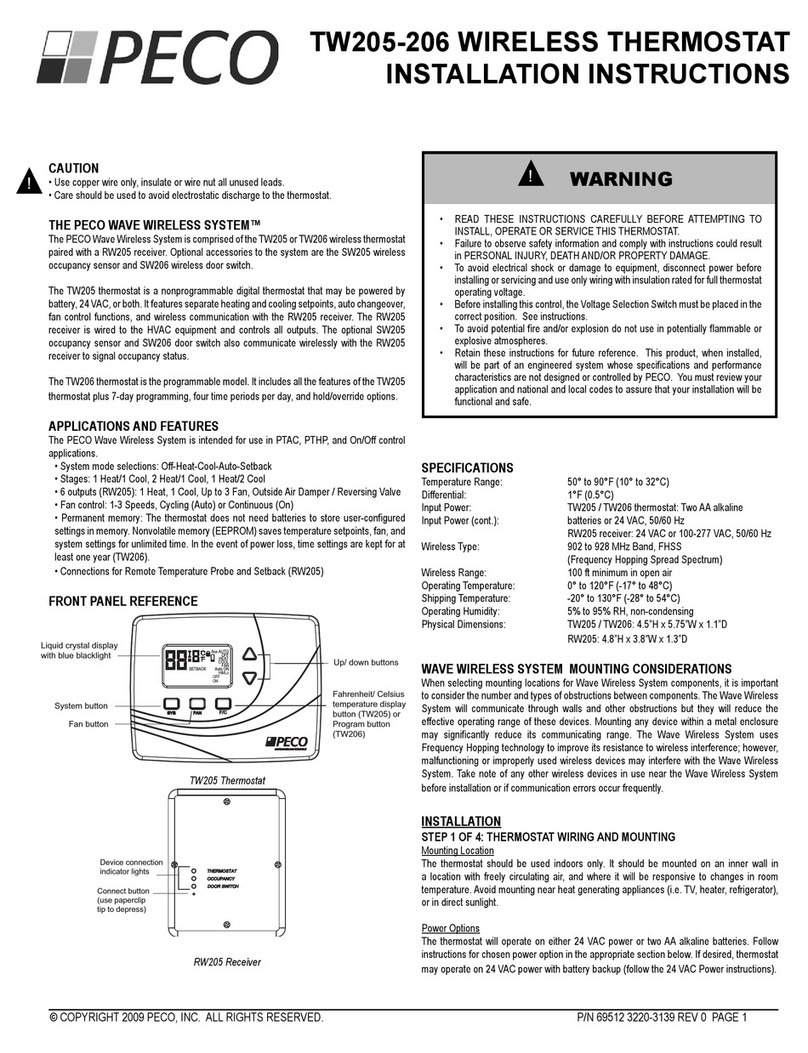
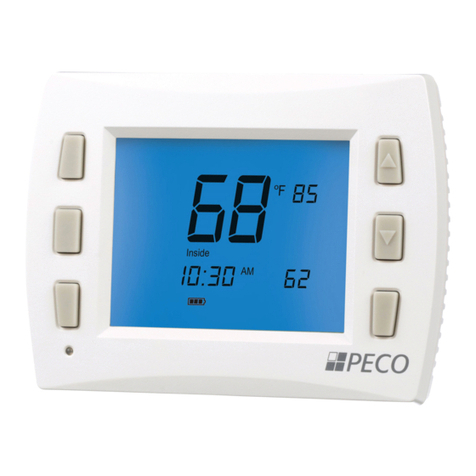
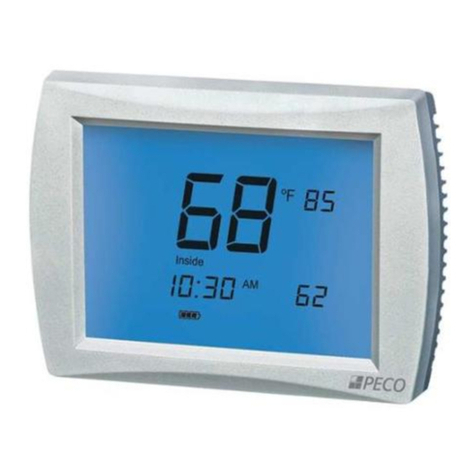
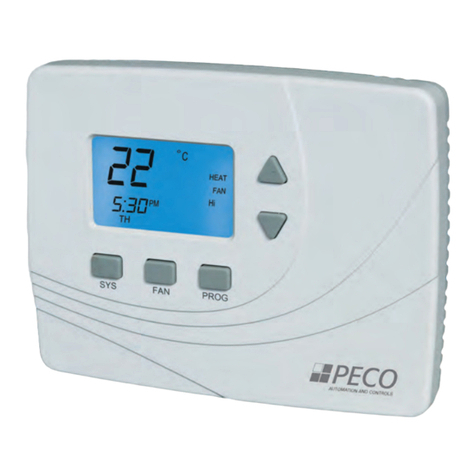
Peco TW180 User manual

WARNING
• READ THESE INSTRUCTIONS CAREFULLY BEFORE ATTEMPTING TO
INSTALL, OPERATE OR SERVICE THIS THERMOSTAT.
• Failure to observe safety information and comply with instructions could
result in PERSONAL INJURY, DEATH AND/OR PROPERTY DAMAGE.
• To avoid electrical shock or damage to equipment, disconnect power
before installing or servicing and use only wiring with insulation rated for full
thermostat operating voltage.
• Use care to avoid electrostatic discharge.
• To avoid potential re and/or explosion do not use in potentially ammable
or explosive atmospheres.
• Retain these instructions for future reference.
• This product, when installed, will be part of an engineered system whose
specications and performance characteristics are not designed or
controlled by PECO®. Review applications and national and local codes to
assure that the installation will be functional and safe.
▲
!
!
© COPYRIGHT 2023 PECO, INC. ALL RIGHTS RESERVED. P/N 74150 3220-2384 REV 04
1
TW180 THERMOSTAT
INSTALLATION INSTRUCTION
CONTROL
SYSTEMS
OUTPUT RATINGS
Voltage Inductive Resistive
Amps Pilot Duty
FLA LRA
24 VAC NA NA NA 24 VA
120 VAC 4.4 26.4 4.5 125 VA
240 VAC 2.2 13.2 4.3 125 VA
277 VAC 1.8 10.8 4.2 125 VA
COMBINED LOAD CURRENT NOT TO EXCEED 20 AMPS
MOUNT ONLY TO A GROUNDED METALLIC BOX
LOW VOLTAGE WIRING IS CLASS 2
PECO TW180 THERMOSTAT
Thank you for choosing a PECO®TW180 thermostat. The TW180 thermostat
is intended for use in commercial and residential enviroments. It supports both
programmable and non-programmable operation.
Key features include: auto-changeover; optional remote sensor; three levels of
keypad lockout with optional PIN access code; a heat/cool Demand Indicator;
up to four scheduled events per day, a 365-day calendar, 20 holidays, holiday
override and temporary override.
Applications
The PECO®TW180 applications include fan coil, PTAC and conventional
system with a single or multi speed fan operation.
System Mode Selections: Off-Heat-Cool-Auto
Outputs: 1 Cool and up to 2 Heat
Fan Control: Cycling (Auto) or Continuous (On); Up to 3 Speeds or Staged
Permanent Memory: All device settings are stored in permanent memory.
Optional Connections: Remote Sensor, Pipe Sensor, Fault Detection,
Setback, Occupancy and Door Switch
SPECIFICATIONS
Temperature Control Range: 50 to 90°F (10 to 32°C
Differential: 1°F
Physical Dimensions: 4.4”H x 5.8”W x 1.1”D
Construction of Control: Independently Mounted
Operating Temperature: 0°F to 120°F (-18° to 49°C)
Shipping/Storage Temperature: -20°F to 130°F (-29°C to 54°C)
Operating Humidity: 5%-95% RH, non-condensing
Low Voltage Terminal Connections: 18 -12 AWG
Remote Sensor: 10K NTC Type 2
Agency Approvals: UL, UL Canada
HEAT 1
COOL
FAN HI
FAN MED
FAN LO
Yellow
Black (Switched Side)
Blue
White/Orange
White/Red
White/Brown
Red
THERMOSTAT CONNECTIONS
L2 Neutral
L1 HOT
Outside Air
or HEAT 2
Brown
Unused
Unused
Door/ Window Switch
Remote Temperature Sensor
Sensor Common
Pipe Sensor
Occupancy
TB1-1
TB1-2
TB1-3
TB1-4
TB1-5
TB1-6
TB1-7
120-277 VAC Operation
HEAT 1
COOL
FAN HI
FAN MED
FAN LO
Yellow
Black
Blue
White/Orange
White/Red
White/Brown
Red
THERMOSTAT CONNECTIONS
Outside Air
or HEAT 2
Brown
24 VAC 1 (Switched Side)
24 VAC 2
Door/ Window Switch
Remote Temperature Sensor
Sensor Common
Pipe Sensor
Occupancy
TB1-1
TB1-2
TB1-3
TB1-4
TB1-5
TB1-6
TB1-7
24 VAC Operation
CAUTION
Individually wirenut
off unused leads
CAUTION
Individually wirenut
off unused leads
TB2-1
TB2-2
TB2-3
Input Power Jumper (Default Postion)
for 120-277 VAC Operation.
Unused MOVE Input Power Jumper
to TB2-1 and TB2-2
for 24 VAC Operation.
TB2-1
TB2-2
TB2-3
Line Voltage
24 VAC
Low Voltage
TB2TB1
Low Voltage
TB2TB1
Wiring Diagram

CAUTION
2x4 Mud Ring
TW180 Base
TW180 Cover Assembly
All wiring connections must be made
inside the electric box or the T180
maybe damaged.
Cover Locking Snaps
(Both Sides)
© COPYRIGHT 2023 PECO, INC. ALL RIGHTS RESERVED. P/N 74150 3220-2384 REV 04
2
This thermostat is intended for indoors use only.
Select an appropriate thermostat location
Locate the thermostat about four feet (1.2m) above the oor on a wall with good
ventilation, average temperature and good response to temperature changes.
Do not locate the thermostat where it can be affected by:
• Direct sunlight
• Drafts or dead areas behind doors
• Radiating heat or cool from appliances or equipment
• Concealed pipes or chimneys
• Outside walls or unheated/uncooled areas
Required components (not included, unless otherwise specied):
• Screws and wall anchors (included)
• Screwdrivers: Phillips (for wallplate); small athead (for terminal blocks)
• Drill with 3/16” drill bit (or 7/32” for plaster)
• Wire cutter and stripper
• Level
PART I: REMOVAL OF OLD THERMOSTAT
1. Turn off power to thermostat at main fuse or circuit breaker box. Ensure
that ALL power is disconnected. To prevent electrical shock and /or
equipment damage, disconnect electrical power to the system at the main fuse
or circuit breaker until installation is complete.
2. Remove the front cover of old thermostat. With wires still attached, remove
wall plate from the wall. If the old thermostat has a wall mounting plate,
remove the thermostat and the wall mounting plate as an assembly.
3. Before removing wires from old thermostat, label each wire with the terminal
designation from which it was attached.Take a photo if possible.
4. Disconnect the wires from the old thermostat one at a time. Do not let wires
fall back into the wall.
PART II: MOUNTING THE THEMROSTAT
1. Thermostat mounts to a 4” x 4” box with a 2” x 4” mud ring. Adapter wall plates
are available if needed.
2. Pull wires through the hole of the thermostat base.
3. Mount thermostat base to the wall using a level to determine best horizontal
mountng.
4. Mark positions of screw holes (two) with a pencil and remove base.
5. Drill holes at pencil-marked locations (3/16” for drywall, 7/32” for plaster).
6. Insert the wall anchors in the holes, tapping them into place.
7. Mount the wall plate onto the wall and insert screws through mounting holes.
Assure that all loose wires come through the center opening of the wall plate
8. Verify that the circuit board is rmly snapped into the cover and has not been
dislodged during handling.
9. Match and connect equipment wire thermostat using the appropriate wiring
diagram. Use onboard terminal connections for sensor wiring. Cap off any
unused wires and terminate properly according to local building codes.
NOTE: Verify that the Input Power Jumper is in the correct position.
10. Firmly press cover to engage the cover locking snaps. Should the cover
need to be removed in the future, use a at edged tool to put pressure on
the base sides. This will release the four side latches.
11. Turn on power to equipment.
PART III: SET CLOCK, MONTH, AND DAY
When power is rst applied to the thermostat, it will activate the clock display.
It is recommended that time and day are entered before performing advanced
conguration. Setting the clock can also be accessed by selecting MORE then
CLOCK. Set clock as follows:
• ▲/ ▼= Arrows set selection. Note: The ashing option is the default selection.
• NEXT = Advances to next menu.
• Menu selections are: 12 to 24 hour format - Hour - Minutes - Year - Month - Day
• DONE = Press Done when operation is complete.
NOTE: Display of Clock is not available when congured for
non-programmable operation.
PART IV: VERIFY THERMOSTAT OPERATION
System test verication is highly recommended to verify thermostat operation.
After wiring and installation is complete, energize the system. From the service
menu select menus 600, 610, 620 to test heating, cooling and fan operation.
For all system tests, press Next to continue to the following system test, or next
available Service Menu. Press Done only if nished performing all system tests.
Pressing Done exits the Service Menus and turns off all active outputs.
PART V: REMOVE BATTERY INSULATOR TAB
Remove Insulator Tab after power is
applied.This tab protects onboard bat-
tery prior to installation. This battery
backups up the clock.
Installation
Terminal Block
TB2
Terminal Block
TB1
1
2
3
4
5
6
7
1
2
3
Input
Power
Jumper
See Wiring Diagram

© COPYRIGHT 2023 PECO, INC. ALL RIGHTS RESERVED. P/N 74150 3220-2384 REV 04
3
THERMOSTAT PROGRAMMING
This thermostat is easily changed from non-programmable to programmable
operation in Service Menu 100. See the Operating Maunal for detailed
instructions on setting up schedules. In non-programmable mode the thermostat
controls to a single setpoint with the dead band used for auto changeover from
Heat to Cool.
FAN AND DAMPER OPERATION
Damper Operation (Service Menu 111)
A damper output is available when the brown lead is not being used for stage 2
heat. Cycled with demand vs continuous on operation is determine in SM 111.
Fan Operation (Service Menu 350)
Congures available fan modes. Selections are ON, AUTO or Staged. When
staged is selected the user does not have access to fan speed selection.
Programmable Fan Operation (Service Menu 500)
This feature changes the fan operation to ON (continuous) during scheduled
Occupied events. TIP: Disable Fan ON selection in SM 350 to ensure cycled
operation in unoccupied scheduled events.
Intermittent Fan Operation (Service Menus 500, 501, 502)
Provides minimum timed fan operation by cycling the fan on and off.
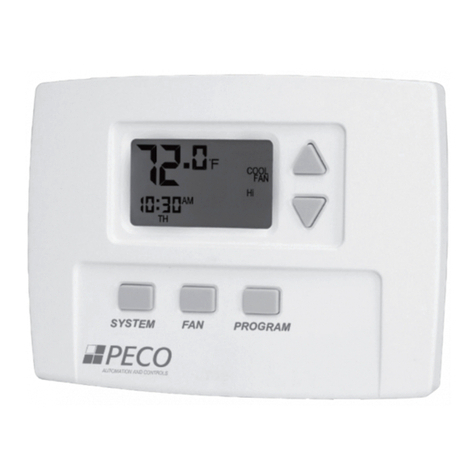
OCCUPANCY/ DOOR SWITCH OPERATION
The TW180 occupancy input can be standalone or used with a door switch. When
occupancy is detected (contact open) the thermostat will run at the last user
setpoint or to the schedule depending on SM100. If no occupancy is detected
(contact closed), the thermostat uses the setback values and SM310 and SM320.
The fan is automatically set to cycle with demand on transition to setback. Service
Menus can be congured for occupied duration (SM 326), setback ramping (SM
327), and nighttime lock and Start Time (SM 328 and SM329).
SM 325 = 1 Occupancy Sensor Only Sequence of Operation:
- Occupancy sensor detection sets the TW180 to occupied mode.
- The Occupied Timer duration is set per SM326.
- Once the timer expires without detection the unit will return to Setback, based on
ramping selection at SM327. The fan will be set to cycle with demand.
- If SM 328, Night Lock On, is enabled and a detection occurs after the time set at
SM329, the TW180 will stay in occupied operation until 7:00AM.
SM 325 = 2 Door/Window Switch Only Sequence of Operation:
- If a door or window is opened a 2-minute timer is started.
- If the timer expires without a door/window closure the thermostat outputs are
turned off.
- When the door/windor is closed normal thermostat operation will resume.
- A one-time ten minute override of open door / window can be initiated by
pressing any thermostat key pad.
- The door state, NO or NC, can be reversed at SM176.
SM 325 = 3 Occupancy Sensor and Door Switch Sequence of operation:
- On a door open signal the thermostat will initiate occupied mode.
- If the door is not closed within 2 minutes the thermostat will go into setback and
fan will be set to cycle with demand.
- Once the door closes, if no occupancy signal is detected within 2 minutes, the
TW180 will go into setback.
- If occupancy is detected any time after the door closes, the TW180 is set to
occupied mode until the door is opened again.
- Once setback is initiated ramping will follow the selection at SM327.
- The door state, NO or NC, can be reversed at SM176.
- Service Menus 326, 328 and 329 are ignored.
KEYPAD LOCK OUT
The keypad lockout function blocks access to features by hiding them from the
user’s view/selectability. Service Menu 340 has 3 levels of lock out. If a PIN is
used to enter the Service Menu, all key pad lockouts will be disabled for a period
of ve minutes.
FAN COIL 2-PIPE/ 4-PIPE OPERATION
When used on a fan coil system the TW180 can be congured to switch between
summer and winter using either a PECO pipe temperature sensor or a controller
like an aquastat that is open for summer and closed for winter. Service Menu 171
sets 2-pipe or 4-pipe fan coil operation.
2-Pipe
Operation
Wire
Color
Summer
(Cold Water or Open Input)
Winter
(Hot Water or Closed Input)
Cool Blue Cool Heat
Stage 1 Heat Red Disabled Disabled
• 2-pipe operation disables the HEAT 1 output. The COOL output is used for cool
in summer and rst stage of heat in winter.
4-Pipe
Operation
Wire
Color
Summer
(Cold Water or Open Input)
Winter
(Hot Water or Closed Input)
Cool Blue Cool Heat
Stage 1 Heat Red Heat Disabled
• 4-pipe operation uses both COOL and rst stage HEAT 1 when chilled water is
available (Summer). When hot water is available (Winter) the HEAT 1 output is
disabled and the COOL output is used for rst stage of heating. Second stage
HEAT 2 may be available, depending on the system type.
PIPE SENSOR: SEASONAL CHANGE OVER
This feature is enabled when 2-pipe or 4-pipe operation is selected in Service
Menu 171. With a pipe sensor connected to the TW180, the system will
automatically change from Summer (cold water) to Winter (hot water) operation
based on water temperature in the main piping riser. This input is looking for a
valid temperature reading when using a pipe sensor, or a contact open/close if
using an aqua-stat type device.
• Summer operation is enabled if the input is open or if the sensed temperature
is below the threshold selection in SM 172.
• Winter operation is enabled if the input is closed or if the sensed temperature is
above the threshold selection in SM 173.
If the water temperature sensed is between selections in SM 172 and SM 173 the
water temperature is considered Ambiguous. The COOL output will be opened for
3-minutes. After the 3 minute purge cycle, the thermostat checks again to see if
the water temperature is Summer or Winter. If yes, the thermostat will transition to
normal operation. If no, the operation is base on selection at Service Menu 174.
NOTE: If at any time the demand goes away, the thermostat will abort the purge
cycle.
SYSTEM FLUSH FOR FAN COIL VALVES
Enable a periodic opening of valve(s) to ush valves and reduce sediment buildup
using Service Menus 375, 376 and 377.
FAULT DETECTION
Fault detection can be used when not using a remote probe. Connect fault
detection relay between terminal block TB1-3 and TB1-7.See Service Menu 175
CONFIGURE SERVICE MENUS
The following Service Menus (SM) commonly require conguration. Please verify that
these are set for your specic application. Additional conguration may be required.
• SM 100 = Programmable or Nonprogrammable
• SM 110 = System Type
• SM 120 = Fan Control for Heating
• SM 135 = W1 Heat Output NO or NC
• SM 170 = Remote Sensors
• SM 240 = Number of Programmable Events per Day
• SM 395 = Override Duration for Programmable Operation
• SM 340 = Keypad Lock Out
SERVICE MENU ACCESS
1. Hold lower right and lower left keys for ve seconds.
2. Press Next or Go Back button to select a Service Menu.
3. Press ▲/ ▼ to select option.
4. Press Done when complete.
Selected
Option
Service Menu
Number
© COPYRIGHT 2023 PECO, INC. ALL RIGHTS RESERVED. P/N 74150 3220-2384 REV 04
4
Menu Feature Option Description
100 Schedule Format 0 = Nonprogrammable (Default) Selects the schedule format. In non-programmable mode all scheduling functions are
removed from the display.
1 = Programmable
2 = 5-1-1 Schedule Mode
3 = 5-2 Schedule Mode
101 Daylight Savings 0 = Disabled (Default) When enabled daylight savings time follows the US 2007 format. (Begins second Sunday
of March at 2AM and ends on the first Sunday of November at 2AM.
1 = Enabled (2007 US Format)
110 System Type 11 Stage Heat /1 Stage Cool (Default) Heat Stage 2 takes the place of this outside air damper output.
22 Stage Heat /1 Stage Cool
31 Stage Heat Only
41 Stage Cool Only
111 Outside Air Damper
Configuration
0 = Damper Continuous Damper output is not available when being used as a fan speed.
0: Output runs continuously when thermostat is not in System OFF Mode.
1: Output cycles with a heat or cool demand.
1 = Damper Cycled with Demand (Default)
120 Fan Control (Heating) 0 = OFF for Heating (Gas/Oil Heat) 0: The thermostat will Not activate the fan with a heating demand.
1: The thermostat will activate the fan with heat demand.
1= Electric Furnace (Default)
121 Fan Speeds 1 = Single Speed Fan Single Speed - White/Orange Lead
2-Speeds - White/Orange & White Brown Leads
3-Speeds - White/Orange, White/Red & White Brown Leads
2 = 2-Speed Fan
3 = 3-Speed Fan (Default)
134 Cool Output Configuration 0 = NC: Normally Closed Operation (Default) Reverses the ON/OFF operation for the heat output. NC operation powers on with a
demand. NO opreation powers off with a demand and will be on with no demand unless
main power is removed from the thermostat.
1 = NO: Normally Open Operation
135 W1 Heat Output
Configuration
0 = NC: Normally Closed Operation (Default) Reverses the ON/OFF operation for the first stage heat output. NC operation powers on
with a demand. NO opreation powers off with a demand and will be on with no demand
unless main power is removed from the thermostat.
1 = NO: Normally Open Operation
170 Remote Sensor Input 0= No Remote Sensors (Default) 0: Remote temperature sensing is disabled.
1: The TW180 uses the remote sensor only for temperature sensing.
2: The TW180 averages the local and remote sensor for temperature sensing.
When using a remote sensor an open or short will turn off outputs and display either
2Ero(open) or 2Erc (closed). Fault detection settings are not used.
1= Remote Indoor Sensor Connected
2 = Remote Sensor Connected And Sensor
Averaging
171 Pipe Sensor 0 = Disabled (Default) Enables fan coil pipe sensor operation. Connect a PECO pipe sensor or dry switch closure
for change over from Summer (cold water) to Winter (hot water) on COOL output (blue
wire). 2-pipe operation uses the COOL output for heating and cooling. Heat 1 is disabled.
4-pipe operation allows heat 1 in summer mode of operation.
Available when SM 110 = 1 or 2
1 = Two Pipe Operation
2 = Four Pipe Operation (use for 2-pipe with
electric heat relay)
172 Pipe Sensor Threshold for
Cooling
50F to 72F (Default 60F) Available when SM 171 = 1 or 2. Changes to Cool when pipe temp is below threshold.
173 Pipe Sensor Threshold for
Heating
75F to 90F (Default 80F) Available when SM 171 = 1 or 2. Changes to Heat when pipe temp is above threshold.
ADVANCED CONFIGURATION SERVICE MENUS

© COPYRIGHT 2023 PECO, INC. ALL RIGHTS RESERVED. P/N 74150 3220-2384 REV 04
5
Menu Feature Option Description
174 Pipe Sensor Purge 0 = Time (Default) Available when SM 171 = 1 or 2
TEMP: Purge continues until a non-ambiguous condition is sensed.
TIME: A 3-minute purge is started. When complete themrostat returns to season operation
or if ambiguous mode all thermostat outputs are disabled for 1 hour. See Pipe Sensor:
Seasonal Chage Over.
1 = Temp
175 Fault Detection/ Setback
(Requires SM170=0)
No Remote Sensor
0 = Disabled (Default) Disabled. When not 0 connect dry switch between TB1-3 and TB1-7.
1 = Active On Open Displays “Door” in clock location, turn outputs OFF, blink red LED
2 = Active On Open Displays “Fdd” in clock location, outputs function normally
3 = Active On Close Displays “Err” on clock location, turn outputs OFF blink red LED
176 Door/Window Switch 0 = Open when door is closed (default) Configure door switch to match door closed state.
1 = Closed when door is closed
240 Number of Program Events 2 or 4 Events (DEFAULT = 2) When the TW180 is set up as programmable this sets the number of events per day.
Events are OCC1, UNOCC1, OCC2, UNOCC2
250 Clock Format 12 or 24 Hrs (Default = 12) This service menu sets the clock format.
260 F or C 0 = Celsius Determines temperature displays in Fahrenheit or Celsius
1 = Fahrenheit (Default)
270 Fan Off Delay Heat 0-99 Seconds (0-Default) The amount of time (in seconds) the lowest available fan speed will run after the
thermostat heating outputs are disabled
280 Fan Off Delay Cool 0-99 Seconds (0-Default) The amount of time (in seconds) the lowest available fan speed will run after the
thermostat cooling outputs are disabled
290 Range Low 50-90 F or 10-32C (50F- Default) The lowest selectable temperature setpoint value
300 Range High 50-90 F or 10-32C (90F- Default) The highest selectable temperature setpoint value
310 Setback Low Off, 50-90 F or 10-32C
(67F- Default)
Accessed from Wi-Fi or by occupancy sensor detection.
“Off” turns heating setpoint off.
320 Setback High Off, 50-90 F Or 10-32C
(78F - Default)
Accessed from Wi-Fi or by occupancy sensor detection.
“Off” turns cooling setpoint off.
325 Occupancy Sensor/ Door
Switch
0 = Disabled See Occupancy Sensor and Door Switch Operation
1 = Occupancy Sensor Only
2 = Door Switch Only
3 = Occupancy and Door Switch
326 Occupied Timer Duration 30 min, 1, 2 (default), 4, 6, 8, 16, 20, 24 hrs Sets the time required to go into setback mode after occupancy detection.
327 Setback Ramping 0 = Economy (No Delay) Determines how fast the thermostat will go to the setback values.
1 = Comfort 1 (1 degree per hour) (Default)
2 = Comfort 2 (2 degrees per hour)
328 Nighttime Lock 0 = Disabled (default) Locks the thermostat into Occupied mode if occupied at time set in Service Menu 329.
1 = Enabled
329 Nighttime Lock Start Time 10 PM (Default) Sets the time of when nighttime lock becomes active.
330 Zone Temp Offset +/-9F or +/-4.5C (0F- Default) Zone Temperature offset adjusts the sensed Zone Temperature displayed, allowing calibra-
tion in the field
340 Keypad Lockout 0- No Key Pad Lockout (Default) This function blocks access to certain features of the device. The Service Menu is still
available if the key pad lockout is enabled.
If PIN is entered keypad lockout is overridden for 5 minutes.
1- Disables Schedule and System Keys
2 - Disables Schedule, System, And Fan Keys
3 - Disables All Keys
341 Enable Pin Access 0=Disable, 1= Enable (Default = 0) Applies a 3-digit access code to enter service menu 342
342 Set Pin 000-999 (Default 000) Selects pin access three-digit code.

© COPYRIGHT 2023 PECO, INC. ALL RIGHTS RESERVED. P/N 74150 3220-2384 REV 04
6
Menu Feature Option Description
350 Fan Mode 1 = On ON: Fan is always on, regardless of demand.
User selections are: ON HI, ON MED, ON LO based on the number of fan speeds.
2 = Auto Auto- Fan is only on with heating or cooling demand User selections are: AUTO HI, AUTO
MED, AUTO LO based on the number of fan speeds.
3 = ON Or Auto (Default) ON or Auto user can choose either selection. User selections are: AUTO HI, AUTO MED,
AUTO LO, ON HI, ON MED, ON LO based on the number of fan speeds.
4 = Staged Only Fan speed selected from available speeds by thermostat per Fan Access section. User
selections are: AUTO or ON.
5 = On Or Staged - Hotel Mode ON- Fan is always on at user selected speed, regardless of demand
AUTO Staged- Thermostat stages available speeds. Fan cycles off with demand.
360 System Mode 0 = Off, Auto Sets the system modes the occupant is able to select
Hotel operation - For ease of use change available System modes to ON-AUTO
SM360=02
1 = OFF, Heat, Cool, Auto (Default)
2 = OFF, Heat, Cool
3 = Heat, Cool, Auto
361 Controlled Off 0 = Disable (default) When enabled, the unit will control to the Setback setpoints while in “off” mode.
1 = Enable
375 System Flush Enable 0 = No Flush (Default) ▲
!WARNING: Service Menu 375 may disable fan operation during valve flush.
Enables the flush function for fan coil systems. This feature should be set to 0
(zero) unless outputs are connected to hydronic heating or cooling valves. Failure
to follow this instruction can result in damage to equipment and/or property.
1 = W1 Flush
2 = Y1 Flush
3 = W1 & Y1 Flush
376 Flush Duration 1 To 3 Minutes (Default 1) Defines how long to open the valve to perform the flush function
377 Flush Frequency 0 = Every 24 Hrs (Default 0)
1 = Every 12 Hours
2 = Every 6 Hours
Defines how often the flush is performed when output has remained inactive
380 Minimum Dead band
Adjustment
3F (Default) A changeover dead band value prevents short cycling between heating and cooling
modes. The value is adjustable to meet various HVAC system requirements.
1-10F, 1.5-5C
390 Pre-Occupancy Purge 0 Hours (Default) Energizes the lowest fan available for selected number of hours (0-3) prior to events Occ 1
and Occ 2. This featrure applies to Programmable thermostat operation.
0-3 Hours
395 Temporary
Occupied Duration Limit
0-4 Hours (Default = 3) This set the duration of a user override for programmable operation.
0: Will override the schedule until the next programmed event.
1,2,3,4: Sets the number of allowed hours of override after user adjustment. User can
adjust override duration up to this limit of hours.
480 Minimum Off Time 0-10 Minutes (Default 1 Minutes) Sets the minimum off time for both the heat and cool output.
500 Programmable/
Intermittent Fan
0 = Disable (Default) In programmable mode the fan will operate continuously during occupied periods or with
demand during unoccupied/setback periods. In intermittent fan will operate based on the
on and off times set in menus 501 and 502 whenever there is demand for fan.
1 = Programmable Fan
2 = Intermittent Fan
3 = Intermittent Fan During Occupied Periods
Only
501 Intermittent Fan On Time 5 Minutes (Default) Defines the duration in which fan low will be on. Fan On will be activated after Fan Off
time has passed.
1-60 Minutes
502 Intermittent Fan Off Time 25 Minutes (Default) Defines the duration in which fan low will be off. Fan Off will be activated after Fan On
time has passed. A selection of 0 will result in continuous Fan.
0-60 Minutes
520 Default Display Icons 0 = Time, Temp, SP (Default) Icons that will be displayed in the default state.
NOTE: Setpoint will not be displayed if TW180 System Mode is OFF.
1 = Time, Temp
2 = Time
3 = Temp
4 = None
5 = Set Point Only
530 Revision Displays Current Revision Information
540 Factory Default Reset 0 = Disable (Default) When enable is selected he device will return to factory default settings.
1 = Enable
600 Cooling System Output
Test
0 = Disable (Default) Cool operation is enabled and the associated outputs based on Service Menu 110. The
output is activated for 10 minutes. The outputs will automatically turn on.
1 = Cooling

© COPYRIGHT 2023 PECO, INC. ALL RIGHTS RESERVED. P/N 74150 3220-2384 REV 04
7
Menu Feature Option Description
610 Heating System Output
Test
0 = Disable (Default) Heat Operation is enabled and the associated outputs based on Service Menu 110. The
output is activated for 10 minutes. The outputs will automatically turn on.
1 = First Stage Heat
2 = Stage 2 Heat or Damper
620 Fan System Output Test 0 = Disable (Default) If enabled is selected it will activate Based On Service Menu 110. The output will be
enabled for 10 minutes. The outputs will automatically turn on.
1 = Enable HI Fan Output
2 = Enable MED Fan Output
3 = Enable LO Fan Output

© COPYRIGHT 2023 PECO, INC. ALL RIGHTS RESERVED. P/N 74150 3220-2384 REV 04
8
In case of difculty, try one of the following suggestions below.
Symptom Potential Cause(s) Solution
If display screen is blank • Thermostat is not being powered • Check to assure proper wiring of power to the thermsotat.
• Check power to verify that there is power (24-277 VAC) available.
• Default Display is set to “4” (None) • Check Service Menu 520.
If keys do not allow manual entry • Keypad Lockout may be enabled • Access Service Menu 340. Within this menu, select option “0” to assure
there is no keypad lockout (so manual entry is enabled).
Service Menu does not display • PIN access is enabled
• Buttons were not pressed simultaneously
• Access requires the three digit code set by the installer.
• Wait for unit to return to default display and retry.
SETBACK is in the Display • System is in setback • Your thermostat has an occupancy detection system connected.
• Check connections between TB1-5, TB1-6, TB1-7
Dashes in the Temperature Display • Remote Probe Error • For remote probe use allow 5 minutes for thermsotat temperature to
stabalize.
• Check Service Menu 170 for correct selection.
Err In Clock Dispay • Indicates a service fault input • Indicates service is required.
Door in Clock Display • Door or window is open • Close door and /or window to clear fault.
Fdd in Clock Display • Indicate an economizer or other system fault • Indicates service is required.
If no heating or cooling is running, but there is a call
for heat or cool (Heat/Cool appears on display) in
Auto mode
• Heating or cooling equipment is not operating
• Minimum off time has not been met
• Power Jumper is not located properly at
terminal TB2.
• Check Service Menu 110 to assure that the correct option is selected to
match the system type.
• Check wiring, using output tests to verify (see Service Menus 600, 610,
620).
• Verify that the Power Jumper is in the correct position for your system
voltage. CAUTION: Do not move the Power Jumper to 24VAC position if
your system is running at line voltage.
If heating or cooling system doesn’t respond • System type selection is incorrect • Check Service Menus 110 and 120 to assure that the correct option is
selected to match the system type.
If heating and cooling equipment are running at the
same time
• System type selection is incorrect • Check Service Menu 110 to assure that the correct option to match the
system type is selected
• Verify wiring connections • Separate the heating and cooling wires, using output tests to verify (see
Service Menus 600, 610, 620).
If Demand Indicator light is red • Heating is occurring • No action is required.
If Demand Indicator light is green • Cooling system is running • No action is required.
Fan outputs turned off after 3-minutes • Pipe sensor is connected and water
temperarture between hot water and cold water
set points
• Building Boiler or Chillers may be turned off.
• See Service Menus 171, 172, 173 & 174
Menu Item Not available • Some service menus are disabled when not in
use or feature is not available.
• Verify system type selection and feature selection is correct.
Red LED is Flashing and a code is displayed in the
clock location
• Fault is present on TB1-3 and TB1-7
• Probe is not wired correctly or is wrong value.
• Check SM175 for code
• If using a remote sensor, verify probe wiring and type.
TROUBLESHOOTING & FREQUENTLY ASKED QUESTIONS
UL60730-1 Required Information:
Purpose of control: Operating Control,Room Thermostat
Type 1.C Action
Pollution Degree 2
Impulse Voltage: 2500 V
Table of contents
Other Peco Thermostat manuals

Peco
Peco T2500-01 WavePRO User manual

Peco
Peco TA170 User manual

Peco
Peco Performance Pro T12000 Series User manual

Peco
Peco WavePRO K2500-001 User manual

Peco
Peco TA155 User manual

Peco
Peco TA155-046 Installation guide

Peco
Peco T190 User manual

Peco
Peco Performance Pro T4900 School User manual

Peco
Peco TF115P-002 User manual

Peco
Peco Performance pro T12000 User manual