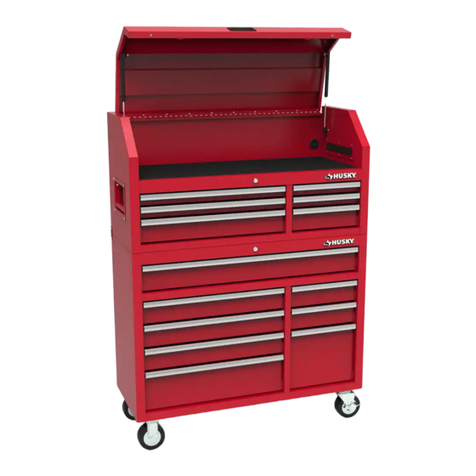
Simpli Home 3AXCART-04 User manual

ARTISAN HOLDEN STRATFORD//
CHEST OF DRAWERS
MODEL # 3AXCART-04
1/23

2/23
FOR REPLACEMENT PARTS OR HELP WITH
ASSEMBLY PLEASE CONTACT US AT:
simpli home.com/customer-support-
PLEASE ENSURE TO HAVE THE MODEL #
INSTRUCTION BOOKLETFROM THE PACKAGING OR
TO RETURN THE PRODUCT:
PLEASE CONTACT THE RETAILER
WHERE THE ITEM WAS PURCHASED FROM

3/23
Upload an image of our furniture
in your home with a short review
to our facebook page for a chance to
ENTER
TO WIN
Win up to $3000 of
Simpli Home furniture!!!
www.facebook.com/simplihomefurnishings

4/23
IMPORTANT : Please read this manual carefully before beginning
.assembly of this product Keep this manual for future reference.
SAFETY INFORMATION
CARE and MAINTENANCE
CAUTION: Injuries and damage can occur from furniture tip over if product is not
properly anchored to the wall. Use the Furniture Anti-Tipping Restraint provided
with the product. Consult our assembly instructions for help.
If the Furniture Anti-Tipping Restraint kit is not in the box, please contact our
customer service department in order to obtain another kit before using the
furniture.
Identify all the parts and hardware. Do not discard of the packaging until you
have checked that you have all of the parts and hardware required. Hardware
package may have spare parts.
WARNING: This item contains small parts which can be swallowed by
children and pets. Keep children and pets away during assembly. To avoid
danger of suffocation, always keep plastic bags away from children and pets.
We recommend that you assemble this unit on a carpeted floor to avoid
scratches. If using power tools, set the tool to low torque to avoid damage.
May require 2 people for ease of assembly.
To clean, use a soft or slightly damp cloth, then wipe with a clean, dry cloth.
Dust with soft dry cloth.
Do not use ammonia-based cleaning products, as they will damage the finish.
Do not leave liquids or damp cloths on this furniture.
To avoid dulling of the finish, do not place furniture in direct sunlight.
Please inspect and tighten all screws or bolts on a regular basis to ensure proper
performance and safety of your item.

NEED HELP? For help with assembly or if you are missing a part,
Please call customer service at 1-866-518-0120 ext. 262 (9 am to 4 pm EST)
PRE ASSEMBLY INFORMATION-
A
PARTS DESCRIPTION
TOP
QTY 1
DIVIDER
QTY 1 PAIR
SMALL DRAWER FRONT
QTY 2
LARGE DRAWER BACK
QTY 3
BACK PANEL
QTY 2
MIDDLE DRAWER FRONT
QTY 1
SIDE
QTY 1 PAIR
LARGE DRAWER FRONT
QTY 3
LARGE DRAWER SIDE
QTY 3 PAIRS
MIDDLE FRAME
QTY 1
BOTTOM FRAME
QTY 1
B C
D
G
J
E
H
K
F
I
L
MODEL # 3AXCART-04
5/23
Front
Back
Front
MIDDLE & SMALL
DRAWER SIDE
QTY 3 PAIRS

NEED HELP? For help with assembly or if you are missing a part,
Please call customer service at 1-866-518-0120 ext. 262 (9 am to 4 pm EST)
PRE ASSEMBLY INFORMATION-
M
PARTS DESCRIPTION
N
LARGE DRAWER BOTTOM
QTY 3
MIDDLE DRAWER BACK
QTY 1
6/23
SMALL DRAWER BACK
QTY 2
MIIDDLE DRAWER BOTTOM
QTY 1
SMALL DRAWER BOTTOM
QTY 2
O
PQ
MODEL # 3AXCART-04
R
PLASTIC JOINING STRIP
QTY 1

1
PRE ASSEMBLY INFORMATION-
HARDWARE DESCRIPTION
23
45
NEED HELP? For help with assembly or if you are missing a part,
Please call customer service at 1-866-518-0120 ext. 262 (9 am to 4 pm EST)
6
7/23
MODEL # 3AXCART-04
7
Required -
Flathead screwdriver
Phillips screwdriver
Not Included
ALLEN KEY BOLT
M6 X 30 mm
QTY 18
ALLEN KEY SCREW
M6 X 30 mm
QTY 36
CAM LOCK PIN
CAM LOCK
QTY 24 SETS
HANDLE
M4 X 25 mm
QTY 6 SETS
ALLEN KEY
QTY 1
PHILLIPS SCREW
ROUND HEAD
M4 X 15 mm
QTY 18
M4 X 25 mm - QTY 1
a.
b.
c.
M4 X 15 mm - QTY 1
M4 X 25 mm - QTY 1
FURNITURE ANTI-TIPPING
RESTRAINT
QTY 1 SET

COMPONENTS – KEY DIAGRAM
8/23
MODEL # 3AXCART-04

ASSEMBLY
1. Attach 4 Cam Lock Pins 3 to pre-drilled holes at back of Small Drawer Front I .
2. Align Cam Lock Pins with pre-drilled holes and attach Small Drawer Sides K .
3. Insert 2 Cam Locks 3 into pre-drilled holes on each Small Drawer Side K .
4. Use flathead screwdriver to secure Cam Locks.
1. Slide Small Drawer Bottom Q firmly into slots on Small Drawer Sides K and
Small Drawer Front I .
STEP 1
STEP 2
9/23
MODEL # 3AXCART-04

ASSEMBLY
1. Align Small Drawer Back N with Small Drawer Bottom Q and press firmly into slot .
2. Attach Drawer Back using 2 Allen Key Screws 2 through pre-drilled holes on
each Side K .
3. Use Allen Key 5 to tighten screws. Do not over-tighten.
1. Use Phillips screwdriver to attach Handle 4 to Small Drawer Front I .
STEP 3
STEP 4
10/23
NOTE: The screwdriver is not
included in the hardware pack.
Repeat Step 1-4 for the second small drawer .
MODEL # 3AXCART-04

ASSEMBLY
1. Attach 4 Cam Lock Pins 3 to pre-drilled holes at back of Middle Drawer Front H .
2. Align Cam Lock Pins with pre-drilled holes and attach Middle Drawer Sides K .
3. Insert 2 Cam Locks 3 into pre-drilled holes on each Middle Drawer Side K .
4. Use flathead screwdriver to secure Cam Locks.
1. Slide Middle Drawer Bottom P firmly into slots on Middle Drawer Sides K and
Middle Drawer Front H .
STEP 5
STEP 6
MODEL # 3AXCART-04
11/23

ASSEMBLY
1. Align Middle Drawer Back M with Middle Drawer Bottom P and press firmly into slot.
2. Attach Drawer Back using 2 Allen Key Screws 2 through pre-drilled holes on
each Side K .
3. Use Allen Key 5 to tighten screws. Do not over-tighten.
1. Use Phillips screwdriver to attach Handle 4 to Middle Drawer Front H .
STEP 7
STEP 8
NOTE: The screwdriver is not
included in the hardware pack.
MODEL # 3AXCART-04
12/23

ASSEMBLY
1. Attach 4 Cam Lock Pins 3 to pre-drilled holes at back of Large Drawer Front G .
2. Align Cam Lock Pins with pre-drilled holes and attach Large Drawer Sides J .
3. Insert 2 Cam Locks 3 into pre-drilled holes on each Large Drawer Side J .
4. Use flathead screwdriver to secure Cam Locks.
1. Slide Large Drawer Bottom O firmly into slots on Large Drawer Sides J and
Large Drawer Front G .
STEP 9
STEP 10
MODEL # 3AXCART-04
13/23

ASSEMBLY
1. Align Large Drawer Back L with Large Drawer Bottom O and press firmly into slot.
2. Attach Drawer Back using 2 Allen Key Screws 2 through pre-drilled holes on
each Side J .
3. Use Allen Key 5 to tighten screws. Do not over-tighten.
1. Use Phillips screwdriver to attach Handle 4 to Large Drawer Front G .
STEP 11
STEP 12
NOTE: The screwdriver is not
included in the hardware pack.
MODEL # 3AXCART-04
Repeat Step 1-4 for the other two large drawers.
14/23

ASSEMBLY
STEP 13
1. Attach Dividers F to Middle Frame C using 6 Allen Key Screws 2
( 3 Screws / each Divider ).
2. Use Allen Key 5 to tighten screws. Do not over-tighten.
15/23
MODEL # 3AXCART-04

ASSEMBLY
STEP 14
1. Attach Middle Frame C and Bottom Frame B to Sides D using 12 Allen Key Bolts 1
( 6 Bolts / each Side ).
2. Use Allen Key 5 to tighten bolts. Do not over-tighten.
16/23
MODEL # 3AXCART-04

ASSEMBLY
STEP 15
1. Attach Top A to Sides D using 6 Allen Key Bolts 1 ( 3 Bolts / each Side ).
2. Attach Top A to Dividers E using 6 Allen Key Screws 2 ( 3 Screws / each Divider ).
3. Use Allen Key 5 to tighten screws and bolts. Do not over-tighten.
17/23
MODEL # 3AXCART-04

ASSEMBLY
STEP 16
18/23
1. Attach the upper Back Panel E to back frame by using Phillips Screws 6 . Only 1 top
st
row of screws ( 5 screws ) to be screwed in advance.
2. Insert the lower Back Panel E into the slot of Plastic Joining Strip R .
3. Insert the entire set of Step 2 into bottom edge of upper Back Panel E and tighten by
screws 6 .
MODEL # 3AXCART-04
R
R

ASSEMBLY
STEP 17
19/23
1. Insert assembled drawers into glides on assembled chest.
MODEL # 3AXCART-04

20/23
7
7
FURNITURE ANTI-TIPPING RESTRAINT ASSEMBLY
STEP 18
NOTE: The screwdriver is not
included in the hardware pack.
NOTE: Injuries and damage can occur from furniture tip-over. It is
important to use the safety bracket included. If the tipping restraint kit is
not in the box, please contact our customer service department in order
to obtain another kit before using the furniture.
Table of contents
Popular LCD Drawer manuals by other brands

KinAn
KinAn LC2808 user manual

Daxten
Daxten RACKACCESS 16I - installation guide

Acnodes
Acnodes RP 1170 user manual

DOMUSA
DOMUSA Bioclass ng 10 Installation and operating instructions

Crystal Image Technologies
Crystal Image Technologies RM-F117 user manual
Austin Hughes
Austin Hughes CyberView X124 user manual
