SINED SOLAR-SPIRAL Specification sheet

SOLAR COLLECTOR
SOLAR-SPIRAL – SPIRAL 1500 – SOLAR-SPIRAL
Instructions for Use and Maintenance
The photo is only indicative. The real product may appear slightly different in color.

Solar eating for swimming pool
Instructions for use
SAFETY WARNINGS
Read the instructions carefully before using the device.
CAUTION: ailure to follow the operating instructions and safety warnings may result in damage to the
equipment or injury to persons.
Carefully follow the instructions and warnings in this manual.
Do not allow children to handle or play with this appliance.
Always deactivate the pool filter system before working on the solar collector.
Do not place the collector too close to the pool: always maintain an adequate distance.
Do not use petroleum-based lubricants; petroleum will attack the plastic components of the manifold.
This appliance is not intended for use by persons (including children) with reduced sensory or mental capabilities,
or lack of experience and knowledge, unless they are supervised by a person responsible for their safety or have
received instructions on the safe use of the appliance.
Children should be supervised to ensure that they do not play with the appliance.
Operation
It is possible to heat the water of a swimming pool through its filtration system using a solar collector. The pump must
have a minimum capacity of 2 000 l/h.
The solar collector must be installed next to the pool at an angle of 30° and facing south.
The unit's extendable support feet allow it to be positioned at just the right angle.
The solar energy is stored under the transparent cover and is then released to the water in the pipe. The heat felt at
the outlet of the heating element depends on the flow velocity of the water.
Material needed
The sun is essential to operate the solar heating collector. The unit can stay on even when the sun is not shining, as it
has very little power loss when it is on.
To use the existing filter system, 32 and 38 mm pipe fittings can be used. The heating element can also be mounted on
the roof of a garden shed. Just make sure that the filter system has sufficient capacity for this height or that the filter
is designed to withstand a higher pressure (1 m height = 0.1 bar pressure). If additional pieces of pipe are inserted or
the unit is placed higher, the capacity of the pump will be reduced.
The unit should always face south. Make sure the collector is exposed to the sun throughout the day.

With the help of the extendable feet, you can set the correct angle of 30°. The same angle is recommended for
rooftop installations.
A white colored lid is included, which can be used on extremely hot days to keep the water from getting too hot.
Easy assembly
The only tool required is a screwdriver to connect the pipe to the solar collector. or ease of installation, you may
use the supplied long tubes. If more than one solar collector is to be connected, the short tubes supplied can be
used. It is recommended not to connect more than 4 collectors in series. If more collectors are required for a larger
pool, it is recommended to connect 2 or 3 rows in parallel.
The solar collector is suitable for a pool of 7.5 to 10 m3. However, this is an indicative value that depends on the
duration of radiation and the power of the sun depending on the latitude.
Easy assembly
Before proceeding with the installation, make sure that all the components listed below are present in the
package:
1) Solar collector with removable transparent cover;
2) Extensible feet on the underside to obtain a 30° inclination;
3) Long pipe (approx. 1.2 m) to connect the solar collector to the pool;
4) Short pipe to connect 2 manifolds in line;
5) n. 2 connectors for 32/38 mm connection;
6) Bag of metal clips ;
7) Rubber reducer 38/32 mm;
8) White lid;
9) Instruction manual
How to proceed
Choose a suitable place to place the solar collector;
Turn off the pump and make sure there is no more water circulating;
Install the support feet on the bottom of the manifold;
Attach the two connectors to the bottom of the solar collector;
Connect the pipes between the filter system, the solar collector and the pool.
Hose connection 32 mm: located directly on the connector. Secure it with the metal clip.

38 mm hose attachment: irst attach the 32/38 mm rubber reducer to the connector and then attach the 38 mm
hose to the connector and secure it with the metal clips.
Remove dust and dirt from the transparent cover.
Start the filter system with the water circuit open.
Check the solar collector and pipes for leaks.
The solar collector is ready to provide hot water allowing you to heat the pool at no cost.
Mounting Multiple Units
Proceed as described above using the short pipes to connect the collectors together.
Winter protection
To avoid frost damage, drain all water from the system in winter. Store the solar collector in a dry place protected
from frost.
Cleaning
Use commercially available cleaners for cleaning. Do not use cleaning agents containing solvents, abrasive cleaners
or hard sponges, brushes, etc.
Warranty
The provisions in force in the European Community apply.
SINED products have a 2-year warranty from the date of purchase against defects in materials and workmanship.
The warranty does not cover components subject to wear.
The warranty does not cover damage due to incorrect assembly, improper use and incorrect maintenance (e.g.
use of inappropriate cleaning agents).
Damage resulting from the use of non-original spare parts is not covered by the warranty.
The warranty does not cover any damage resulting from work not carried out by specialized technicians.
Damage due to frost, limescale or other impurities is not covered by the warranty.
In the presence of problems covered by the warranty, the product must be returned to the seller.
The product must be carefully packaged and complete with all its parts and accessories;
Must be described in detail the reason for return and provided proof of purchase (invoice or receipt);
Return shipping costs are the responsibility of the buyer;
The returned product will be checked by the seller and repaired or replaced at the sole discretion of the seller.
Production: Starmatrix Group Inc.
Address: 253 Mengxi Road
Zhenjiang, Jiangsu, CHINA
Made in China Imported in Italy by M.P.C. srl Via Tortona 21 Milano 20144 Italy Tel +39 02 47758004
e-mail [email protected] website www.sinedtechnology.com
The SINED trademark and the SINED logo are registered by SINED VENTAS ONLINE S.L.U. EUTM 018196373
This manual suits for next models
1
Table of contents
Popular Inverter manuals by other brands
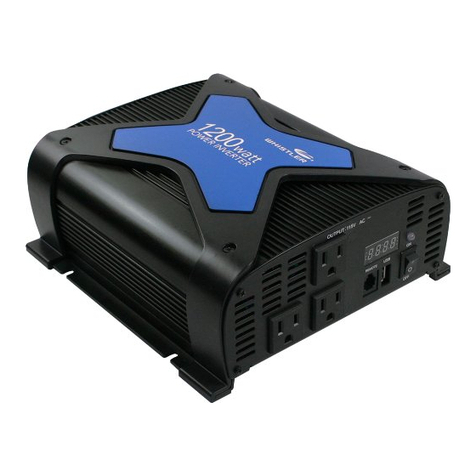
Whistler
Whistler Pro-1200W owner's manual

DSPM
DSPM Defender Micro Maintenance manual
SunSynk
SunSynk SUN-3.6K-SG01/03LP1-EU Installer manual
Mitsubishi Electric
Mitsubishi Electric FR-CS84-295-60 instruction manual

Shenzhen Huangjintai Electronic
Shenzhen Huangjintai Electronic NK-GP600 user manual
Huawei
Huawei SUN2000-3.8KTL-USL0 quick guide

Parkside
Parkside PS 2900 A1 Translation of the original instructions

DXPOWER
DXPOWER DXM 300 user manual
Turbo Energy
Turbo Energy SUNBOX 5.0 Series instruction manual
Wasserstein
Wasserstein Noorio Spotlight Cam B210 user manual

Unitest
Unitest KERBEROS POWER 6000.B user manual
SolaX Power
SolaX Power X1 Series Quick installation guide
