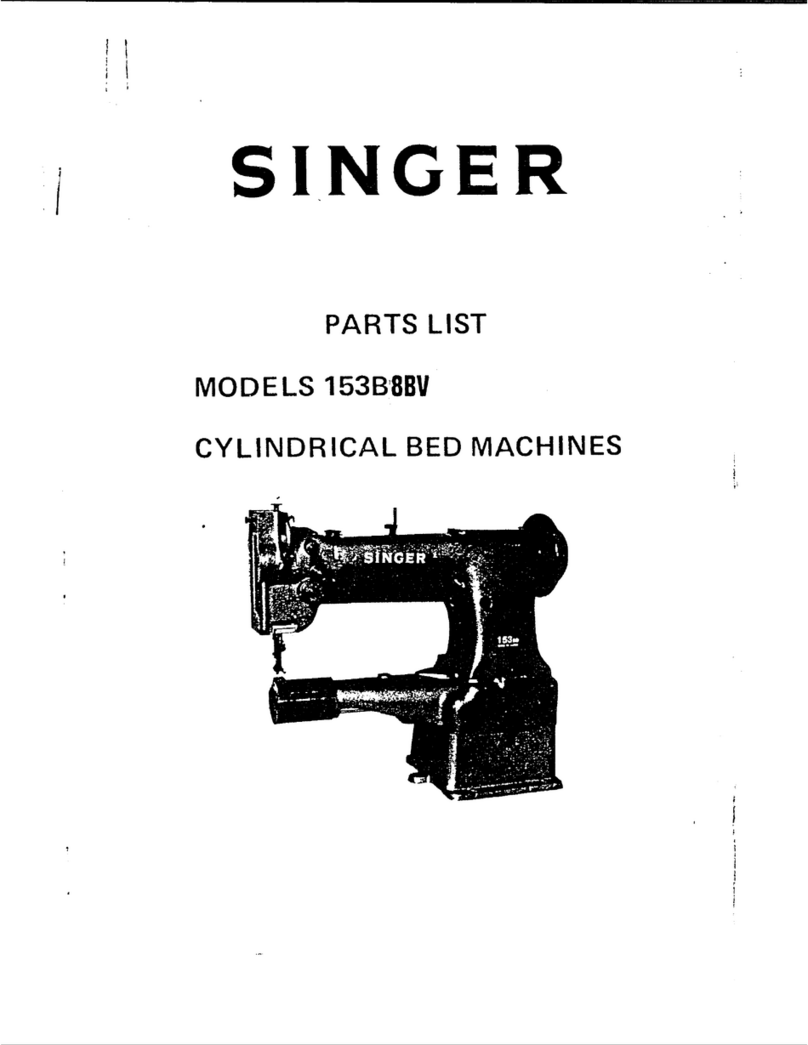
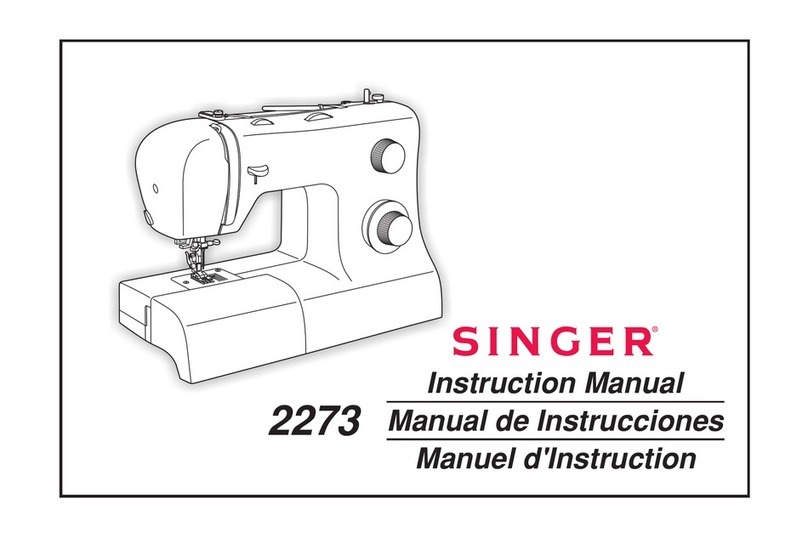
Singer 7285Q User manual

INSTRUCTION MANUAL
MANUEL D’INSTRUCTION
MANUAL DE INSTRUCCIONES
7285Q

“IMPORTANT SAFETY INSTRUCTIONS”
“WARNING
-
7RUHGXFHWKHULVNRIEXUQV¿UHHOHFWULFVKRFNRULQMXU\WRSHUVRQV´
1. “Do not allow to be used as a toy. Close attention is necessary when this sewing machine is used by or near children.”
2. “This appliance is not intended for use by persons (including children) with reduced physical, sensory or mental capabilities,
or lack of experience and knowledge, unless they have been given supervision or instruction concerning use of the appliance
by a person responsible for their safety. Children should be supervised to ensure that they do not play with the appliance.”
3. “Use this sewing machine only for its intended use as described in this manual. Use only attachments recommended by the
manufacturer as contained in this manual.”
4. “Never operate this sewing machine if it has a damaged cord or plug, if it is not working properly, if it has been dropped
or damaged, or dropped into water. Return the sewing machine to the nearest authorized dealer or service center for
examination, repair, electrical or mechanical adjustment.”
³,IWKHVXSSO\FRUGLVGDPDJHGLWPXVWEHUHSODFHGE\WKHPDQXIDFWXUHULWVVHUYLFHDJHQWRUVLPLODUO\TXDOL¿HGSHUVRQVLQ
order to avoid a hazard.”
6. “Never operate the sewing machine with any air openings blocked. Keep ventilation openings of the sewing machine and foot
control free from the accumulation of lint, dust, and loose cloth.”
7. “Never drop or insert any object into any opening.”
8. “Indoors use only.”
9. “Do not operate where aerosol (spray) products are being used or where oxygen is being administered.”
10. “To disconnect, turn switch to the off („0“) position, then remove plug from outlet.”
11. “Switch off or unplug the appliance when leaving it unattended, unplug the appliance before carrying out maintenance or
replacing lamps.”
12. “Do not unplug by pulling on cord. To unplug, grasp the plug, not the cord.”
³.HHS¿QJHUVDZD\IURPDOOPRYLQJSDUWV6SHFLDOFDUHLVUHTXLUHGDURXQGWKHVHZLQJPDFKLQHQHHGOH´
14. “Never sew with a damaged needle plate as this can cause needle to break.”
15. “Do not use bent needles.”
³'RQRWSXOORUSXVKIDEULFZKLOHVWLWFKLQJ,WPD\GHÀHFWWKHQHHGOHFDXVLQJLWWREUHDN´
17. “Switch the sewing machine off (“0”) when making any adjustments in the needle area, such as threading needle, changing
needle, threading bobbin, or changing presser foot, etc.”
18. “Always unplug sewing machine from the electrical outlet when removing covers, lubricating, or when making any other user
servicing adjustments mentioned in the instruction manual.”
19. “To avoid electrical shock never put the machine nor the mains cable or mains plug into water or other liquids.”
20. “The LED lamp maximum power is 0.3w, maximum voltage is DC 5v, if the LED lamp is damaged, you should not use the
product and send it to the manufacture or service agent to repair or replace at once.”
21. “Attention the following to avoid injury:
- Unplug the foot controller of the appliance when leaving it unattended:
- Unplug the foot controller of the appliance before carrying out any maintenance.”
“SAVE THESE INSTRUCTIONS”
“This product is for household use, or equivalent.”
“When using an electrical appliance, basic safety precautions should always be followed, including the following.”
“Read all instructions before using this sewing machine.”
“DANGER
-
-To reduce the risk of electric shock:”
1. “This sewing machine should never be left unattended when plugged in. Always unplug this sewing machine from the electric
outlet immediately after using and before cleaning.”
FOOT CONTROL (USA & Canada only)
Use Model YC-485 EC or Model JF-1000 with this sewing machine.
POLARIZED PLUGS CAUTION (USA & Canada only)
This appliance has a polarized plug (one blade wider than the other). To reduce the risk of electric shock, this plug is intended
WR¿WLQDSRODUL]HGRXWOHWRQO\RQHZD\,IWKHSOXJGRHVQRW¿WIXOO\LQWKHRXWOHWUHYHUVHWKHSOXJ,ILWVWLOOGRHVQRW¿WFRQWDFWD
TXDOL¿HGHOHFWULFLDQWRLQVWDOOWKHSURSHURXWOHW'RQRWPRGLI\WKHSOXJLQDQ\ZD\
“CAUTION
-
- 0RYLQJSDUWV7RUHGXFHULVN RI LQMXU\ VZLWFKRIIEHIRUHVHUYLFLQJ&ORVHFRYHUEHIRUHRSHUDWLQJ
machine.”
This appliance complies with EEC Directive 2004/108/EC covering the electromagnetic compatibility.
Please note that on disposal, this product must be safely recycled in accordance with relevant National legislation
relating to electrical/ electronic products. If in doubt please contact your retailer for guidance.
6,1*(5LVWKHH[FOXVLYHWUDGHPDUNRI7KH6LQJHU&RPSDQ\/LPLWHG6jUORULWV$I¿OLDWHV
7KH6LQJHU&RPSDQ\/LPLWHG6jUORULWV$I¿OLDWHV$OOULJKWVUHVHUYHG

1
1. Un appareil ne devrait jamais être laissé sans surveillance lorsqu’il est branché.
Débranchez toujours l’appareil de la prise externe de courant immédiatement après usage et avant le nettoyage.
Lorsqu’un appareil électrique est en usage, il faut toujours observer certaines mesures élémentaires de sécurité y compris les suivantes.
Lire les instructions en entier avant d’utiliser cette machine à coudre.
DANGER
-
MESURES DE SÉCURITÉ IMPORTANTES
MISE EN GARDE
-
1. “Cet appareil ne doit pas être utilisé comme un jouet. Une stricte surveillance doit être exercée lorsque l’appareil est en usage
par ou près des entants.”
2. “Cet appareil n’est pas destiné à être utilisé par des personnes (enfants compris) avec réduction des handicaps physiques,
sensoriels ou mentaux de capacités ou de manque d’expérience et des connaissances, à moins qu’ils n’aient été donnée de
surveillance ou d’instructions concernant l’utilisation de l’appareil par une personne responsable de leur sécurité. Les enfants
GRLYHQWrWUHVXUYHLOOpVD¿QGHV¶DVVXUHUTX¶LOVQHMRXHQWSDVDYHFO¶DSSDUHLO´
3. “N’utilisez cet appareil qu’aux fins mentionnées dans ce manuel. N’utilisez que les accessoires recommandés par le
manufacturier tel qu’indiqué dans ce manuel.”
4. “N’utilisez jamais cet appareil si le cordon ou la fiche sont endommagés, si l’appareil fait défaut, s’il a été échappé ou
endommagé ou immergé. Retournez cet appareil au concessionnaire autorisé ou centre de réparations pour examen.
Réparation réglage électrique ou mécanique.”
5. “Si le cordon d’alimentation est endommagé, il doit être remplacé par le constructeur, les personnes de son agent de service
RXGHPrPHTXDOL¿FDWLRQD¿QG¶pYLWHUXQGDQJHU´
6. “N’utilisez jamais l’appareil lorsque les ventilateurs sont obstrués. Gardez les ventilateurs de la machine à coudre et du
rhéostat libres de mousse, poussière ou de tissu.”
7. “Gardez les doigts loin des pièces en mouvement spécialement autour de l’aiguille de la machine à coudre.”
8. “Usage intérieur seulement.”
9. “N’utilisez jamais d’aiguilles gauchies.”
10. “Ne tirez ni ne poussez le tissu pendant que vous cousez. Ceci peut faire dévier l’aiguille et la briser.”
11. “Éteignez ou débranchez l’appareil quand il laisse sans surveillance, débranchez l’appareil avant d’effectuer l’entretien ou le
remplacement des lampes.”
³$UUrWH]³´ODPDFKLQHjFRXGUHORUVTXHYRXVIDLWHVGHVUpJODJHVjO¶DLJXLOOHHQ¿ODJHFKDQJHPHQW
HQ¿ODJHGHFDQHWWHRXFKDQJHPHQWGHSLHGSUHVVHXUHWF´
13. “Débranchez toujours la machine de la prise externe de courant lorsque vous retirez les couvercles,
HIIHFWXH]ODOXEUL¿FDWLRQRXWRXWDXWUHHQWUHWLHQPHQWLRQQpGDQVOHPDQXHOG¶LQVWUXFWLRQV´
14. “N’insérez ni ne laissez tomber aucun objet dans aucune ouverture.”
15. “N’utilisez pas en plein air.”
16. “N’utilisez pas où des produits en aérosol sont en usage ni où est administré de l’oxygene.”
17. “Pour débrancher, tournez tous les réglages en position d’arrêt (“0”), puis débranchez la prise externe de courant.”
³1HGpEUDQFKH]SDVHQWLUDQWOHFRUGRQ3RXUGpEUDQFKHUVDLVLVVH]OD¿FKHQRQSDVOHFRUGRQ´
19. “Pour éviter un choc électrique ne jamais mettre la machine ou le câble d’alimentation ou prise d’alimentation en eau ou autres liquides.”
20. “Le voyant d’alimentation maximale de la lampe est 0,3 W, tension maximale est de DC 5V, si la lampe LED est endommagée,
vous ne devriez pas utiliser le produit et l’envoyer à la fabrication ou l’agent de service pour réparer ou remplacer à la fois.”
21. “Attention ce qui suit pour éviter les blessures:
- Débranchez le contrôleur de pied de l’appareil lorsque vous le laissez sans surveillance:
- Débranchez le contrôleur de pied de l’appareil avant d’effectuer l’entretien.”
“PRECAUTION
-
3LqFHVHQPRXYHPHQW$¿QGH UpGXLUHWRXWULVTXH GHEOHVVXUHpWHLJQH]HW GpEUDQFKH]
le cable électrique avant d’éffectuer toute intervention de maintenance sur la machine.
Fermez le carter avant d’utiliser la machine.”
CONSERVEZ CES INSTRUCTIONS
Cette machine à coudre est couçue pour usage domestique seulement.
Pour réduire le risque de brûlures, de feu, de décharge électrique ou de
blessures personnelles:
Pour réduire le risque de décharge électrique:
RHÉOSTAT (Etats-Unis et canada seulement)
Avec cette machine à coudre, utilisez le modèle YC-485 EC ou JF-1000.
Cet appareil est conforme à la directive CEE 2004/108/EC concernant les normes
électromagnétiques.
INFORMATIONS CONCERNANT LES FICHES POLARISÉES (Etats-Unis et canada seulement)
Cet appareil est équipé d'une fiche polarisée (une lame est plus large que I’autre). Pour réduire les risques de décharge
pOHFWULTXHFHWWH¿FKHQHSHXWrWUHEUDQFKpHGDQVODSULVHTXHG¶XQHVHXOHIDoRQ6LOD¿FKHQHSHXWSDVrWUHLQVpUpHHQWLqUHPHQW
GDQVODSULVHWRXUQH]OD¿FKH6LOD¿FKHQHSHXWWRXMRXUVSDVHQWUHUGDQVODSULVHYHXLOOH]FRQWDFWHUXQpOHFWULFLHQTXDOL¿pD¿Q
TXLOYRXVLQVWDOOHODSULVHPXUDOHDSSURSULpH1HPRGL¿H]OD¿FKHHQDXFXQFDV
9HXLOOH]QRWHUTX¶HQFDVGHGHVWUXFWLRQFHSURGXLWGRLWEpQp¿FLHUG¶XQUHF\FODJHVpFXULVpFRQIRUPHjODOpJLVODWLRQ
nationale applicable aux produits électriques/électroniques. En cas de doute, veuillez contacter votre distributeur
agréé.
6,1*(5HVWXQHPDUTXHH[FOXVLYHGH7KH6LQJHU&RPSDQ\/LPLWHG6jUORXGHVHV$I¿OLpV
7KH6LQJHU&RPSDQ\/LPLWHG6jUORXGHVHV$I¿OLpV7RXVGURLWVUpVHUYpV

2
IMPORTANTES INSTRUCCIONES DE SEGURIDAD
Cuando se usa un aparato eléctrico, debe seguirse unas precauciones básicas y que vienen incluidas a continuación.
“Leer las instrucciones antes de usar la máquina de coser.”
PELIGRO
-
Para reducir el riesgo de una descarga eléctrica.-
1. La máquina no debe dejarse nunca desatendida mientras esté conectada. Desconectar la máquina de la red eléctrica
inmediatamente después de su uso y antes de limpiarla.
CUIDADO
-
Para reducir el riesgo de quemaduras, fuego, descargas eléctricas o causar daños a personas.
1. “No usar la máquina como un juguete.”
Prestar atención si fuese necesario cuando la máquina está siendo usada por niños o cerca de ellos.
2. “Este aparato no está destinado al uso por personas (incluyendo niños) con una reducción de física, sensorial o mental,
capacidad, o falta de experiencia y el conocimiento, a menos que se les ha dado la supervisión o las instrucciones de
utilización del aparato por una persona responsable de su seguridad. Los niños deben ser supervisados para asegurarse de
que no juegan con el aparato.”
3. “Usar la máquina de coser solamente como se describe en este manual.
8VDU~QLFDPHQWHORVDFFHVRULRVUHFRPHQGDGRVSRUHOIDEULFDQWH\TXHYLHQHQHVSHFL¿FDGRVHQHVWHPDQXDO´
4. “No trabajar nunca con la máquina en caso de que tenga el cable o el enchufe en malas condiciones, si no cose
correctamente, en caso de que se haya caído, haya sido dañada o se haya mojado.”
5. “Si se daña el cable de suministro, debe ser sustituido por el fabricante, su agente de servicio o similares a personas
FDOL¿FDGDVD¿QGHHYLWDUXQSHOLJUR´
³1RXVDUODPiTXLQDFRQORVRUL¿FLRVGHYHQWLODFLyQEORTXHDGRV0DQWHQHUORVRUL¿FLRVGHYHQWLODFLyQGHODPiTXLQDGHFRVHU
y el pedal sin acumulación de polvo, suciedad y restos de tejido.”
³1RLQWURGXFLUQRLQVHUWDUREMHWRVHQORVRUL¿FLRVGHYHQWLODFLyQ´
8. “Adentro uso solamente.”
9. “No usar mientras se estén utilizando productos aerosoles (spray) o en lugares donde se esté administrando oxigeno.”
10. “Para desconectar, girar el interruptor hasta la posición Off ( “0” ), luego desconectar el enchufe de la red.”
11. “Apague o desconecte el aparato cuando no lo use, desconecte el aparato antes de llevar a cabo el mantenimiento o
sustitución de las lámparas.”
12. “No desconectar el enchufe tirando del cable. Para desconectar, tirar de la clavija, no del cable.”
³0DQWHQHUORVGHGRVDOHMDGRVGHWRGDVODVSDUWHVPRYLEOHVGHODPiTXLQD7HQHUXQFXLGDGRHVSHFLDOFRQODDJXMD´
14. “Usar siempre la placa de agujas apropiada. Una placa de agujas impropia puede producir la rotura de la aguja.”
15. “No usar agujas despuntadas.”
16. “No presionar ni tirar del tejido mientras se está cosiendo. Esto podría doblar la aguja y romperla.”
17. “Situar el interruptor principal de la máquina en posición Off ( “0” ) cuando se realice algún ajuste en el área de la aguja como
enhebrar la aguja, cambiar la aguja, cambiar la canilla, cambiar el pie prensatelas y similares.”
18. “Desconectar siempre la máquina de la red eléctrica cuando se retiren las tapas, para lubricar, o cuando se realice algún otro
tipo de ajuste mecánico mencionado en el manual de instrucciones.”
19. “Para evitar descargas eléctricas, no ponga la máquina ni el cable o enchufe en agua u otros líquidos.”
20. “La lámpara LED de potencia máxima es 0,3 W, la tensión máxima es de DC 5V, si se daña la lámpara LED, que no debe
usar el producto y enviarlo a la fabricación o el agente de servicio para reparar o reemplazar a la vez.”
21. “Atención los siguientes campos para evitar lesiones:
- Desconecte el pedal del aparato cuando no lo use:
- Desconecte el pedal del aparato antes de realizar cualquier tipo de mantenimiento.”
PARTES MÓVILES
-
Para reducir el riesgo de daños personales, apague y desconecte antes de
cualquier mantenimiento. Cierre la tapa antes de utilizar la máquina.
CONSERVE ESTE MANUAL DE INSTRUCCIONES
Esta máquina de coser es para uso doméstico
PEDAL (sólo EE.UU. y Canadá)
Use el modelo YC-485 EC o JF-1000 con esta máquina de coser.
Este instrumento se conforma con directivo de CEE 2004/108/EC cubriendo supresión contra
interferencia de radio.
INFORMACIÓN REFERENTE AL ENCHUFE POLARIZADO (sólo EE.UU. y Canadá)
Este electrodoméstico está equipado con un enchufe polarizado (note que una patita es más ancha que la otra). Para reducir el
riesgo de choques eléctricos, este enchufe solamente puede ser usado en una toma de corriente polarizada. Si no puede insertar el
enchufe completamente en la toma de corriente, déle la vuelta e inténtelo de nuevo. Si el enchufe no entra todavía correctamente,
FRQWUDWHDXQHOHFWULFLVWDFDOL¿FDGRSDUDTXHOHLQVWDOHODWRPDGHFRUULHQWHDGHFXDGD1RLQWHQWHPRGL¿FDUHOHQFKXIH
6,1*(5HVXQDPDUFDUHJLVWUDGDGH³7KH6LQJHU&RPSDQ\/LPLWHG6jUO´RVXV$¿OLDGDV
7KH6LQJHU&RPSDQ\/LPLWHG6jUORVXV$¿OLDGDV7RGRVORVGHUHFKRVUHVHUYDGRV
Por favor, recuerde que estos productos deben ser reciclados de acuerdo con la legislación nacional
referente a productos eléctricos y electrónicos. Si tiene alguna duda al respecto, por favor contacte con el
distribuidor.
3
1. KNOWING YOUR SEWING MACHINE
0DFKLQHLGHQWL¿FDWLRQ------------------------------------------------6 - 7
Accessories -------------------------------------------------------------8 - 9
Setting up your machine -----------------------------------------10 - 11
Spool pins, Presser foot lifter ---------------------------------- 12 - 13
Darning plate ------------------------------------------------------- 12 - 13
Converting to free-arm sewing -------------------------------- 14 - 15
Large extension table -------------------------------------------- 14 - 15
Winding the bobbin ----------------------------------------------- 16 - 17
Threading the bobbin thread ----------------------------------- 18 - 19
Threading the top thread ---------------------------------------- 20 - 23
Using automatic needle threader
Picking up bobbin thread ---------------------------------------- 24 - 25
Needle, thread and fabric chart ------------------------------- 26 - 27
Adjusting top thread tension ----------------------------------- 28 - 29
Changing presser foot ------------------------------------------- 28 - 29
Functions of control panel -------------------------------------- 30 - 33
Operation buttons ------------------------------------------------- 34 - 37
2. STARTING TO SEW
Quick reference table of stitch length and width ---------- 38 - 41
Straight stitching -------------------------------------------------- 42 - 45
Keeping seams straight
Straight stitch with auto tie-off function ---------------------- 44 - 45
Inserting zippers and piping
Zigzag stitching ---------------------------------------------------- 46 - 47
Adjusting stitch width and length, Satin stitch
Placement of patterns
Blindhem stitch ---------------------------------------------------- 48 - 49
TABLE OF CONTENTS
0XOWLVWLWFK]LJ]DJ6KHOOVWLWFK --------------------------------- 50 - 51
Sewing on a button ----------------------------------------------- 50 - 51
Decorative and stretch stitches -------------------------------- 52 - 61
Straight stretch stitch, Honeycomb stitch, Overedge stitch,
Feather stitch, Ric-rac stitch, Double overlock stitch,
Criss-cross stitch, Entredeux stitch, Ladder
stitch,
Pin stitch, Blanket stitch, Slant pin stitch,
Slant overedge stitch, Crossed stitch, Chevron stitch,
Greek key stitch, Edge-joining stitch,
Fishbone stitch, Thorn stitch,
Reinforced overedge stitch, Wizard stitch
0RUHGHFRUDWLYHVWLWFKHVLGHDVIRU
decorative machine stitching ----------------------------------- 62 - 63
Buttonhole making ------------------------------------------------ 64 - 69
Automatic buttonhole, Corded buttonholes,
0DQXDOEXWWRQKROH
3. CARING FOR YOUR MACHINE
Cleaning hook area and feed dogs --------------------------- 70 - 71
4. OTHER INFORMATION
Satin stitch foot, Twin needle ----------------------------------- 72 - 73
Straight stitch needle position --------------------------------- 74 - 75
5.
SPECIAL ACCESSORIES ------------------------------ 76 - 79
1/4” Foot, Overcasting foot,
'DUQLQJHPEURLGHU\IRRW*DWKHULQJIRRW
Rolled hem foot
6.
PERFORMANCE CHECKLIST ----------------------- 80 - 81
Dimensions: 376 mm × 197 mm × 301 mm
0DVVRIWKHHTXLSPHQWNJ
Rated Voltage: 230 V ~
Rated Frequency: 50 Hz
Rated input: 65 W
Using ambient temperature: Normal temperature
Acoustic noise level: less than 70 db(A)
For European version

4
Version pour l’Europe
1. VOTRE MACHINE À COUDRE
Description de la machine ------------------------------------------6 - 7
Accessoires -------------------------------------------------------------8 - 9
Préparation de la machine ---------------------------------------10 - 11
Porte-bobine, Levier du pied presseur ----------------------- 12 - 13
Plaque de reprisage ---------------------------------------------- 12 - 13
Utilisation du bras libre ------------------------------------------ 14 - 15
Plateau de rallonge ----------------------------------------------- 14 - 15
Préparation de la canette --------------------------------------- 16 - 17
(Q¿ODJHGX¿OGHFDQHWWH---------------------------------------- 18 - 19
(Q¿ODJHGX¿OVXSpULHXU ----------------------------------------- 20 - 23
8WLOLVDWLRQGHO¶HQ¿OHXUGHFKDVG¶DLJXLOOH
5DSSHOGX¿OLQIpULHXU -------------------------------------------- 24 - 25
7DEOHDXGHVDLJXLOOHV¿OVHWWLVVXV---------------------------- 26 - 27
5pJODJHGHODWHQVLRQGX¿OVXSpULHXU ----------------------- 28 - 29
Remplacement du pied presseur ----------------------------- 28 - 29
Fonctions du panneau de commande ----------------------- 30 - 33
Boutons de fonctionnement ------------------------------------ 34 - 37
2. COMMENCEZ À COUDRE
Tableau de référence rapide des
longueurs et largeurs de points --------------------------- 38 - 41
Point droit------------------------------------------------------------ 42 - 45
Pour garder la couture droite
Point droit avec fonction de nouage automatique--------- 44 - 45
Inserér une fermeture à glissière ou un biais (galonner)
Point zigzag -------------------------------------------------------- 46 - 47
Réglage de la largeur et de la longueur de point,
Point bourdon, Positionnement des motifs
Point invisible ------------------------------------------------------ 48 - 49
TABLE DES MATIÈRES
Zigzag multi-point, Point de lingerie -------------------------- 50 - 51
Pose de boutons -------------------------------------------------- 50 - 51
Point décoratifs et points extensibles ------------------------ 52 - 61
Point droit extensible, Point nid d’abeille,
Point surjet extensible, Point plume, Point ric rac,
Point surjet double, Point entrecroisé, Point entredeux,
Point d’échelle, Point épingle, Point languette,
Point épingle oblique, Surjet oblique, Point croisé,
Point chevron, Point grec, Point d’assemblage des rebords,
Point d’arrête, Point d’épine, Point surjet renforcé,
Point sorcier
3OXVGHSRLQWGpFRUDWLIVLGpHVSRXUODFRXWXUH
décorative à la machine ----------------------------------------- 62 - 63
Confection des boutonnières ---------------------------------- 64 - 69
Boutonnière automatique
Boutonnieres gansées (renforcées),
Boutonnière manuelle
3. ENTRETIEN DE VOTRE MACHINE
Nettoyage des griffes et du crochet -------------------------- 70 - 71
4. RENSEIGNEMENTS AUTRES
Pied pour point bourdon, Aiguille jumelée ------------------ 72 - 73
Réglage de la position d’aiguille pour le point droit ------ 74 - 75
5.
ACCESORIOS ESPECIALES ------------------------- 76 - 79
Pied d’un quart de pouce, Pied de surjet,
Pied à repriser et à broder, Pied fronceur,
Pied de Nervures
6. VÉRIFICATION DES PETITS
PROBLÈMES DE COUTURE ------------------------- 80 - 81
Dimensions: 376 mm × 197 mm × 301 mm
Poids de l’équipement: 6,7 kg
Tension nominale: 230 V ~
Fréquence nominale: 50 Hz
Entrée nominale: 65 W
Utilisation de la
température ambiante: température normale
Niveau de bruit acoustique: moins de 70 db(A)

5
Para versión europea
1. PRINCIPALES PARTES DE LA MAQUINA
,GHQWL¿FDFRyQGHODPiTXLQD --------------------------------------6 - 7
Accesorios --------------------------------------------------------------8 - 9
Preparación de la máquina --------------------------------------10 - 11
Porta carretes, Palanca pie prensatelas -------------------- 12 - 13
Placa transparente ----------------------------------------------- 12 - 13
Utilización del brazo libre --------------------------------------- 14 - 15
Base de extension ------------------------------------------------ 14 - 15
Devanado de la bobina ------------------------------------------ 16 - 17
Enhebrado del hilo de la bobina ------------------------------ 18 - 19
Enhebrado del hilo superior ------------------------------------ 20 - 23
Empleo del ensartador automático de aguja
Extracción del hilo de la bobina ------------------------------- 24 - 25
Tabla de hilo, aguja y material --------------------------------- 26 - 27
Ajuste de la tensión del hilo superior ------------------------ 28 - 29
Cambio del pie prensatelas ------------------------------------ 28 - 29
Funciones de panel de control -------------------------------- 30 - 33
Interruptores de funcionamiento ------------------------------ 34 - 37
2. EMPEZER A COSER
Cuadro de referencia rápida de largo y ancho
de puntada ------------------------------------------------------ 38 - 41
Puntada recta------------------------------------------------------- 42 - 45
0DQWHQLHQGRODSXQWDGDGHUHFKD
Puntada recta con función de remate automático -------- 44 - 45
Colocación de cierres y vivo
Puntada zig-zag --------------------------------------------------- 46 - 47
Ajuste del ancho y largo de puntada, Puntada de relleno,
Ubicacion de los patrones
Puntada invisible -------------------------------------------------- 48 - 49
INDICE DE CONTENIDOS
Zig-zag de tres puntadas, Puntada de lencería ----------- 50 - 51
Cosido de botones ------------------------------------------------ 50 - 51
Puntadas decorativas y elásticas ----------------------------- 52 - 61
Puntada recta triple, Puntada panal, Puntada sobre-orillado,
Puntada pluma, Puntada ric rac, Puntada obrlock doble,
Puntada entrecruz, Puntada “Entredos”,
Puntada en escalera, Puntada de broche, Puntada de ribete,
3XQWDGDDO¿OHULQFOLQDGR3XQWDGDRYHUORFNLQFOLQDGR
Puntada cruzada, Puntada chevron, Puntada llave griega,
Puntada une-orillas, Puntada raspa, Puntada “Herringbone”,
Puntada sobre-borde reforzado, Puntada mago
0DVSXQWDGDVGHFRUDWLYDVHLGHDVSDUDGHFRUDUVXV
manualidades ------------------------------------------------------ 62 - 63
Confección de ojales --------------------------------------------- 64 - 69
Ojales automaticos, Ojales con cordón,
Ojal manual
3. CUIDE SU MAQUINA
Limpiar el area del transportador y la lanzadera ---------- 70 - 71
4. INFORMACIÓN ADICIONAL
Pie prensatelas para coser en satén ------------------------- 72 - 73
Aplicacion de dos aguja doble --------------------------------- 72 - 73
Ajuste de posición de aguja para puntada recta ---------- 74 - 75
5.
ACCESORIOS ESPECIALES ------------------------- 76 - 79
Pie de 1/4 de pulgada, Pie para sobrehilado,
Pie para bordado y zurcido, Pie para Fruncidos,
Pie para dobladillo angosto
6. CUADRO DE VERIFICACION DE
RENDIMIENTO ---------------------------------------------- 84 - 85
Dimensiones: 376 mm × 197 mm × 301 mm
Peso del equipo: 6,7 kg
Voltaje nominal: 230 V ~
Frecuencia nominal: 50 Hz
Consumo nominal: 65 W
Uso de temperatura ambiente: temperatura normal
Nivel de ruido acústico: menos de 70db(A)

6
2
1. Bobbin winding tension disk
2. Thread take-up
3. Thread tension control
4. Face cover
5. Thread cutter
6. Removable extension table/
Accessory box
7. Bobbin winder shaft
8. Bobbin winder stop
9. Sewing speed control
10. Pattern number reference guide
11. Operation buttons
12. Horizontal spool pin
13. Handle
14. Hand wheel
15. Power/light switch
16. Cord socket
,GHQWL¿FDWLRQSODWH
18. Presser foot lifter
19. Buttonhole lever
20. Thread guide
21. Automatic needle threader
22. Thread guide
23. Thread guide
24. Presser foot screw
25. Needle
26. Bobbin cover plate
27. Needle bar
28. Thread cutter
29. Foot release lever
30. Needle clamp screw
31. Presser foot
32. Feed dogs
33. Needle plate
34. Bobbin cover release button
35. Large extension table
36. Power line cord
37. Foot control
38. Instruction manual
1. KNOWING YOUR SEWING MACHINE
MACHINE IDENTIFICATION 1
3
4
5
6
7
8
9
13
15
14
12
21
22
23
24
25
26
28
29
11
31
33
34
17
32
18 19
16
27
20
36 37 38
10
30
35

7
DESCRIPTION DE LA MACHINE
1. VOTRE MACHINE À COUDRE
IDENTIFICACOÓN DE LA MÁQUINA
1. PRINCIPALES PARTES DE LA
MAQUINA
1. Disque de tension du bobineur
5HOHYHXUGH¿O
5pJODJHWHQVLRQGX¿OVXSpULHXU
4. Plaque frontale
&RXSH¿O
6. Boîte à accessoires/Table de rallonge
7. Axe du bobineur
8. Butée d’arrêt du bobinage
9. Régulateur de vitesse
10. Guide de référence des points
11. Bouton d’opération
12. Porte-bobine horizontal
13. Poignée
14. Volant
15. Interrupteur/Lumière
16. Prise de cordon
3ODTXHG¶LGHQWL¿FDWLRQ
18. Levier du pied de biche
19. Levier-poussoir boutonnière
*XLGH¿O
(Q¿OHXUGHFKDVG¶DLJXLOOH
*XLGH¿O
*XLGH¿O
24. Vis du pied
25. Aiguille
26. Couvercle canette
27. Barre à aiguille
&RXSH¿O
29. Levier de verrouillage du pied
30. Vis de l’aiguille
31. Pied presseur zigzag
32. Griffe d’entraînement
33. Plaque-aiguille
34. Bouton du couvercle canette
35. Grand plateau de rallonge
36. Cordon
37. Rhéostat
0DQXHOG¶LQVWUXFWLRQ
1. Disco de tensión de bobina
2. Tira hilos
3. Control tensión hilo
4. Cubierta frontal
5. Cortador de hilo
6. Caja de accesorios
7. Eje devanador de la bobina
8. Tope devanador de la bobina
9. Control de velocidad de costura
10. Guía de referencia del número de puntada
11. Botones de Operación
12. Portacarrete horizontal
13. Asa para transportar
14. Volante
15. Interruptor corriente/luz
16. Conector del cable
3ODFDGHLGHQWL¿FDFLyQ
18. Palanca pie prensatelas
19. Palanca para ojales
20. Guía hilo
21. Ensartador automático de aguja
22. Guía hilo
23. Guía hilo
24. Tornillo pie prensatelas
25. Aguja
26. Placa transparente
27. Barra de aguja
28. Cortador de hilo
29. Palanca de desprendimiento prensatelas
30. Tornillo de sujeción aguja
31. Pie prensatelas
32. Impelentes
33. Placa aguja
34. Botón de apertura de placa transparente
0HVD([WHQVRUD
36. Cordón de la linea eléctrica
37. Control por pedal
0DQXDOGHLQVWUXFFLRQHV

8
ACCESSORIES
1. Needles
2. Bobbins (4 total - 1 in machine)
3. Auxiliary spool pin
4. Spool pin felt discs (2)
6. Spool pin cap (small)
7. Spool pin cap (large)
8. Buttonhole opener/Seam Ripper and Brush
9. Screwdriver for needle plate
10. Darning plate
11. Zipper foot
12. Satin stitch foot
13. Blind stitch foot
14. Buttonhole foot
15. 1/4” Foot
16. Overcasting foot
'DUQLQJHPEURLGHU\IRRW
18. Gathering foot
19. Rolled hem foot
20. Even feed / walking foot
567
231
8
4
910 11 12
13
17 18 19 20
14 15 16
The Foot that comes on your Sewing
machine is called the General Purpose Foot
and will be used for the majority of your
sewing.
The Satin Foot (12) is another very useful
foot and should be used for most decorative
sewing.
When purchasing additional bobbins, be
sure they are Class I5 J.

9
ACCESSOIRES
1. Aiguilles
2. Canettes (total 4 - 1 dans la machine)
3. Porte-bobine auxiliaire
4. Rondelle feutre
5. Chapeau pour mini bobine
6. Chapeau pour petite bobine
7. Chapeau pour grande bobine
8. Ouverture de boutonnière/Pinceau/Déchire-surjet
9. Tournevis pour plaque aiguille
10. Plaque de reprisage
11. Pied fermeture glissière
12. Pied pour point bourdon
13. Pied point invisible
14. Pied boutonnière
15. Pied d’un quart de pouce
16. Pied de surjet
17. Pied à repriser et à broder
18. Pied fronceur
19. Pied de Nervures
20. Pied double entraînement
ACCESORIOS
1. Agujas
2. Bobinas (4 total – 1 en máquina)
3. Porta carrete adicional
4. Fieltros
5. Sujetador de hilo (mini)
6. Sujetador de hilo (pequeño)
7. Sujetador de hilo (grande)
8. Descocedor y brocha
9. Desarmador para placa de aguja
10. Placa transparente
11. Prensatelas para cierres
12. Pie prensatelas para coser en satén
13. Prensatelas de puntada invisible
14. Prensatelas de ojales
15. Pie de 1/4 de pulgada
16. Pie para sobrehilado
17. Pie para bordado y zurcido
18. Pie para Fruncidos
19. Pie para dobladillo angosto
20. Prensatelas de avance simultáneo
Le pied qui accompagne votre machine à
coudre est appelé le pied universel et est
utilisé pour la plus grande partie de vos
travaux de couture.
El prensatelas que viene con la máquina de
coser se llama pie prensatelas universal y
será usado para la mayoría de sus costuras.
Le pied pour point bourdon (12) est un autre
pied fort utile, et doit être utilisé pour la
plupart des points décoratifs.
El prensatelas para coser en satén (12) es
otro prensatelas muy útil y debe ser usado
para costura de puntadas decorativas.
Si vous achetez des canettes, chercher que
la classe 15 J. Cuándo compre bobinas adicionales este
segura que sean clase 15 J.

10
Power/light switch “OFF”
Interrupteur moteur/lumière “OFF”
Interruptor corriente/luz “OFF”
Power/light switch “ON”
Interrupteur moteur/lumière “ON”
Interruptor corriente/luz “ON”
POWER/LIGHT SWITCH
Your machine will not operate until the
power/light switch is turned on. The same
switch controls both the power and the light.
When servicing the machine, or changing
needles, etc., machine must be disconnected
from the power supply.
Always disconnect the machine from power
supply by removing the plug from the wall-outlet.
1
13
0achine socket
Connecteur de la machine
Conector de la máquina
2
2
SETTING UP YOUR MACHINE
%HVXUHWRZLSHRIIDQ\H[FHVVRLOIURPQHHGOHSODWHDUHDEHIRUHXVLQJ\RXUPDFKLQHWKH¿UVWWLPH
WHEN USING POWER LINE CORD ONLY
Connect the plug of the power line cord into the cord socket (1)
and your wall outlet (2) as illustrated (A).
A B
WHEN USING POWER LINE CORD AND FOOT
CONTROL
Connect the plug of the power line cord into the cord socket (1)
and your wall outlet (2) as illustrated (B).
Connect the foot control plug into the machine socket (3).
NOTE: This machine can be used either with or without foot control.
Set power/light switch at “OFF”
0HWWH]O¶LQWHUUXSWHXUPRWHXUOXPLqUHVXU³2))´
Poner el Interruptor de corriente/luz de velocidad en “OFF”
Power line cord
Cordon
Cordón de la linea eléctrica
Foot control
Rhéostat
Control por pedal
Pin plug
Butée
Pasador
0HWWH]O¶LQWHUUXSWHXUPRWHXU
lumière sur “OFF”
Poner el Interruptor de corriente/
luz de velocidad en “OFF”
Set power/light switch at “OFF”
Power line cord
Cordon
Cordón de la linea eléctrica

11
PRÉPARATION DE LA MACHINE
Assurez-vous d’essuyer tout surplus d’huile autour de la
plaque à aiguille, avant d’utiliser votre machine pour la
première fois.
PRÉPARACION DE LA MÁQUINA
Asegúrese de limpiar cualquier sobrante de aceite del área de
la placa aguja antes de usar su máquina por primera vez.
INTERRUPTEUR MOTEUR ET LUMIÈRE
Votre machine est équipée d’un interrupteur unique moteur/
lumière. Vous piquez donc constamment avec votre travail
éclairé.
INTERRUPTOR CORRIENTE/LUZ
La máquina no funcionará hasta que se conecte el interruptor
de corriente/luz. El mismo interruptor controla la corriente
y la luz. Cuando se está utilizando la máquina, o se están
cambiando agujas o bobinas, etc., la máquina se debe
desconectar de los suministros principales.
Siempre desconecte la máquina de la fuente
de alimentación retirando el enchufe del
tomacorriente de la pared.
Débranchez toujours. La machine de
O¶DOLPHQWDWLRQpOHFWULTXHHQUHWLUDQWOD¿FKHGHOD
prise murale.
Note: Cette machine fonctionne avec ou sans
rhéostat.
NOTA: Esta máquina puede usarse con o sin pedal.
EN UTILISANT UNIQUEMENT LA FICHE ÉLECTRIQUE.
Brancher la fiche du cordon électrique dans la prise de la
machine (1) et dans la prise électrique murale(2) comme
indiqué (A).
CUANDO SE USE EL CORDÓN DE LA LÍNEA
ELÉCTRICA SOLAMENTE
Conecte el cordón de la línea eléctrica a la máquina (1) y
el enchufe a la alimentación de corriente en la pared (2) tal
como se ve en la ilustración (A).
EN UTILISANT LA FICHE ÉLECTRIQUE ET LE
RHÉOSTAT.
Brancher la fiche du cordon électrique dans la prise de la
machine (1) et dans la prise électrique murale(2) comme
indiqué (B).
%UDQFKHUOD¿FKHGXUKpRVWDWGDQVODSULVH
CUANDO SE USE EL CORDÓN DE LÍNEA
ELÉCTRICA Y EL CONTROL DE PEDAL
Conecte el cordón de la línea eléctrica a la máquina
(1) y el enchufe a la alimentación de corriente en
la pared (2) tal como se ve en la ilustración (B).
Conectar el enchufe del control de velocidad de pedal en el
conector de la máquina (3).

12
SPOOL PINS
HORIZONTAL SPOOL PIN
Place thread spool on the pin and secure with a spool cap to
HQVXUHVPRRWKÀRZRIWKUHDG,IWKHWKUHDGVSRROKDVDWKUHDG
retaining slit, it should be placed to the right.
Select the correct spool pin cap according to the type and
diameter of spool being used. The diameter of the spool pin
cap should always be larger than that of the spool itself.
PRESSER FOOT LIFTER
There are three positions for your presser foot.
1. Lower the presser foot to sew.
2. Raise the lifter to the middle position to insert or remove
fabric, and to change presser foot.
3. Lift it to its highest position to accommodate thicker fabrics.
VERTICAL SPOOL PIN
Attach the spool pin and place a felt disc over it. Place a spool
of thread on the spool pin.
Spool pin cap
&RXYUH¿O
Tapa del pasador carrete
Spool
Bobine
Carrete
Spool pin
Porte-bobine
Pasador carrete
Vertical spool pin
Porte-bobine vertical
Pasador de carrete vertical
Spool
Bobine
Carrete
Thread retaining slot
)HQWHGHUHWHQXHGH¿O
Ranura de retención de hilo
Spool pin felt discs
Rondelle feutre
Disco del pasador carrete
DARNING PLATE
Use the darning plate when you need to control fabric feeding
for button sewing, free motion work and free motion darning.
Raise needle and presser foot, and position darning plate onto
the needle plate with the two pins on the back inserted to the
holes of needle plate.

13
PORTE-BOBINE
PORTE-BOBINE HORIZONTAL
Placez la bobine sur la tige et fixez-y un couvre-fil pour
DVVXUHUXQGpELWGH¿OELHQUpJXOLHU6LODERELQHHVWGRWpHG¶XQH
IHQWHGHUHWHQXHGH¿OHOOHGRLWrWUHSODFpHjODGURLWH
6pOHFWLRQQHUOH FRXYUH¿OFRUUHFWH HQIRQFWLRQ GXW\SH HWGX
GLDPqWUHGHOD ERELQHXWLOLVpH /HGLDPqWUH GXFRXYUH¿OGRLW
toujours être supérieur à celui de la bobine elle-même.
PORTE-BOBINE VERTICAL
Fixer le porte-bobine et la rondelle feutre sur le capot
supérieur. Placer la bobine sur le porte-bobine.
PORTA CARRETES
PORTA CARRETE HORIZONTAL
Coloque el carrete de hilo en el porta carrete y asegúrelo con
el sujetador de hilo para asegurarse que el hilo se mueve
suavemente. El carrete de hilo tiene una ranura de retención
de hilo, que debe quedar hacia la derecha.
Seleccione la tapa de pasador de carrete de acuerdo al tipo y
diámetro del carrete usado. El diámetro de la tapa de pasador
de carrete debe ser siempre mayor que la del mismo carrete.
PORTA CARRETE VERTICAL
&RORFDUHOSRUWDFDUUHWH\SRQHUHOGLVFRGH¿HOWUR&RORFDUXQ
carrete de hilo en el portacarretes.
LEVIER DU PIED PRESSEUR
Il y a 3 positions:
1. Abaisser le levier pour coudre.
2. Soulever le levier en position moyenne pour insérer ou
enlever le tissu, et changer le pied.
3. Soulever le levier à sa position la plus haute, pour
accommoder les tissus épais.
PALANCA PIE PRENSATELAS
Su prensatelas tiene tres posiciones.
1. Bajar el prensatelas para coser.
2. Levantar la palanca a la posición media para insertar o
mover la tela.
3. Levantar a la posición más alta para acomodar telas mas
gruesas.
PLAQUE DE REPRISAGE
Utilisez la plaque de reprisage lorsque vous devez contrôler
vous-même l’entraînement du tissu pour coudre des boutons,
pour les travaux à mouvements libres et pour effectuer du
reprisage par vous-même.
0HWWUHODLJXLOOH jVD SRVLWLRQOD SOXV KDXWHHW UHOHYHUOH SLHG
presseur. Placer la plaque à reprisage sur la plaque aiguille
en veillant à ce que les deux tiges s'introduisent correctement
dans les trous.
PLACA TRANSPARENTE
Use la placa transparente cuando deba controlar la
alimentación del tejido para costura de botones, trabajo de
bordado libre y zurcido.
Alzar la aguja y el pie prensatelas y montar la placa
transparente en la plancha de agujas, con los dos pasadores
de la parte posterior introducidos en los agujeros de la placa
aguja.

14
CONVERTING TO FREE-ARM SEWING
<RXUPDFKLQHFDQEHXVHGHLWKHUDVDÀDWEHGRUDVDIUHH
arm model.
With the extension table in position, it provides a large working
surface.
7RUHPRYHWKHH[WHQVLRQWDEOHKROGLW¿UPO\ZLWKERWKKDQGV
and pull it off to the left as shown. To replace, slide the
extension table back into place until it clicks.
With the extension table removed the machine converts into
a free-arm model for sewing children’s clothes, cuffs, trouser
legs, and other hard-to-reach places.
LARGE EXTENSION TABLE (OPTIONAL)
To place onto the machine, lift the supporting leg of the
H[WHQVLRQWDEOHDQGVOLGHWKHWDEOHLQWRSODFHZKLOH¿WWLQJWKH
guide pins A, B, C and D into machine as illustrated.
C
DB
A
Extension table
Base de extensión
Plateau de rallonge
Supporting leg
Pata de soporte
Pied de support

15
UTILISATION DU BRAS LIBRE
Cette machine peut s’utiliser aussi bien sous la forme d’une
base plane que celle d’un bras libre.
En conservant la table de rallonge en place, vous obtiendrai
une plus grande surface de travaille.
Pour retirer la table de rallonge, tenez-la fermement avec
les deux mains et tirez-la à gauche vers l’extérieur, comme
indiqué sur l’illustration. Pour la remettre en place, faites
glisser la table de rallonge à sa place jusqu’à ce qu’elle
s’enclenche.
En retirant la table de rallonge, la machine sera converti
en bras-libre pour confectionner des vêtements d’enfants,
SRLJQHWVSDQWDORQVDLQVLTXHWRXWHQGURLWGLI¿FLOHG¶DFFqV
UTILIZACIÓN DEL BRAZO LIBRE
La máquina tanto se puede utilizar como base plana o una
máquina de brazo libre.
&RQODEDVHGHH[WHQVLyQLQVWDODGDVHREWLHQHXQDVXSHU¿FLH
de trabajo más amplia.
3DUD UHWLUDU OD H[WHQVLyQ GH OD FDPD VRVWpQJDOD ¿UPHPHQWH
con ambas manos y sáquela hacia la izquierda tal como se
indica. Para volver a colocarla, deslice la extensión de la
cama nuevamente a su lugar hasta que haga clic.
Sin la base de extensión, la máquina se convierte en un
modelo de brazo libre para costura de ropa de niños, puños,
piernas de pantalones, y otros lugares complicados.
PLATEAU DE RALLONGE (OPTIONNEL)
3RXU¿[HUjODPDFKLQHUHOHYHUODSDWWHGHVXSSRUWGXSODWHDX
de rallonge, et faite le glisser en positionnant les tiges A, B, C
et D comme indiqués.
BASE DE EXTENSION (OPCIONAL)
Para colocarla en la máquina, levante el soporte de la mesa
de extensión para liberarla y deslícela en su lugar, ajustándola
a la guías A, B, C y D en la máquina tal como se ilustra.

16
WINDING THE BOBBIN
1. Place a spool of thread on the spool pin, and secure it with
the spool pin cap. Pull the thread out from the spool and
place it through thread guides as shown in illustration.
Be sure to pull thread securely into the bobbin winding
tension disk.
2. Put end of thread through the hole in bobbin as shown.
Push bobbin winder shaft to far left position, if it is not
already there.
3. Place bobbin onto shaft with end of thread coming from
top of bobbin. Push bobbin winder shaft to the right until it
clicks. Hold the end of thread.
4. Start machine and the bobbin starts to wind. Bobbin will
automatically stop turning when completely filled. Push
shaft to the left to remove bobbin and cut thread.
2
3
4
1
Be sure to use Class 15 J bobbins.

17
PRÉPARATION DE LA CANETTE
3ODFH]XQHERELQHGH¿OVXUXQSRUWHERELQHHW¿[H]ODELHQ
jO¶DLGHGXFRXYUH¿O7LUH]OH¿OKRUVGHODERELQHHWIDLWHV
OHSDVVHUSDUOHJXLGH¿OFRPPHLQGLTXpGDQVO¶LOOXVWUDWLRQ
Assurez-vous de bien insérer le fil dans les disques de
tension du bobineur.
2. Faites passer l’extrémité du fil par le trou de la canette,
comme indiqué.
Pousser l’axe du dévidoir vers la gauche, placer la canette
sur cet axe.
3. Pousser le tout vers la droite jusqu’au déclic. Tenir le bout
GH¿OjODYHUWLFDOH
0HWWUHODPDFKLQHHQPDUFKH/DFDQHWWHYDVHUHPSOLU
Des que la canette est pleine, elle s’arrêtera de tourner.
$UUrWHUODPDFKLQH&RXSHU OH¿O3RXVVHU O¶HQVHPEOHD[H
canette vers la gauche pour pouvoir enlever la canette
pleine de l’axe. Pendant la couture, l’axe doit toujours
rester à gauche.
DEVANADO DE LA BOBINA
1. Coloque el carrete de hilo en el porta carrete y asegúrelo
con la tapa de pasador de carrete. Tire del hilo hacia
afuera del carrete y páselo a través de las guías de hilo tal
FRPRVHLQGLFDHQOD¿JXUD
Asegúrese de jalar el hilo con firmeza en los discos de
tensión del devanador de bobina.
2. Pase el extremo del hilo a través del agujero en la bobina
tal como se indica.
Empujar el eje del devanador bobina hacia la posición
maxima izquierda, si no está ya ahi.
3. Colocar la bobina en el eje, con el extremo del hilo
saliendo por la parte superior de la bobina. Empujar hacia
la derecha el eje del devanador, hasta que se sienta un
golpe seco. Retener el extremo del hilo.
4. Poner en marcha la máquina. El hilo que está retenido se
soltará. La bobina cesará de girar cuando se haya llenado
por completo. Empujar hacia la izquierda el eje para sacar
la bobina.
Utilisez que la canette 15 J. Este seguro de usar clase 15 J bobinas.

18
2
3
4
5
6
1
THREADING THE BOBBIN THREAD
1. Raise the needle to its highest position by rotating the hand
wheel toward you (counter-clockwise).
2. Remove the bobbin cover plate by pushing the release
EXWWRQWRWKHULJKW%REELQFRYHUZLOOSRSXSVXI¿FLHQWO\WR
allow you to remove the cover.
3. Insert the bobbin making sure the bobbin rotates counter-
clockwise when you pull the thread.
4. Pull thread through the slot (A) and then to the left.
5. With a finger held gently on top of the bobbin, pull the
thread until it stops in slot (B). Then pull about 6" (15 cm)
of thread and lead it towards back of the machine under
the presser foot.
6. Replace the bobbin cover plate onto the needle plate.
A
A
B
NOTE: This is also a very important step to assure
the bobbin thread does not slip out of position.
NOTE: This is a very important step as the bobbin
can become unthreaded and cause sewing problems
if it rotates clockwise.
Other manuals for 7285Q
1
Table of contents
Other Singer Sewing Machine manuals

Singer
Singer 212U141 Manual

Singer
Singer 112W138 Quick start guide

Singer
Singer 457UX143 User manual

Singer
Singer 770A51 User manual

Singer
Singer 281-22 User manual

Singer
Singer 246K42 Troubleshooting guide

Singer
Singer Stylist 7258 User manual

Singer
Singer 245-4 Quick start guide

Singer
Singer Touch & Sew 648 User manual

Singer
Singer C5105 User manual

Singer
Singer 7256 User manual

Singer
Singer 338 User manual

Singer
Singer 149-4 User manual

Singer
Singer 626 User manual

Singer
Singer 6416 User manual

Singer
Singer 35-1 User manual

Singer
Singer 87-1 Installation and operation manual

Singer
Singer 151W1 Quick start guide

Singer
Singer Scholstic 5523 User manual

Singer
Singer 160 User manual