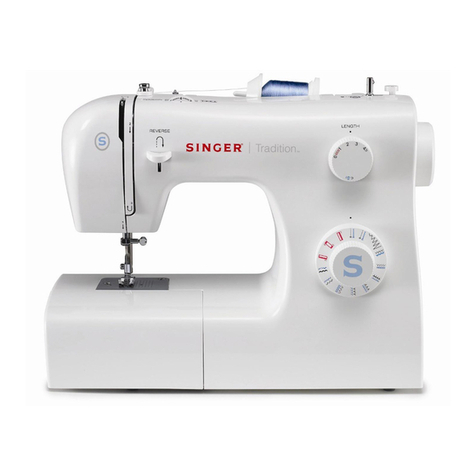
Singer De Lux ZIG ZAG User manual

I
I
I
-
/
/
_I
The
c,tuxe
Automatic
ZIG
ZAG
Sewing
Machine
INSTRUCTION
BOOK


CONTENTS
Features
and
Parts
2
Sewlight
3
Installing
Head
into
Cabinet
3
Setting
the
Needle
4
Winding
the
Bobbin
4
Threading
the
Bobbin
Case
5
Placing
Bobbin
Case
in
Shuttle
6
Upper
Thread
7
Setting
the Stitch
Length
8
Sewing
in
Reverse
8
Adjusting
the Tensions
8
Adjusting
Pressure and
Feeding
of
fabric
9
Preparing
to Sew
10
Removing
the Work
11
Regulating
Width
of
Zig-Zag
Stitch
12
Automatic
Sewing
13
Sewing
Designs
14
The
Zipper
Foot
&
To Make Cording with
Zipper
Foot
15
Embroidering
With
a
Hoop
16
Darning
16
Making Buttonholes
17
Sewing
on
Buttons
18
How
to
Use
Accessories
19
Care and
Maintenance
of
Your
Machine
20
Cleaning
and
Oiling
the
Shuttle
21
Check
Up
for
Smooth Sewing
22
Needle
and
Thread
Sizes
23

Selli
9
the
jlfeedle
See Fig.
3.
Raise
the
needle
bar
to
its
highest
point,
turning
wheel
toward
you by
hand.
Then
loosen
the
needle
clamp screw
and
the
needle
can
be
inserted
into clamp.
Place
needle
(flat
side
to
right)
in
the
needle
clamp
and
push
it
upward
as
far
as
it
will
go
into
the
needle
clamp
hole,
tightening
the
needle
clamp screw
securely
with
a
screw
driver.
*/üidüi
9
the
I?o44i.z
Disengage
the
hand
wheel
(Fig.
4)
from
the
stitching
mecha.
nism
by
turning
the
clutch
toward
you
or
counterclockwise.
Place
a
spool
of
thread
on
the
spool
pin,
lead
thread
through
the
upper
thread
guide
on
the
arm,
and
down
through
the
tension
disc
(Fig.
5)
at
the
base
of
the machine.
Run
end
of
thread
through
a hole
in
the bobbin edge
and
place
bobbin
on
spindle
of
bobbin
winder,
fitting
the
notch
on
bobbin
over
small
pin on
spindle.
Push
bobbin
winder
against
hand
wheel,
Hold
thread
end loosely
and
start
machine
slowly.
Bobbin
will
stop
winding when
it
is
filled.
Turn
clutch
away
from
you
until
sewing
mechanism
is
again engaged
so
that
needle
moves
when
you
turn
the
hand
wheel.
Break
off
loose
thread
end
used
to
start
the
winding.
.
Fr)L
31
1-
Fig.
3

5
e
1”.
Th’zead
ihe
I?
czII’a
Ca’m
‘
Before
threading
the
bobbin
case,
study
Fg.
6,
7
&8
to
get
a
general
idea
as
to
how
it
is
done.
Hold
the
bobbin
case
with
your
left
hand
and
put
the
bobbin
into
the
bobbin
case
with
your
right,
leav
ing
about
two
inches
of
the
thread
end
unwound
Fig.
6).
As
the
bobbin
is
being
inserted
in
the
bobbin
case,
the
thread
flow,
you
vill
note,
in
clockse
Fig.
6).
2,
While
holding
the
bobbin
case
as
before,
grasp
the
thread
end
with the
right
hand,
guide
it
into
the
cross slot
(Fig.
7).
3.
Then
pull
it
throught
under the
tension
spring
of
the
bobbin
case
Fig.
7)
until
it
enters
the
(lelivery
eye
Fig.
8).
/
.,NSPRNG
\
/
N
Fig.
5
Fig.
6
Fig.
7
t
8

P1ac
f?óIL&4
ee
i
S/u
1.
Raise the
presser
bar
by
lifting the
presser bar
lifter.
2.
Raise
the
needle
bar
to
its
highest
position
by
turning
the
balance
wheel
toward
you.
3.
Pull
out slide
plate
(Fig.
9).
4.
Hold
the
bobbin
case
latch
(Fig.
10)
between
the
thumb
and
forefinger
of
the
left
hand,
with
at
least
three
inches
of
thread
running
from
the
top
of
the
bobbin
case to
the
right.
Insert
and
center
the
bobbin
case
on
the
stud
of
the
shuttle
body.
Be
sure
the
bobbin
case
finger
is
opposite
the
shuttle
race
notch.
Press
the
bobbin
case
into
the
shuttle
as
far
as
possible
until
latch
catches
on
the
center
post
of
the
shuttle.
5.
THEN
release
the bobbin
case
latch,
Press
bobbin
case
again
after
latch
has
been
released.
To
make
sure
the
bobbin case
is
locked
securely
in
place.
Close
the
cover
plate.
Fig.
9
Fig,
10

7
l1,tzisze
7h4ead
1.
Turn
the
balance
wheel
toward
you to
raise
the
take-up
lever
to
its
highest
position.
(Fig.
11)
2.
Place
a
spool
of
thread
on
the
spool
pin.
3.
Lead
the
thread through
the
upper
arm
thread
guide.
4.
Run
the
thread
down
through
the
thread
guide
bar
to
the
ten
sion discs,
then
around
and
between
them
from
right
to
left.
5.
Draw the
thread
up
through
the check
spring
and with
a
slight
tug
into
the
hook.
(See
insert,
Fig.
11)
6.
Pass the
thread
under
the
bar
and
up
through
the
eye of
the
take-up
lever
from
right
to
left.
7.
Lead
thread
down
through
the
lower
thread
and
then
through
the
needle
bar
guide
from
the
back.
8.
Thread
needle
FROM
LEFT
TO RIGHT,
drawing
it
through
about
3
or
4
inches.
Hold
the end
of
upper
thread
loosely
and
turn
hand
wheel
toward
you
until
the
needle
goes
all
the
way
down
and comes
back
up.
A
loop
will
be
formed
over the
upper
thread
which
then
can
be
pulled
out
straight.
Place
both
thread
ends
under
the slot
of
the
presser
foot
and
draw
toward the
back
of
the machine.
leaving
both
threads
three
or
four inches
long.
Fg.
Ii

SeI
9
44e
Sükh
The
length
of
the
stitch
is
regulated
by
the
knob,
Fig.
12.
Near
0
is
the
shortest
stitch
and
4
is
the
longest,
but
the
knob
may
be
set
at
any
spot
between
markings
for
a
variety
of
lengths.
Turn
the
knob
to
the
left
to
lengthen
and
to
the
right
to
shorten
the
stitch.
Sews#i
9
When
you
wish
to sew
backward,
to
tie
the
threads
at
the
beginning
or
end
of
a
seam,
press
the
button
in
Fig.
12,
as
far
as
it
will
go.
The
machine
will
sew
backward
as
long
as
the
button
is
held
in.
Always
adjust
the
upper
tension
with the presser
foot
down,
as
the
tension
is
automatically
released
when
it
is
raised.
To
increase
the
tension
on
the
upper
thread, turn
dial
(Fig.
13)
to
the
right,
or
clockwise.
To decrease turn
to
the
left.
The
higher number
on
the
dial
the
tighten
the
tension.
Before
adjusting
lower
tension
be
sure
that
the machine
is
threaded
properly.
When
necessary
to
change
the
bobbin
tension,
turn
small
screw
on
side
of
the
bobbin
case
clockwise
to
tighten,
counter-clockwise
to loosen.
Fig.
12
4dj
1
s
the
Te
4
nsions
Fig.
13

9
When the
upper
and
under
tensions
are
properly
balanced,
a
perfect
stitch
will
be
formed
with
both
threads
interlocking
in
fabric
(Fig.
14).
When
the
upper
tension
is
too
tight,
the
lower
thread
is
pulled
up
over
the
upper
thread
which
is
lying
flat
on
the
fabric
(Fig.
15).
When
the
under
tension
is
too
tight,
the
upper
thread
from
loops
over
the
lower
thread
lying
flat
on
the
fabric
(Fig.
16).
Correct Stitch
Fig.
15
Needle
Thread
Tension
too
strong
Fig.
16
Needle
Thred
Tension
too
weak
4dsk
9
PZeS4e
ad
%ed
o
%bac
GENERAL
SEWING.
Usually for
straight
sewing
and
zigzag
stitching,
the
pressure
bar
cap
or
darner
release,
Fig.
17,
is
at
its
lowest
position
and
the
drop
feed
release
knob,
Fig.
18,
is
Turn
to
the
right
“N”.
Fig.
14
Fig.
17
Fig.
18

SEWING
THIN
OR
LIGHT
WEIGHT
FABRICS.
When
lighter
pressure
is
required
to
sew
satisfactorily
on
thin
silk
or
filmy
material,
the
pressure
cap
should
be
about
halfway
down.
Release
all
the way
by
pressing
the
snap
lock,
A,
Fig.
17,
and
then
press
cap
B
Fig.
19
down
again
to
halfway
spot.
The
Drop
feed
knob
pointer
(Fig.
18)
should
be
at
the
middle
of
indicator
“S”.
DARNING
AND MONOGRAMING.
In
order
to move
the
fabric
freely
in
any
direction
for
darning,
mending
and certain
kinds
of
free.
hand
embroidery,
release
the
pressure
cap
B
completely
by
pressing
down
on
the
snap
lock,
A,
Fig.
17.
Turn
the
Drop
feed
knob
to
the
left,
“E”
which
drops
the
feed
well below
the
needle plate.
To
return
feed
to
normal,
the
Drop
feed
knob
turn
to
the
right
“N”.
Fig.
19
Fig.
20
Fig.
21

11
Hold
the
end
of
the
upper-thread
with
the
left
hand,
leaving
it
slack
from
the
hand
to
the
needle.
Turn
the
balance
wheel
toward
you to
raise
the
needle
bar
to
its
highest
position.
Pull
the
thread
you
are
holding,
as
the
lower
thread
will
be
brought
up
with
it
through
the
hole
in
the
needle
plate,
as
shown
Fig.
20.
Place
both
ends
of
the
upper
and
lower
thread
to
the back
of
the presser
foot
Fig.
21.
Now,
place
material
to
be
sewn
beneath
the presser
foot
and
lower
the
presser
foot.
Start
sewing
by
slowly
turning
the
balance
wheel
in
direction
toward
you
while
gradually
working
the
foot
or
knee
control.
DO
NOT
TRY
to
help
the feeding
by
pulling
the material
as
this
may
deflect
the
needle and
cause
it
to
break.
ALWAYS TURN
BALANCE
WHEEL
TOWARD
YOU!
Be
sure
to
stop
the
machine
when
the
thread
take-up
lever
and
needle
bar
are
located
at
the
highest
position.
Now
raise
the presser
foot
and
draw
the
fabric
back and
pass
the
threads
over
the
thread
cutter.
Pull
down
slightly,
holding
thread
in
both
hands,
so
as not
to
bend
the
needle.
Leave
the ends
of
thread
under the
presser
foot.

/?ea/.atii9
the
*Jidlh
oj
3’9-Ja9
Sühh
The width
of
the
zigzag
stitch
is
regulated
by
the zigzag
width
knob
(Fig.
22).
By
turning
the
zigzag width
knob,
the
zigzag
width
indicator
appearing
in
the
zigzag
width
window
will
move
from
O-4
and
the
width
of
the
zigzag
stitch
will
increase
accordingly.
In
order
to
set the
desired
zigzag
of
the
zigzag
stitch.
use
the
zigzag width
limiting
lever
attached
to
the
back
side
of
the zigzag
width
knob.
By
turning
the
zigzag width
limiting
lever
together
with
the
zigzag
width
knob,
you
can
set
your desired
zigzag
width.
In
order
to
revert
to
the
previously
used zigzag
width,
turn
only
the zigzag
width
knob.
Fig.
22

4doinaüc
Sew
Your
machine
can
sew
beautiful
stitches
AUTOMATICALLY
with
18
automatic
sew
discs.
To
insert
a
zigzag
disc into
the
machine,
follow
these
instructions:
1.
Pull
lid
A
open.
2.
Turn
zigzag
width
dial
B
to
the
extreme
right,
and
keep
it
there
during
insertion.
3.
insert
disc
into
axle
C
.
Turn
disc
until
it
slips
down
and
the
retaining
pin
D)
enters
hole
E)
in
disc.
4.
Release
dial
(B).
5.
Chse
lid
A
To
remove the
disc, open
the
Nd,
turn
dial
B
to
the
right
and
pull
disc
up.
Now
GLI
can
insert
another
disc
to
produce
another
design.
(Cams
attached
to
the
machine)
13
Fig.
23

14
SEWING
DESIGNS
Cam
No.
13
rijujq
C
am
No.
1
1flIWlT lit
Cam
No.
2
III?
m
llIll4#illill
C
am
No.
14
.j
;#‘,
.it;,
C
am
No.
3
C
am
N
0
.
1
5
wVl
Cam
No.
4
Cam
No.
16
wv
wm
J
Cam
No.
5
Cam
No.
17
Cam
No.
6
Cam
No.
18
JL.
//IL
L
L
Cam
No.
7
WIIIihIN
dII1Illh/lltllhI1lh..
C
am
No.
1
9
Cam
No.
8
C
am
No.
20
A{k
A.
Ai
•&
Cam
No.
9
Cam
No.21
Cam
No.
10
]
h_i_/L
Cam
No.22
I
J
4
JL
AkLiL
C
am
No.
1
1
J
L
C
am
No.
23
Cam No.
12
Cam
No.24
?iw1?f.

15
Th
8
Jie*
The
zipper
foot
can
be
readily adjusted
to
either
the
right
or
left
side
of
the
slide
fastener.
Loosen
the
screw
“A”
(Fig.
24a
&
24b)
and
slide
the
foot
into
desired position.
Adjust the
needle
position
as
required
to
make
the
stitching
close
to
the
zipper
teeth.
Needle
plate
should
be
in
zig-zag
sewing
position
and
use
zig-zag
presser
foot,
so
that
needle
position can
be
changed
freely.
To
Mahe
wdh
JIape
4Zoo
Cut
a
true
bias
strip
of
fabric
wide
enough
to
go
over
the cord
and
allow
for
a
seam,
usually
1”
to
2”
depending
on
size
of
the
cord. Place
cord
inside
the
bias
and
place it
under the
foot
so
that
the
seam
edges
are
to
the
left.
Stitch
the
fabric as
close
as possible
to
the
cord
without
catching
it.
Gently
stretch
the
bias
as
you
sew
(Fig.
24c).
Fig.
24.
A
Fig.
24b
Fig.
24c

16
t,n4ioid.w
4
.r
9
*Je4
a
€1Iooi
It
is
easy
to
follow
a
stamped
design
or
to
work
free
hand
when
embroidering
or
monogramming.
(See
Fig. 25).
Release
the
pressure
from the
foot
by
pressing
down
the
snap
lock
on
the
automatic
darner.
Turn the
drop feed
knob
to
the
left
E”
which
drops
the
feed
well
below
the
needle
plate.
Stretch the
fabric
in
an
embroidery
hoop,
and
place
under
the
needle
after
removing
the
presser
foot.
Set
the
stitch
width at
the
size
you
prefere
and
lower
the
presser
bar
lifter.
Then
operate the
machine
at
a
rather
high
speed
while
moving the
hoop slowly
both
hands.
the
path
of
the
needle.
Work
carefull
and
be
sure
to
keep
fingers
out
of
Release
pressure
from
foot and
drop
feed as
directed
above.
Place
fabric
to
be
mended
under
foot,
and
stitch
around
hole,
moving
the
fabric firmly
and
slowly
in
any
direction.
To
fill
in
the
hole,
stitch
from
center
outward, completing
the
stitching
in
fabric.

Afahn
9
&dlo#iholes
Thi,
type
of
Buttonhole
Foot
can
he
used
for
buttonhole
and
also
zigzag
sewing.
First, mark
the
beginning
and end
of
the
buttonhole
on
babric
with
a
basing
line
or
tailor’s
chalk.
Make
one
on
scrap
fabric
followmg
directions
below)
to
he
sure machine
adjustments
are
correct.
1.
Replace
presser
foot
with buttonhole
foot
which
is
grooved
deeply
underneath
to
prevent
piling
up
of
the
thread
(See
Fig,
26.
2.
Look
the
stitch
width
between
1
and
2,
and
set
the
stitch
length
near
0.
3.
Lower
needle
carefully
into
the
mark
on
fabric
indicating
Fig.
26
the
beginning
of
buttonhole.
Stitch
to
the
mark
for
the
end
of
the
buttonhole,
step
1,
Fig.
27,
stopping
machine
with
needle
in
fabric
at
right
side
of
stitching.
4.
Lift
the
presser
foot
and
using
the
needle
as
a
pivot,
turn
the
fabric
end
for
end.
5.
Lower
presser
foot
and
turn
hand
wheel just
enough
to
raise
needle
out
of
fabric.
6.
Drop
feed
knob
turn
to
the left
and
move
zigzag
knob
to
4.
While
holding
the
knob
at
4
width,
take
five
or
six
stitches
to
form
bar
tack, step
2,
Fig.
26.
7.
Raise
needle
out
of
fabric
and
return
feed
to
“UP”
position
and
let
stitch
width
dial
return
to
2.
8.
Stitch
second
side
of
buttonhole,
step
3
Fig.
27
9.
Make
bar tack
by
repeating
5
and
6
above
(step
4).
10.
Return
stitch
width
to
0
and
take
two
or
three
stitches
to
fasten bar
threads
and
prevent
raveling.
Cut
the
buttonhole
opening
with
a
seam
ripper,
being
careful
not
to
cut
the
stitching.
‘I
TI
Till
Til
C
OH
SS
S
E
E
L
F.
p
p
P
P
Tfl
E
1
2
3
4
D

If
you
plan
to
make
buttonholes
on
sheer
or soft
material,
place
tarlatan
or
paper
which
can
be
turn away
after stitching,
under
the fabric.
And
it
is
always
wise
to
make
several
buttonholes
on
scraps
of
fabric
before
working
on
the
garment.
Sewü
eøs
1.
Remove
hinged presser
foot
and
attach
button
sewing
foot.
(See
Fig.
28)
2.
Drop
feed
to
down
position.
3.
Move
zigzag
width
dial
to
‘0’
position
or
to
the
extreme
left.
Place
the
button
so
that
its
left
hole
comes
directly
under
the
needle,
then
gently
lower
the
presser
foot.
Move
the zigzag
outer
dial
to
the
right
until the
needle come
exactly
over
the
right
hole
of
the
button.
Turn
the
balance
wheel
slowly
by
hand
to
be
sure
the
needle
clears
both
holes
of
the
button.
Correct
width
if
neccessary,
then
lock
in
place.
4.
When
needle
goes
into
the
center
of
each
hole,
run
the
machine
at
medium speed,
rnakin
ve
or
six
stitches,
stopping
with
the
needle
in
the
left
hole.
5.
To
lock
the
zigzag
stitch
and
prevent
raveling, set the
stitch
width
at
0,
and
take
afew
stitches
in
the
same
hole.
If
you
wish
you
may
place
a
rounded
toothpick
over
the
button,
between
the
two
holes,
and
sew
button
to
fabric
in
regular
way.
Remove
the
toothpick
and wind
thread
upper
button,
forming
a
shank.
Fasten.
Apply
the above method
to
sew
on
buttons
with four
holes,
hooks
and
snaps,
etc.
If
a
four
hole
button
is
to
be
sewn,
follow
the
same
procedure
above
for
the
two
hole
button.
Now
lift
presser
foot
slightly and
move
fabric
to
permit
stitching
the
remaining
two
holes.
Kooks,
snaps,
etc.,
are
sewn
to
the fabric
with
the same
procedure
as
for
sewing
two
hole
buttons.

19
,4øw
Io
‘lisa
4ocooies
NARROW
HEMMER. While
the
needle
at
its
highest
position,
‘eplace
regular
presser
foot
with
narrow hemmer
(Fig.
29).
For
a
)lain
narrow
hem’
make
a
1,i8
inch
double
fold
for
about
two
inches
long
of
fabric.
Hold
each
end
of
the
two
inch
fold,
slip
underneath
emmer.
Bring
fold
up
in
to
the
scroll
of
hemmer,
draw
foward
to
nd
and
fasten
with
point
of
needle.
Lower
presser
bar
lifter.
Gently
3u11
ends
of
threads
as
you
stitching.
Guide
material
slightly
to
right,
and
it
will
automatically take
a
louble
turn
through
scroll.
Fig.
29
LACE
TRIMMED
HEM.
To
sew
a
narrow
hem
and
attach
lace
n
one
stitching,
insert
lace
in
the slot
next
to
needle.
Sew
hem
as
above,
guiding
lace
in
under
needle
and
hem
into
scroll.
LACE EDGE
WITH
INVISIBLE
STITCHING,
Hold
lace
1/8
inch
rrom
raw
edge
On
right
side
of
fabric.
Insert
both
in
scroll
as
for
lain
narrow
hem.
Let
hem
roll
over
and
sew
in
lace.
Press
lace
ut flat
along
edge
with
hem
turned
up.
It
is
possible
to
have
a
ittle
fullness
in
lace
by
feeding
it
freely
under
scroll.
FRENCH
SEAM.
With
right
sides
together,
place
top
piece
of
iaterial
1/8
inch
inside
edge
of
lower
piece.
Insert
in
hemmer
scroll
illowing
hem
to roll
over
and sew
in
top fabric,
making French
eam.
FLAT
FELLED
SEAM.
Open
out
French
seam and
insert
rolled
edge
in
scroll
of
hemmer.
Edgestitch
to
lay
seam
flat.
Fag.
30
HAND
ROLLED
EFFECT.
Use
a
narrow
zigzag
stitch.
just
wide
enough
to
catch
both
edges
)f
the
narrow,
rolled
hem.
QUILTING
GUIDE.
This
guide
for
making
parallel
rows
of
stitching
is
attached
by
placing
the
conged
holder between
the
presser
foot
and the presser
foot
thumb
screw
(Fig.
30).

20
Adjust
the
curved
bar
to
press
lightly
on
the
fabric.
sive
rows
will
be
an
equal
distance
apart.
By
letting
the
guide
ride
on
the
first
stitching
line,
succes
When
the
bar
is
attached
so
that
the
curved
part
is
to
the
right
of
the
needle,
it
may also
serve
as
a
seam
width
guide.
SEAM GAUGE
OR
CLOTH
GUIDE.
Use
the
seam
gauge
as
a
guide
for
straight
seams and
even
rows
of
top
stitching
along
edges
of
fabric.
Fasten gauge
with
accompanying
screw
in
threaded
hole
in
needle
plate
or
in
bed
of
machine
(Fig.
31).
Adjust
to
seam
width
desired.
Fig.
31
e*e
ad
Afadenawe
0/
1o
Afachüie
HOW
TO
OIL
YOUR MACHINE
Your
machine
should
be
oiled
occasionally
to
keep
it
operating
smoothly-how
often
depends
on
the
amount
of
sewing
you
do.
Before
oiling
the
upper
part
of
the sewing
unit
at
points
indicated
by
arrows
in
Fig.
32,
turn
hand
wheel
toward
you
until
the
take-up
lever
is
at
its
lowest
point.
‘:
__________
I’
Fg.
32
F
9
.
33
Avoid
over
oiling.
Only
a
drop
is
needed
at
each
point.
To
oil
parts
under
the
bed
of
the
machine,
tip the
unit
back
on
its
hinges
and
apply
a
drop
of
oil
at
each
point
indicated
in
Fig.
32.
Table of contents
Other Singer Sewing Machine manuals

Singer
Singer 147-81 User manual

Singer
Singer 44-82 User manual

Singer
Singer 400W107 User manual

Singer
Singer 15K - MANUAL 2 User manual

Singer
Singer 95-10 User manual

Singer
Singer 2010 User manual

Singer
Singer 300wl03 User manual

Singer
Singer 121W User manual

Singer
Singer S0100 User manual

Singer
Singer Superb 2010 Owner's manual

Singer
Singer 107W50 User manual

Singer
Singer Centurion 121D200A User manual

Singer
Singer 9876 User manual

Singer
Singer Professional 14U12 Manual

Singer
Singer 29K71 Troubleshooting guide

Singer
Singer Touch & Sew 636 User manual

Singer
Singer 119W1 Quick start guide

Singer
Singer 591EUTT Manual

Singer
Singer 990B3 User manual

Singer
Singer 400W11 Quick start guide