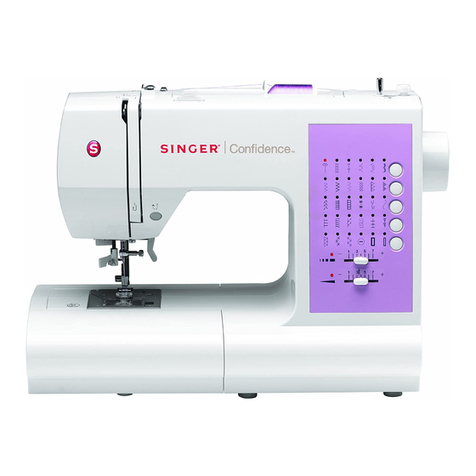
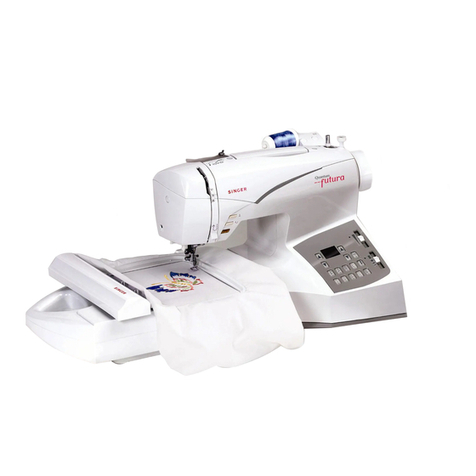
Singer Quantum XL-6000 Operation instructions

Workbook
QUANTUM XL-6000
®
0639_SS_XL6000_WRKBK 6/9/04, 3:47 PM1

Quantum®XL-6000
Table of Contents
SEWING MACHINE SECTION of Quantum®XL-6000 0
Principal Parts of the Machine....……………………………………………. 1
Operation Keys..……………….………….………………………………………. 2
Pattern Category Screens...…….…………………………………………….. 3
Help Screens………………………….......…………………………………….… 4
Pictograms and Color-coded Screens……………………………………….. 5
Operation Pictograms……………………………………………………………. 6
Knee Lifter and Screen Brightness…..……………………………………… 7
Automatic Threading………………………………...…………………………. 8
Manual Threading……………....……………………………………………….. 9
Wind-In-Place Bobbin System™…………....…………………………………. 10
Manual Bobbin Winding…....…………………………………………………… 12
Machine Thread Exchanger…………………………………….………….….. 13
Tension, Odometer, Needles…………………………………………………… 15
Standard Machine Operation…..……………..………………………………. 16
Large and Small Decorative Patterns.…...…………………………………. 19
Built-in Lettering...……………………………………………………………….. 21
Memory in Regular Sewing Machine Mode.……………………………….. 22
EMBROIDERY SECTION of Quantum® XL-6000 23
Categories of Built-in Embroideries...………………………………………. 24
Auto Thread Exchanger™..……………………………………………………… 25
Endless Bobbin™..………………………………………………………………… 26
Pictograms on the Embroidery Screen..…………………………………… 28
Smart Cards..………………………………………………………………………. 29
Combination Embroidery..…………………………………………………….. 30
Multiple Hoop Embroidery.……………………………………………………. 40
Memory in Embroidery…………………………………………………………. 48
Continuous Hoop Attachment………....……………………………………... 49
Conversion Software……………………………………………………………… 51
**Thank you to Singer USA Education Department and Singer Sourcing for developing this Workbook**
Singer®, Quantum®,Wind-In-Place Bobbin System™, Auto Thread Exchanger™, and
Endless Bobbin™are registered trademarks of The Singer Company Limited.
©2004 Singer Sewing Company
Part # 640 5052550GE

Quantum®XL-6000
SEWING MACHINE SECTION

Quantum®XL-6000
Principal Parts of the Machine
- 1 -

Quantum®XL-6000
Operation Keys
- 2 -
When this key is pressed “stitching procedure” is shown on LCD
Screen
Used to save and recall patterns and letter strings
Used to change thread tension, stitch length, needle position and
zigzag width
Used to automatically thread sewing machine
Used to automatically wind a bobbin
Used to pause to take a break during embroidery sewing. The
machine may be turned off and the current status will be saved to be
used when returning to the machine and turning on the power.

Quantum®XL-6000
Pattern Category Screens
- 3 -
The Quantum®XL-6000 has a 256 color 3-D appearance LCD screen. All
commands are input with a light touch on the LCD Screen.
Do not press on the screen*.
The Utility Patterns are provided on four different screens.
Touch the file folder pictograms to access the four “Utility” screens (green).
Touch the numbered arrows to access
the “Continuous Pattern” screens (rose).
Initial Screen First Utility Screen
Touch lightly on
screen
* If the Pictograms do not line up
directly under your finger please
refer to the 4-Point Adjustment
Procedure detailed on Page 25 of
your Instruction Book.

Quantum®XL-6000
Help Screens
- 4 -
The Help Screens give different types of guidance including Machine Usage,
Advice, and Sewing Methods. Each “guidance” category gives detailed
information and easy-to-understand graphics.
Turn the machine on and touch anywhere on the screen.
Stitching Procedure (Obtain information on “how to sew” methods)
Select STRAIGHT STITCH.
Touch advice key.
Touch the ‘forward page turning” pictogram, and it will advance to the next
screen. Touch the “backward page turning” pictogram, and it will return to
the previous screen.
To return to Utility Pattern screen, touch Return Arrow pictogram.
Use of sewing machine (Help in machine set up and for customizing
options) (Pink pictograms)
Example: Get information on how to perform “Manual Needle Threading”:
Touch advice key. Advice screen comes up.
Touch pictogram.
Touch Hand pictogram. This brings up screen showing
“Manual Needle Threading”.
To return to Utility Pattern screen, touch Return Arrow pictogram 3
times.
Tips (Obtain sewing tips) (Yellow pictograms)
Example: For information about “Inadequate Thread Tension”:
Touch advice key. Advice screen comes up.
Touch pictogram.
Touch pictogram.

Quantum®XL-6000
Pictograms and Color-coded Screens
- 5 -
Now is the time to scroll through the vast assortment of Stitch Patterns available on the
Quantum®XL-6000. The Stitch Selection Process of the Quantum®XL-6000 is a simple touch
of the Pictograms which is all it takes to change groupings and select Stitch Patterns. All Stitch
Patterns are grouped by general function and are color coded for easy identification.
Utility Patterns are grouped on 4 screens and are color-coded green.
Continuous, Functional and Decorative Patterns are grouped on 10
screens and are color-coded rose.
Large [X-Y Feed] Decorative Patterns are grouped on 6 screens and
are color-coded orange. Note: To access the Large Decorative
Patterns first touch the Pictogram.
Small Decorative Patterns are grouped on 4 screens and are color-
coded purple.
Alphabet and Numeric Screens are grouped by fonts on 25 screens
and are color-coded blue.

Quantum®XL-6000
Operation Pictograms
-6-
Used to vertically invert - turn over - a pattern
Used to mirror image a pattern
Used to select straight stitch and to return quickly to “Utility
Stitch Pattern” screen (green)
Used to activate “Large Decorative Pattern” screen (orange]
and leads to Small Decorative Patterns and Alphabets
Pattern Elongation - Change visible on screen
Pattern Positioning
Enlarge Size Pictogram
Regular Size Pictogram
Reduce Size Pictogram
Used for sewing with Twin Needle
Used to activate Two-Color Sewing
Used to make single pattern designs sew continuously
Used to clear patterns stored in memory
Used to scroll and check patterns stored in memory

Quantum®XL-6000
Knee Lift and Screen Brightness
- 7 -
LCD Screen Brightness / Contrast
Adjustment
Knee Lift
The Knee Lift attachment fits
into the slot, located at the front
of the machine just below the
LCD screen. It is used to raise
and lower the presser foot, when
the presser foot is down.
Fit the smallest part of the
screwdriver into the
brightness adjustment
hole.
To increase the screen
brightness (make lighter)
turn the screwdriver
clockwise.
To decrease the screen
brightness (make darker)
turn the screwdriver
counter clockwise.
Li
g
hter
Darker

Quantum®XL-6000
Automatic Threading
- 8 -
Automatic Threading in Regular Sewing Machine Mode:
1. Place the spool of thread and Spool Cap onto the spool pin.
Horizontal Spool Pin
2. Use both hands to pull the thread into the primary thread guide.
Note: This thread guide is only used with the horizontal spool pin.
With the Auto Thread Exchanger™you must use the guides
specifically designed for use with the Exchanger.
3. Hold the thread in your right hand and thread the top of the machine along
the groove. Pull it in the direction of the arrow and cut it with the thread
cutter blade A.
4. Lower the presser foot lifter.
5. Touch the “thread” key.
6. Touch the needle pictogram
7. Touch to return to active screen.
Align mark on
handwheel with
mark on machine.
A
It is strongly
recommended that
you use name brand
high quality thread
with the Quantum®
XL-6000. High
quality thread
performs better and
does not leave as
much lint and debris
in the threading and
sewing mechanisms.

Quantum®XL-6000
Manual Threading
- 9 -
1. Remove thread from thread path.
2. Align mark on handwheel with mark on machine.
3. Raise presser foot lifter.
4. Open faceplate cover.
5. Place thread and spool cap onto spool pin.
6. Draw thread toward you with both hands.
7. Hold end of thread and guide it through the thread path as shown.
8. Thread needle using automatic needle threading mechanism.
Align mark on
handwheel with
mark on machine.

Quantum®XL-6000
Wind-in-Place Bobbin System™
- 10 -
The Wind-in-Place Bobbin System™feature is for
regular sewing mode only, as it winds the bobbin from
the top spool directly to the bobbin. The Endless
Bobbin™ feature is for Embroidery Sewing.
1. Remove the bobbin cover.
2. Load an empty special bobbin and replace the cover.
3. Place the Standard “A” foot on the machine.
4. Thread the machine for regular sewing.
5. Press the “bobbin” key.
6. Select the amount of thread to be wound
on the bobbin.
7. Move the drop feed lever to the right to lower the feed dogs.
Be sure to use the
special bobbin
shown. The machine
cannot perform the
automatic bobbin
winding without this
special bobbin.
Align mark on
handwheel with
mark on machine.

Quantum®XL-6000
Wind-in-Place Bobbin System™
- 11 -
8. Hold the thread taut and pass it under the presser foot. Lower the presser
foot and pull the thread into the Thread End Retaining Spring.
9. Press the bobbin-winding pictogram on
the LCD screen.
10. When the bobbin is filled, the thread will be automatically cut. Remove
the remaining thread from the Thread End Retaining Spring.
11. Return the dropped feed dog lever to the left to raise the feed dogs.
Thread End Retaining Spring
Note: If you want to temporarily
stop winding the bobbin before
automatic completion, press the
start/stop button.
Note: Be aware that the appearance
of the thread on a bobbin wound with
the Wind-in-Place Bobbin System™
feature will not appear the same as
with Manual Bobbin winding. The
loose appearance is natural and will
cause no sewing problems.

Quantum®XL-6000
Manual Bobbin Winding
- 12 -
1. Place a spool of thread on the spool pin and place the spool cap securely
in place.
2. Draw the thread into the primary thread guide as shown on Page 8.
7. Start the machine and wind the bobbin.
8. When the bobbin is full, push the bobbin back to the left. Remove it from
the shaft and cut the thread.
3. Pass the thread over the top
of the thread guide.
4. Open the cover of bobbin winding
shaft hole. Shaft is stored in
accessory box. Place the bobbin on
the shaft and fit it into the hole.
5. Pass the thread through
the hole in the bobbin.
6. Push the bobbin against the
bobbin winding regulator.
Note: Although the manual
bobbin winding system uses
Standard 15 Class Bobbins, it is
suggested that you use genuine
Singer®branded bobbins. Generic
bobbins may be a different size
and weight. Additionally, Singer®
does not endorse the use of
pre-wound bobbins.

Quantum®XL-6000
Auto Thread Exchanger™ in Regular Sewing Mode
- 13 -
1. Install Auto Thread Exchanger™….
2. Install Thread Spools and Caps….
The Auto Thread Exchanger™is a
Singer®Exclusive Feature that
may be used semi-automatically
on the Sewing Machine side and
fully automatically on the
Embroidery Side of the Quantum®
XL-6000. The Auto Thread
Exchanger™is a true time saving
feature and is easy to use once
the procedure for threading and
operation is learned. Use this
time to learn the correct
operation.
Installation of the Auto Thread Exchanger
™
is self-evident. Holding the exchanger at a slight
angle with the lever pressed; slide the projections into the grooves on the back of the machine.
Pro
j
ec
t
ion
Groov
e
Proper installation of the thread
spools and spool caps is vital to
the Auto Thread Exchanger™
operation. Refer to the drawings
at the left for proper direction
to lead the thread from the
spool and proper thread spools
to use with the selected thread.
Please note that when using the
small cross-wound spools
sometimes the final 10% of the
thread will not reel off
smoothly. In this case, use the
Auxiliary Spool Pin to use up
the remaining thread.

Quantum®XL-6000
Auto Thread Exchanger™ in Regular Sewing Mode
- 14 -
3. Stage Left Thread through Mast and through Exchanger Thread Guide A…
4. Stage Thread into Automatic Threading Mechanism
4. Automatically Thread Left Spool A and Stage Right Spool B…
Thread the
mast as
illustrated
This Specific
Thread Guide
must be used.
Failure to use
will cause
failure when
rewinding.
S
p
ool A
S
p
ool B
This step is vital to the success of the Auto
Thread Exchanger™. Hold the thread
tightly in your right hand as shown and
guide the thread with your left hand. Be
sure you pull the thread into the holding
pinch plate of the threading mechanism
before cutting the thread. You will
actually feel a light “snap” and may hear
a slight “click” when the thread is
properly engaged in the Threading Pinch
Plate.
Touch Automatic Threading Key
Touch Automatic Threading Pictogram to
thread Left Spool A
Stage Right Spool B through Mast Guide and into
Automatic Threading Mechanism holding pinch plate
Upon completion of sewing with Left Thread
A, touch pictogram to rewind left spool
Thread right
thread B
Rewind right
thread B

Quantum®XL-6000
Tension, Odometer, Needles
-15-
How to adjust thread tension (manually):
The sewing machine has an automatic computer controlled thread metering
system that calculates and delivers the precise amount of thread for each
needle penetration to create the optimum appearance of each stitch. An
override control is available to allow for individual modification for specialized
effects.
To change thread tension for special-purpose stitching style, follow
procedure described below:
Tension shows automatically on the 4 Utility Screens. For all other screens,
tension will be shown on a “pop-up” screen accessed by pressing key.
Stitch Count Odometer:
Your sewing machine has an Odometer that keeps track of how many stitches
you have sewn in both Regular Sewing Mode and Embroidery Mode. A count
of 1 is equal to 100,000 stitches. It is a good idea to change needles every
200,000 stitches. Clean your machine every 500,000 stitches. Have your
sewing machine and embroidery unit professionally cleaned and serviced every
3,000,000 stitches.
To access Odometer: touch key, then pictogram, then
pictogram.
Sewing Machine Needles:
SINGER®has developed a new style needle for use in the Quantum®XL-6000
and other top quality sewing machines. These chromium needles are available
in Universal/Round Point Style 2000 and Ball Point Style 2001 in sizes 11/80,
14/90 and 16/100.
Marketed under the Name of “Platinum”, the needles have special features
including an eye specially suited for the Quantum®XL-6000 Automatic
Threading System. They also deliver exceptional performance for regular
sewing and embroidery sewing. Additionally, the needles are chromium plated
the same as Industrial Needles and will last substantially longer than normal
household needles.
The Style 2000 and 2001 Chromium Needles will improve sewing in all
Household Sewing Machines and Overlock Machines designed to use 15x1RS,
HAx1and 130/705H Household Needles.
To increase tension, touch the + pictogram. To decrease tension, touch the
–
p
icto
g
ram. Tension increases and decreases in 8 ste
p
s.

Quantum®XL-6000
Standard Machine Operations
- 16 -
Utility Stitches
Turn the machine on and touch anywhere on the “Welcome Screen” to begin.
Note: The sewing speed of the Quantum®XL-6000 is 850 stitches per minute
for straight stitch regular sewing.
Exercise #1 – Basting (5, 10, 15 and 20mm)
1. Select the basting stitch in Folder 1, Row 2, Stitch 6.
2. The default setting for the basting stitch length is 10mm; sew the basting
stitch lengthwise down the center of the fabric.
3. Change the basting stitch length to 5mm; sew down the left side of the
fabric.
4. Change basting stitch length to 20mm; sew along the right side of the
fabric.
The basting stitch aids in securing fabrics in place for various techniques such
as blind hemming, zipper insertion, and quilting. Use it also to gather ruffles
or ease sleeve caps. It removes from the fabric easily.
Exercise #2 – Patented Quilting Stitch
Every quilter needs the Patented Quilting Stitch because this stitch looks just
like “hand-sewn” quilting.
1. Select the Patented Quilting Stitch (Folder 3, Row 2, Stitch 3).
2. Place contrasting thread in the bobbin and thread to color-blend with
fabric in the needle. Monofilament nylon thread may be used as an
alternative. However, be aware that nylon thread may present problems
when ironing your completed project.
3. Change stitch length to 3mm. Stitch length available: 2.0, 2.3, 2.5, 3.0,
3.5 and 4.0mm.
4. Sew, with no need to trim between stitches.
Note: Depending upon the fabric and thread combination, it may be necessary
to increase the tension setting to make the stitch more prominent looking.
Experiment to achieve desired results.

Quantum®XL-6000
Standard Machine Operations
- 17 -
Buttonholes (18 built-in buttonholes)
Exercise #1 – Large Buttonhole
1. Select Folder 2, Row 1, Buttonhole 3.
2. Place thread in needle and bobbin.
3. Attach buttonhole foot “E” onto machine.
4. Fold the woven fabric in half, cross-wise, placing interfacing between
layers.
5. Place fabric between foot and underplate.
6. Place button in buttonhole foot, pushing slide to set buttonhole length;
remove button.
7. Lower buttonhole lever and sew.
8. Machine will stop when buttonhole is complete; use thread cutter button
to finish.
Note: To create a Purl Stitch buttonhole simply press the pictogram.
Needle thread and bobbin thread interlace with each other on right side of fabric
to create a finished appearance that resembles a hand-sewn buttonhole.
Exercise #2 – Stretch Buttonhole
Repeat the same procedure as in Exercise 1, except:
Select the Stretch Buttonhole in Screen 3, Row 1, Buttonhole 5.
Fold the knit fabric in half, cross-wise, placing interfacing between layers of
fabric.
* The Quantum®XL-6000 has 18 built-in buttonhole styles!
Note: Simply decreasing the stitch length can change the density of the zigzag
stitches on any buttonhole. This will create a satin-looking buttonhole.
Other manuals for Quantum XL-6000
3
Table of contents
Other Singer Sewing Machine manuals

Singer
Singer 503 User manual

Singer
Singer 2932 User manual

Singer
Singer 5127 User manual

Singer
Singer 9417 User manual

Singer
Singer 211A165AA Setup guide

Singer
Singer FUTURA CE-150 User manual

Singer
Singer Futura SES2000 User manual

Singer
Singer 484.1544180 User manual

Singer
Singer 6201; 6211 User manual

Singer
Singer 44-26 User manual

Singer
Singer Tradition 2250 Owner's manual

Singer
Singer 4522 User manual

Singer
Singer 116-1 User manual

Singer
Singer 153K101 Quick start guide

Singer
Singer 271K User manual

Singer
Singer 66-1 User manual

Singer
Singer 11W6 Quick start guide

Singer
Singer S0705 User manual

Singer
Singer 321C - User manual

Singer
Singer 114W101 User manual