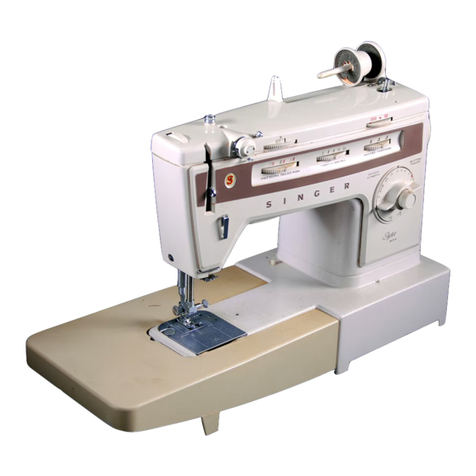
Singer Quantumlock 14T957DC Operation instructions


Table of Contents
Triple Cover Hem
Home Decorator Fabric with Buttonhole Twist page 1
Leather, Vinyl or Canvas with Buttonhole Twist page 2
Garment Hems for Knits page 3
Double Cover Hem
Garment Hems page 4
Attaching Trim to Sheer fabric page 5
Five-Thread Safety Stitch
Seams on Chenille page 6
Four-Thread Ultra-Stretch Mock Safety Stitch
Seams on Stretch Fabric page 7
Attaching Ribbing page 8
Differential Feed with Optional Shirring Foot page 9
Optional Taping Foot page 10
Optional Cording/Piping Foot page 11
Optional Elastic Foot page 12
Three-Thread Overlock (Wide)
Seams Finishes page 13
Decorative Flatlock page 14
Flatlock Fringe page 15
Flatlock Ladder Stitch page 16
Flatlock Ladder Stitch with Ribbon page 17
Flatlock Couching page 18
Three-Thread Overlock (Narrow)
Optional Bead/Sequin Foot page 19
Blindhem with Optional Blind Hem/Lace Foot page 20
Three-Thread Rolled Hem
Texturized-nylon Edge Finishes page 21
Custom Ribbon with Pearl/ Sequin Foot page 22
Pintucks page 23

Table of Contents
(page 2)
Two-Thread Rolled Hem
Lace Insertion with Optional Blind Hem/Lace foot page 24
Delicate Edge Finishes page 25
Three-Thread Ultra- Stretch Stitch
Seams on Active Wear page 26
Four-Thread Safety Stitch
Seam Construction page 27
Chainstitch
Decorative Chainstitch page 28
Tassels page 29
List of Optional Presser Feet page 30

Supply List
5 spools of overlock cone thread
Triple Cover Hem
(3) spools of butttonhole twist
(1) 5X5 inch piece of home decorator fabric
(1) 5X5 inch piece of leather, vinyl or canvas
(2) 3X5 inch pieces of stretch fabric
Double Cover Hem
(1) 5X5 inch piece of woven fabric
(1) 4X6 inch piece of sheer fabric
(1) 10 inch piece of 1/4”wide ribbon
Five-Thread Safety Stitch
(2) 3X5 inch pieces of chenille or terry cloth
Four-Thread Ultra-Stretch Mock Safety Stitch
(2) 3X5 inch pieces of stretch fabric
(1) 5X5 inch piece of fleece
(1) 2X5 inch piece of ribbing
(1) 3X5 inch piece of cotton
(1) 3X10 inch piece of cotton
(1) 10 inch piece of twill tape 1/4 wide
(2) 3X5 inch pieces of sweater knit
(1) 10 inch piece of cording
(2) 3X5 inch pieces of home decorator fabric
(1) 10 inch piece of elastic 1/4 wide
(1) 3X5 inch piece of tricot or lingerie type fabric
Three-Thread Overlock (Wide)
(2) 3X5 inch pieces of woven or linen fabric
(1) spool of texurized nylon
(1) 5X5 inch piece of denim, felt or woven fabric
(1) 4X5 inch piece of very loosely-woven wool
(1) 5X5 inch piece of denim, felt or woven fabric
(1) decorative thread which will fit through the needle’s eye
(1) 10 inch piece of ribbon, 1/4 wide
(1) 5x5 inch piece of denim, felt or woven fabric
(1) 10 inch piece of yarn

Supply List
(part II)
Three-Thread Overlock (Wide) continued
(1) 5X5 inch piece of denim, felt or woven fabric
Three-Thread Overlock (Narrow)
(1) 10 inch strand of pearls
(1) 3X6 inch piece of sheer fabric
(1) 5X5 inch piece of woven or linen fabric
(1) spool of monofilament thread
Three-Thread Rolled Hem
(1) 3X5 piece eyelet or batiste
(1) spool of texturized nylon
(1) 10 inch piece of fish line
(1) 3X10 piece of cotton fabric
(1) 5X10 piece of batiste
Two-Thread Rolled Hem
(2) 5 inch long pieces of 1 inch wide lace
(2) 3X3 inch pieces of batiste
(1) 3X10 inch piece of chiffon
(2) spools of monofilament thread
Three-Thread Ultra- Stretch Stitch
(1) 3X5 inch piece of spandex
Four-Thread Safety Stitch
(2) 3X5 pieces of canvas
Chainstitch
(2) spools of decorative thread
(2) 5X5 inch pieces of cotton
(1) 5X5 inch piece of batting
(1) 5X5 inch piece of cardboard

Right Cover Stitch
Needle (Orange)
6.0
Middle Cover Stitch
Needle (Blue)
7.0
Left Cover Stitch
Needle (Green)
7.5
Upper Looper
(Green)
Non-Working
Position
Lower Looper
(Red)
Not Threaded
Chain Stitch
Looper (Brown)
4.0
Upper Knife Non-Working
Position
Seam Guide Plate Installed
Seam Width Dial N
Differential Feed
Dial
N
Presser Foot
Pressure
N
Stitch Length Dial N
Stitch Finger R
Triple Cover Hem
This innovative stitch provides a very wide 5.6 mm professional and
creative triple topstitch to sewing projects. This is ideal for heavier
fabrics traditionally used in home decorating. It also adds a unique accent
for garment construction. The Singer Quantumlock CoverHem 14T957DC
sews 1300 stitches per minute, enabling the decorative Triple Cover Hem
stitch to be applied to projects quickly and easily.
Example:
Triple topsitching hem and edge finishing on drapes.
Directions:
Place topstitching thread in the right, middle and left cover stitch needles.
Place regular overlock thread in the chainstitch looper. Press a 1 inch hem into a woven
home decorator fabric. Sew using the seam guides to ensure a straight hem. The thread
tension releases when the presser foot is raised.
Needle set up:
1.
Left Cover Stitch
Needle (Orange)
6.0
Middle Cover Stitch
Needle (Blue)
7.0
Right Cover Stitch
Needle (Green)
7.5
Upper Looper
(Green)
Non-Working
Position
Lower Looper
(Red)
Not Threaded
Chain Stitch
Looper (Brown)
4.0
Upper Knife Non-Working
Position
Seam Guide Plate Installed
Seam Width Dial N
Differential Feed
Dial
N
Presser Foot
Pressure
N
Stitch Length Dial N
Stitch Finger R

Triple Cover Hem
The Triple Cover Hem makes a stunning and pronounced finish on Home
Decorating projects using fabrics such as leather, vinyl or canvas.
Example:
Triple topstitching hem and an edge finish on a vinyl table cloth.
Directions:
Place topstitching thread in the right, middle and left cover stitch needles.
Place regular overlock thread in the chainstitch looper. Move stitch length to 4 and the
foot pressure adjusting dial to 1. Press 1 inch hem on fabric and sew using the seam
guides to ensure a straight triple line of stitching.
Needle set up:
2.
Left Cover Stitch
Needle (Orange)
6.0
Middle Cover Stitch
Needle (Blue)
7.0
Right Cover Stitch
Needle (Green)
7.5
Upper Looper
(Green)
Non-Working
Position
Lower Looper
(Red)
Not Threaded
Chain Stitch
Looper (Brown)
4.0
Upper Knife Non-Working
Position
Seam Guide Plate Installed
Seam Width Dial N
Differential Feed
Dial
N
Presser Foot
Pressure
1
Stitch Length Dial 4
Stitch Finger N
Triple Cover Hem
The Triple Cover Hem makes a stunning and pronounced finish on Home
Decorating projects using fabrics such as leather, vinyl or canvas.
Example:
Triple topstitching hem and an edge finish on a vinyl table cloth.
Directions:
Place topstitching thread in the right, middle and left cover stitch needles.
Place regular overlock thread in the chainstitch looper. Move stitch length to 4 and the
foot pressure adjusting dial to 1. Press 1 inch hem on fabric and sew using the seam
guides to ensure a straight triple line of stitching.
Needle set up:
2.
Left Cover Stitch
Needle (Orange)
6.0
Middle Cover Stitch
Needle (Blue)
7.0
Right Cover Stitch
Needle (Green)
7.5
Upper Looper
(Green)
Non-Working
Position
Lower Looper
(Red)
Not Threaded
Chain Stitch
Looper (Brown)
4.0
Upper Knife Non-Working
Position
Seam Guide Plate Installed
Seam Width Dial N
Differential Feed
Dial
N
Presser Foot
Pressure
1
Stitch Length Dial 4
Stitch Finger R

Triple Cover Hem
In addition to sewing on woven fabrics, the Triple Cover Hem makes a
beautiful topstitch and a strong hem on stretch fabrics. This stitch
emulates hem finishing as seen on ready-to-wear garments.
Example:
Triple topstitching hem and an edge finish on a knit dress.
Directions:
Place regular overlock thread in the right, middle and left cover stitch
needles, as well as the chainstitch looper. Move stitch length to “N” and the foot
pressure adjusting dial to “N.” Press 1 inch hem into the knit fabric. Sew using the seam
guides to ensure a straight triple line of stitching.
Needle set up:
3.
Left Cover Stitch
Needle (Orange)
6.0
Middle Cover Stitch
Needle (Blue)
7.0
Right Cover Stitch
Needle (Green)
7.5
Upper Looper
(Green)
Non-Working
Position
Lower Looper
(Red)
Not Threaded
Chain Stitch
Looper (Brown)
4.0
Upper Knife Non-Working
Position
Seam Guide Plate Installed
Seam Width Dial N
Differential Feed
Dial
N
Presser Foot
Pressure
N
Stitch Length Dial N
Stitch Finger R

Double Cover Hem
This professional Cover Hem stitch is a necessary requirement for today’s
sewing. This stitch is often seen in ready-to-wear garments. With easy
access to the needle, it is simple to remove the center needle and convert
the stitch into a Double Cover Hem.
Example:
Double topstitching hem and edge finish on a jacket.
Directions:
Using the extra long small Allen screwdriver from the accessory kit, remove
the middle cover stitch needle and clip thread. Press a 1 inch hem into a woven fabric.
Sew using the seam guides to ensure a straight hem.
Needle Set up:
4.
Left Cover Stitch
Needle (Orange)
6.0
Middle Cover Stitch
Needle (Blue)
Not Threaded
Right Cover Stitch
Needle (Green)
7.5
Upper Looper
(Green)
Non-Working
Position
Lower Looper
(Red)
Not Threaded
Chain Stitch
Looper (Brown)
4.0
Upper Knife Non-Working
Position
Seam Guide Plate Installed
Seam Width Dial N
Differential Feed
Dial
N
Presser Foot
Pressure
N
Stitch Length Dial N
Stitch Finger R
The EXTRA LONG
Allen screwdriver makes
needle change easy

Double Cover Hem for Attaching Ribbon or Trim
The Double Cover Hem can be used to add a decorative accent to many
types of projects. By inserting ribbon or trim through the presser foot
opening, the Cover Hem can attach the trim to the fabric with either a 2.8
or 5.6mm wide stitch.
Example:
Adding a ribbon and an edge finish hem to a sheer dress.
Directions:
Place ribbon through the opening in the foot and pull excess to the back
under the foot. Press a 1 inch hem into the fabric. Sew the ribbon onto the fabric, using
the seam guides to ensure straight sewing.
Needle Set up:
5.
Right Cover Stitch
Needle (Orange)
6.0
Middle Cover Stitch
Needle (Blue)
Not Threaded
Left Cover Stitch
Needle (Green)
7.5
Upper Looper
(Green)
Non-Working
Position
Lower Looper
(Red)
Not Threaded
Chain Stitch
Looper (Brown)
4.0
Upper Knife Non-Working
Position
Seam Guide Plate Installed
Seam Width Dial N
Differential Feed
Dial
N
Presser Foot
Pressure
N
Stitch Length Dial N
Stitch Finger N
Double Cover Hem for Attaching Ribbon or Trim
The Double Cover Hem can be used to add a decorative accent to many
types of projects. By inserting ribbon or trim through the presser foot
opening, the Cover Hem can attach the trim to the fabric with either a 2.8
or 5.6mm wide stitch.
Example:
Adding a ribbon and an edge finish hem to a sheer dress.
Directions:
Place ribbon through the opening in the foot and pull excess to the back
under the foot. Press a 1 inch hem into the fabric. Sew the ribbon onto the fabric, using
the seam guides to ensure straight sewing.
Needle Set up:
5.
Right Cover Stitch
Needle (Orange)
6.0
Middle Cover Stitch
Needle (Blue)
Not Threaded
Left Cover Stitch
Needle (Green)
7.5
Upper Looper
(Green)
Non-Working
Position
Lower Looper
(Red)
Not Threaded
Chain Stitch
Looper (Brown)
4.0
Upper Knife Non-Working
Position
Seam Guide Plate Installed
Seam Width Dial N
Differential Feed
Dial
N
Presser Foot
Pressure
N
Stitch Length Dial N
Stitch Finger R

Five-Thread Safety Stitch
This stitch is a combination of a two-thread chainstitch and a three-thread
overlock stitch. It is suitable for woven fabrics and provides a durable
seam for heavy weight fabrics such as denim and terrycloth.
Using this strong safety stitch eliminates the need to reinforce the seam
with a conventional sewing machine straight stitch. The foot pressure
adjusting dial makes it simple to sew on all weights of fabrics.
Example:
The side seams and edge finish on a chenille bath robe.
Directions:
Remove the right and left cover stitch needles, and insert the middle cover
stitch needle. Place a needle in the back overedge right position and engage the upper
looper. Use the one-step lower looper and chain looper threader to thread. Remove the
seam guide plate and replace with the overedge guide plate. Engage the knife. Set the
foot pressure adjusting dial to setting 5. Sew two pieces of chenille, right sides together
to form a seam.
Needle set up:
6.
Middle Cover Stitch
Needle (Orange)
4.0
Back Overedge
Right Needle (Blue)
4.5
Right Cover Stitch
Needle (Green)
Upper Looper
(Green)
3.5
Lower Looper
(Red)
3.5
Chain Stitch
Looper (Brown)
7.5
Upper Knife Engaged
Seam Guide Plate Removed
Seam Width Dial N
Differential Feed
Dial
N
Presser Foot
Pressure
5
Stitch Length Dial N
Stitch Finger N

Four-Thread Ultra-Stretch Mock Safety Stitch
This stitch is a favorite when sewing a knit fabric because the stitch
stretches as the fabric stretches. This allows for neat and professional
finishes that will not “pop” when the fabric is stretched.
Example:
The side seams and edge finishes of garments such as stretch twill pants.
Directions:
Remove the middle cover stitch needle, and insert back overedge left nee-
dle. Clip and remove chain looper thread. Set foot pressure adjusting dial to N.
Sew two pieces of knit fabric, right sides together.
Needle set up:
7.
Back Overedge Left
Needle (Orange)
4.0
Back Overedge
Right Needle (Blue)
4.0
Left Cover Stitch
Needle (Green)
Upper Looper
(Green)
4.0
Lower Looper
(Red)
4.0
Chain Stitch
Looper (Brown)
unthreaded
Upper Knife Engaged
Seam Guide Plate Removed
Seam Width Dial N
Differential Feed
Dial
N
Presser Foot
Pressure
N
Stitch Length Dial N
Stitch Finger N

Four-Thread Ultra-Stretch Mock Safety Stitch
This stitch works well when applying ribbing to a garment. Ribbing is often
seen on cuffs, collars and waistbands of active wear. Because the stitch
stretches with the fabric, the seam will not break when the fabric is
stretched.
Example:
The seam and edge finish for joining ribbing to fleece on a baby’s bunting
jacket.
Directions:
Set for the Four-Thread Ultra-Stretch Mock Safety Stitch. Place ribbing on
top of fleece and sew. While sewing, stretch the ribbing as needed.
Needle set up:
8.
Back Overedge Left
Needle (Orange)
4.0
Back Overedge
Right Needle (Blue)
4.0
Left Cover Stitch
Needle (Green)
Upper Looper
(Green)
4.0
Lower Looper
(Red)
4.0
Chain Stitch
Looper (Brown)
unthreaded
Upper Knife Engaged
Seam Guide Plate Removed
Seam Width Dial N
Differential Feed
Dial
N
Presser Foot
Pressure
N
Stitch Length Dial N
Stitch Finger N

Four-Thread Ultra-Stretch Mock Safety Stitch and the
Differential Feed to Create Gathers
Differential Feed is great for easing or shirring of sleeves, yokes and skirt
hems. It is also useful for keeping stretch fabrics and bias cut fabrics from
becoming “stretched out”. The optional Shirring Foot and the differential
feed work together to create gathers, which attach to a flat piece of fabric
all in ONE STEP. This timesaving technique allows quick gathers to be
added to garments, home decorating and crafts.
Example:
The ruffle on a bed skirt or the ruffle on a little girl’s dress.
Directions:
Set for the Four-Thread Ultra–Stretch Mock Safety Stitch. Set differential
feed dial to 0.6, and replace standard foot with Shirring Foot. Join two pieces of cotton
fabric, one piece 5 inches long and the other 10 inches long. Place the 5 inch piece into
the foot. Place the 10 inch piece under the foot. Sew, allowing the bottom fabric to “feed”
faster than the top fabric.
Needle set up:
9.
Back Overedge
Left Needle(Orange)
4.0
Back Overedge
Right Needle (Blue)
4.0
Left Cover Stitch
Needle (Green)
Upper Looper
(Green)
4.0
Lower Looper (Red) 4.0
Chain Stitch Looper
(Brown)
Unthreaded
Upper Knife Engaged
Seam Guide Plate Removed
Seam Width Dial N
Differential Feed Dial 2.0
Presser Foot
Pressure
N
Stitch Length Dial 4
Stitch Finger N

Back Overedge
Left Needle
(Orange)
4.0
Back Overedge
Right Needle (Blue)
4.0
Left Cover Stitch
Needle (Green)
Upper Looper
(Green)
4.0
Lower Looper
(Red)
4.0
Chain Stitch
Looper (Brown)
Unthreaded
Upper Knife Engaged
Seam Guide Plate Removed
Seam Width Dial N
Differential Feed
Dial
0.6
Presser Foot
Pressure
N
Stitch Length Dial N
Stitch Finger R
Four-Thread Ultra-Stretch Mock Safety Stitch and
the Taping Foot
The optional Taping Foot is designed to add reinforcement to stress areas
of knit or loosely–woven garments by inserting a stabilizing twill tape to
the seams. The tape prevents the seam from “stretching out” or losing its
shape. The foot keeps the tape in place, making it easy to sew straight.
Example:
The shoulder seam in a sweater knit top.
Directions:
Set for the Four-Thread Ultra-Stretch Mock Safety Stitch. Replace standard
foot with the Taping Foot. Place twill tape under the foot guide and adjust the foot’s
screw to the widest position. Place two pieces of knit fabric under the foot and sew. The
twill tape will be applied as the seam is sewn.
Needle set up:
.
10.
Back Overedge
Left Needle
(Orange)
4.0
Back Overedge
Right Needle (Blue)
4.0
Left Cover Stitch
Needle (Green)
Upper Looper
(Green)
4.0
Lower Looper
(Red)
4.0
Chain Stitch
Looper (Brown)
Unthreaded
Upper Knife Engaged
Seam Guide Plate Removed
Seam Width Dial N
Differential Feed
Dial
N
Presser Foot
Pressure
N
Stitch Length Dial N
Stitch Finger N

Four-Thread Ultra-Stretch Mock Safety Stitch and the
Cording/Piping Foot
The optional Cording/Piping foot is perfect for applying corded piping
between two layers of fabric. This makes a decorative finish for pillows,
bed linens, garments and many other projects.
Example:
Adding piping, finishing the fabric’s edges and joining the seams on a pillow
or window treatment.
Directions:
Set for the Four-Thread Ultra-Stretch Mock Safety Stitch. Change standard
foot to the Cording/Piping Foot. Place two pieces of fabric, right sides together. Insert
corded piping between the two pieces of fabric. Be certain the cording is in the groove of
the foot to ensure the cording is sewn straight.
Needle Set-up:
11.
Back Overedge Left
Needle (Orange)
4.0
Back Overedge
Right Needle (Blue)
4.0
Left Cover Stitch
Needle (Green)
Upper Looper
(Green)
4.0
Lower Looper
(Red)
4.0
Chain Stitch
Looper (Brown)
Unthreaded
Upper Knife Engaged
Seam Guide Plate Removed
Seam Width Dial N
Differential Feed
Dial
N
Presser Foot
Pressure
N
Stitch Length Dial N
Stitch Finger N
Tip:
Cut bias fabric strips
to cover filler cord
and make your own
custom cording!

Four-Thread Ultra-Stretch Mock Safety Stitch and the
Elastic Foot
The optional Elastic Foot makes inserting narrow elastic an easy endeavor.
This foot is ideal for applying elastic to lingerie, swimwear and great for
children’s clothing.
Example:
Applying narrow elastic and finishing the edges to the waistband of lingerie.
Directions:
Set for the Four-Thread Ultra-Stretch Mock Safety Stitch and change stitch
length to 4. Before changing to the Elastic Foot, pass the elastic tape through the sewing
foot, going over the roller and under the pressure plate. Pull the elastic to the back of the
machine. Sew 2-3 stitches to secure the elastic to the fabric, then turn the pressure
adjustment screw to create the desired “stretch” of the elastic.
Needle Set up:
12.
Back Overedge Left
Needle (Orange)
4.0
Back Overedge
Right Needle (Blue)
4.0
Left Cover Stitch
Needle (Green)
Upper Looper
(Green)
4.0
Lower Looper
(Red)
4.0
Chain Stitch
Looper (Brown)
Unthreaded
Upper Knife Disengage
Seam Guide Plate Removed
Seam Width Dial 6.5
Differential Feed
Dial
N
Presser Foot
Pressure
N
Stitch Length Dial 4
Stitch Finger N

Three-Thread Overlock
The Three-Thread Overlock stitch provides a wonderful professional seam
finish to woven fabrics. It is beneficial in preventing loosely woven fabrics
from unraveling. In addition, the Three-Thead Overlock stitch offers
unlimited decorative capabilities.
Example:
The edge finish in an unlined wool or linen suit jacket, where it is desirable to
keep the entire 5/8” seam allowance.
Directions:
Remove the back right overedge needle and clip thread. Use the standard
presser foot. Using two pieces of fabric, sew one edge of the first piece. Then sew one
edge of a second piece of fabric. Place the two fabrics, rights sides together. Using a
conventional sewing machine, sew a straight stitch with a 5/8 inch seam. Press the seam
open.
Needle Set up:
13.
Back Overedge Left
Needle (Orange)
4.0
Back Overedge
Right Needle (Blue)
Left Cover Stitch
Needle (Green)
Upper Looper
(Green)
3.5
Lower Looper
(Red)
3.5
Chain Stitch
Looper (Brown)
Unthreaded
Upper Knife Engaged
Seam Guide Plate Removed
Seam Width Dial N
Differential Feed
Dial
N
Presser Foot
Pressure
N
Stitch Length Dial N
Stitch Finger N

Decorative Flatlock with Three-Thread Overlock Stitch
The Flatlock stitch is used decoratively to achieve the look of applied trim
on a garment, craft or home decorator projects. Special decorative threads
are used for a textured and dramatic embellishment effect.
Example:
Bed linens with decorative touches of lace and trim created by flatlocking
with a textured thread.
Directions:
Set for the Three-Thread Overlock, place a decorative thread in the
upper looper (green). Fold fabric lengthwise. Place the edge of the lace on the fold and
sew. To help the stitch lay flat, guide the fabric so that the overedge stitch forms slightly
off the fabric. Pull fabric to open the seam flat.
Needle Set up:
14.
Back Overedge Left
Needle (Orange)
0.0
Back Overedge
Right Needle (Blue)
Left Cover Stitch
Needle (Green)
Upper Looper
(Green)
4.5
Lower Looper
(Red)
7.0
Chain Stitch
Looper (Brown)
Unthreaded
Upper Knife Disengaged
Seam Guide Plate Removed
Seam Width Dial N
Differential Feed
Dial
N
Presser Foot
Pressure
N
Stitch Length Dial N
Stitch Finger N

Flatlock Fringe Hem with Three-Thread Overlock Stitch
The Flatlock Fringe technique creates a beautiful finish on loosely woven
fabrics, such as those used for scarves and hems. The Flatlock stitch cre-
ates a trim-like finish that is not only decorative, but secures the fringing.
Example:
A fringed hem on a Celtic wool skirt.
Directions:
Set for the Three-Thread Overlock, placing a decorative thread in the
upper looper. Pull 1 or 2 threads to establish straight grain, approximately 1 inch from the
fabric’s raw edge. Fold the fabric, wrong sides together, on the “pulled” or drawn thread
line. Guide the fabric so that the stitch slightly falls over the fabric’s fold. Pull fabric to
open the seam flat. Use a Tapestry needle to bring the beginning and ending thread tails
to the fabric’s backside. Tie off and then secure with a liquid fray-preventer.
Pull the remaining fabric threads up to the stitching line to create fringe.
Needle Set up:
15.
Back Overedge Left
Needle (Orange)
0.0
Back Overedge
Right Needle (Blue)
Left Cover Stitch
Needle (Green)
Upper Looper
(Green)
4.5
Lower Looper
(Red)
7.0
Chain Stitch
Looper (Brown)
Unthreaded
Upper Knife Disengaged
Seam Guide Plate Removed
Seam Width Dial N
Differential Feed
Dial
N
Presser Foot
Pressure
N
Stitch Length Dial N
Stitch Finger N
Other manuals for Quantumlock 14T957DC
2
Table of contents
Other Singer Sewing Machine manuals

Singer
Singer 246-13 Installation and operation manual

Singer
Singer XL-550 User manual

Singer
Singer 2277 User manual

Singer
Singer 112W146 User manual

Singer
Singer 6408 User manual

Singer
Singer 251 Troubleshooting guide

Singer
Singer XL-1000 User manual

Singer
Singer 147-4 User manual

Singer
Singer 14T967 User manual

Singer
Singer 591 User manual

Singer
Singer 4411A566A User manual

Singer
Singer 02; 22 User manual

Singer
Singer C9920 User manual

Singer
Singer 242-1 User manual

Singer
Singer 15-210 User manual

Singer
Singer 147-2 User manual

Singer
Singer 5160 User manual

Singer
Singer 299U1350 User manual

Singer
Singer 2277 User manual

Singer
Singer 6704 User manual