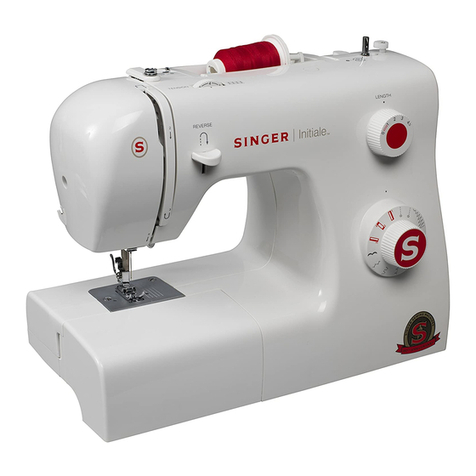
Singer S010L User manual

SEWING MACHINE S010L
NÄHMASCHINE
Bedienungs- und Sicherheitshinweise
SEWING MACHINE
Operation and Safety Notes MACHINE À COUDRE
Instructions d‘utilisation et consignes de sécurité
NAAIMACHINE
Bedienings- en veiligheidsinstructies
347907_BE 2 24-Apr-2020
IAN 347907

GB/IE Operation and Safety Notes Page 5
FR/BE Instructions d‘utilisation et consignes de sécurité Page 29
NL/BE Bedienings- en veiligheidsinstructies Pagina 53
DE/AT/CH Bedienungs- und Sicherheitshinweise Seite 77
Before reading, unfold the page containing the illustrations and familiarise yourself with all functions of the
device.
Avant de lire le mode d‘emploi, ouvrez la page contenant les illustrations et familiarisez-vous ensuite avec
toutes les fonctions de l‘appareil.
Vouw vóór het lezen de pagina met de afbeeldingen open en maak u vertrouwd met alle functies van het
apparaat.
Klappen Sie vor dem Lesen die Seite mit den Abbildungen aus und machen Sie sich anschließend mit allen
Funktionen des Gerätes vertraut.
347907_BE 3 24-Apr-2020

2
3
4
5
6
11
12
1
13 14 15 16 17
7910 8
18
347907_BE 4 24-Apr-2020

347907_BE 5 24-Apr-2020

5GB/IE
Safety information........................................................................................................................................................................................................Page 7
Introduction
Intended use..............................................................................................................................................................................................................................Page 7
Parts description........................................................................................................................................................................................................................Page 7
Technical Data ..........................................................................................................................................................................................................................Page 7
Scope of delivery......................................................................................................................................................................................................................Page 8
Stitch selection...................................................................................................................................................................................................................Page 8
Overview chart................................................................................................................................................................................................................Page 9
Accessories...........................................................................................................................................................................................................................Page 10
About the needles..........................................................................................................................................................................................................Page 10
Opening the looper cover.......................................................................................................................................................................................Page 10
Looper compartment parts description.......................................................................................................................................................Page 10
Preparing to sew............................................................................................................................................................................................................Page 11
Preparing to thread
Attaching the thread guide.......................................................................................................................................................................................................Page 11
Removing and inserting needles
Removing needle(s) ..................................................................................................................................................................................................................Page 11
Inserting needle(s).....................................................................................................................................................................................................................Page 11
Threading
Threading diagram ...................................................................................................................................................................................................................Page 12
Colour code ..............................................................................................................................................................................................................................Page 12
Correctly threading the machine..............................................................................................................................................................................................Page 12
Threading the upper looper (orange)......................................................................................................................................................................................Page 12
Threading the lower looper (yellow) .......................................................................................................................................................................................Page 12
Threading the right needle (green)..........................................................................................................................................................................................Page 13
Threading the left needle (blue)...............................................................................................................................................................................................Page 14
Important information about threading.....................................................................................................................................................Page 15
Changing thread (knotting)...................................................................................................................................................................................Page 15
Setting the stitch length.............................................................................................................................................................................................Page 15
Adjusting the seam width
Setting the widths by changing the needle position ...............................................................................................................................................................Page 15
Setting the width with the seam width dial..............................................................................................................................................................................Page 16
Setting the presser foot pressure .....................................................................................................................................................................Page 16
Differential feed
Gathered overlock seam..........................................................................................................................................................................................................Page 16
Stretched overlock seam...........................................................................................................................................................................................................Page 16
Deactivating the moving upper knife
Bring the upper knife to the rest position.................................................................................................................................................................................Page 17
Bringing the upper knife into operating position.....................................................................................................................................................................Page 17
Attaching the converter to the right looper
Attaching the converter.............................................................................................................................................................................................................Page 17
Removing the converter ............................................................................................................................................................................................................Page 17
Free arm sewing (working with closed round items)
Removing the free arm cover ...................................................................................................................................................................................................Page 17
Reattaching the free arm cover................................................................................................................................................................................................Page 17
Standard overlock seams and rolled hems
Sewing standard overlock seams ............................................................................................................................................................................................Page 18
Sewing rolled hems...................................................................................................................................................................................................................Page 18
347907_BE 5 24-Apr-2020

6 GB/IE
Linking and sample seams.....................................................................................................................................................................................Page 18
Adjusting the thread tension
2-Thread overlock seam ...........................................................................................................................................................................................................Page 18
Correct tension setting...........................................................................................................................................................................................................Page 18
Adjusting the tension .............................................................................................................................................................................................................Page 19
2-Thread rolled hem, standard.................................................................................................................................................................................................Page 19
Correct tension setting...........................................................................................................................................................................................................Page 19
Adjusting the tension .............................................................................................................................................................................................................Page 19
3-Thread overlock seam ...........................................................................................................................................................................................................Page 19
Correct adjustment ................................................................................................................................................................................................................Page 19
Adjusting the thread tension .................................................................................................................................................................................................Page 20
3-Thread flatlock seam .............................................................................................................................................................................................................Page 20
Correct adjustment ................................................................................................................................................................................................................Page 20
Adjusting the thread tension .................................................................................................................................................................................................Page 20
3-Thread overlock seam ...........................................................................................................................................................................................................Page 21
Correct adjustment ................................................................................................................................................................................................................Page 21
Adjusting the thread tension .................................................................................................................................................................................................Page 21
4-Thread stretch safety stitch ....................................................................................................................................................................................................Page 21
Correct adjustment ................................................................................................................................................................................................................Page 21
Adjusting the thread tension .................................................................................................................................................................................................Page 21
Sewing rolled hems
Preparing the machine..............................................................................................................................................................................................................Page 22
2-Thread overlock seam ...........................................................................................................................................................................................................Page 22
Correct tension setting...........................................................................................................................................................................................................Page 22
2-Thread rolled hem, standard.................................................................................................................................................................................................Page 22
Correct tension setting...........................................................................................................................................................................................................Page 23
3-Thread rolled hem, standard.................................................................................................................................................................................................Page 23
Correct adjustment ................................................................................................................................................................................................................Page 23
3-Thread upper looper overlock rolled hem ...........................................................................................................................................................................Page 23
Correct adjustment ................................................................................................................................................................................................................Page 23
Additional information about rolled hems...............................................................................................................................................................................Page 23
Securing the rolled hem thread chain......................................................................................................................................................................................Page 23
Seam variations and sewing techniques
Decorative flatlock seams.........................................................................................................................................................................................................Page 23
Preparing the machine..............................................................................................................................................................................................................Page 24
Sewing a flatlock seam as a cover stitch.................................................................................................................................................................................Page 24
Sewing a flatlock seam as a decorative seam........................................................................................................................................................................Page 24
Additional information about flatlock seams...........................................................................................................................................................................Page 24
Overlock blind hems.................................................................................................................................................................................................................Page 24
Pin-tucks......................................................................................................................................................................................................................................Page 24
Sewing corners
Outside corners.........................................................................................................................................................................................................................Page 25
Inside corners ............................................................................................................................................................................................................................Page 25
Inserting pins..............................................................................................................................................................................................................................Page 25
Securing the thread chain.........................................................................................................................................................................................................Page 25
Reinforced seam........................................................................................................................................................................................................................Page 25
Sewing edging..........................................................................................................................................................................................................................Page 25
Maintaining the machine
Cleaning the machine...............................................................................................................................................................................................................Page 26
Oiling the machine....................................................................................................................................................................................................................Page 26
Replacing the lower knife.........................................................................................................................................................................................................Page 26
Sewing troubles and how to correct them ...............................................................................................................................................Page 26
Material-, thread- and needle chart ...............................................................................................................................................................Page 26
Guarantee and Service
Warranty ...................................................................................................................................................................................................................................Page 27
Service .......................................................................................................................................................................................................................................Page 27
Declaration of Conformity......................................................................................................................................................................................Page 27
347907_BE 6 24-Apr-2020

7GB/IE
Sewing Machine
Safety information
A damaged power cable must be replaced by the manufacturer, dealer,
or other qualified person to prevent potential hazards.
This product is not suitable for persons with physical, sensory and mental
limitations (including children) or lacking the experience or knowledge to
handle this product. This product may be used after being instructed on
its use by a responsible person. This person is responsible for its safe use.
Ensure small children do not play with this product.
Switch off or unplug the machine when left unattended.
Unplug from the mains before maintaining the machine.
If the lighting unit is damaged, it must be replaced by authorised retailer.
Always observe basic safety instructions when using this machine.
Carefully read all instructions before using the machine.
Prevent electric shock
Never leave the machine unattended whilst connected to the mains.
Unplug from the socket after use and before cleaning.
Prevent fires, electric shock
and personal injuries
The mains voltage (voltage of the socket connection) must match the
voltage of the motor.
Only use the machine for the purposes specified in these instructions.
Only use the accessories recommended by the manufacturer in these
instructions for use.
Unplug from the socket or switch off the machine when performing any
work near the needle, such as threading the needle or looper, or when
switching the needle, needle plate, or presser foot.
Unplug the overlock machine from the socket when removing covers,
oiling, or performing any other maintenance by the user as described in
these instructions for use.
Adjusting the motor belt yourself is prohibited. You must contact the
service representative if such adjustments are necessary.
Do not unplug the power plug by the lead, always hold by the plug.
Handle the foot control carefully and do not let it fall to the ground. In
particular, do not place objects onto the foot control.
Always use the correct needle plate. The wrong needle plate can cause
the needle to break.
Do not use bent needles.
Keep your fingers away from any moving parts whilst sewing. Be espe-
cially careful near the overlock needles.
Do not pull or push the fabric whilst sewing. This can bend or break the
needle.
Only lift or carry the machine by the handle.
Never operate the machine if the cable or plug are damaged, the
machine is not working properly, has fallen to the ground, or if damaged
or wet. If an inspection or repair is necessary, or electrical or mechanical
adjustments are required, bring the machine to your nearest authorised
dealer or to a customer service location.
The machine may not be operated if venting ports are sealed. Keep the
vents of the machine and foot control free from lint, dust, and loose fabric.
Do not allow any objects to fall into the openings of the machine.
Do not operate the machine outdoors.
Never operate the machine in locations where sprays or pure oxygen
are used.
Do not use the machine as a toy. Use maximum attention if the machine
is being operated by or in the presence of children.
Do not expose the machine or the machine case to direct sunlight or very
hot or humid indoor climate.
Never touch the machine, foot control or the power cable with wet
hands, wet cloths, or other wet objects.
Do not connect the power plug to a power strip with several leads of
other appliances connected.
Only use the machine on a level and stable table.
Close the machine‘s free arm and hook looper cover before every startup.
Keep presser feet and needles out of the reach of children.
Do not disassemble or modify the machine yourself.
Before maintaining the machine, verify the power switch is off and the
machine is unplugged from the socket.
PLEASE KEEP THESE INSTRUCTIONS IN A SAFE PLACE
Any service must be performed by authorised service technicians.
This product is not intended for industrial use.
Introduction
Congratulations on the purchase of this sewing machine. We are
certain you will be very happy with this product. To ensure you
will be using the product in safely and correctly, we ask you to
observe the following instructions. Read these instructions for use before use,
and follow the safety instructions and information. Keep these instructions for
future reference and be sure to pass them on to other users.
Intended use
This sewing machine will handle a variety of fabrics, from cambric to denim.
Optimal use and maintenance are described in these instructions. This prod-
uct is not intended for industrial use.
Parts description
1Thread guides with spool stand
2Spool pin
3Spool holder
4Thread bar
5Feed regulator wheel
6Hand wheel
7Power- and light switch
8Feed adjuster
9Looper cover
10 Seam width finger support plate
11 Free arm cover
12 Throat plate
13 Thread tension dial left needle (blue)
14 Thread tension dial right needle (green)
15 Carrying handle
16 Upper looper thread tension dial (orange)
17 Lower looper thread tension dial (yellow)
18 Presser bar lifter
Technical Data
Sewing speed:
Stitch length:
Differential feed ratio:
Overlock stitch width:
Needle bar stroke:
Presser foot stroke:
Needle:
Model:
Number of threads:
1,300 rpm
1–4mm (standard: rolled hem, F-2, regular
overlock: 3.0)
1:0.7-1:2 (for machines with differential
feed)
rolled hem: 1.5mm,
regular overlock 3.0-6.7mm
27mm
4.5mm
SINGER N° 2022 # 11
SINGER N° 2022 # 11, #14
S010L
2,3,4
347907_BE 7 24-Apr-2020

8 GB/IE
Machine dimensions: 338x 280 x265mm (w x d x h)
Weight: 6 kg
Mains voltage: 230V ~50 Hz
Rated power: 90W
Sound pressure level: 77dB(A)
Protection class: II
Scope of delivery
1 Sewing machine
1 Set of instructions for use
Remove all packaging materials after unpacking and check the product for
any transport damage. If damaged, do not use the machine but contact our
service centre (see section Warranty Terms).
ATTENTION! DANGER OF SUFFOCATION!
Keep packaging film and bags away from infants and toddlers!
Stitch selection
This machine can produce a variety of stitches, depending on the combina-
tion of needle positions, threading technique and tension settings selected.
Stitch type
1. 2-Thread overlock seam: This 2-thread-1-needle stitch is used for lightweight fabrics or knitted materials.
Changing the needle position will also produce overlock seams 3.5mm and
5.7mm wide. *
2. 2-Thread rolled hem, standard: This 2-thread-1-needle stitch is used to finish edges, for cleaning and sewing bluff
edges. Changing the needle position will also produce rolled hems 3.5mm and
5.7mm wide. *
3. 3-Thread overlock seam: 1-Needle-3-thread stitch is for example useful for serging. Depending on the
needle position selected, the overlock seam width can be 3.5 mm or 5.7 mm. *
4. 3-Thread flatlock seam: 1-Needle-3-thread stitch for lapped seams and decorative stitches using decorative
thread. Depending on the needle position selected, the flatlock seam width can be
3.5 mm or 5.7 mm. *
5. 3-Thread overlock seam: 1-Needle-3-thread stitch for narrow rolled hems or decorative edges. Depending
on the needle position selected, the overlock seam width can be 3.5mm or
5.7mm. *
6. 4-Thread stretch safety stitch: 2-Needle-4-thread stitch is ideal for medium to heavy stretch fabrics such as knitted
material and swimwear.
* Depending on the needle position selected, the machine can sew an overlock seam with a standard width of 3.5mm or 5.7 mm.
347907_BE 8 24-Apr-2020

9GB/IE
The seam width adjustment dial can be extended to make seams even wider for sewing overlock seams on heavy fabrics
(see chapter „Adjusting widths with the seam width dial“).
Overlock width 3.5mm 5.7 mm
Needle used Right overlock needle Left overlock needle
Upper thread tension dial Green Blue
Overview chart
Stitch type Needle
positions
Tension dial: the following values are average values for medium
weight fabrics and regular polyester thread. Converter/
Looper
Blue Green Orange Yellow
1 2-Thread overlock seam (502)
4.0 2.0 Converter
3.5 1.0 Converter
22-Thread rolled hem,
standard (503)
0.5 6.0 Converter
0.5 5.0 Converter
3 3-Thread overlock (504)
3.0 3.0 3.0 Looper
3.0 3.0 3.0 Looper
4 3-Thread flatlock (505)
0.5 5.0 7.0 Looper
0.5 5.0 7.0 Looper
5 3-Thread overlock seam
3.0 1.0 7.0 Looper
5.0 0 8.5 Looper
64-Thread stretch safety stitch
(514) 3.0 3.0 3.0 3.0 Looper
The higher the setting on the dial, the higher the thread tension. The tension settings specified on this page and in other sections of the instructions for use are
guidelines. Always set the thread tension to the fabric being sewn and the thread being used. For optimal sewing results, only change the thread tension by a
half number at a time.
347907_BE 9 24-Apr-2020

10 GB/IE
Accessories
The accessories are located inside the accessory case inside the free arm
cover.
S010L
1 x (1) Set of needles
1 x (2) Screwdriver
1 x (3) Tweezers
1 x (4) Converter
About the needles
SINGER needles #2022 size 90/14 (installed in the machine).
In exceptions you may also use a SINGER no. 2020 standard needle. In
this case, adjust the recommended tension to avoid skipped stitches.
SINGER needle no. 2022
Available sizes 80/11
90/14
Opening the looper cover
CAUTION! Be sure to switch off the power switch before opening the
looper cover.
Slide the cover all the way to the right (1).
Pull the cover down towards you (2).
CAUTION! The looper cover must be closed whilst sewing.
Looper compartment parts description
(1) Upper looper
(2) Moving upper knife
(3) Presser foot
(4) Fixed lower knife
(5) Lower looper
(6) Seam width finger switch
(7) Seam width dial
347907_BE 10 24-Apr-2020

11GB/IE
Preparing to sew
Plug the combo plug (1) into the machine socket (2).
Plug the power cable (3) into the mains socket (4).
Power switch: press the side marked „–“ to switch the machine on.
Press the side marked „0“ to switch the machine off.
Activate the foot control to start the machine and determine the speed.
The more pressure is applied to the controller, the faster the machine
will sew.
Take your foot off the controller to stop sewing.
ATTENTION! Only use the foot controller included with the machine.
Further, be sure to observe the following warnings.
ATTENTION!
The mains voltage (voltage of the socket connection) must match the
voltage of the motor.
Be careful when handling the foot control, do not drop it on the floor and
do not place objects on it.
Unplug from the socket when changing needles, presser foot or throat
plate, or when leaving the machine unattended. This will prevent the ma-
chine from starting if pressure is accidentally applied to the foot control.
Preparing to thread
Attaching the thread guide
The machine‘s thread guide is pushed in at the time of delivery.
Carefully extend the thread guide all the way.
In the correct setting you will hear the two joint parts of the telescoping
rod lock into place.
Position the thread guides centred above the spool pins.
Place the thread onto the spool holders of the spool pins.
Note: Tighten the threads when threading the machine to prevent them
from becoming entangled.
Removing and inserting needles
Removing needle(s)
CAUTION! Unplug from the socket before removing the needle(s).
Turn the hand wheel toward you until the needle is at its highest position.
Loosen, but do not remove, the needle set screw using the small
screwdriver.
(1) Set screw left needle
(2) Set screw right needle
(3) Left needle
(4) Right needle
Remove the needle(s).
Inserting needle(s)
CAUTION! Unplug from the socket before inserting the needle(s).
Hold the needle with the flat side to the back.
Slide it all the way into the needle holder using the lint brush.
Firmly tighten the needle set screw.
Note: This machine requires no. 2022 needles. Please refer to „About the
needles“ for additional information.
Note: Removing the looper cover will make it easier to insert and remove
the needles.
Flat side to the back
347907_BE 11 24-Apr-2020

12 GB/IE
Threading
Threading diagram
A colour-coded threading diagram is
located on the looper cover for quick
reference.
Thread the machine in the order 1–4 as
shown on the right.
Colour code
1. Upper looper thread.............orange
2. Lower looper thread..............yellow
3. Right needle thread...............green
4. Left needle thread..................blue
Correctly threading the machine
CAUTION! The power switch must be off. Raise the presser foot before
threading. If one thread breaks, all 4 threads must be rethreaded.
Threading the upper looper (orange)
Thread the upper looper in the order 1–8.
Insert the thread into the thread guide (1) from front to back.
Thread into the uppermost thread guide by pulling the thread down until
it slips under the thread guide (2).
2
Hold the thread in your fingers, guide it between the two tensions discs,
then pull it downward so it is seated correctly between the tension
discs (3).
Thread the thread guides (4–7) inside the looper compartment accord-
ing to the orange markings.
Thread the eye in the upper looper (8) front to back.
Note: Using the tweezers inside the accessory box will make threading
easier.
Pull approx. 10 cm of thread through the looper and place it down
toward the back.
Threading the lower looper (yellow)
Thread the lower looper in the order 1–9.
Insert the thread through the thread guide (1) from back to front.
Thread into the uppermost thread guide by pulling the thread down until
it slips under the thread guide (2).
347907_BE 12 24-Apr-2020

13GB/IE
2
Hold the thread in your fingers, guide it between the two tensions discs,
then pull it downward so it is seated correctly between the tension
discs (3).
Turn the hand wheel toward you until the lower looper is all the way to
the right.
Thread the thread guides 4-7 inside the looper compartment according
to the yellow markings.
Note: Using the tweezers inside the accessory box will make the looper
easier to thread.
Hold the thread with the tweezers approx. 4 cm from the thread
guide (7).
With the tip of the tweezers, slightly insert it under the thread guide (8)
from left to right.
Pull the thread up into the thread guide (8).
Feed the thread to the back and over the upper end 9-A of the left
looper.
Then carefully pull the thread down so it slips into the opening 9-B of the
looper.
Insert the thread into the looper eye (10).
Note: Using the tweezers inside the accessory box will make threading
easier.
The thread should run through the groove of the lower looper.
Pull approx. 10 cm of thread through the looper and place it over the
upper looper and toward the back.
Threading the right needle (green)
Thread the right needle in the order 1–8 as illustrated.
Insert the thread through the thread guide (1) from back to front.
347907_BE 13 24-Apr-2020

14 GB/IE
Thread into the uppermost thread guide by pulling the thread down until
it slips under the thread guide (2).
2
Hold the thread in your fingers, guide it between the two tensions discs,
then pull it downward so it is seated correctly between the tension
discs (3).
Now thread items 4–7.
Note: The thread must be pulled through the upper thread path of the
thread guide (6).
Thread the eye (8) of the right needle.
Note: Using the tweezers from the accessory box makes it easier to
thread the eye.
Pull approx. 10 cm of thread through the eye.
Place the thread toward the back below the presser foot.
Threading the left needle (blue)
Thread the left needle in the order 1–7 as illustrated.
Insert the thread into the thread guide (1) from front to back.
Thread into the uppermost thread guide by pulling the thread down until
it slips under the thread guide (2).
2
Hold the thread in your fingers, guide it between the two tensions discs,
then pull it downward so it is seated correctly between the tension
discs (3).
Now thread items (4) and (5).
Note: The thread must be pulled through the lower thread path of the
thread guide (5).
Thread the eye (7) of the left needle.
Note: Using the tweezers from the accessory box makes it easier to
thread the eye.
Pull approx. 10cm of thread through the eye.
Place the thread toward the back below the presser foot.
347907_BE 14 24-Apr-2020

15GB/IE
Important information about threading
Always thread the needle(s) last to prevent errors when threading the
lower looper.
If the lower looper unthreads, proceed as follows:
1. Unthread needle(s)
2. Thread the lower looper
3. Thread needle(s)
Correct Wrong
Changing thread (knotting)
If you would like to change the thread (different colour or type), first cut
the thread near the spool.
Place a new spool onto the spool stand.
Tie the end of the new thread to the old thread.
Shorten the end strings of the knot to a length of 2–3cm.
Don‘t cut the strings too short or they may come undone.
Pull on both strings and verify the knot is tight.
Note the settings of the tension dials.
Turn the tension dials all the way down.
One by one, pull the threads through the machine.
If the thread is not easy to pull through, check if they are tangled in the
thread guides or a loop formed under the spool stand.
Stop pulling just before the knots get to the needle.
Cut the thread and thread it through the eye.
Return the thread tensions to the previous settings.
Setting the stitch length
A stitch length of 3 mm is recommended for
most sewing jobs.
When working with heavy fabrics you should
set the stitch length dial to 4 mm.
When working with lightweight fabrics you
should set the stitch length dial to 2 mm. This
will produce a perfect seam and the fabric
will not curl.
Adjusting the seam width
The width of the overlock seams can be determined by changing the
needle position and with the seam width dial.
Setting the widths by changing
the needle position
The width of an overlock seam can be determined by changing the
needle position.
a) Only using the left needle............................5.7 mm
b) Only using the right needle..........................3.5 mm
347907_BE 15 24-Apr-2020

16 GB/IE
Setting the width with the seam width dial
Use the seam width dial to adjust the seam width to the ranges specified
below.
a) Only using the left needle............................5.2–6.7 mm
b) Only using the right needle..........................3.0–4.5 mm
Left/ right
needle
Left
needle
Right
needle
CAUTION! Always power off the machine using the power switch when
making adjustments to the machine.
Note: Removing the looper cover makes it easier to make adjustments.
Note: Slide the upper knife to the right and hold it in this position.
Meanwhile turn the adjustment dial to set to the desired seam width. Use
the markings on the throat plate as a reference.
CAUTION! Always close the looper cover before starting up the
machine.
3.5 / Orla enrolada
(ajuste de fábrica)
3.5 / rolled hem
(factory settings)
Setting the presser foot pressure
The machine‘s preset presser foot pressure is suitable for medium weight
fabrics.
Most fabrics do not require the presser foot pressure to be changed.
When using light or heavy fabrics, sometimes the pressure may need to
be adjusted.
In this case, insert a screwdriver through the access hole (A) located in
the upper part of the machine and into the slot (B) for the pressure set
screw, and turn the screw as needed.
Note: Turn the set screw counterclockwise until it touches the face cover.
If you then turn the screw 6 turns clockwise, it is at the standard presser
foot pressure.
For lightweight fabrics: reduce pressure
For heavy fabrics: increase pressure
Differential feed
The differential feed stretches or gathers the
work piece, depending on the feed differen-
tial set between the front and rear feeder.
The differential feed ratio can be set within a
range from 1:0.7 to 1:2.0. The adjustment is
made using the differential feed adjustment
lever (see illustration).
The differential feed can be used to create
beautiful effects when sewing overlock seams in stretch materials and
bias cut pieces.
Having the differential feed lever set to „1.0“ corresponds to a differen-
tial feed ratio of 1:1.
Gathered overlock seam
The gathered overlock seam is best
suited for gathering sleeves, yokes,
back top sections, skirt hems, etc.
Sew this seam before sewing the
fabric pieces together. The gathered
seam is also suitable for stretchy
materials such as knitting or jersey.
Adjusting the differential feed lever
Set the differential feed lever to a setting
higher than 1.0. The differential feed setting
depends on the material you are working
with and the gather effect. We recommend
testing the seam on a fabric scrap before
starting to sew.
Note: For regular overlock seams it is best
to set the differential feed lever to 1.0.
Stretched overlock seam
The stretched overlock seam is ideal
for creating ruffles on collars,
sleeves, skirt hems, etc. on soft,
stretchy fabrics and knitting.
347907_BE 16 24-Apr-2020

17GB/IE
Adjusting the differential feed lever
Set the differential feed lever to a setting
higher than 1.0.
Slightly stretch the piece whilst sewing. To do
so, lightly hold on to the work piece in front
of and behind the presser foot.
Note: If the amount of stretch is not ad-
justed according to the materials, it will tend
to „run away“ from the needle, resulting in
improperly finished overlock seams. In this
case, set the adjustment lever for the differen-
tial feed slightly closer to the centre mark.
Note: Don‘t forget to return the differential
feed lever back to 1.0 to sew regular over-
lock seams again.
Deactivating the moving upper knife
CAUTION! The power switch must be off.
Bring the upper knife to the rest position
Turn the hand wheel toward you and bring the upper knife up and into
its highest position.
Open the looper cover (see „Opening the looper cover“).
Push the holder for the upper knife all the way to the right.
Turn the button away from you until the knife locks into a horizontal
position.
Note: If the knife is stuck in the top position
– turn the hand wheel toward you
– continue turning the hand wheel until the knife is in a horizontal
position.
Upper knife holder
Bringing the upper knife into operating position
Open the looper cover and slide the holder
for the upper knife all the way to the right.
Turn the button toward you until the knife
locks into working position.
CAUTION! Always close the looper cover
before starting the machine.
Attaching the converter to the right looper
Note: Switch the machine off before installing or removing the converter.
Attaching the converter
B
A
D
E
C
Slide the insert (A) of the converter into the
hole (B) of the right looper.
Set the locating pin (C) onto the top edge of
the looper.
Slide the arm tip (D) into the hole (E) of the
right looper.
Removing the converter
Remove the arm tip (D) from the hole (E) of
the right looper and remove the converter
from the looper.
Note: Place the converter in the accessory
box.
Free arm sewing (working with
closed round items)
This machine can quickly be converted into a free arm machine. You only
need to remove the free arm cover.
Removing the free arm cover
Pull the free arm cover to the left and take it off the machine. Press button
A on the underside when doing so.
Free arm sewing is particularly suitable for hard to reach sections on
garments, e.g. armholes and turn-ups on trousers.
Slide the garment over the free arm to sew.
Reattaching the free arm cover
Align the lug on the free arm cover with the groove on the free arm and
slide the free arm cover to the right until the tab of the free arm cover
locks into the slot on the free arm.
347907_BE 17 24-Apr-2020

18 GB/IE
Standard overlock seams and rolled hems
Sewing standard overlock seams
„
Seam width finger switch
Set the seam width finger switch to S to
push the seam width finger forward.
Note: The seam width finger switch must
be moved all the way toward the adjust-
ment mark S.
Sewing rolled hems
„
Set the seam width finger switch to R to
slide the seam width finger back.
Note: The seam width finger switch must
be moved all the way toward the adjust-
ment mark R.
Linking and sample seams
With the machine fully threaded, place all thread under the presser foot
toward the back, slightly toward the left, across the throat plate.
Hold the threads slightly taut.
Turn the hand wheel 2 to 3 full turns toward you to start forming the
thread chain.
Lower the presser foot.
Continue holding on to the thread chain and activate the foot control
until the free chain is approx. 5–7.5 cm.
Place the fabric piece under the presser foot from the front, and sew a
sample seam.
Note: Never pull the fabric piece whilst sewing, as the machine could
otherwise bend and break.
Adjusting the thread tension
2-Thread overlock seam
Note: The following tensions are only recommendations.
Thread tension is determined by:
1) Fabric type and thickness
2) Needle size
3) Thread quality and thickness
(also see „Attaching the converter to the right looper“)
Needle position
Seam width head S
Stitch length 2–4
Use converter
Needle thread
Top side Underside
Left looper thread
Correct tension setting
Set each tension dial to the following setting and sew a sample seam
using the fabric scrap.
Material Thread tension
blue green orange yellow
Lightweight fabrics 2.5 Converter 1.0
Medium weight
fabrics 3.5 Converter 1.0
Heavy fabrics 4.0 Converter 1.0
Material Thread tension
blue green orange yellow
Lightweight fabrics 2.5 Converter 2.0
Medium weight
fabrics 4.0 Converter 2.0
Heavy fabrics 5.0 Converter 2.0
347907_BE 18 24-Apr-2020

19GB/IE
Adjusting the tension
If the tension of the left looper thread is too tight or the needle thread
tension is too loose:
– Reduce the tension setting of the left looper thread (yellow dial) or
– Increase the needle thread tension (blue and green dial)
If the tension of the left looper thread is too loose:
– Increase the tension for the left looper thread (yellow dial)
Needle thread Needle thread
Top side Top side
Underside Underside
Left looper thread Left looper thread
2-Thread rolled hem, standard
Note: The following tensions are only recommendations.
Thread tension is determined by:
1) Fabric type and thickness
2) Needle size
3) Thread quality and thickness
(also see „Attaching the converter to the right looper“)
Needle position
Seam width head R
Stitch length 2–4
Use converter
Left looper thread
Top side Underside
Needle thread
Correct tension setting
Set each tension dial to the following setting and sew a sample seam
using the fabric scrap.
Material Thread tension
blue green orange yellow
Lightweight fabrics 0 Converter 5.0
Medium weight
fabrics 0.5 Converter 5.0
Heavy fabrics 1.0 Converter 5.0
Material Thread tension
blue green orange yellow
Lightweight fabrics 0 Converter 5.0
Medium weight
fabrics 0.5 Converter 6.0
Heavy fabrics 1.0 Converter 6.5
Adjusting the tension
If the left looper thread is visible on the underside of the fabric:
– Increase the tension for the left looper thread (yellow dial)
– Reduce the needle thread tension (blue or green dial)
If the needle thread tension is too loose:
– Increase the needle thread tension (blue or green dial)
– Reduce the tension for the left looper thread (yellow dial)
Left looper thread Left looper thread
Top side Top side
Underside Underside
Needle thread Needle thread
3-Thread overlock seam
Note: The following information is merely a guide.
Tension settings depend on:
1) Type and thickness of the work piece
2) Needle size
3) Thickness, type and material composition of the thread
Needle position
Seam width finger switch S
Stitch length 2–4
Left looper thread
Top side Underside
Needle thread
Lower looper
thread
Correct adjustment
Set the adjustment dials for the thread tensions to the following values
and sew a sample seam on the material you will be sewing.
Material Thread tension
blue green orange yellow
Light 2.5 3.0 3.0
Medium 3.0 3.0 3.0
347907_BE 19 24-Apr-2020

20 GB/IE
Material Thread tension
blue green orange yellow
Heavy 3.5 3.0 3.0
Material Thread tension
blue green orange yellow
Light 2.5 3.0 3.0
Medium 3.0 3.0 3.0
Heavy 3.5 3.0 3.0
Adjusting the thread tension
If the upper looper thread is visible on the reverse of the material, then
– set the dial for the upper looper thread tension (orange) to a higher
value or
– set the dial for the lower looper thread tension (yellow) to a lower
value.
If the lower looper thread is visible on the face side of the material, then
– set the dial for the lower looper thread tension (yellow) to a higher
value or
– set the dial for the upper looper thread tension (orange) to a lower
value.
If the upper thread is too loose, set the dial for the upper looper thread
tension (green or blue) to a higher value.
Needle thread
Right side Left side
Lower looper
thread
Upper looper
thread
Needle thread Needle thread
Right side Right side
Left side Left side
Lower looper
thread
Upper looper
thread Upper looper
thread Lower looper
thread
3-Thread flatlock seam
Note: The following information is merely a guide.
Tension settings depend on:
1) Type and thickness of the work piece
2) Needle size
3) Thickness, type and material composition of the thread
Needle position
Seam width finger switch S
Stitch length 2–4
Upper looper
thread
Right side Left side
Needle thread
Lower looper
thread
Needle thread
Correct adjustment
Set the adjustment wheels for the thread tensions to the following values
and sew a sample seam on the material you will be sewing.
Material Thread tension
blue green orange yellow
Light 0.5 5.0 7.0
Medium 0.5 5.0 7.0
Heavy 0.5 5.0 7.0
Material Thread tension
blue green orange yellow
Light 0.5 5.0 7.0
Medium 0.5 5.0 7.0
Heavy 0.5 5.0 7.0
Adjusting the thread tension
If the lower looper thread is too loose, then
– set the dial for the lower looper thread tension (yellow) to a higher
value or
– set the dial for the upper thread tension (blue or green) to a lower
value.
If the upper looper thread is too loosen, then
– set the dial for the upper thread tension (orange) to a higher value or
– set the dial for the upper thread tension (blue or green) to a lower
value.
If the upper thread is too loose, then
– set the dial for the upper thread tension (blue or green) to a higher
value or
– set the dial for the upper thread tension (orange) to a lower value.
Needle thread
Right side Left side
Lower looper
thread
Needle thread
Upper looper
thread
Needle thread
Right side Right side
Left side Left side
Lower looper
thread
Upper looper
thread Upper looper
thread Lower looper
thread
Needle thread
Needle thread Needle thread
347907_BE 20 24-Apr-2020
This manual suits for next models
1
Table of contents
Languages:
Other Singer Sewing Machine manuals

Singer
Singer 107W50 User manual

Singer
Singer 691 Setup guide

Singer
Singer 112W146 User manual

Singer
Singer 95K32 User manual

Singer
Singer 136W102 Quick start guide

Singer
Singer 900-3 User manual

Singer
Singer 71-112 Quick start guide

Singer
Singer 5160 User manual

Singer
Singer 146-33 Quick start guide

Singer
Singer 99W130 User manual

Singer
Singer 6180 User manual

Singer
Singer 755U 300 Setup guide

Singer
Singer 95-82 User manual

Singer
Singer Quantumlock 14T957DC User manual

Singer
Singer 3323 User manual

Singer
Singer 3337 User manual

Singer
Singer 4325 User manual

Singer
Singer 791D100A User manual

Singer
Singer 6SS User manual

Singer
Singer 1408 User manual