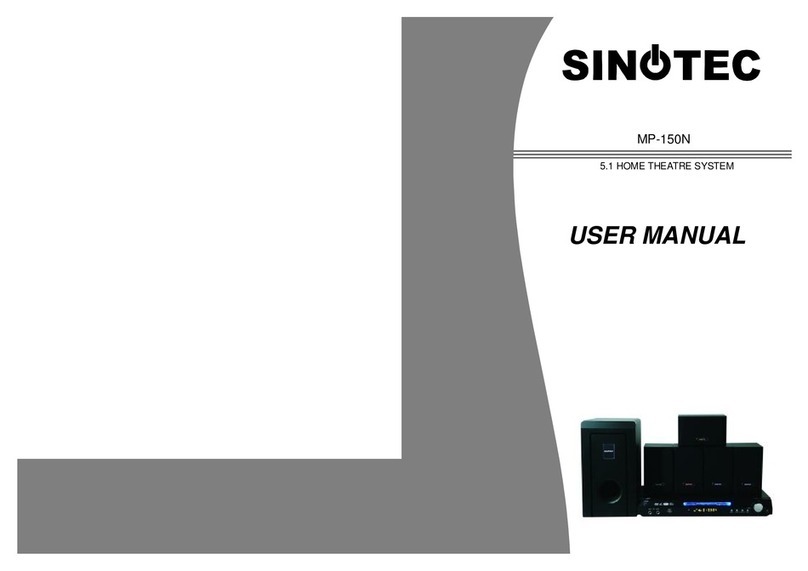
Sinotec HTS-517 User manual


CONTENTS
Page
WARNINGS 1
PRECAUTIONS 2
INTRODUCTION 3-5
ABOUT DVD 3
ABOUT PLAYER 4-5
SYSTEMCONNECTION 6
GETTING STARTED 7-8
FUNCTION BUTTONS 9-11
MP3/PICTURE DISC PLAYBACK 12
SETUP MENU 13-18
SYSTEMSETUP 13-14
LANGUAGE SETUP 15
AUDIO SETUP 16
VIDEO SETUP 17
DIGITAL SETUP 18
TROUBLESHOOTING 19-20
SPECIFICATION 21

1
WARNINGS
Use a separate power socket, one not sharing
with others electrical appliances.
Do not dismantle, repair or re-assemble the
machine yourself.
Remove the power plug when the machine is not
in use to save electricity.
Do not use the machine either below 100V or
above 240V.
When the voltage is below 100V, the machine
may not work and its longevity will be affected
adversely. When the voltage is above 240V, the
machine may explode or cause a fire.
Maintain and look after the power cord. In order
to ensure your safety, do not pinch, twist, pull,
lengthen or subject the cord to pressure or
abuse.
Do not wet the machine or use it in a bathroom or
other humid environments to avoid an accident or
damage to the machine.

2
PRECAUTIONS
Positioning
Although the machine does not produce much heat, ensure that you leave at least a 5cm space
around the machine for ventilation.
Do not locate the machine in
an unstable place,
in a hot or sunny place, or
in a humid or dusty place.
Caution
Do not operate the machine outdoors in rainy or
humid conditions to avoid electrical leakage, a
short circuit or unforeseen accidents from
happening.
Thunder
If the machine does not work in bad or thundery
weather, remove the plug from the power socket,
wait a minute and then re-insert the power plug.
Cleaning & Maintenance
Use a soft cloth or a cotton bud dipped in a
diluted, neutral cleanser to gently wipe the cover
of the machine. Do not use any abrasive cloths,
harsh cleansers or volatile chemical solutions
Small Objects/Liquids
If any small objects or liquids drop into the
machine or if the machine emits smoke or
otherwise behaves abnormally, disconnect the
machine immediately and send it to an
authorised service center for repair.
Relocation
Remove the disc prior to relocating the machine
to ensure the safety of the disc and the machine.
Re-packaging
Please use the original packaging materials to
repackage the machine in order to minimize
vibration during transit.

3
INTRODUCTION
ABOUT DVD
DVD (Digital Versatile Disc) is a digital video medium in
the MPEG II format, featuring a variety of revolutionary
entertainment capabilities. The MPEG II video
compression technology provides capacity for an
excellent picture of a minimum 500 lines on-screen
resolution, up to 8 language soundtracks, up to 9 views
from different camera angles and up to 32 language
subtitles (provided by the DVD discs which supports these
features).
Disc Information
Disc Types
DVD
CD
DecodingMethod
Digital/MPEG II
Digital
Capacity
Single layer / Single side
(4.7 GB = 2 hrs)
Single layer / Double sides
(8.5 GB = 4 hrs)
Double layers / Single side
(9.4 GB = 4.5 hrs)
Double layers / Double sides
(17 GB = 8 hrs)
650 MB = 74 mins
Disc Size
12 cm / 8 cm
Horizontal
Resolution
500 lines up -
Subtitles
32
-
Soundtracks
8
1
Symbol
DVDfeatures andsymbols
Each DVD disc contains various features depending on
the production of the disc. Below are some of the symbols
representing the features:
N
umber of Audio Tracks
S
creen Format
N
umber of Subtitles
Z
oom
A
ngle Indicator
If a video recorder is connected to the
player, the video output image will be
distorted during recording.
REMARK
Some features contained in this DVD player are related to the DVD
disc’s software. Some features cannot be performed if the disc
does not supportthe feature, or requires special settings.
Check the features printed on the disc’s packaging or follow the on
screen menu instructions of the disc.
SelectingA DVD
Disc DVDRegionCode
DVD discs and DVD players are manufactured
in accordance with the worldwide agreed DVD
regional code system that states the player will
operate only with corresponding discs of the
same regional code.
Region
Code
Region
1
Canada, USA
2
Europe (incl. Poland, Romania, The Czech
Republic, Japan, Middle East (incl. Saudi
Arabia, Egypt, Iran, South Africa)
3
East Asia (incl. Hong Kong, Taiwan, South
Korea), South East Asia
4
Australia, Caribbean, Central & South
America, Mexico, New Zealand
5
Africa, Russia, India, North Korea,
Pakistan, Turkmenistan
6
China
Caring For Your Disc
Video discs contain high-density compressed data
that need proper handling
·Hold the disc with your fingers. Hold the
disc’s outer edge and/or the center spindle
hole. Do not touch the disc surface.
·Do not bend or press the disc. Do NOT
expose the disc to direct sunlight or heating
sources.
·Store discs vertically in a dry cabinet.
·Clean the disc surface with a soft, dry cloth.
Wipe the disc surface gently, radiating from
the center toward the outer edge.
·Do not apply thinners, alcohol chemical
solvent or sprays when cleaning. Such
cleaning fluids will permanently damage the
disc surface.

4
INTRODUCTION
ABOUT PLAYER
01. DVD DOOR
02. OPEN / CLOSE
03. DISPLAY WINDOW
04. PLAY / PAUSE
05. POWER
06. USB
07. MIC
Back Panel
01. SUBWOOFER
02. S-R SURROUND RIGHT
03. F-R FRONT RIGHT
04. AUX RIGHT
05. CENTER
06. S-L SURROUND LEFT
07. F-L FRONT LEFT
08. AUX LEFT
09. VIDEO

5
INTRODUCTION
Remote Control
1. POWER
2. NUMBER KEY
3. SETUP
4. SEARCH REVERSE/FAST
BACKWARD
5. MENU
6. REV/SEARCH-
7. SOURCE
8. PREV/RADIO-
9. V-MODE
10. STOP
11. CH-LEVEL
12. PROG
13. OSD
14. USB/DISC
15. TITLE
16. RIP/COPY/MO/ST
17. OPEN/CLOSE
18. A/B
19. ANGLE
20. PBC
21. SLOW
22. GOTO
23. ZOOM
24. OK
25. MUTE
26. FWD/SEARCH+
27. NEXT/RADIO+
28. VOL +/-
29. PLAY/PAUSE
30. S.EFFECT
31. TONE
32. STEP
33. REPEAT
34. SUBTITLE/AUTO
35. AUDIO/MEMORY
Notes
1. The remote control transmits a directional infrared beam. Be sure to aim the remote control directly at
the infrared sensor during operation. When the sensor is covered or there is a large object between
the remote control and the sensor, the sensor cannot receive signals. The sensor may not be able to
receive signals properly when it is exposed to direct sunlight or a strong artificial light (such as a
fluorescent or strobe light). In this case, change the direction of the light or reposition the unit to avoid
direct lighting.

6
SYSTEM CONNECTION
DO NOT connect the AC power socket
t
o the wall outlet before the system
c
onnection is completed.
AUX input
Please connect from other audio output device

7
GETTING STARTED
Unpack the unit.
Read through this user manual before installing
and using.
Load batteries into the remote control unit.
Connect the system and make sure the
connections are secure.
Connect the power plug to the AC power outlet
Loading batteries into the remote control
Remove the battery compartment cover.
Load two AAA (UM-4 or R03) batteries into the
battery compartment.
Make sure that the batteries have been
inserted with the correct polarities matching to
the symbols +/- marked in the battery
compartment. Close the battery compartment
cover.
When replacing batteries, replace both
batteries. Do not mix new and used batteries
operating together; otherwise, the operation
lifetime will be much shorter than normal.
Remove batteries if the unit will not be used for
a prolonged period of time.
The remote control transmits a directional infrared
beam. Be sure to aim the remote control directly at
the infrared sensor of the unit during operation.
If the sensor has been covered or there is a large
object between the remote control and the sensor,
the sensor will not respond.
The sensor may not be able to receive the remote
signal when it is exposed to direct sunlight or a
strong artificial light (fluorescent or strobe light). In
this case, change the direction of the light or
reposition the unit to avoid direct lighting.
Switch on the Player
Press the main power switch on the DVD player.
Power on the TV set and the amplifier,
if connected.
Setup the System
Select the corresponding setting on the TV set (AV1,
AV2, S-Video, DVD, etc).
If your connection is through a RF modulator, switch
the channel where the DVD screen appears.
If an amplifier has been connected, switch to the
correct output mode.
Load a Disc
Press OPEN/CLOSE button on the remote control
(or front panel) to eject the disc tray.
Load a disc, label side up, onto the disc tray and
press OPEN/CLOSE button.
Automatic Playback
The unit will take a few seconds to load the disc’s
initial data. It will then display the disc type logo on
the left upper corner on the screen and then start
playing back automatically.
NOTE
Normally, when a MP3 disc is loaded, the player
will take a longer time to load.
If a DVD disc menu appears on the screen
Press the PLAY button on the remote (or
on the unit) to start playing.
Press the DIRECTION buttons to select
the desired feature in the menu and then
press the ENTER button to confirm a
selection in the menu.
FM operation
Press SOURCE to select to FM function.
Press this button once briefly to select
previous channels,press it 3 to 5 seconds to search
100KHz step up counter manually.
Press this button briefly to select previous
channels,press it 3 to 5 seconds to search
100KHz step up counter manually.
Press VOL+ or VOL- to set the desired
volume.
AUX operation:
Press SOURCE to select to AUX function.

8
GETTING STARTED
Problemdisc messages
The following message will display on the screen when there is a problem with the format of the disk
loaded:
“WRONG REGIONAL DISC”
Region code of the disc does not match the player’s region code (region 1 – 6)
“WRONG PASSWORD”
The rating level of the disc is higher than the rating level setting of the player.
The player will not play the disc.
“WRONG DISC”
The player is equipped with automatic disc quality detection software. When the player detects a problem
disc or a damaged disc, the player may keep playing the disc at a lower quality or stop playing depending
on the damage level of the disc.
Production quality of DVD discs vary, some discs may deviate from the industrial standard. Some
incorrectly formatted discs may play back on the player, however, the playback and operational
quality of those discs may be substandard.
Power Management
For safety reasons, unplug the DVD player if you intend not to use it for an extended period of time.

9
FUNCTION BUTTONS
Power On/Standby
Open/Close Disc Tray
Press this button to open or close the disc
tray. You can also do this on the front
panel.
Program
To play a disc in a desired sequence:
Press PROG to enter the program menu.
In DVD mode
When the program menu appears, input the title and
press OK. Then input the chapter number and press
OK.
(PLAY) Move the cursor to START and
then press the PLAY or OK button to start
program play.
Press PROG button to quit the program
menu.
In VCD mode
In PBC mode, press the PROG button and the
program menu appears. Input the track number and
press OK when the programming is completed.
NOTE
Some DVD discs do not allow program setting. Single track discs
cannot be programmed.
Under DVD mode,press this button to switch
CVBS
Press SETUP and go to AUDIO SETUP
for adjusting KEY,ECHO,And MIC
VOLUME
NOTE
DVD disc start menu may contain the setup of Screen Format,
Multi-angle Viewing and Zoom functionality. The picture quality
will decrease as the picture size increases
While playing a DVD, press the TITLE
button to return to the beginning of the
DVD disc.
While playing a DVD,press the MENU
button to return to the DVD disc start
menu
NOTE
Some DVD discs refuse the MENU/TITLE function
Searching
To search for a desired Title, Chapter or Track.
In DVD mode
Press the GOTO button once and the
following will appear:
Press the GOTO button twice and the
following will appear:
Press the GOTO button three times and
the following will appear:
Press the OK button to execute the
search
Numeric Key Pad(RandomProgram
Access)
1. To directly access a DVD chapter or
a CD track, input the desired chapter or track number
using the numeric key pad.
2. Input data for the DVD disc start menu or the
player’s setup menu
NOTE
Some DVD discs do not allow direct access function.
The unit will copy or rip the content or
song from CD to USB
In FM mode, press to select mono or stereo
sound

10
FUNCTION BUTTONS
Press AUDIO (MEMORY) to switch between L
MONO/R MONO and Stereo when reading a VCD
discs.
Press AUDIO (MEMORY) to choose the audio
language (e.g. Chinese, Portuguese, Spanish,
English, etc.) when reading DVD discs.
In radio mode pressing this button can store the
channel.
Press SUBTITLE to switch to different subtitles (e.g.
Chinese, Portuguese, Spanish, English, etc.) when
reading DVD discs.
In radio mode,,Press AUTO button to automatically
search for a radio station.
While playing back a DVD disc, press the ANGLE
button repeatedly to select the desired camera angle.
A DVD disc may contain up to 9 selectable camera
angles.
Select an itemin the menu
In the DVD disc mode menu or in the player’s setup
menu, press the DIRECTION button to highlight
function icons.
Press the OK button to confirm selection.
Press SOURCE to select between DVD, FM and
AUX mode.
Play
Press this button to play the disc.
Pause
Press this button to pause the disc. Press again to
resume normal playback.
This button has 2 modes.
1. Press the STOP button once and the player
memorizes the interrupted position and the
OSD shows PRESTOP. When the PLAY
button is pressed, the player will resume
where it was interrupted.
2. Press the STOP button again to completely
stop the disc. The OSD shows STOP. When
the PLAY button is pressed, the disc will start
from the beginning.
Previous and Next
During play, press the PREV key to go back to
the start of the chapter. Each time that you press this
key it will skip a chapter until it is at the beginning of the disc. Each
press of NEXT key during play will skip the current chapter and
play the next one.
In RADIO mode
The PREV and NEXT keys will switch the RADIO channels.
While playing back a disc, press the VOLUME button – or + to
adjust the volume output. Volume level will display on screen, e.g.
FastForward/Backward
Press button to skip backward
through the disc. Each time the button is
pressed, the fast reverse motion speed
changes.
Press button to fast forward
through the disc. Each time the button is
pressed, the fast forward motion speed
changes.
In RADIO mode
The two keys can fine tune the CF
frequency.
NOTE
The player is muted in fast forward or fast backward mode.
Player will not fast forward/backward during WARNING section of
a DVD disc.
Press CH-LEVEL can switch
FL,FR,SL,SR,CT,SW
And also can adjust the volume through
VOLUME button.
Press button to select mute on
or mute off.
Play DVD/VCD/CD/JPEG
Press S.EFFECT for EQ function in
VCD, CD, DVD, MP3 and MP4. The EQ
in STANDARD, CLASSIC, ROCK, JAZZ
and POP can be switched using the
DIRECTION buttons. Press the OK
button to confirm the setting.
Press this key to switch DVD mode and
USB mode
Invalid Key
TONE

11
FUNCTION BUTTONS
Repeat
Repeatedly plays back the desired Title, Chapter or Track.
Press REPEAT button to toggle between different
repeat modes.
In DVD mode
REPEAT A CHAPTER REP: [CHAPTER]
REPEAT A TITLE REP: [TITLE]
REPEAT OFF REP: [OFF]
In CD/MP3 mode
REPEAT A TRACK REPEAT 1
REPEAT A DISC REPEAT ALL
REPEAT OFF REPEAT OFF
NOTE
Some DVD discs do not allow the REPEAT function. When playing
a VCD disc, REPEAT will only work in PBC off mode only.
Repeat section A-B
To repeat playback of a specific section of a disc:
Press the A-B button at the starting point of the
desired section. will display on the
screen.
Press the A-B button again at the end of the
desired section, will display on screen.
The selected section from A to B will be played
back repeatedly until the function is cancelled.
To cancel the function, press the A-B button again
to return to normal play.
NOTE
Some DVD discs do not allow A-B function. Repeat A-B does not
apply to MP3 discs.
Press this key when playing a DVD disc and the
screen will show the title, chapter and length in
play. Press this key again to toggle between the
display of the elapsed time, the playing time and
the remaining time of this section and title.
Continue pressing STEP to realize slow
playing under VCD and DVD disc.
Press the ZOOM button repeatedly and the TV will
display:
NOTE
The picture quality decreases as the picture size increases.
Press to return to the START menu when
playing a VCD disc.
Press to play in slow motion. Press once to play
at1/2 of the normal playing speed; press twice to
play at 1/3 of the normal playing speed; press
three times to play at 1/4 of the normal playing speed;
press four times to play at 1/5 of the normal
playing speed; press five times to play at 1/6 of the
normal playing speed; press six time to play at 1/7
of the normal playing speed; press seven times of
press the[Play/Pause] button to return to normal
playing speed

12
MP3/ PICTURE DISC PLAYBACK
When a MP3/KODAK disc is loaded, the following will display on the screen:
Press to select the file when the cursor appears in file window.
Press select to play the current file select by the cursor.
Press to switch between the directory window and the file window.
Note:The player will not function correctly under the following condition:
1.The disc is badly scratched,damaged or dirty.
2.The disc is not finalized.
3.The recording format is not supported by the player.
Picture Disc play back instructions
Insert the disc,there will be a catalogue menu on the TV screen.Press button to move the cursor to the left
catalogue. Next Press buttons to move the cursor to the title you want and press"OK". Move
the cursor to the right catalogue and press"OK",you can display the picture you selected or press "PLAY" button to
display the images in order.
When playing, press "ZOOM" button, the picture can be enlarged or dwindled to the rate of
2,3,4,1/2,1/3,1/4.Press "ZOOM" button again, it will return to normal view. When Zoomed in or out, use the
direction buttons to change or navigate the enlarged image.
When playing, press the ”RETURN” button to go back to the catalogue menu. Using the direction buttons to
move the cursor to choose the catalogue. Then pressing ”PBC” button can start the six-picture playing function.
By using the number or direction buttons and pressing “PLAY” button ,it can continue to play orderly
When in six-picture condition, press the ”PREVIOUS” button or “NEXT” on the remote control, you can see the
picture of the next page up and down.
When in six-picture playing condition ,pressing ”RETURN” button can return to the six-picture condition, press it
again will return to the catalogue menu.
When in photo playing condition, press the “PREVIOUS””NEXT” can choose the previous or the next photo
When playing ,press the button “PROGRAM” to switch to the 17 pictures display mode.
Ripping instructions
Under the condition of OPEN or POWER OFF connect the USB and then put the CD DISC in and then play
When playing the CD, press RIPPING key and enter into the main operation interface, using the direction key
and ENTER key to change the record.
In the OPTIONS menu, The user can choose the exact song to record
In the START menu, after confirming the information without any mistake, press “Enter”key to enter into the
recording process
After finishing the record, exit by pressing ”QUIT”and press USB/DISC key to read or play the recorded
contents
Current
directory name
File Switch Region:Displays
the file type of the playing
and the switching
The playing file is a JPEG
picture file.
Current MP3/JEPG file
name. If a JPEG file is
playing the name
should have a JPEG
extension.

13
SETUP MENU
Using the setup menu, you can select the play mode
setting and the various outputs, etc.
In each menu page, the menu items are shown on
the left. Use the button on the remote to go to the
option list or setting on the right. Use the button to
go back to the left menu item.
1. Press the SETUP button on the remote and the
current setup menu appears on the screen.
2. Select the main menu item desired using ,
then press OK, the selected main menu item is
highlighted and its option list is shown on the
screen.
3. Press to go to the option list.
4. Select the option desired using , then
press the OK button.
5. Use to go back to the left menu item.
6. Press the button SETUP to leave the setup
menu main page.
SYSTEM SETUP
TV SYSTEM
According to the system of the TV to be connected,
set the system of the unit to have it match the TV.
Press SETUP button, the screen shows:
Press ENTER on the remote, the setup menu
screen shows. Press ENTER to select TV
SYSTEM ,SCREEN SAVER,VIDEO,TV
TYPE ,PASSWORD,RATING,DEFAULT
1.If the system of the TV is NTSC, select NTSC;
2.If it is PAL, select PAL;
3.If it is AUTO, select AUTO.
SCREEN SAVER
O·
·
N: Turn the SCREEN SAVER on. The Disc
will play automatically.
OFF: Turn the SCREEN SAVER off.

14
SETUP MENU
VIDEO
INTERLACE: Video output through
CVBS(Video),S-Video and interlace video
from Component(Y/Pb/Pr)output
P-SCAN: Video output through
Component(Y/Pb/Pr)output
TV TYPE
NORMAL/PS–4x3 PanScan
Choose this setting and the movie will fill the
entire TV screen with some parts to the left and
the right cut off.
Normal/LB–4x3 Letter Box
Choose this setting if you want to see movies in
their original aspect ratio. You will see the entire
frame of the movie, but it will occupy a smaller
portion of the screen.
WIDE–16x9WideScreen
Choose this setting if your DVD player is
connected to a wide screen TV.
PASSWORD
ON: When password is unlocked, RATING can
be selected.
When password is locked, RATING cannot be
selected
If you want to change the password,
follow this steps:
1.Enter the password 8888 when the unit is
turned on, press OK
2.Enter the new password, Press OK,
3.New password change completed and locked
RATING
Press button to select the rating.
DEFAULTS
If you select RESTORE, each function setting
returns to the initial status set by the factory.

15
SETUP MENU
LANGUAGE SETTINGS
Press button to select LANGUAGE
SETUP
OSD LANGUAGE
ENGLISH
The on screen display language is
English
RUSSIAN
The on screen display language is
Russian
SELECT LANGUAGE
If a language mentioned is recorded on the
disc, you can select sounds, subtitles or disc
menu languages. If not, the language recorded
on the disc is shown.
AUDIO SETUP

16
SETUP MENU
MIC SETUP
A
·
·
·
UTO: Auto select the voice input.
OFF: Disable the MIC.
PROLOGIC
The open state will play stereo audio
source, which evolved into virtual 5.1
output.
When in closed state, broadcast source
for stereo is active,broadcast source for
5.1 the power output is 5.1
ECHO
Use to adjust the echo effect.
MIC VOL
Use UP/DOWN button to adjust the microphone
volume.
DOWNMIX
Use the UP/DOWN button to adjust LT/RT,
STEREO, VSS, 5.1CH of the downmix.
SUBWOOFER
ON:Turn on the
SUBWOOFER,SUBWOOFER a voice
output.
OFF:Turn off the
SUBWOOFER,SUBWOOFER on voice
output.

17
SETUP MENU
VIDEO SETUP
Press UP/DOWN buttons on the remote to select
VIDEO SETUP.
BRIGHTNESS
Use UP/DOWN button on the remote to set
brightness.
CONTRAST
Use UP/DOWN button on the remote to set contrast.
HUE
Use UP/DOWN button on the remote to set hue.
SATURATION
Use UP/DOWN button on the remote to set
saturation.
SHARPNESS
Use UP/DOWN button on the remote to set
sharpness.
FONT COLOR
Use UP/DOWN button on the remote to set the
colour of the font.
FONT BACK COLOR
Use UP/DOWN button on the remote to set the
colour of the font back.

18
SETUP MENU
DIGITAL SETUP
The DVD player must be in the stop mode to
access the DIGITAL SETUP menu. You have to
press the STOP button twice to go into stop
mode
Press the UP/DOWN buttons on the remote to
select DIGITAL SETUP from the SETUP menu.
Press the ENTER button to enter the submenu.
OP MODE
L·
·
INE OUT: Line out mode, with digital
dialog normalisation, compresses input
signal linearly.
RF REMOD: RF remodulation mode, with
heavy decompression and digital dialog
normalisation.
DYNAMIC RANGE
When the compression mode is set to LINE
OUT, this setting can be used to adjust the
linear compression rate, to obtain the different
compression results of the signals.
DUAL MONO
This is the output mode of the L and R signals
of the set audio output. If it is set to MIX-MONO,
the function only works when the DVD being
played is a 5.1- channel DVD.
Table of contents
Other Sinotec Home Theater System manuals
