Sinotec S730 User manual

1
Contents
1. Notes....................................................................................................................................2
2. Accessories..........................................................................................................................2
3. Main Functions ....................................................................................................................2
4. Appearance And Buttons.....................................................................................................3
5. MID Hardware Parameters..................................................................................................4
6. MID Use And Preparation....................................................................................................4
7. Keys Functions....................................................................................................................4
8. Start-up And Shutdown........................................................................................................5
8.1 Start-up.......................................................................................................................5
8.2.Shutdown....................................................................................................................5
8.3 Sleep...........................................................................................................................6
9. Main Menu Operation..........................................................................................................6
10. Communication Function...................................................................................................7
10.1 Phone.......................................................................................................................7
10.2 Text Message ...........................................................................................................8
10.3 Contact List...............................................................................................................9
11. System Settings.................................................................................................................9
11.1 Wireless And Networks...........................................................................................10
11.2 Device.....................................................................................................................12
11.3 Personal..................................................................................................................12
11.4 System....................................................................................................................12
12. Install, Uninstall The Application......................................................................................14
12.1 Install APK Software Program From The TF Card.................................................14
12.2 Uninstall The Application........................................................................................14
13. Main Programs Operation Introduction ...........................................................................15
13.1 Browser ..................................................................................................................15
13.2 Camera...................................................................................................................15
13.3 Email.......................................................................................................................16
13.4 Explorer..................................................................................................................17
13.5 Sound Recorder.....................................................................................................17
14. External Device................................................................................................................19
14.1 USB Connection.....................................................................................................19
14.2 OTG Use ................................................................................................................19
14.3 Keyboard And Mouse.............................................................................................19
15. Other Network Connection Method.................................................................................19
16. Troubleshoot....................................................................................................................20

2
1. Notes
* This is a complex electronic product; please do not dismantle it by yourself.
* Avoid any high impact shocks to the product.
* Avoid using this product in the following environments: high and low temperature, high
humidity levels, a dusty place, in/around a strong magnetic force or long-term exposure to
the sun.
* Please wipe the product casing gently with a cotton cloth; the use of other chemical
cleaning products is prohibited. This product should be kept away from any liquids
especially dripping or splashing water.
* Listening to audio through the headphones at a high volume for a long period of time can
cause permanent damage to your hearing.
* Do not use headphones when you are crossing a road, driving a motorcycle or bicycle in
order to prevent a traffic accident.
* Only use specified batteries, chargers and accessories, the use of any other type of
product would be a breach of warranty regulations, and may be dangerous.
* Please deal with waste machinery and accessories according to local environmental
regulations.
* If you have any questions during the process of using the product, please contact the
local dealer or the supplier’s customer service center.
* Please note that the supplier is not responsible for any memory loss caused by damage
to the product, repair or tampering. Please follow the user's guide and regularly backup
personal files and content.
2. Accessories
Power Adapter ×1
USB Cable ×1
User Manual ×1
OTG Cable×1
Warranty Card ×1
Earphone ×1
3. Main Functions
●Multiple network access, supporting WIFI and 3G network, enjoy the network life
anywhere at any time.
●Supports GPS function to make your outdoor activity more conveniently.
●Supports Bluetooth function, you can send or receive files from this device to another
device with Bluetooth function.
●Supports normal calling function with dual SIM.
●Support APK format installation and application, Multiple software can be downloaded
through the "Play Store" , you can also download or install from a PC network.

3
4. Appearance And Buttons
Description of Button Functions
1
Micro USB Port
2
Earphone Jack
3
Front Camera
4
Telephone Receiver
5
P-Sensor
6
Volume +/-
7
Power Key
8
Reset
9
Mic
10
Rear Camera
11
Flash Light
12
Speaker

4
5. MID Hardware Parameters
MID hardware parameters
Processor
SoFia 3G-R Quad Core Cortex A7 1.3GHz
O.S
Android 5.1
Display
7 inch IPS Screen, Resolution 1024*600, 5 points capacitive screen
RAM
1GB
Flash
Memory
8GB
WiFi
IEEE 802.11 b/g/n
Camera
0.3MP front, 2.0MP rear camera
2G/3G
GSM 850/900/1800/1900 WCDMA900+2100
GPS
Support
Bluetooth
Support
FM
Support
I/O ports
Micro USB Port, Earphone Jack, Dual SIM Card Slot, TF Card Slot
Battery
2500mAh
Accessories
Earphone ×1 Power Adapter ×1
User Manual ×1 USB Cable ×1
OTG Cable×1 Warranty Card ×1
6. MID Use and Preparation
Battery charging
Before using MID - firstly, please charge the battery.
1. Use the power adapter to charge the MID.
2. In order to ensure that the battery is full, please charge it for a minimum of 4 hours.
7. Keys Functions
1. “ ”:Power Key, On shutdown state, long press the power key and the system will enter
the process of Start-up; on boot state,long press the power key and the system will exit to
show shutdown information; on boot state, short press will lock the interface.
2. “Volume +/-”: Press to increase or decrease the volume.
3. : This icon is used to return back to previous interface.
4. :At any interface, touching the icon will cause the MID to return to the home
5. : Touch this icon to display the recent apps

5
8. Start-up and Shutdown
8.1 Start-up
A long press of the power key will cause the system to enter the process of Start-up,
The system will start and enter theAndroid system.
Then the system enters the default home page, as showed below:
8.2 Shutdown
A long press of the power key will display a pop-up menu with shutdown options on the
desktop, Click the option of Power off, as shown below, then it will shut down.

6
8.3 Sleep
In the normal state of operation, a short press of the power button, will cause the device to
enter a state of dormancy, at this time, the screen will be closed. Another short press on
the power button and it will resume to normal mode. In order to reduce power
consumption, you can start this function when MID is not in use.
9. Main Menu Operation
First slide the interface to unlock the interface, and then click to enter into main menu
interface with different applications, as shown below:

7
In the main menu, you can set the system, operate an existing application, install a new
application, play music and video, browse webpage and play games and so on.
10. Communication Function
10.1 Phone
1. Click , it will show the interface as the picture below, then click to dial
numbers and make a phone call.

8
2.Click , you could check your recent calls.
10.2 Text Message
Enter into main menu, choose application, then click to edit new messages.

9
10.3 Contact List
Click icon in the home page, enter into the contact list as Picture below
Add contact: click icon or to edit new contacts information and
add it into contacts list.
11. System Settings
Click the "Settings" icon in main menu interface to enter into setting interface, you can
slide up and down to choose the item you want to set, as shown below:
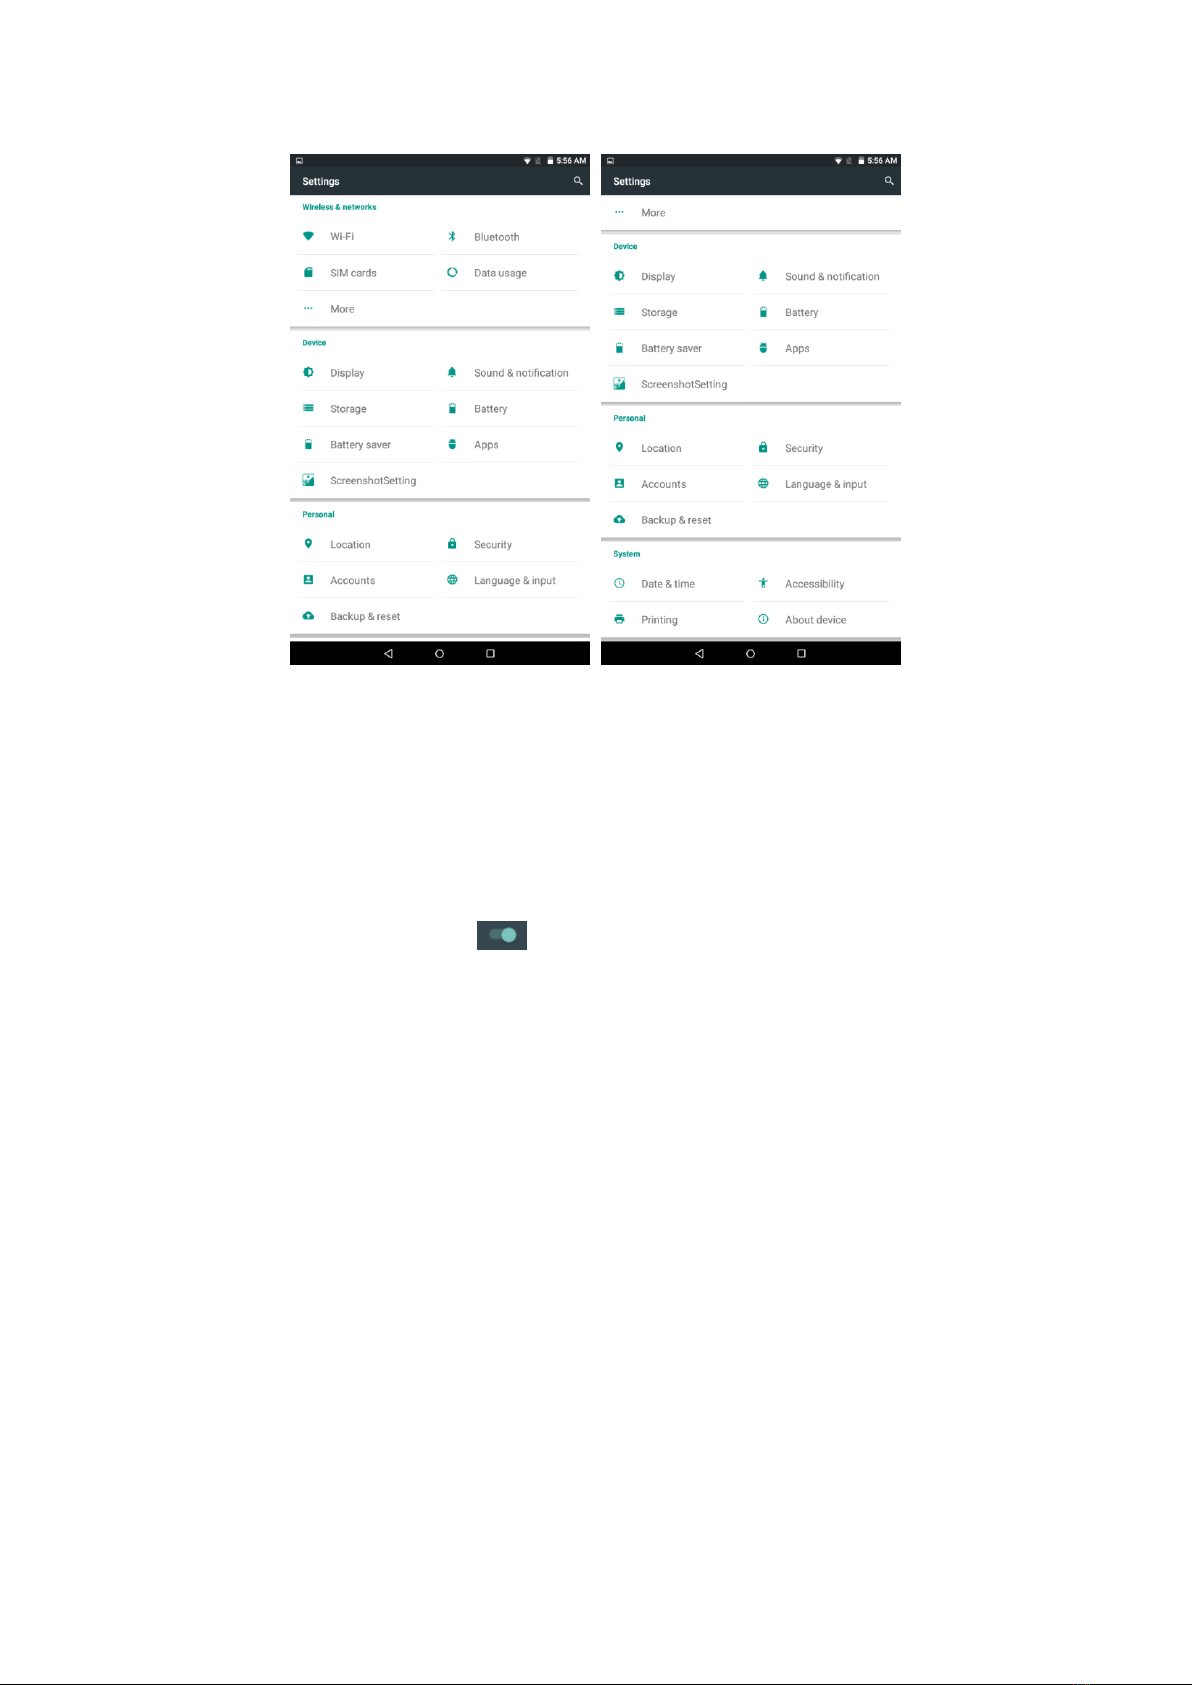
10
Select the relevant items to perform the corresponding operation, for example:
* Wireless & networks * Device * Personal *System
11.1 Wireless And Networks
Click on the "Settings" icon in the main menu.
Choose “Wi-Fi”, and slide the to turn on Wi-Fi then you will see picture below.
Choose the WIFI and type the password to connect it.

11
Choose “Bluetooth”and slide the to turn the Bluetooth on and click the Bluetooth
as seen in the below picture. If you want to send files by Bluetooth just connect it with
another one.
12
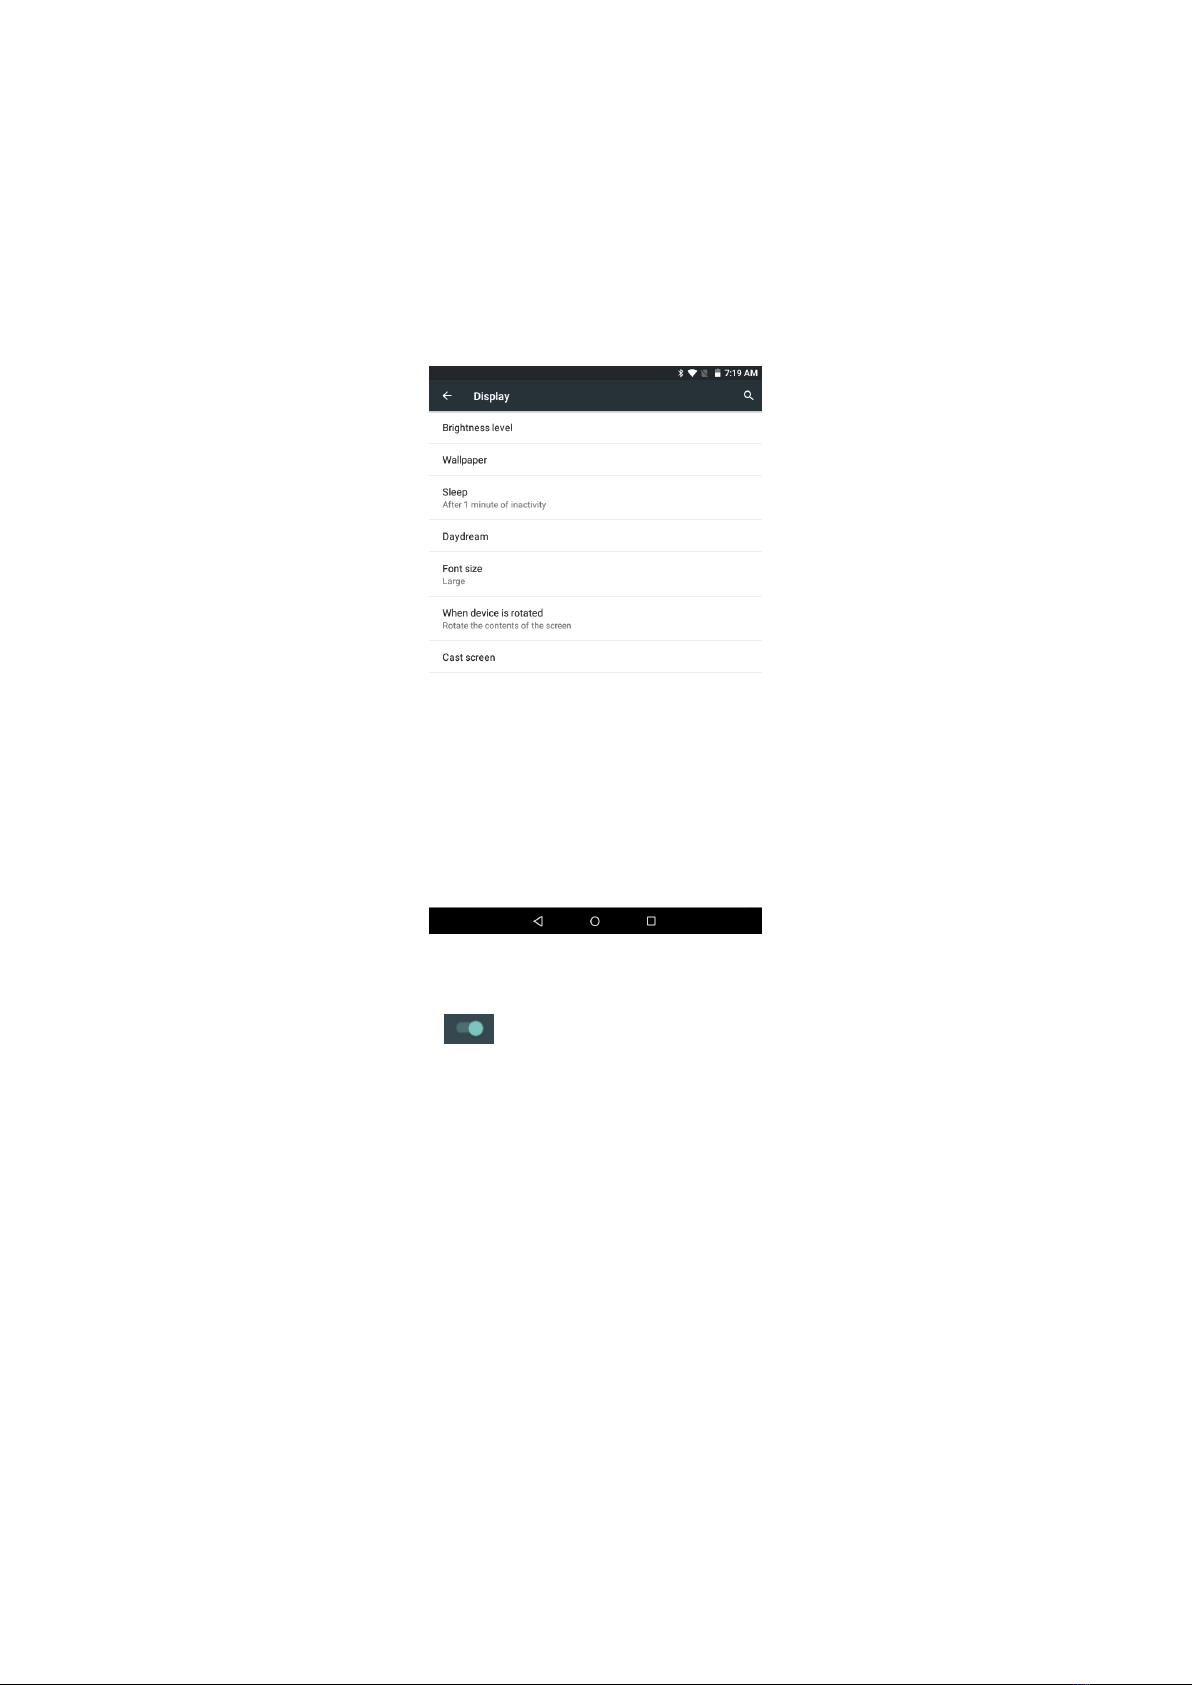
11.2 Device
Under this column you may find Display, Storage, Battery saver, ScreenshotSetting,
Sound¬ification, Battery and Apps.
Click each item to set as you like. For example:
*Click Display, as seen below, you could set the predefined profiles based on your needs :
11.3 Personal
*Click Location, then slide to turn on location so that some apps could collect
anonymous location data.
*Click Security, and you could use some settings to protect your device from being used
by other users or from being hacked by unknown sources.
*Click the Accounts icon, then you could add accounts like email accounts or some other
chatting apk’s accounts.
*Click the "Language&input" icon, and you could set up the language you want, and set up
the input method or search method. You could also set Pointer speed if you connect the
device with mouse or other accessories.
*Click Backup&reset to reset the devise to its original factory setting, erasing everything
you have stored in your device.
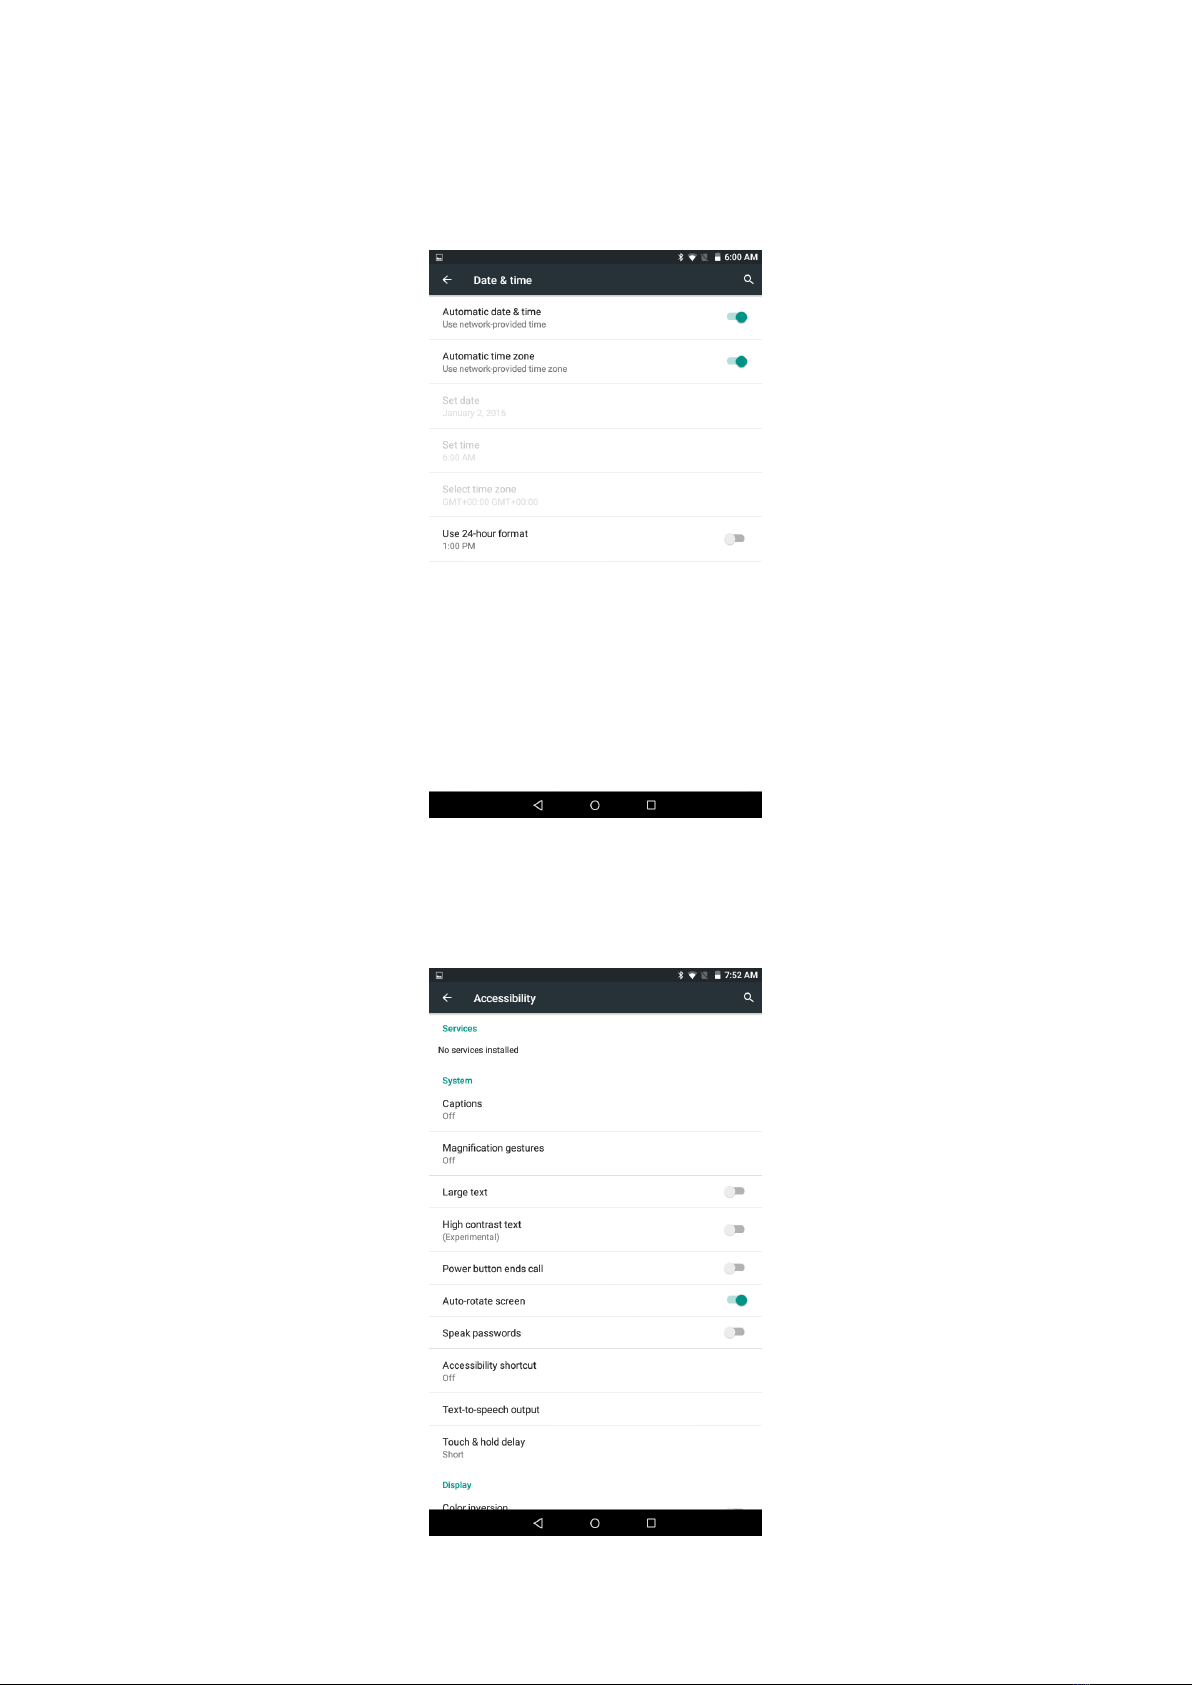
11.4 System
13
*Click the “date & time”, and you can calibrate the time by just connecting to the network.
If the tablet does not connect to the network, you could just calibrate the time yourself.
See picture below :
*Click the "Accessibility" icon. You can set the Auto-rotate screen, Speak passwords and
so on, as shown below:
14
*Click Printing to install printing services so that you could print documents from the
device.
*ClickAbout device, you can check some information about this device.
12. Install, Uninstall The Application
Android installation: there are a variety of ways to install applications, for example, install
applications by USB setup, by TF card, by computer and so on. You can also do on-line
installation through “play store" or through websites.
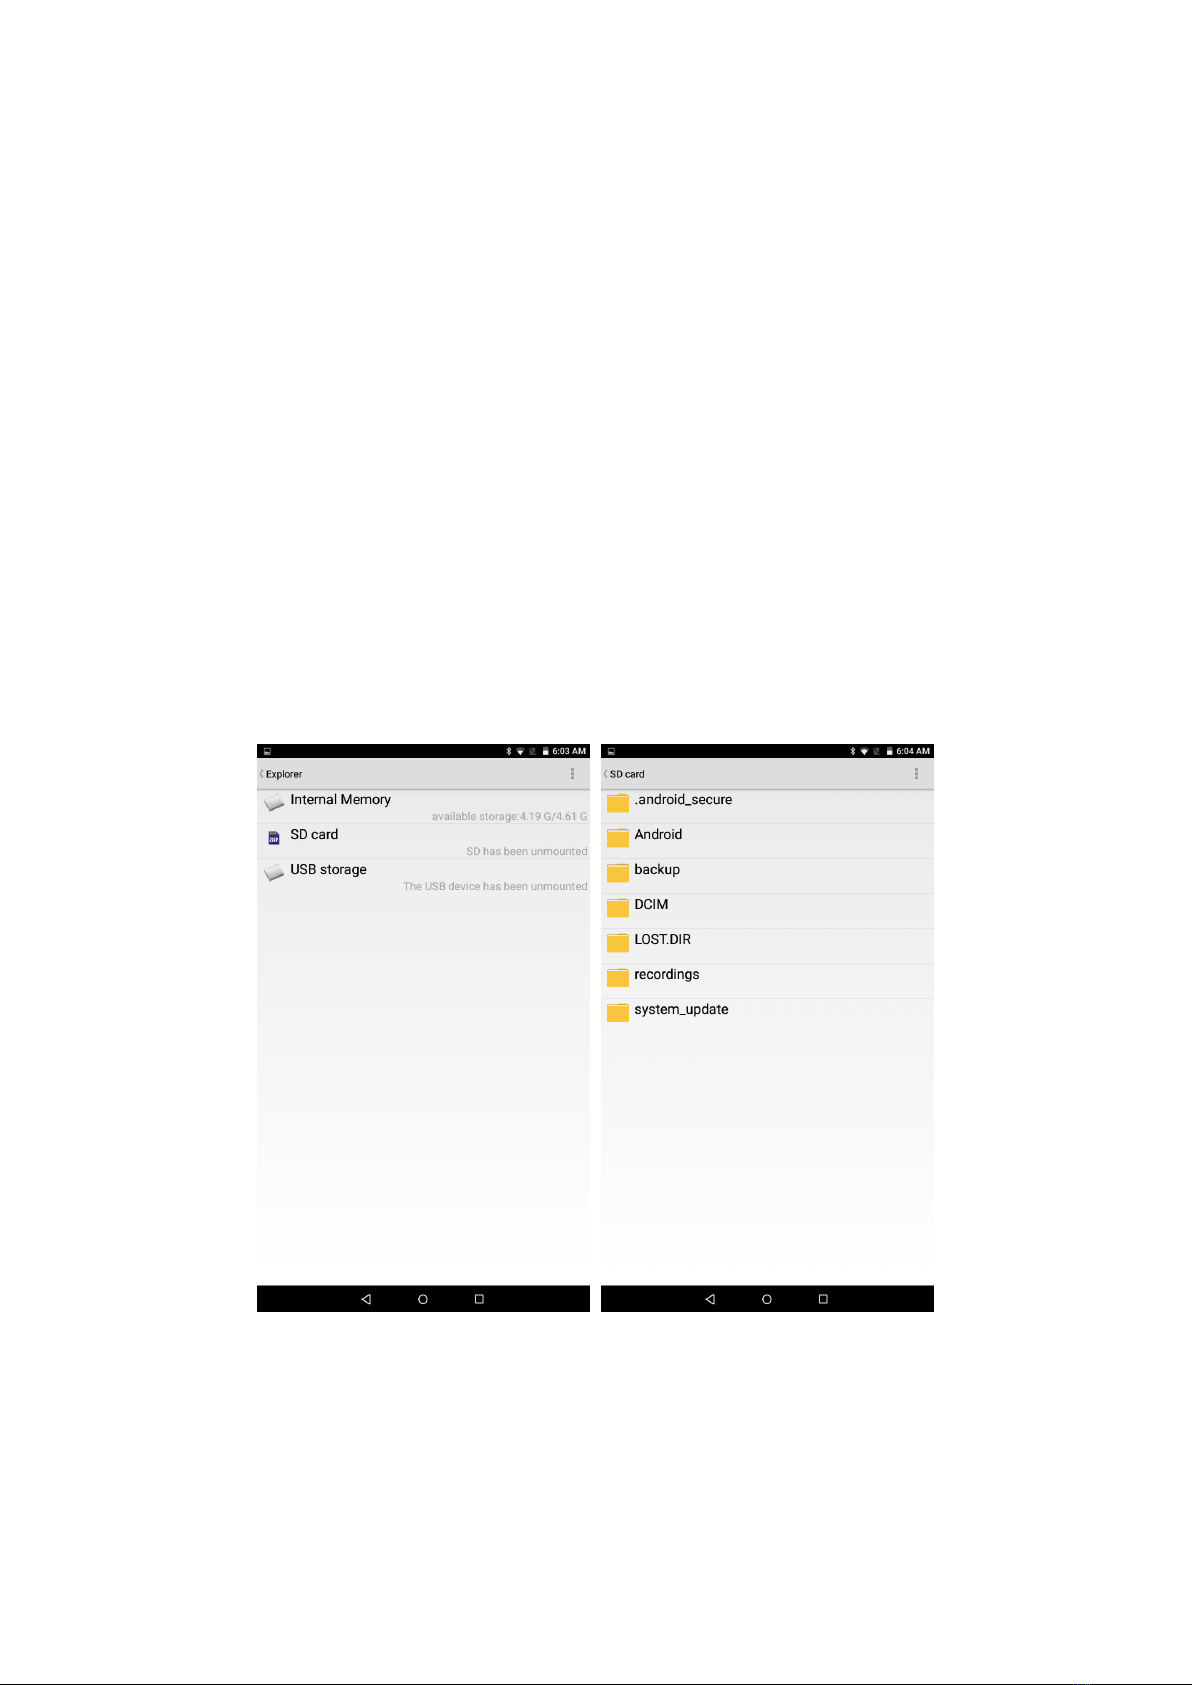
12.1 Install APK Software Program From The TF Card
Insert the TF card which has been already pre-loaded with the software you want to install.
Click " Explorer " icon to choose SD card, find and click the APK file you want to install,
then go on installation according to what device tells you to.
Note: The way to install from the USB (U disk) is the same as the installation from TF
card(Micro SD).
12.2 Uninstall The Application
Long press the apps in main menu and keep your finger on the screen, the screen will

15
show “Uninstall”at the top side. Use your finger to slide to the app towards the “Uninstall”
place and click “OK”. Then the apps is uninstalled.
13. Main Programs Operation Introduction
13.1 Browser
Webpage browsing:
When the network is connected, open the “Browser" or “Chrome”and type the URL and
click “go”so that you could browse the website.
13.2 Camera
Click on the "Camera" icon in the main menu and enter the "camera" main interface, touch
the to take a photo, as shown below:

16
Click to set normal mode.
Click to open smile face recognition.
Click to open Zero Second Later function.
Click to set delayed shooting, there are 3s and 10s two choices for your option..
Click the” “on the interface ,it will change to front camera ,touch it again, it will turn to
back camera again.
Click to set the flash light.
Click to open square mode to take photos.
Click to set filter of pictures.
Slide to right, then click ,it will change to videography.
13.3 Email
Click on the "Email" icon in the main menu. Then type your email address and password
to enter into your email account as shown below.

17
Note: before the mail account will be set, please ensure that you are already linked to the
network.
13.4 Explorer
Click on the "Explorer" icon in the main menu, you can view all the files or information from
the external devices or the internal memory.
From this interface, choose the Editor and then you can edit the files as you like, for
example: Copy, Delete,Move, Paste, Rename, Send, and Create shotcut.
13.5 Sound Recorder
Click on the " Sound Recorder" icon in main menu and enter the recorder interface.
Click the menu to start recording as shown below.
Click the to finish recording.

18
After finishing recording, click “Save in Phone”or ”Save in SD card”to save the record file,
or click “Discard”to discard the record file as shown below:

19
14. External Device
14.1 USB Connection
Using USB to connect the MID and PC, it will pop up the screen as shown below. There
are two options, you can click one according to your own request. For example, click
camera, then you could transfer photos by using camera software.
14.2 OTG Use
Use the OTG wire to connect the MID USB OTG and the external equipment.
14.3 Keyboard and Mouse
Support plug and play USB mouse, keyboard device.
15. Other Network Connection Method
If you have inserted a SIM card in the tablet, you could use the mobile networks by 2G/3G
data connection.

20
16. Troubleshoot
1. Out of run
Check if the battery is flat.
Check after connecting to the power adapter.
If it still cannot turn on after charging, please contact the customer service center.
2. No voice in the earphone
Make sure the volume is not turned down all the way
Unplug the headset, then plug it in again. Make sure you push the connector all the way
in.
3. How to get APK?
Answer: You can download and install it through a PC terminal online, you can also
download and install it by “Play store" online.
4. Can the machine be charged by USB?
Answer: Yes it can. We recommend the use of the accessories: DC. 5V adapter to charge.
5. Why some of downloaded videos cannot play normally?
The device is compatible with most video file formats, but there are still differences in
format, encoded mode, resolution and code rate etc. It could result in some of the videos
not playing correctly. Our suggestion is that you use the third-party adapter and software
for converting the format on the PC and then copying the file to the device.
6. Device crashed or does not switch on
Once the device crashed during the running time, it can be restarted via tapping the
RESET button under the power key.
The picture is for reference only, product appearance, function, referring to the actual
product, the product rule and design are subject to change without notice.
Table of contents


