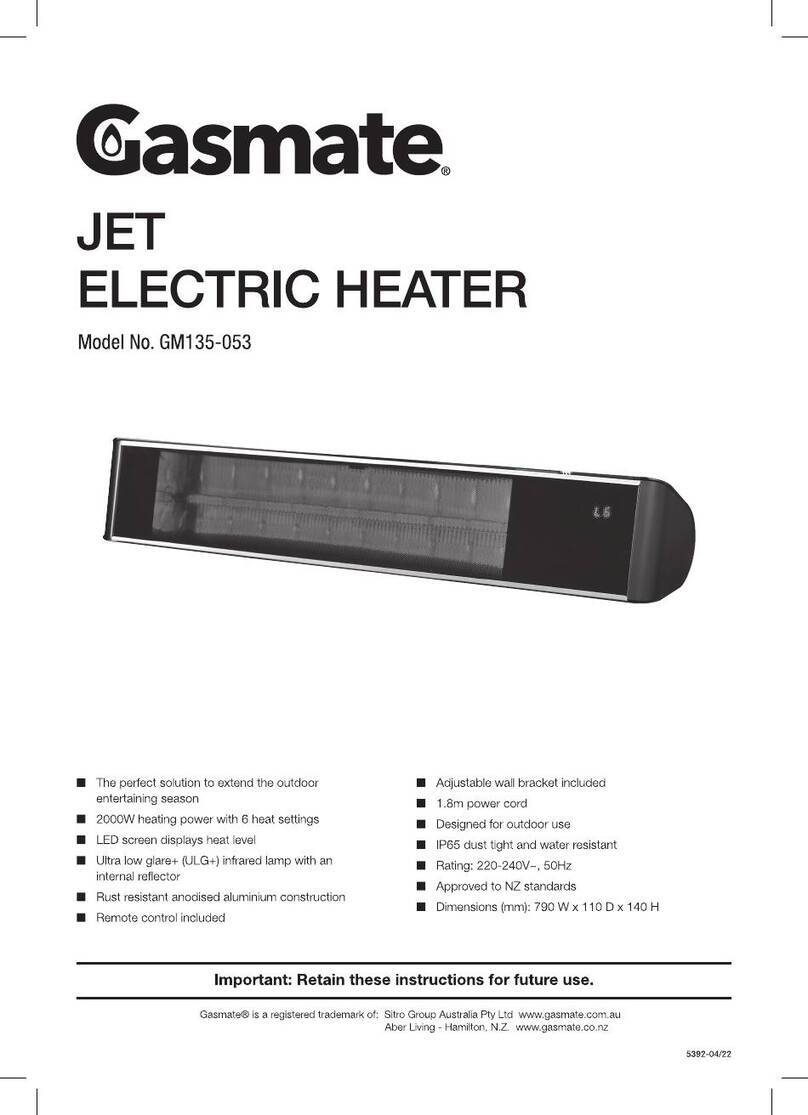
Sitro Group Gasmate LUMOS GM135-043 Manual

1
■Lightweight and slender design
■ 2000W heating power with 6 heat settings
■ Tungsten filament heating element with low
glare reflector
■ Rust resistant anodised aluminium construction
■ Remote control included
■ Adjustable wall bracket included
Important: Retain these instructions for future use.
5114-06/19
Gasmate® is a registered trademark of: Sitro Group Australia Pty Ltd www.gasmate.com.au
Aber Living - Hamilton, N.Z. www.gasmate.co.nz
LUMOS ELECTRIC
HEATER
Model No. GM135-043
■ 1.5m power cord
■ Designed for outdoor use
■ IP65 dust tight and water resistant
■ Rating: 220-240V~, 50Hz
■ Approved to NZ standards
■ Dimensions (mm): 610 W x 55 D x 85 H

32
INSTALLATION, OPERATION AND MAINTENANCE INSTRUCTIONS
BEFORE FIRST USE
• Read and follow all the instructions below even if you
feel you are familiar with the heater.
• Remove the packing and make sure that the heater is
intact. If in doubt do not use the heater and contact
the place of purchase.
• Do not leave packaging materials such as bags and
staples within reach of children.
• Dispose of packaging carefully and with consideration
for the environment.
• It is ideal to retain the heater carton for seasonal
storage.
For your convenience record the date you received the
heater on the warranty page of these instructions, and
attach your proof of purchase. Retain this information in
the event that a warranty service is required.
NOTE: The rating of this heater (as marked on the rating
label) is based on specific loading tests. Normal use or
the use of other recommended attachments may draw
significantly less power.
IMPORTANT SAFETY INFORMATION
Before attempting to operate this heater, the following
basic safety precautions should be taken to reduce
the risk of fire, electric shock and personal injury. It
is important to read the instruction manual and to
understand its’ applications, limitations and potential
hazards associated with this heater.
• Do not locate in areas of high foot traffic, ensure
the power cord and heater are in view to avoid
accidents.
• Do not operate in areas where gasoline, paint or
other flammable liquids are used or stored.
• This heater heats up when in use. To avoid burns,
do not touch the front of the heater or any of the
grilles or vents.
• Before moving the heater, switch off the heater by
unplugging it from the wall and allowing it to cool.
• Do not use the heater to dry clothes.
• Do not insert or allow foreign objects or metal
utensils into any ventilation or exhaust openings
as this may cause an electric shock, fire or
damage to the heater.
• Do not use this heater in the immediate
surroundings of a bath, a shower or a swimming
pool.
• Do not immerse in liquid or use the heater within
1m or above a water source as this could create
an electrical shock hazard.
• If the heater accidentally comes into contact with
water switch off the power supply and do not
touch the heater.
• Do not operate any heater with a damaged cord
or plug or after the heater malfunctions or has
been dropped or damaged in any manner – in
order to avoid a hazard. Return to a qualified
electrical person for service or repair.
• Do not operate the heater with wet hands.
• Do not connect the heater to the mains voltage
until completely assembled and adjusted.
• Always operate level, on a flat surface only.
• Unroll the cord before operating. Operating with a
coiled cord may cause overheating and fire risk.
• This heater is NOT designed to run off an
extension cord. If you require an additional power
point please have one installed by a qualified
electrician.
• Do not remove the plug from the power socket
until the heater has been switched off.
• The use of extension cords may cause power
voltage loss which will result in damage to the
heater this will NOT be covered under warranty.
• Always hold the plug when removing it from the
wall, do not pull the cord.
• Always unplug the heater when it is not in use.
• Do not allow the cord to come in to contact with
the heater surface during operation.
To reduce the risk of fire, electrical shock or injury to
persons or property:
• To avoid overheating, keep airflow grilles clear
of dust and hair build up - especially if you have
pets.
• Use only the voltage specified on the rating label
of the heater.
• Do not cover or restrict airflow to the inlet or outlet
grilles in any manner as the heater may overheat
and become a fire risk.
• Do not cover grilles, block entry or exits of airflow
by placing the heater against any surface. Keep
all objects at least 1 metre from the front, side and
rear of the heater.
WARNING: DO NOT
COVER IN ORDER TO AVOID
OVERHEATING.

32
WARNING: Fire risk exists if this heater is covered or
positioned close to combustible materials.
Always ensure you select the correct fixing
accessories which suit the particular material you
are attaching to, if in doubt please discuss with your
local retailer or local hardware store. This heater is
not designed for use within 1m or above a water
source. All installations must meet the requirements
of Australia Standard AS/NZS 3000:2007.
NOTE: When using this heater outside ensure that it
is connected directly to an outdoor power point.
The electrical system of this heater must be
connected with an automatic 30mA circuit breaker
and/or residual current device (RCD). If uncertain
have a qualified electrician check your electrical
system before installation and/or use.
All electrical connections are made in a dry area.
Outdoor power points must be weatherproof and
installed by a qualified electrician.
The distributor is not responsible for incorrectly
chosen additional fixing accessories or any damage
which may be caused by an incorrectly fitted heater.
FOR YOUR SAFETY
• Do not twist, kink or wrap the cord around the
heater as this may cause the insulation to weaken
and split.
• This heater is not intended for use by persons
(including children) with reduced physical, sensory
or mental capabilities, or lack of experience
and knowledge, unless they have been given
supervision or instruction concerning use of the
heater by a person responsible for their safety.
• Children should be supervised to ensure that they
do not play with the heater.
• This heater is intended for light domestic use and
not for heavy duty commercial or industrial use.
• The heater must not be located immediately
below or in front of a socket-outlet.
• CAUTION: In order to avoid a hazard due to
inadvertent resetting of the thermal cut-out, this
heater must not be supplied through an external
switching device, such as a timer, or connected
to a circuit that is regularly switched on and off by
the utility.
• Never remove the cover of the heater – in case of
a fault contact a qualified service person.
• Repairs should only be carried out by qualified
persons using original spare parts. Failure to
do so may result in considerable danger to the
operator.
• Use this heater only as described in this manual.
• Any other use is not recommended by the
manufacturer and may cause fire, electric shock
or injury.
• The remote control function is line of sight and
may not operate if something or someone is in the
way of the signal.
Installation
This heater is not designed for use within 1m or above a
water source.
Ensure that the heater is not positioned directly above,
below or in front of a power point or switch.
This heater is not designed to be used with 3rd party
timer or programmable system.
This electric heater complies with New Zealand and
International standards and safety requirements. All
installations must meet the requirements of New Zealand
Standard AS/NZS 3000:2007.
ELECTRICAL DATA
IMPORTANT
This product is fitted with a sealed electrical connection
plug that is compatible with the heater, the mains
supply for New Zealand and meets the requirements of
international standards. This heater must be connected
to a supply voltage that is equal to that stated on the
rating label.
If the mains connection plug or power cord becomes
damaged it must be replaced with a complete assembly
that is identical to the original, and this must be replaced
by an authorised service centre.
Always follow the New Zealand requirements for
connection to the mains supply. If in doubt always
consult a qualified electrician.
Technical Specification
Model GM135-043
Voltage: 220V-240V~ 50Hz
Input Wattage: 2000W
Unit Weight: 1.5kg
IP Rating: IP65
Heater specifications can be found on the data label.

54
Do not use the heater in areas where there is a risk of
explosion or fire from flammable gases. Ensure that
the heating area is kept clear of combustible materials.
Do not use the heater in damp areas, without suitable
ventilation. This heater is not designed for use within
1m or above a water source. Do not place within one
metre (1m) of any water source. Do not place directly in
front of, below or above any power points or switches.
Fire risk exists if this heater is covered by or positioned
near combustible materials.
• This heater is intended for domestic/ household use
only.
• This heater is designed for outdoor use.
• Always ensure that this heater is installed as per the
requirements noted in New Zealand Standard AS/
NZS 3000:2007.
• Always keep heater at least one metre (1m) from
combustible materials.
• DO NOT locate this heater directly below, above or
in front of the power supply socket or switch.
• DO NOT use this heater in either a bathroom or
ensuite.
• DO NOT use a 3rd party timer, or programmable
system with this heater.
• DO NOT clean the heater while the heater is on or
plugged into the mains power supply.
• DO NOT touch any part of the heater while on, hot
surfaces may burn.
• DO NOT use the heater as a dryer.
• DO NOT attempt to modify the heater, power cord,
power plug or the supplied accessories in any way.
• DO NOT expose the heater to rain, water, or use in
damp wet conditions.
• NEVER cover this heater.
• NEVER carry the heater by its power supply cord.
• NEVER use with the power cord coiled, bundled up
or tied up. Always extend fully before use.
• Always ensure that the power cord is fully extended
and NOT in contact with any part of the heater.
• NEVER use the heater if any part of it is damaged.
• Ensure that the heater is disconnected from the
mains supply when installing, cleaning or removing/
installing.
• Ensure this heater is not left on when unattended.
• Ensure the heater is not used in areas where
flammable gases are present, e.g. paint, petrol etc.
• Always allow the heater to cool, about one (1) hour
after the heater has been turned off, before cleaning
the heater.
• Always ensure that the heater is kept clean and free
from dust.
• Only use this heater on a level surface.
• Always turn the heater OFF at the unit switch and
the power point switch when not in use for extended
periods of time.
WARNINGS
SPECIFIC SAFETY INSTRUCTIONS

54
On
Off
ASSEMBLY INSTRUCTIONS
For best results and your safety, please follow the
instructions carefully. DO NOT modify this product in any
way as the distributor will accept no liability for improper
use.
Remove all package material (including anti-vibration
object on the lamp) and check the heater, supply cord
and plug for signs of damage.
Pay attention to the mounting place and all mounting
material (dowels, screws). See figure 1. Ensure they are
suitable and stable enough for mounting and holding the
heater securely.
Before mounting, the minimum safe mounting distances
and tilt angles shown in the figures below must be strictly
followed.
• The distance between the bottom edge of the
heater and the floor must be at least 1.8m. See
figure 2.
• There must be a distance of at least 0.25m between
the heater and the ceiling, roof or other overhangs.
See figure 2.
• There must be a distance of at least 0.5m on each
side of the heater and walls or the like. See figure 2.
• Recommended degree of tilt of the heater to the
mounting surface is 45°. See figure 3.
Pay attention that the heater is not installed in
excessively windy locations.
Fix the mounting bracket to the wall first.
1. Take the wall bracket and select the position on
the wall
2. Mark the holes for the wall bracket and drill
3. Using 4 suitable screws (not supplied) attach the
wall bracket to the wall. Now assemble the wall
bracket to the heater.
Ensure that the place it is to be installed is secure and
firm. Or connect the appliance to a stand (optional).
Adjust the desired angle of heater and tighten all screws.
Check the screws are secure. Mechanical bearing
pressure and oscillation due to wind or rain could lead to
loosening.
Plug in to the power point and use the remote control to
turn on and test as shown on next page. Then observe
for the first 10-15 minutes that the heater works trouble-
free.
If you do not use for an extended period, please remove
batteries from the remote.
Figure 2: Minimum distance to floor, ceiling and wall.
Figure 1: Mounting bracket and anchor dowels provided.
Connection from the wall to the infrared heater.
Figure 3: Tilt angle.
45°
0.5m
0.25m
1.8m
2.2M
3.6M
3.3M
COVERAGE AREA

76
REMOTE CONTROL INSTRUCTIONS
Remote maximum receiving distance: 6m line of sight
Button Graphic Feature
Up Arrow Up one heating level
Max Instantly go to the highest heat level.
Down Arrow Down one heating level
On To switch the heater on:
Press ON. The patio heater has a
soft start function of 33% power. 4
seconds after the heater has been
turned on, it will automatically switch
to the last heating level used.
Note: On first-time use, after 4 seconds the
heater will automatically switch to 100% power.
Off To switch the heater off:
Press OFF. The heater will switch to
standby mode (the receiver indicator
will light up).

76
• Heater must not be located immediately below a
socket outlet.
• Heater must not be located in front of a socket
outlet.
IMPORTANT
POSITIONING THE HEATER
The heater should only be operated at the minimum
distances noted in Figure 2 on page 5.
TO OPERATE
1. Plug into 240V AC power point.
2. To turn on - switch on the power point and the power
switch on the rear of the heater.
3. See remote control instructions on previous page.
4. Unplug lead from power point when not in use.
IMPORTANT: Turn off the heater. Switch off the power
switch and disconnect the heater from the power socket.
Wait for the heater to be completely cool before cleaning
(at least one hour).
Always ensure that the heater has been left for one (1)
hour to cool before cleaning.
• Turn off and disconnect from mains power, allow to
cool.
• Wipe unit over with a damp, clean, soft lint-free cloth.
• For stubborn marks you can use a mild dish washing
solution on a damp, clean, soft lint-free cloth.
NEVER use solvents, e.g. Petrol, Toluene, Methylated
Spirits etc to clean the heater, as these will damage the
surface finish and may cause a fire when unit is next
used.
• DO NOT spray with liquids or submerge in liquids or
water.
• DO NOT allow water or mild dish washing solution to
enter or drip onto the heater.
• DO NOT attempt to clean the interior of the heater.
• DO NOT attempt to open the heater casing at any
time.
Gasmate®is a registered trademark of: Sitro Group Australia Pty Ltd www.gasmate.com.au
Aber Living, Hamilton, N.Z. www.gasmate.co.nz
CLEANING AND CAREOPERATING INSTRUCTIONS

88
20
Limited Warranty
ELECTRIC HEATER RANGE
Aber Living warrants the purchaser of this product against defects in workmanship and material,
for a period of up to 12 months from the date of purchase. The warranty is non-transferable and
becomes void if used for commercial or rental purposes.
Warranty and purchase receipt of this product are to be retained as proof of purchase and must be
presented if making a claim under the terms of the Aber Living Warranty. Repairs under warranty
are free of charge, provided the product is delivered to our Service Department or Authorised
Service Agent and freight charges both ways are paid by the owner. No liability will be accepted for
any loss of damage in transit.
Aber Living reserves the rights to replace or repair the product within the warranty period.
Warranty does not apply to any defect, deterioration (including corrosion if located within 1km of
the sea), loss, injury or damage occasioned by or as a result of the misuse or abuse, negligent
handling or if the product has not been installed and used in accordance with the instructions. The
warranty is void if there is evidence of the product being tampered with by unauthorised persons.
If the product includes one or a number of accessories, only the defective accessory or part will be
replaced, eg. power cable, lamp, reflector.
In the event of Aber Living choosing to replace the product, the warranty will expire at the original
date, i.e. 12 months from the original purchase date.
Where this product contains information from an overseas country, nothing in that
information is intended to limit any condition, guarantee, right or remedy which may be
available under the Consumer Guarantees Act 1993, except to the extent permitted by that Act.
Approved for Outdoor Use Only
For service, spare parts or product information in New Zealand, please call Aber Living
on the Customer Service Line - 0800 161 161. www.aberliving.co.nz
YOUR PURCHASE RECORD (please complete)
Date of Puchase
Model Number
Serial Number (if applicable)
Purchased from
Attach copy of purchase receipt here
Table of contents
Other Sitro Group Electric Heater manuals
Popular Electric Heater manuals by other brands
Trane
Trane BAYHTR1405 Series Installer's guide
DEVOLA
DEVOLA SLIMLINE DVM10WF User instructions

Ducasa
Ducasa Vitro-i 750 Black Instructions for operation and installation

NuTone
NuTone 665RP instruction manual
Beper
Beper RI.163 use instructions

Roberts Gorden
Roberts Gorden Blackheat BH15UT Installation & servicing instructions
Dynasty Fireplaces
Dynasty Fireplaces EF43D Installation instructions & operating manual
Dimplex
Dimplex SP420 Installation and operating instructions
GÜDE
GÜDE GEH 5000 R Original instructions
Rowenta
Rowenta DUALIO 029659 - 38/02 FR050 Instructions for use
Kemper
Kemper 65432KW21 instruction manual

OZONA
OZONA OH010990 user manual
