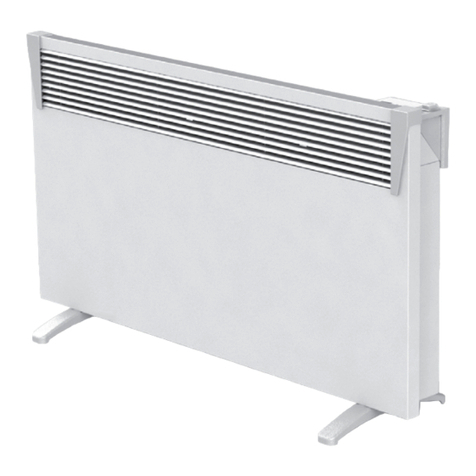
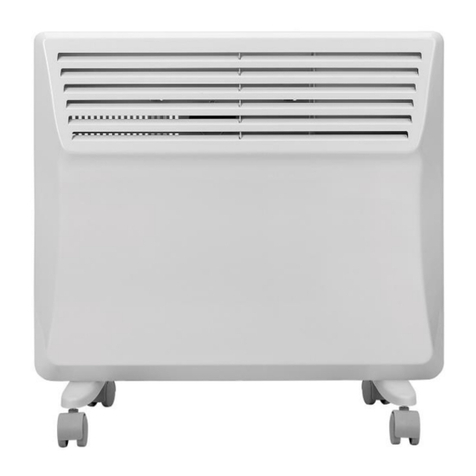
DEVOLA SLIMLINE DVM10WF User manual

ELECTRIC CONVECTOR
HEATER
SLIMLINE PANEL HEATER WITH DIGITAL TIMER
MODEL(s): DVM10WF
DVM15WF
DVM20WF
DVM24WF
User Instructions
Please read and save these instructions

2
Safety Instructions
BEFORE FIRST USE
Read and follow all the instructions in this manual even if you feel you are familiar with
the product and find a place to keep it handy for future reference.
NOTE: The rating of this product (as marked on the product rating label) is based on
specific loading tests. Normal use or the use of other recommended attachments may draw
significantly less power.
IMPORTANT SAFEGUARDS
When using any electrically powered product, basic safety precautions should always be
Followed.
PLEASE READ THE FOLLOWING INSTRUCTIONS CAREFULLY BEFORE USING THE PRODUCT.
WARNING 一to reduce the risk of fire, electrical shock or injury to persons or property:
·Read all instructions before using this appliance and keep them for future reference.
·Use only the voltage specified on the rating label of the heater.
·Do not cover or restrict airflow to the inlet or exhaust grilles in any manner as the appliance may
overheat and become a fire risk.
·Do not cover grilles, block entry or exhaust of airflow by placing appliance against any
surface. Keep all object at least 1 meter from the front, side and rear of the appliance.
·Do not place the appliance close to a radiant heat source.
·Do not operate in areas where gasoline, paint or other flammable liquids are used or stored.
·This appliance heats up when in use. To avoid burns, do not let bare skin touch hot surface.
·Switch off and leave to cool before moving.
·Do not use the appliance to dry clothes.
·Do not insert or allow foreign object or metal utensils to enter any ventilation or exhaust
opening, as this may cause an electric shock, fire or damage to the appliance.
·Do not immerse in liquid or allow liquid to tun into the interior of the appliance, as this could
create an electric shock hazard.
·Do not reach for an appliance that has fallen into water. Switch off at supply and
unplug immediately.
·Do not operate any appliance with a damaged cord, plug or after the appliance malfunctions
or has been dropped or damaged in any manner. Return to a qualified electrical person for
examination, electrical or mechanical adjustment, service or repair.
·Do not operate appliance with wet hands.
·The most common cause of overheating is deposits of dust or fluff in the appliance. Ensure
these deposits are removed regularly by unplugging the appliance and vacuum cleaning air
vents and grilles.
·Do not use this appliance near a window as rain may cause electric shock.
·Do not use abrasive cleaning products on this appliance. Clean with a damp cloth (not wet)
rinsed in hot soapy water only. Always remove plug from the mains supply before cleaning.
·Do not connect the appliance to the mains voltage until completely assembled and adjusted.
·This appliance is not intended for use in outdoor locations.
·Do not use this appliance in the immediate surrounds of a bath, a shower or a swimming pool
or other liquids.
·Always operate upright.

3
·Switch off and leave to cool before moving.
·Do not operate with cord coiled up as a build up of heat is likely, which could be sufficient
to become a hazard.
·The use of an extension cord with this appliance is not recommended.
·Do not remove plug from power socket until the appliance has been switched off.
·Do not remove plug from power socket by pulling the supply cord-always grip plug.
·Always unplug appliance when not in use.
·CAUTION: This product is NOT suitable to be used on long pile carpets or Flokati rugs.
·Do not allow cord to come in contact with heated surface during operation.
·Do not run cord under carpeting, throw rugs or runners etc. Arrange cord away from traffic
areas so that it will not be tripped over.
·Do not twist, kink or wrap the cord around the appliance, as this may cause the insulation to
weaken and split. Always ensure that all cord has been removed from any cord storage area.
·Do not use outdoors or whilst standing on a damp floor.
·Do not store appliance while it is still hot.
·This appliance is not intended for use by young children or infirm persons without
supervision.
·Young children should be supervised to ensure they do not play with the appliance.
·The appliance must not be located immediately below a socket-outlet.
·Do not use this appliance with another programmer, timer or any other device that switches
the heater on automatically, since a fire risk exists if the appliance is covered or positioned
incorrectly.
·All covers on this appliance are intended to prevent direct access to the heating elements and
must be in place when the appliance is in use.
·WARNING: In order to avoid overloading, do not cover the heater.
·To reduce the risk of electric shock, do not immerse or expose the product or flexible cord to
rain, moisture or any liquid other than those necessary for correct operation of the product.
the fireguard does not give full protection for young children and for infirm persons.
If the supply cord is damaged, it must be replaced by a qualified electrical person to
avoid a hazard.
·Do not use this appliance outdoors pr on wet surfaces Avoid spilling liquid on the appliance.
·CAUTION: In order to avoid a hazard due to inadvertent resetting of the thermal cutout, this
appliance must not be connected to an external switching device, such as a timer, or
connected to a circuit that is regularly on and off by the utility.
·Use this appliance only as described in this manual. Any other use is not recommended by
the manufacturer and may cause fire, electric shock or injury.
·This appliance is intended for domestic use.

4
Appliance Overview
Fig.1
Circuit Diagram
Air Outlet
Control Panel
Power Switch
Castor Wheel Stand
Tip over switch
Heating element
KSD thermostat KSD thermostat
Temperature sensor
Switch

5
Installation
Warning
1. Fix the heater correctly on the wall or place the heater in the sturdy position.
2. The heater should be installed so that the controls cannot be touched by a person using a bath
or shower.
3. The heater should be installed so that it is not located directly under a socket outlet.
Clearances
Mounting Guide
Caster Installation & Removal
Air outlet
Minimum 1000mm
Minimum 1000mm
Minimum 1000mm
Floor
This heater MUST be installed to the
minimum required distances at the
four sides of the heater.
Push the button up to remove
the caster
1. Insert the bracket (into the hole), turn it 90° anti-clockwise
to fasten the screw
2. Press the rubber pad (in the hole), fasten it with the screw).
Push the button up to remove
the caster

6
Control Panel
Fig.2 Control Panel
OPERATION
Getting Started
•Carefully remove the heater from the box and keep the carton for off-season storage.
•Ensure the power switch (13) is turned off before plugging the unit in.
•Make sure the heater is safely installed in accordance with the installation instructions.
•It is best to avoid using the heater in an outlet that is already being used for other high-
power electrical equipment, to avoid overloading the circuit.
Power On
•When the product is connected to the power supply, the power indicator (1) will illuminate,
and the Wi-Fi indicator (12) will begin to flash.
•Press the power button (9) to switch the unit on.
Power Off
•Hold the power button (9) for three seconds to switch the unit off.
Half Power and Full Power Selection
•Press the heating power button (8) to change the power to partial or full load.
•At full heating capacity, “HI” is shown in the display (3) and the half heating capacity (2)
"LO" is deactivated.
•In the case of partial capacity heating, "LO" is activated on the display (2) and "HI" is
deactivated on the display (3).
8. Select Full/Half Capacity Heat Mode
9. Power/Set Button
10. Timer Indicator
11. Time Indicator
12. Wi-Fi Indicator
13. Power Switch
1. Power Indicator
2. Half Power Indicator (LO)
3. Full Power Indicator (HI)
4. Heating Indicator
5. Temperature Measure (℃)
6. Upward Adjustment Button
7. Downward Adjustment Button

7
Wi-Fi Reset
•Hold the heat capacity button (8) for 5 seconds to re-set the Wi-Fi.
Child Lock
1. When the unit is in operation, press the up (6) and down (7) buttons simultaneously for 3
seconds. The control panel will now be locked.
2. Press the up (6) and down (7) buttons simultaneously for 3 seconds to deactivate the child
lock.
Open Window Detection
•When the heater is in operation it is automatically in open window detection mode and will
shut down if the ambient temperature rapidly falls below 3 degrees or more.
Signal Sound
•An acoustic signal sounds each time a key is pressed on the unit. If a button is held
continuously the unit will only signal once.
Setting the Thermostat Temperature
•The unit of measure for the target temperature is ℃.
1. Press the Power/Set button (9) then you can select a target temperature using the up (6)
and down keys (7). The temperature setting range is between 5 and 45℃.
2. If no action is taken for 10 seconds after the setting is completed, the system
automatically saves the setting and exits the menu.
Setting the Timer – 24 Hour Shutdown
1. Press the Power/Set button (9) twice then use the up (6) and down keys (7) to select a
shutdown timer within 24 hours.
2. When a timer is set the Timer Indicator (10) will illuminate.

8
Connecting to the App – Smart Life
1. Plug the heater into mains supply suitable for a BS plug.
2. Switch the heater on via the power switch on the right-hand side of the unit (when front
facing). Note: you do not need to switch the unit on via the power button (9) to
connect the device to the Smart Life app.
3. Download / open the Smart Life Application. (For new members go to step 4, existing
users see step 5).
4. Register an account by entering a username/email address and memorable password.
Then sign-in to your account with these credentials.
5. Go to the ‘All Devices’ section of your app and press the + icon in the top right-hand
corner of the screen to add a new device.
6. You will then see a list of product categories on the left-hand side of the screen. Click
Small Home Appliances.
7. You then need to select ‘Heater’. Note: do not select Heater (BLE), Heater (Zigbee) or
Heater (Other).
8. You will then be prompted to enter the Wi-Fi Network details that you wish to connect
to. It is imperative that you are connecting the device using a 2.4GHz Wi-Fi network
and NOT 5GHz as the device will not connect. Once you have entered the Wi-Fi details
press Next.
9. The app will then prompt you to confirm that the Wi-Fi icon on your heater is flashing. If
the icon is blinking rapidly tick confirm then Next. If the icon is not blinking, you will need
to reset the Wi-Fi by holding down the Full/Half Power Select button for a few seconds.
10. The app will then begin searching for the device and should connect within the 2-minute
scanning window. If possible, try to keep the heater, device with the application and the
Wi-Fi router in proximity whilst it is connecting.
11. Once the device is found and connected you can change the name of it by clicking the
pencil icon. You can also select a room that you want to associate the device with.

9
Using the App
1. Use the + and – button on the app to adjust the desired temperature
2. Press the Switch button to turn the unit on & off
3. Press the Gear button to select 1 (Low Heat) or 2 (High Heat)
4. Press Countdown to set a Timer.
a. If the heater is off, the Timer will turn the unit on after the countdown.
b. If the heater is o, the Timer will turn the unit off after the countdown.
5. Press Settings – Child Lock to turn the Child Lock on and off.
6. To set a schedule click Settings then Timer.
a. Click Add then choose the time.
i. Repeat is to choose which days to repeat this setting on.
ii. Note is to put a note to differentiate your schedules
iii. Notification is to send a notification to your phone
iv. Switch is to choose whether the heater turns on or off at the set time.

10
Considerations if the device fails to connect:
-Double check that you are connecting to a 2.4GHz network. If it is not you will need
to look at splitting your SSID. Google, YouTube, your network provider are some
sources to assist with this.
-Ensure the network connection is strong and secure.
-Also check that the Wi-Fi indicator is still blinking.
-Try bringing the router, heater, and device closer (where possible)
If the above recommendations do not work, please contact our customer services
team for further support.
Cleaning & Maintenance
Cleaning
Do not use abrasive cleaning products on this appliance. Clean with a damp cloth (not wet)
rinsed in hot soapy water only. Always remove plug from the mains supply before cleaning.
The heater requires regular cleaning to ensure trouble-free operation:
•Unplug the heater from the mains supply before cleaning.
•Ensure that the heater has been allowed to cool down completely before cleaning.
•Use a damp cloth (not wet) to wipe the exterior of the heater to remove dust and dirt.
•Use a vacuum cleaner to remove dust and fluff from around the grilles.
•Ensure the heater is dry before plugging back into the mains supply.
Service
When you require service, contact your local dealer.
Replacement of supply cord
If the supply cord is damaged must be replaced by a service agent or
equivalent qualified person to prevent a hazard.
Storage
If you do not plan to use the heater for extended periods of time, it is recommended that the
heater is cleaned and then stored (preferably in its original packaging) in a cool dry place.
•Always store the heater when not in use.
•Make sure the heater has cooled down before storing it away.

11
Specifications
Model Number
DVM10WF
DVM15WF
DVM20WF
DVM24WF
Rated Power
500W/1000W
750W/1500W
1000W/2000W
1200W/2400W
Rated Voltage
220-240V~ 50Hz
Dimensions(mm)
W460 x D107 x
H400
W595 x D107 x
H400
W830 x D107 x
H400
W950 x D107 x
400
Room Coverage
(㎡)
12
17
22
26
IP Rating
IP24
Cable Length
1.5m
Clearances
Minimum of 1m from wall/ceiling/floor
Colour
White
Table of information - requirements for electric local space heaters
P
Item
Symbol
Value
Unit
Model identifier(s):
DVM10WF
DVM150WF
DVM20WF
DVM24WF
Heat output
Nominal heat output
Pnom
1.0
1.5
2.0
2.4
kW
Minimum heat output
(indicative)
Pmin
0.5
0.75
1.0
1.2
kW
Maximum continuous
heat output
Pmax
1.0
1.5
2.0
2.4
kW
Auxiliary electricity consumption
At nominal heat output
elmax
0.990
1.432
1.890
2.230
kW
At minimum heat
output
elmin
0.496
0.723
0.946
1.132
kW
In standby mode
elSB
0.00038
0.00038
0.00038
0.00038
kW
Item
Type of heat input, for electric local space heaters
Manual heat charge control with integrated thermostat
[no]
Manual heat charge control with room and/or outdoor temperature feedback
[no]
Electronic heat charge control with room and/or outdoor temperature feedback
[no]
Fan assisted heat output
[no]
Type of heat output/room temperature control
Single stage heat output and no room temperature control
[no]
Two or more manual stages, no room temperature control
[no]
With mechanic thermostat room temperature control
[no]
With electronic room temperature control
[no]
Electronic room temperature control plus day timer
[yes]

12
Electronic room temperature control plus week timer
[no]
Other control options
Room temperature control, with presence detection
[no]
Room temperature control, with open window detection
[yes]
With distance control option
[no]
With adaptive start control
[no]
With working time limitation
[no]
With black bulb sensor
[yes]
Remark:
For electric local space heaters, the measured seasonal space heating energy efficiency ηs cannot
be worse than the declared value at the nominal heat output of the unit.

13
Warranty
Guarantee and service policy
This product is covered by a standard parts or replacement warranty for a period of 12 months
from the date of purchase. Extend your warranty for 12 months for free by visiting
www.devola.co.uk/warranty. Incorrect installation and failure to follow correct operating
instructions are excluded. Consequential costs such as labour charges or damage to surroundings
are expressly excluded.
Contact Us
If you experience a problem with this product you should first contact us on 0121 250 2180 before
taking any further action.
CLAIM YOUR EXCLUSIVE 5% OFF YOUR NEXT ONLINE ORDER
DISCOUNT CODE: DEV5
OFFER VALID FOR 21 DAYS. DON'T MISS OUT!
YOUR DISCOUNT CODE ALSO APPLIES TO OUR SISTER WEBSITES
Visit our websites:
www.devola.co.uk
www.energybulbs.co.uk
www.airconcentre.co.uk
www.ledbulbs.co.uk
This manual suits for next models
3
Table of contents
Other DEVOLA Electric Heater manuals
Popular Electric Heater manuals by other brands

Baxi Fires Division
Baxi Fires Division 828 Longlite Installer and owner guide

Watlow Electric
Watlow Electric WATROD 316-42-5-1 Installation & maintenance manual

Soleus Air
Soleus Air HM5-15R-32 owner's manual

Lucci Fresco
Lucci Fresco THERMASTRIP 200060 installation instructions

Warmtec
Warmtec VARILLA user manual

EUROM
EUROM EK Delta 2000 operating instructions