5
-tighten lock knob to keep the position
! do not force the head beyond 170 degrees
• Adjusting the upper light q
-the upper light pivots 270 degrees
-manually move the head to any position
! do not force the head beyond 270 degrees
! the lights automatically turn o when the upper light
is folded closed qb
• Mounting options
-release hook from the tool to hang it
-use tripod mount to mount the tool on a tripod
MAINTENANCE / SERVICE
• This tool is not intended for professional use
• Always keep the tool clean
! remove battery from tool before cleaning
ENVIRONMENT
• Do not dispose of electric tools, batteries, accessories
and packaging together with household waste material .
The electric tools, accessories and packaging should be
sorted for environmentalfriendly recycling
! prior to disposal protect battery terminals with heavy
tape to prevent short-circuit
INTRODUCTION
• The worklight is intended for illumination in dry indoor areas
• This tool is not intended for professional use
• Read this instruction manual carefully before use and save it
for future reference 3
SAFETY
GENERAL
• Handle the worklight with care
• Do not direct the light beam at persons or animals
and do not stare into the light beam yourself (not even
from a distance)
• Do not cover o the lamp head while operating the
worklight (the lamp head heats up during operation
and can cause burns when the heat accumulates)
• Only use the following batteries and chargers with this
tool
-SKIL battery: BY5197E-03 BY5196E-03
-SKIL charger: SC5358E-01 QC5360E-01 QC5359E-00
• Do not use battery when damaged; it should be replaced
immediately
• Do not disassemble the battery
• Do not expose tool/battery to rain
• Permitted ambient temperature (tool/charger/battery):
-when charging 4...40°C
-during operation –20...+50°C
-during storage –20...+50°C
EXPLANATION OF SYMBOLS ON TOOL/BATTERY
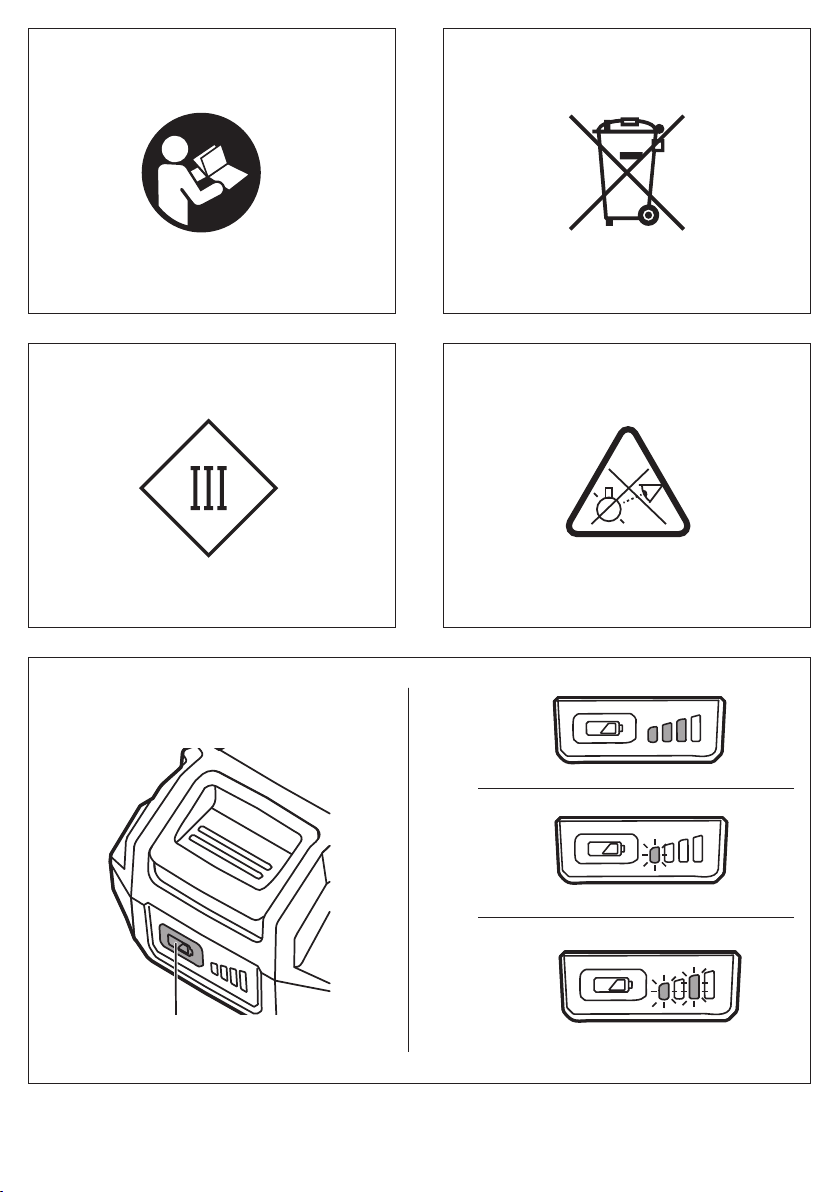
3 Read the instruction manual before use
4 Do not dispose of electric tools and batteries together with
household waste material
5 Insulation class III
6 Do not stare into the light beam
USE
• Charging battery
! read the safety warnings and instructions provided
with the charger
• Removing/installing the battery 1
• Battery protection
The tool is suddenly being switched o or prevented from
being switched on, when
-the load is too high --> remove load and restart
-the battery temperature is not within the allowable
operating temperature range of -20 to +50°C --> 2
levels of the battery level indicator start ashing when
pressing the battery level indicator button 7c; wait
until battery has returned within the allowable operating
temperature range
-the battery is nearly empty (to protect against deep
discharge) --> a low battery level or ashing low battery
level 7b is shown by the battery level indicator when
pressing the battery level indicator button; charge battery
! do not continue to press the on/o switch after the
tool is switched o automatically; battery may be
damaged
• Operating the tool 8
-press switch on/o switch once to turn on the light in high
brightness mode
-press switch on/o switch again to select low brightness
mode
-press switch on/o switch again to turn o 1 light
-press switch on/o switch again to turn o both lights
• Adjusting the lamp head 9
-release lock knob
-the lamp head pivots 170 degrees
-manually move the head to any position