Sky Angel NeuLion User manual

Setup & ser Guide

IMPORTANT SAFETY INSTRUCTIONS
1. Read these instructions.
2. Keep these instructions.
3. Heed all Warnings.
4. Follow all instructions.
5. Do not use this apparatus near water.
6. Clean only with a damp cloth.
7. Do not block any o the ventilation openings. Install in accordance with the
manu acturers instructions.
8. Do not install near any heat sources such as radiators, heat registers, stoves or
other apparatus (including ampli iers) that produce heat.
9. Do not de eat the sa ety purpose o the polarized or grounding-type plug.
A polarized plug has two blades with one wider than the other. A grounding plug
has two blades and a third grounding prong. The wide blade or the third prong are
provided or your sa ety. When the provided plug does not it into your outlet,
consult an electrician or replacement o the obsolete outlet.
10. Protect the power cord rom being walked on or pinched particularly at plugs,
convenience receptacles and the point where they exit rom the apparatus.
11. Only use attachments/accessories speci ied by the manu acturer.
12. Use only with a cart, stand, tripod, bracket, or table speci ied by the manu acturer,
or sold with the apparatus. When a cart is used, use caution when moving the
cart/apparatus combination to avoid injury rom tip-over.
13. Unplug this apparatus during lightning storms or when unused
or long periods o time.

IMPORTANT SAFETY INSTRUCTIONS (con inued)
14. Re er all servicing to quali ied service personnel. Servicing is required when the apparatus has been
damaged in any way, such as power-supply cord or plug is damaged, liquid has been spilled or objects
have allen into the apparatus, the apparatus has been exposed to rain or moisture, does not operate
normally or has been dropped.
15. The power unit socket-outlet shall be installed near the equipment and shall be easily accessible.
16. The apparatus shall not be exposed to dripping or splashing and no object illed with liquid, such as
vases, shall be placed on the apparatus.
17. Where the MAINS plug or an appliance coupler is used as the disconnect device, the disconnect
device shall remain readily operable.
WARNING: To reduce the risk o ire or electric shock,
do not expose this appliance to rain or moisture.
Supply Voltage: DC12V1.5A
MAX POWER: <18W
CAUTION
RISK OF ELECTRIC SHOCK
DO NOT OPEN
The lightning lash with arrowhead symbol, within an
equilateral triangle, is intended to alert the user to the
presence o uninsulated “dangerous voltage” within the
product’s enclosure that may be o su icient magnitude
to constitute a risk o electric shock to persons.
The exclamation point within an equilateral triangle is
intended to alert the user to the presence o important
operating and maintenance (servicing) instructions in
the literature accompanying the appliance.
CAUTION: TO REDUCE THE RISK OF ELECTRIC
SHOCK, DO NOT REMOVE COVER (OR BACK).
NO USER SERVICEABLE PARTS INSIDE. REFER
SERVICING TO QUALIFIED SERVICE PERSONNEL.

1
This guide provides in ormation related to the setup and use o your
receiver. Follow these simple steps and you will be on your way to
enjoying the best in amily entertainment in just minutes.
Welcome!
Revised: 1/25/2012

2
Table of Contents
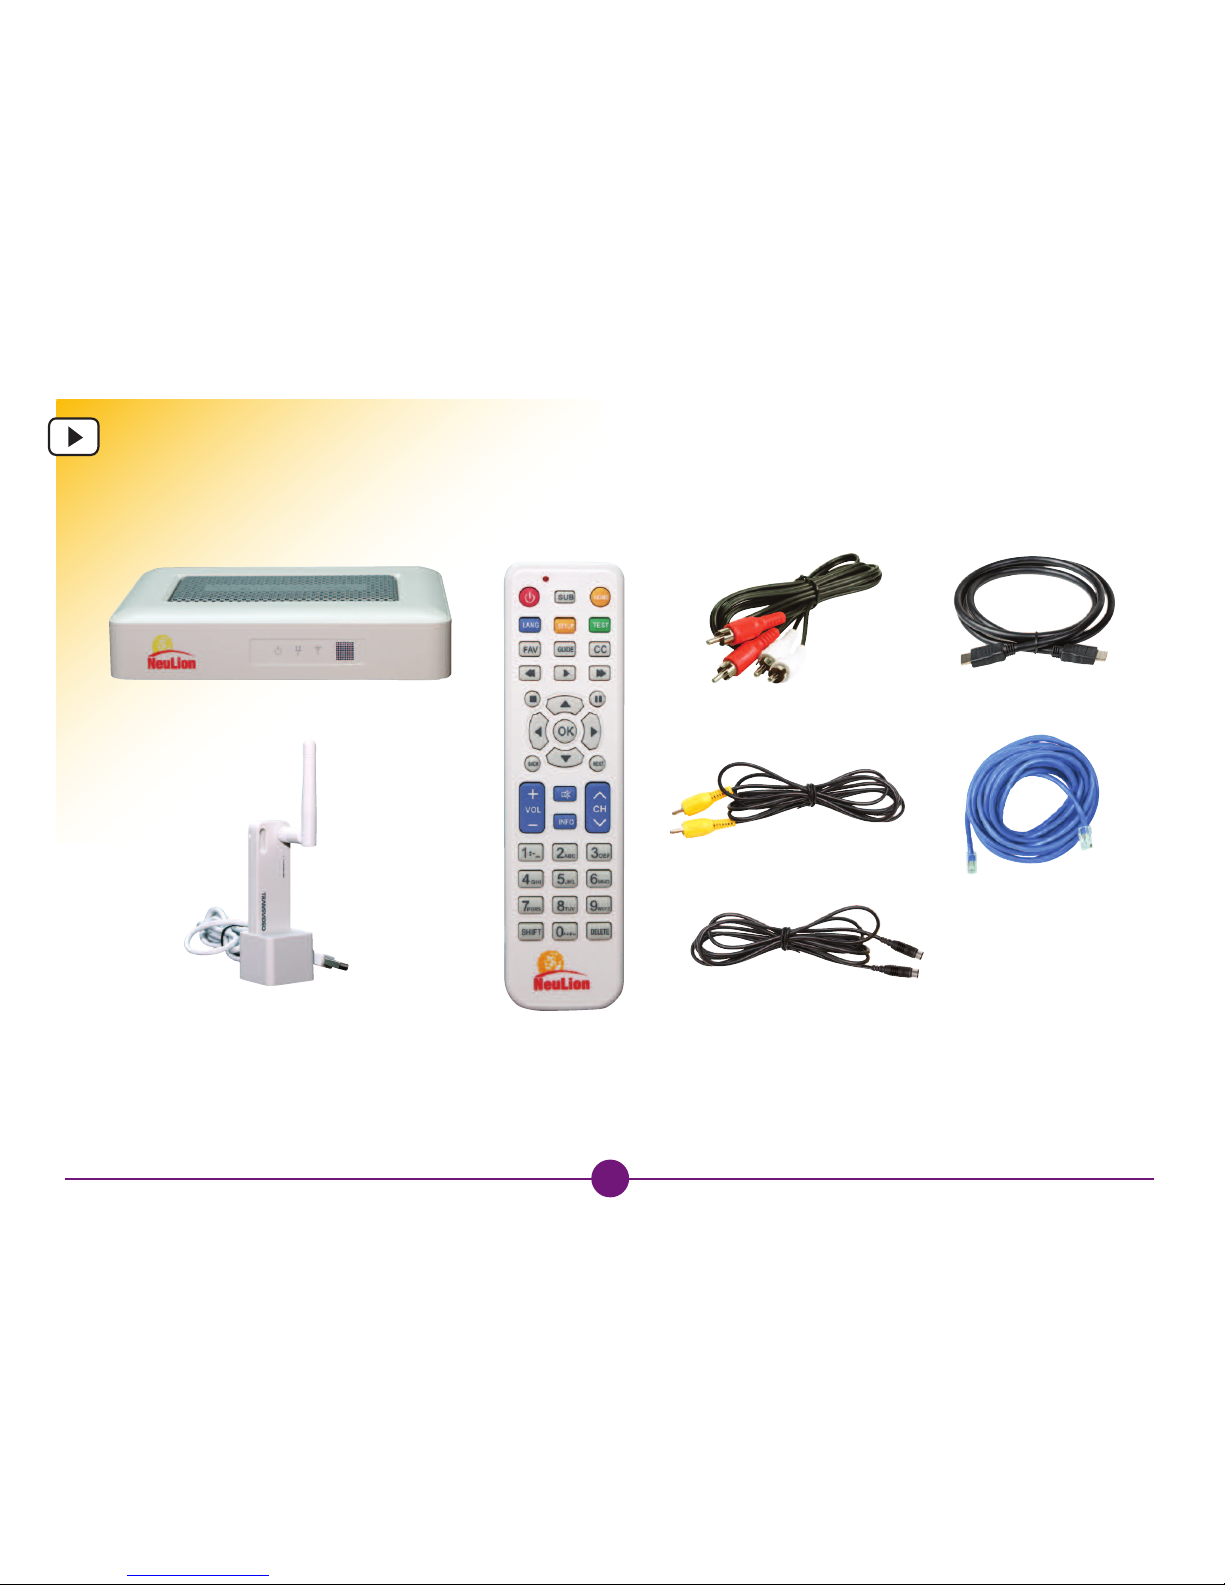
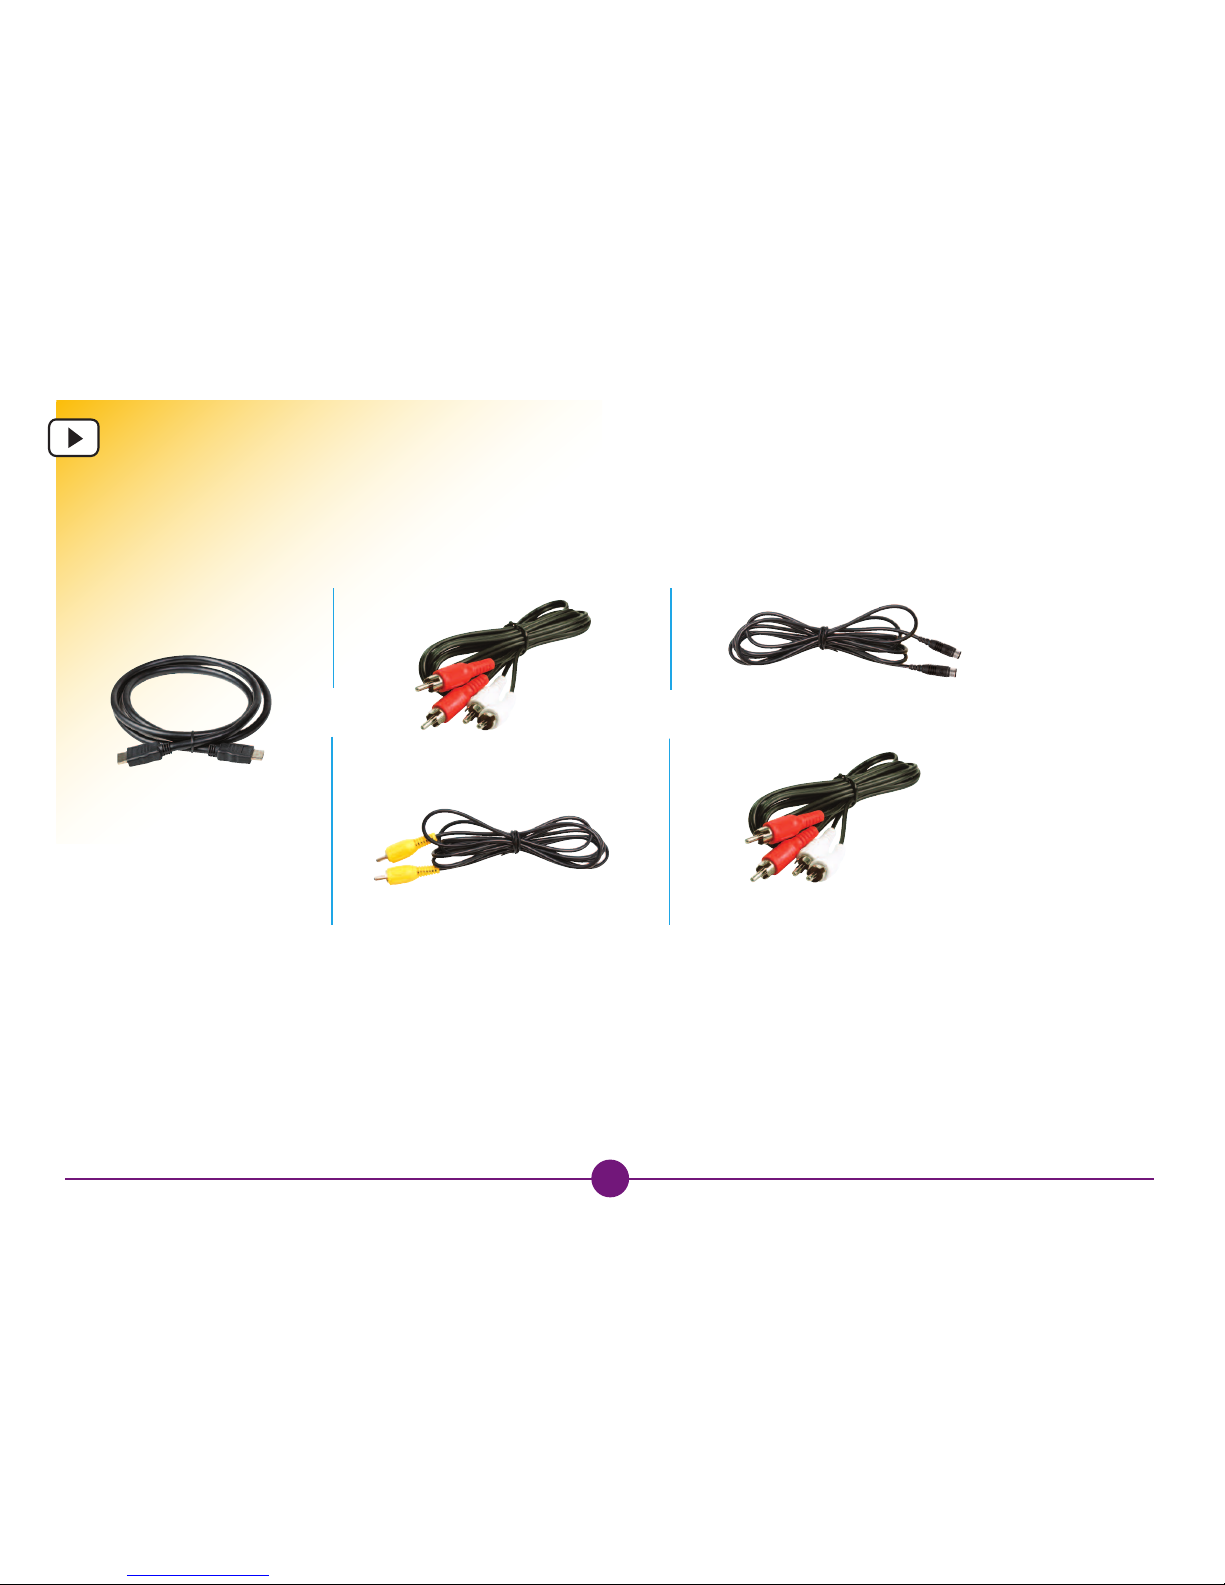
Equipment: In The Box ..................................................................3
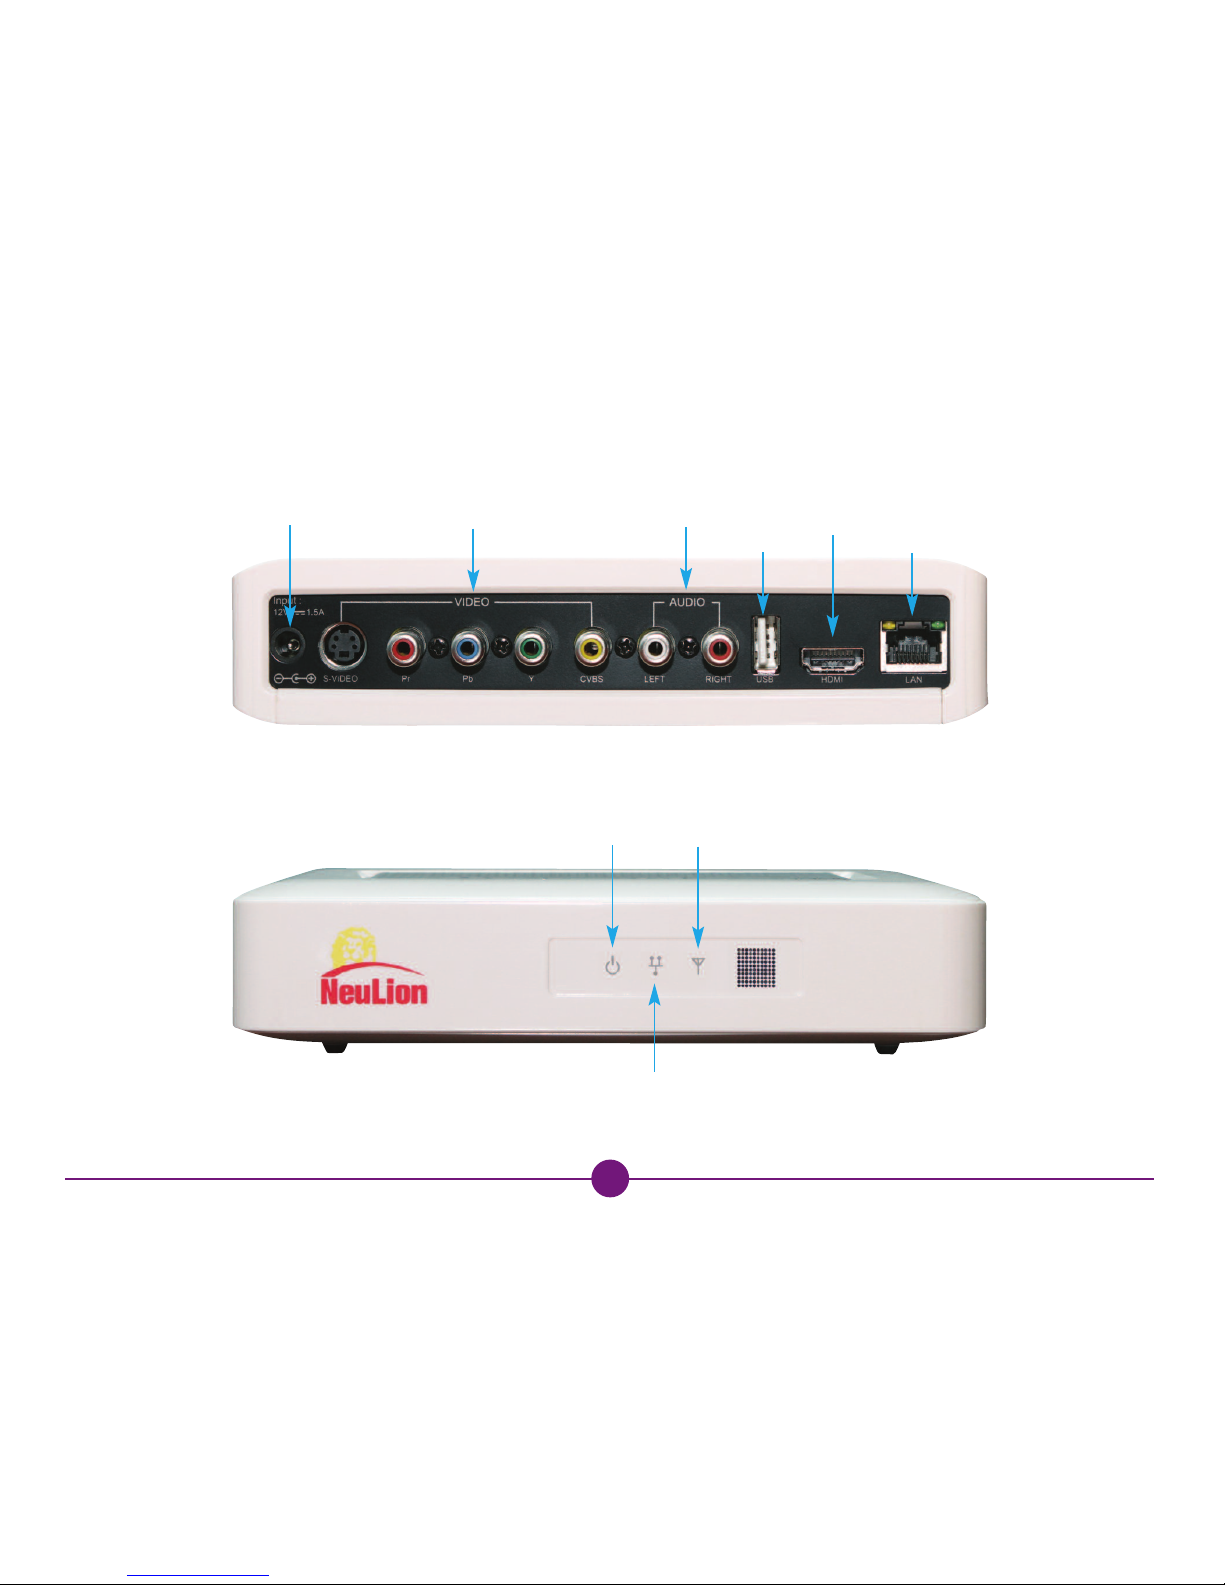
Equipment: The Receiver ..............................................................4
Equipment: The Remote Control Unit ......................................5
Quick Setup.......................................................................................6
Step 1: Connecting t e Receiver to your TV........................7
Connecting irectly to Your Television .................................8
Step 2: Connecting: To t e Internet........................................9
Connecting: irectly to Your Modem
Using an Ethernet CAT-5 Cable ............................................10
Connecting: To a Router Using an
Ethernet CAT-5 Cable...................................................................11
Connecting: To a Router Using a Wireless Connection ...12
Quick Setup for Wireless Connection.................................13
Quick Setup for Wireless Connection (continued) ........14
Wireless Configuration ............................................................15
Step 3: Start Watc ing t e Service.......................................16
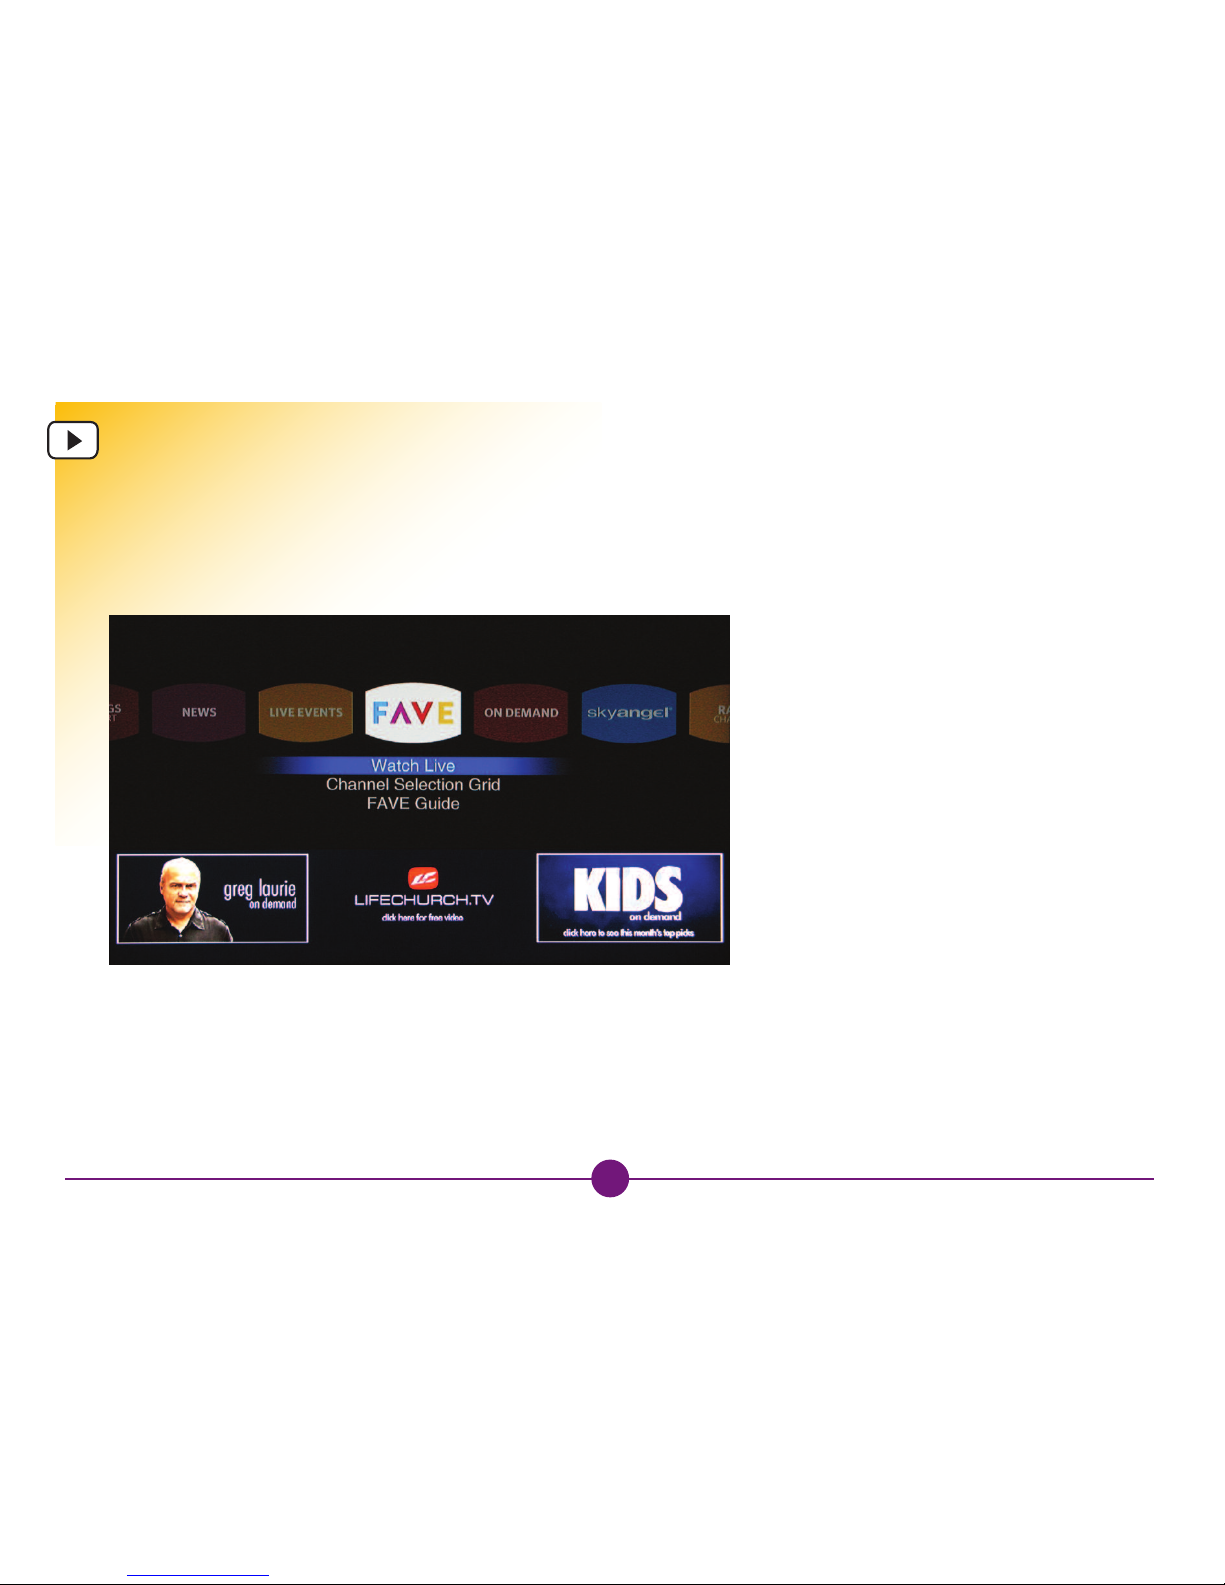
Navigating: The Homepage and Channel Selection Grid....17
Choosing: Channel Selection and Channel Playback ........18
Revised: 1/25/2012
Choosing: Video On emand (VO )......................................19
Choosing: Subscription VO (SVO ) .....................................20
Choosing: Internet Video ...........................................................21
Choosing: Market Place...............................................................22
My Account: VO Bookmarks & Account Information.......23
Settings & Support ........................................................................24
Network Configuration Screen..................................................25
System Configuration Screen ....................................................26
Summary Screen ...........................................................................27
How to Use the Virtual Keyboard.............................................28
Frequently Asked Questions......................................................29
Frequently Asked Questions (continued)..............................30
Frequently Asked Questions (continued)..............................31
Appendix A: Network Settings ..................................................32
Appendix B: Finding Your ESSI or SSI ...............................33
Appendix B: Finding Your ESSI or SSI (continued).......34

3
Equipment: In The Box
Revised: 1/25/2012
The following items will come with your Receiver Package:
Wireless Network
Access Adapter Remote Control Unit
Ethernet CAT-5 Cable
Audio Cables
H MI Cable
Composite Video Cable
S-Video Cable
Receiver

4
Equipment: The Receiver
Revised: 1/25/2012
Power Jack Video Output Audio Output H MI Port
USB Port LAN Ethernet Port
Note: The HDMI port is available, however at this time the service o ers limited
High De inition content.
Power Light Wireless Light
Local Area Network (LAN) Light

5
Equipment: The Remote Control nit
Revised: 1/25/2012
“SUB” key is not currently used.
Press “HOME” to go back to Homepage.
Press “SETUP” to go to Setting
Configuration screen.
Press “TEST” to see the bit rate when
you are watching a program.
“CC” key is not currently used.
Press the “OK” button to choose
selections.
“NEXT” key is not currently used.
Press “CH” UP and OWN to navigate
between channels.
Press “INFO” when playing to activate
“Channel Playback” and “Channel Selection”;
It also shows the current time or remaining
time when viewing a VO program.
Power Button.
“LANG”/“FAV” keys are not currently used.
Press “GUI E” on channel listing page
to switch between live channels and
Electronic Program Guide.
Press “ ”, “ ”, “ ” and “ ” to
rewind, fast forward, pause and stop.
Press “ ” to play normally.
“BACK” to go back to previous page.
Press “ ” to mute.
“VOL+” / “VOL-“ to change volume.
The number keys can be
used to switch channels.
“SHIFT” will display additional letters
such as capital letters and symbols on
virtual keyboard during setup.
NOTE: Remote requires two “AA” batteries.
SHIFT 0
DELETE
PQRS TUV
WXYZ
789
GHI JKL
MNO
DEFABC
4
123
56
CH
VOL
INFO
HOME
BACK
NEXT
OK
LANG
FAV CC
SETUP
GUIDE
TEST
SUB
The “ ELETE” key is not currently used.

6
Quick Setup
Revised: 1/25/2012
Homepage
For Wireless Setup Instructions refer to page 15.
I you can see the Homepage similar to the picture on the
le t, it means you have setup success ully. Congratulations!
You are ready to watch! Use the arrow keys on your
remote control to highlight menu options and press “OK”
to make a selection.
Connect the H MI cable between your TV and the receiver, and then select
the relevant H MI Input from your TV remote control. (*Recommended
for best picture quality.)
Connect an Ethernet Cat-5 Cable between your router/modem and the
receiver. (Recommended for most stable Internet output.)
Connect the power cable to a power outlet. In the future you can use the
remote control to power on and off the receiver. on’t forget to put the
batteries in the remote control while the receiver is powering on.
Now, you should see the service logo with a “please wait” message. Then the Homepage will
appear, similar to the screen below. If an error screen appears instead, continue to the next
page and follow the step-by-step procedures.
*Note: The service offers limited High efinition
content at this time.
HDMI
HDMI
HDMI
LAN
HDMI
USB
RIGHT
LEFT
CVBS
S-VIDEOY
Pb
Pr
AUDIO
VIDEO
Input
12V15A
HDMI
HDMI
HDMI
OCO
Power
Outlet
Set-top
Box
Router
TV

7
Step 1: Connecting the Receiver to Your TV
Revised: 1/25/2012
The following page will show you how to connect the receiver directly to your TV.
You will need the following accessories:
Audio Cables
H MI Cable
Composite Video Cable
S-Video Cable
OR OR
Audio Cables

8
Connecting Directly to Your Television
8
Revised: 1/25/2012
Connect the red and white audio cables
to the AU IO ports on the rear panel of
the receiver with their corresponding
colors.
Take the other end of the red and white
cables and connect them to the corre-
sponding red and white AU IO ports
on your TV.
Note: Make sure you connect to the
“AUDIO IN” port. I there is only one
set o AUDIO ports, it is probably an
“AUDIO IN”.
The following steps are for connecting the receiver directly to your TV.
You can choose “ONE” of the following options to connect video:
Option A: Yellow Video Cable (Good Video Quality)
Connect the yellow video cable between the yellow VI EO port on the back
of the receiver and the yellow VI EO port on the TV. Please make sure the
port is a “VI EO IN” port.
Option B: Component Video (Better Video Quality)
Component Video cables are not included. Connect the color coded component
video cables to the corresponding colored ports under “VI EO” on the back
of the receiver. Connect the other ends to your TV.
Option C: HDMI Cable
(Excellent Video Quality)
Connect the H MI cable between
the H MI port on the back of the
receiver and H MI port on the
TV. H MI will also provide audio;
therefore you do not need to
connect the red and white audio
cables for audio. Recommended
for best picture quality.
Rear Panel
of Receiver
Audio Ports
on TV
Note: If the H MI setup is not
working, please test your TV and
Internet connection by setting up the
receiver using the composite cables.
Red Audio
White Audio
Rear Panel
of Receiver
Video Ports
on TV
HDMI
HDMI
HDMI
HDMI
HDMI
HDMI
BC
A

9
Step 2: Connecting to the Internet
Revised: 1/25/2012
In order to receive the services, your receiver must connect to the Internet through
your existing broadband connection ( SL, cable modem, etc.). You can connect
using either an Ethernet CAT-5 cable or the Wireless Network Access Adapter. Note
that you may need a wireless router to have a wireless connection.
You will need the following accessories:
OR
Ethernet CAT-5 Cable
Wireless Network
Access Adapter
Wireless Router
Note: It is recommended to hard-wire the receiver to the Internet
modem using the CAT-5 Cable, as demonstrated on page 8,
for best Internet signal stability.

10
10
Revised: 1/25/2012
Turn off your modem first. Make sure the
receiver is turned off.
Connect the Ethernet CAT-5 cable into the
Ethernet port of your modem. Modems may
only output the Internet to one device. If you
plan on using a computer or any other
Internet device, you will need to use a router.
Connect the other end of the Ethernet CAT-5 cable into the “LAN”
port on the back of the receiver.
Turn on the modem. Wait a minute or two until all lights stop blinking
and the modem is stable.
Connect the power cord of the receiver to a power outlet and
power on your receiver. You should be ready to watch!
Turn to “Step 3: Start Watching the Service” on page 16.
Ethernet Port
Rear Panel of Receiver
Use this setup method in order to use the Ethernet cable or if you do not have a wireless network. Please refer to the next
page if you are using a router. Make sure you have already followed “Step 1: Connecting the Receiver to Your TV ”.
Back of Modem
Coaxial Cable Port
Connecting: Directly to Your Modem
using an Ethernet CAT-5 Cable

11
Connecting: To a Router using an Ethernet CAT-5 Cable
Revised: 1/25/2012
Your router should already be connected to your
Cable or SL Modem as shown below.
Connect the Ethernet CAT-5 cable into the “LAN” port on
your receiver. Then connect the other end into any available
port on your router (e.g. numbered “1”, “2”, “3” or “4”).
Connect the power cord of the receiver to a power outlet
and power on your receiver. You should be ready to watch!
Turn to “Step 3: Start Watching the Service” on page 16.
Please make sure you have already followed “Step 1: Connecting the receiver to your TV ”. Use this setup method if you have
a router with either a cable or SL modem and you are not using a wireless connection. “Linksys” and “Belkin” are recom-
mended routers for use with the receiver. Make sure your router is already connected to your Cable or SL modem and that
they are working properly. If your computer is connected to the router, make sure the Internet connection is working.
Back of Cable/ SL Modem
Rear Panel of Receiver
Back of Router

12
Connecting: To a Router using a Wireless Connection
12
Revised: 1/25/2012
Make sure you have already followed “Step 1: Connecting the
receiver to your TV ”. You must have a wireless network with a wire-
less router in order to use wireless connection. Connect your wireless
router to your cable modem or SL Modem. “Linksys” and “Belkin”
are recommended routers to use with the receiver. Make sure your
wireless router is on and working properly.
Remove the cap from the end of the Wireless Network Access
Adapter and connect it to the USB port of the receiver.
You can now configure the service to recognize your wireless network.
Turn to the next page.
Before you begin the wireless installation process…
Make sure to have the following information in front of you:
•Your Series II receiver(s) that you just received and the Wireless Network Access Adapter
•Information related to your wireless Internet including your ESSI and WEP/WPA Key (if applicable)
For future reference fill out the information below:
Network Name (ESSI ):
WEP/WPA Key (password):
Box MAC Address:

13
Quick Setup for Wireless Connection
Revised: 1/25/2012
Wireless Network selection screen
Make sure you have already followed “Step 1: Connecting the receiver to your TV ”.
You should see the service logo with a “please wait” message. The receiver will
automatically search for any available networks.
The Wireless Network selection screen will appear which is similar to the screen
below. If the “Encrypt Mode” is “on”, you will need a key (password) to access.
If it is “off”, you can access the wireless network directly by pressing “OK” on
the remote control.

14
Quick Setup for Wireless Connection (continued)
14
Revised: 1/25/2012
Choose your Network Name (ESSI ) and press “OK” on the remote
control. A pop-up window, pictured on the right, will appear.
The receiver will recognize the ESSI and Encryption type. Move
the cursor to the “password” and press “OK” on the remote control.
It will display a virtual keyboard. Use the virtual keyboard to input
your password. Move the cursor to “ ” to complete your pass-
word setting. Move the cursor to “confirm” on the virtual keyboard
to complete your wireless setting.
Note:
•WPA is case sensitive;
•When you use the virtual keyboard, you can press “SHIFT” on
the remote control to change case. Refer to page 29 “How to
Use the Virtual Keyboard” for more information;
•After the wireless setting is completed, press “HOME” on the
remote control. If you can see the Homepage similar to the
picture on the right, it means you have set up successfully.
Congratulations! You are ready to watch! Use the arrow keys
on the remote control to highlight the menu options and press
“OK” to make a selection.
Wireless Setup
Virtual Keyboard
Homepage

15
Follow the steps below to change
your wireless setting.
1. When you are on the Homepage,
press right on the remote control
to move the cursor to “Settings &
Support” and highlight “Network”.
Then press “OK” on the remote
control to access the Network Setting
Screen. You can also simply press
“SETUP” on your remote control.
2. Press down on your remote
control to move the cursor to “Search
Wireless”. Then press “OK” on the
remote control to access the wireless
network results page.
3. The Wireless Network selection
screen will appear which is similar to
the screen to the right. If the “Encrypt
Mode” is “on”, you will need a key
(password) to access. If it is “off”,
you can access the wireless network
directly by pressing “OK” on the
remote control.
4. Choose your Network Name (ESSI )
Wireless Configuration
Revised: 1/25/2012
Settings on Homepage
Wireless Setup
Virtual Keyboard
and press “OK” on the remote control. A
pop-up window, pictured on the left,
will display.
5. The receiver will recognize ESSI and
Encryption type. Move the cursor to the
“password” and press “OK” on the remote
control. A virtual keyboard will appear.
Use the virtual keyboard to input your
password. Move the cursor to “ ” to
complete your password setting. Move
the cursor to “confirm” on the virtual
keyboard to complete your wireless
setting.
Note:
•WPA is case sensitive;
•When you use the virtual keyboard, you can
press “SHIFT” on the remote control to change
case. Refer to page 29 “How to Use the Virtual
Keyboard” for more information;
•After the wireless setting is completed, press
“HOME” on the remote control. If you can see
the Homepage similar to the picture on the
right, it means you have set up successfully.
Congratulations! You are ready to watch! Use
the arrow keys on the remote control to
highlight the menu options and press “OK” to
make a selection.

16
Step 3: Start Watching the Service
Revised: 1/25/2012
Homepage
Error Message Screen
This section will confirm that your setup of the receiver
is completed.
If you see the “Homepage” screen similar to the top left, you are
now ready to start waching your favorite TV or radio programs!
Turn to the next page.
If you see an Error Message screen similar to the bottom left,
your receiver is unable to connect to the Internet. You may
need to configure your network setting manually. Turn to the
“Frequently Asked Questions” section on page 30.

17
After you turned on your receiver, you should see the “Homepage” as
pictured on the left. You can go to “Homepage” by pressing “HOME”
on the remote control from any screen. The Main Menu (navigation
panel) is on the upper section of the Homepage. Use right , left to
browse between each section on this Main Menu. Press “OK” to
choose your selection.
Channel Selection Grid:
Choose Main Menu to enter Channel Selection Grid. The left side of the
screen lists the channels with their channel logos and the right side
shows the Electronic Program Guide (EPG) with the corresponding
times. You can switch between these two sections by pressing “GUI E”
on the remote control. Use right , left on the remote control to
change the date on the EPG in order to access the 48-Hour Playback
Feature and down and up on the remote control to navigate
between programs. Press “OK” on the remote control to play the
program you selected.
Navigating: The Homepage and Channel Selection Grid
Revised: 1/25/2012
Homepage
Channel Guide
Table of contents