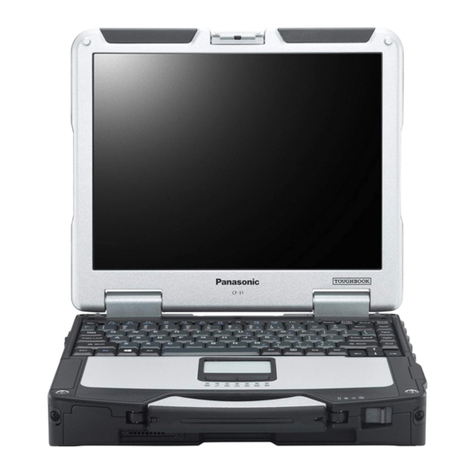
Skye Psion Workabout User manual

Using the Psion Workabout with
DataHog2
SKYE INSTRUMENTS LIMITED
21, DDOLE ENTERPRISE PARK
LLANDRINDOD WELLS
POWYS, LD1 6DF
TEL: +44 (0) 1597 824811
FAX: +44 (0) 1597 824812
EMAIL: [email protected]
WEB: www.skyeinstruments.com
Updated June 2006

2
CONTENTS
USING THE PSION WORKABOUT WITH DATAHOG2
1INTRODUCTION 3
2SETTING UP 4
2.1 Initial switch on 4
2.2 Setting up the Workabout for communication with the DataHog2 4
2.3 Installing the PC software 4
3OPERATION 5
3.1 Connecting to the DataHog2 logger 5
3.2 To display ‘live’ data 5
3.3 To download data from the DataHog 6
3.4 Transferring data to a PC 6
3.5 Deleting data from the Workabout memory 7
4 GRAPHING DATA IN SKYE SOFTWARES 8
4.1 265SKYECS WizzCom Software 8
4.2 SkyeLynx Deluxe Software 8

3
1INTRODUCTION
This manual describes the operation of the Psion Workabout hand-held PC with the Skye
Instruments DataHog2 datalogger. The Psion has many more uses, menus and facilities which are not
described here.
The Workabout system consists of:
1Psion Workabout hand-held PC
1User guide
1Lithium coin cell back up battery
2Main batteries size AA alkaline
1Psion - PC datalead
You will also require the RS232 datalead supplied with the DataHog2 datalogger.

4
2SETTING UP
2.1 Initial switch on
Follow instructions in the Psion Workabout User Guide for installing the lithium coin cell
backup batteries and the main AA batteries. This user guide also shows the layout of the keypad,
connections etc on the Workabout.
Press the ON/ESC button on the keypad, the Psion logo will appear.
Press the MENU button and use the arrow buttons to choose SYSTEM SCREEN. Press the ENTER
button.
When you switch the Workabout off using the OFF button, it will come back in the same
‘menu’ position as when it was switched off (except if batteries have failed, when it will display the
Psion logo as above).
2.2 Setting up the Workabout for communication with the DataHog2
Use the arrow keys to scroll through the icons to highlight the COMMS icon. Press ENTER to
display the main Terminal Window – this looks like a blank screen with a flashing cursor in the top
corner.
Press MENU, press the right arrow button to choose the SPEC (Special) menu. Use the up &
down arrows to highlight PORT and press ENTER. Use the arrow keys to select Port A and Baud Rate
9600. When Parameters is highlighted, press the TAB button – use the arrows to select Data Bits 8,
Stop bits 1, Parity None, Ignore Parity Yes. (It is likely that these settings are already in place). Press
ENTER twice to return to the main Terminal Window.
To return to the icon display, press MENU, choose the SPEC Special menu as above, use the
arrows to scroll down to EXIT and press ENTER.
2.3 Installing the PC software
To transfer data from the Psion Workabout to a PC you can use the Skye softwares SkyeLynx
Standard, WizzCom (265SC) or SkyeLynx Deluxe.
Install the software CD as described in the program’s instruction manual.
In SkyeLynx Standard, choose DataHog2 as the device and the appropriate Com Port on your
PC.
In WizzCom, choose File, Configure and Configure Comm Port. Choose DataHog2 and the
appropriate Com Port on your PC.
In SkyeLynx Deluxe, choose Settings, Configure Instrument Profile, name a profile Psion
Workabout, choose the appropriate Com Port on your PC and enter a default DataFile Identifier such as
xxxxxxxxxxxx (must be 12 characters).

5
3OPERATION
3.1 Connecting to the DataHog2 logger
If using for the first time, make sure the DataHog is switched on by following the instructions
on the temporary card fixed to its base.
Switch on the Workabout, choose the COMMS icon and press ENTER.
Connect the logger’s RS232 datalead between the DataHog and the Workabout. The Round 8
pin plug should be fitted and gently screwed into the DataHog RS232 socket, the 9 pin D connector
should be fitted to the Workabout’s RS232 socket.
The DataHog will begin to beep once every 10 seconds and the following message will be
seen in the Workabout’s Terminal Window:
*<ANY NUMERIC KEY TO WAKE-UP (!0 TO 9!) >*
hh:mm:ss dd.mm.yy (being the current time and date as set in the DataHog logger)
You can use the arrow keys to move around the Terminal Window to view the whole text if
wished.
(If you do not hear the beep check the DataHog batteries. If you do not see the message above,
check the datalead is fully connected and check the settings in the Workabout described in Chapter 2).
If the message above is displayed, you may now communicate with the DataHog logger as
described in the logger’s instruction manual.
To ‘wake-up’ the DataHog into Main Menu mode, press the 2 key at one second intervals
until the Main Menu is displayed. NOTE – when the logger is in Main Menu mode it is not recording
or logging data. To return the DataHog to log mode, press the ON/ESC key (when in log mode the
DataHog will beep once every 10 seconds when the RS232 datalead is connected).
3.2 To display ‘live’ data
Connect the DataHog to the Workabout and ‘wake-up’ into Main Menu mode as described in
Section 3.1 above. You can use the arrow keys to move around the Terminal Window to view the
whole text if wished.
1. Press the 0 (zero) key to choose Option 0 – Display readings from all active channels.
2. Each time you press the SPACE key the logger will display a line of data in the format :
hh:mm:ss dd.mm.yy (current time and date)
00 xxxxx 01 xxxxx 02 xxxxx 03 xxxxx 04 xxxxx etc.
Channel numbers 00, 01, 02, 03, 04 etc are followed in turn by the current reading (xxxxx) from
the sensor attached to that channel. Please see the Hardware Configuration Certificate at the front
of the DataHog2 instruction manual for details of which sensor is attached to which channel.
3. To exit live display mode press the ON/ESC key.
4. Press the ON/ESC key again to return to log mode – the DataHog will begin beeping again.
*** NOTE– caution should be used when displaying wind speed readings in this mode. Accurate m/s
measurements will only be displayed if the space bar is pressed to activate a reading at the same time
interval as the logger’s SAMPLE time (usually set to 30 seconds). This is because the logger is
measuring windrun in metres over a set time period (e.g. 30 seconds SAMPLE time) to calculate wind

6
speed in m/s. For accurate measurements always refer to the data the logger has automatically stored
(i.e. download the data).
3.3 To download data from the DataHog
Connect the DataHog to the Workabout and ‘wake-up’ into Main Menu mode as described in
Section 3.1 above. You can use the arrow keys to move around the Terminal Window to view the
whole text if wished.
1. Press the 4 key to choose Option 4 – Offload Data.
2. Press the MENU key and then the right arrow key 3 times to display the TRAN (Transmit /
Receive) menu.
3. Press the down arrow key to highlight CAPTURE and press ENTER.
4. Enter a file name for the date under TO NAME, e.g. data1234.txt (maximum of 8 letters plus .txt)
and press ENTER. Now press any key to proceed, e.g. A and the data stored in the logger’s
memory will scroll up the screen and be captured into your filename.
5. When the data has stopped scrolling press the MENU button. CAPTURE OFF is already
highlighted, press ENTER to close the data file.
6. Press any key to proceed, e.g. A
7. Press ON/ESC to return the DataHog logger to log mode. It will begin beeping once every 10
seconds again.
8. Disconnect the RS232 datalead.
You may switch off the Workabout in this state if you wish, it will switch on
showing the same screen again later. Or if you prefer return to the icon display, press MENU, choose
the SPEC Special menu , use the arrows to scroll down the EXIT and press ENTER.
3.4 Transferring data to a PC
Start the Skye PC software as usual.
Switch on the Workabout, choose the COMMS icon and press ENTER. (If you switched it off
in Terminal Window last time it will still be in that mode).
Connect the Psion-PC datalead between the RS232 socket on the Workabout and the chosen
PC comms / serial port.
If using SkyeLynx Deluxe, click Logger, Connect to current instrument, choose Psion
Workabout in the drop down box and click Connect.
In all PC softwares, choose the File menu and Open Data Capture File. Type in a filename
including the full folder address to save the data on the PC hard drive.
On the Workabout:
1. Press MENU, use the arrow keys to choose the TRAN menu and highlight TRANSMIT, press
ENTER.
2. When FROM NAME is highlighted, press TAB and use the arrow keys to highlight your filename
as entered in Section 3.2 above, e.g. data1234.txt, press ENTER. (If you cannot see it at first,
highlight ‘\’ and press ENTER, this may bring up another ‘folder’, scroll to find your file)
3. FROM NAME should now show your filename, press ENTER again. The data should now be
scrolling up the blue window on the Skye software on the PC.

7
When the data has finished scrolling, on the Skye PC software choose the File menu and Close
Data Capture File. You can view and analyse your data saved in the filename above, use View Data
Files in WizzCom or SkyeLynx Deluxe, or Microsoft Word, Excel etc.
Disconnect the Psion-PC datalead. You may switch off the Workabout in this state if you wish, it
will switch on showing the same screen again later. Or if you prefer return to the icon display, press
MENU, choose the SPEC Special menu , use the arrows to scroll down the EXIT and press ENTER.
3.5 Deleting data from the Workabout memory
The Workabout has a 2Mbyte memory, this will hold approximately 4 datafiles of ‘full’ DataHog
memory, or may more smaller ones. You will find it necessary to delete some data files once they have
been safely transferred to the PC.
If the Workabout is still in the Terminal Window (blank screen with cursor), return to the icon
display - press MENU, choose the SPEC Special menu , use the arrows to scroll down the EXIT and
press ENTER.
1. In the icon display, press MENU, use the arrow keys to choose the FILE menu and highlight
DELETE FILE and press ENTER.
2. When FILE NAME is highlighted, press TAB and use the arrow keys to highlight the filename
you wish to delete and press ENTER. (If you cannot see it at first, highlight ‘\’ and press ENTER,
this may bring up another ‘folder’, scroll to find your file and press ENTER)
3. FROM NAME should now show your filename, press ENTER again. Press Y to confirm delete.

8
4 GRAPHING DATA IN SKYE SOFTWARES
Once you have transferred the data from the logger to the PC, you will be able to analyse it
using Microsoft Excel or similar softwares, or the Skye softwares 265SKYECS WizzCom and
SkyeLynx Deluxe.
4.1 265SKYECS WizzCom Software
The single data file containing all the data from the logger’s memory must first be converted
into “dayfiles” suitable for graphing by the WizzCom software. There is an automatic function within
the software to do this. It will separate the data into individual files each containing data from one day.
1. Start the 265SKYECS WizzComsoftware
2. Click on the TOOLS menu and choose DataHog2 / MiniMet2 and then Convert Data Files for
Display
3. Click on the button Select File and locate the file, e.g. data1234.txt, that you have transferred to the
PC from the Psion. Click OK
4. The logger’s data will be shown in the small blue window. Click on the button Convert File.
5. Wait a few moments until the button marked Cancel changes to Finish.
6. The file conversion is now complete. Click on the Finish button.
7. The data is now stored in the C:\SKYEDATA folder on the PC and is ready to graph or summarise
in WizzCom as required.
4.2 SkyeLynx DeluxeSoftware
The data transferred from the PC cannot be immediately used in Skye Lynx Deluxe. It must
first be converted into WizzCom “dayfiles” as described above. There is an automatic function within
the SkyeLynx Deluxe software which will then import the WizzCom “dayfiles” and convert them to
the SkyeLynx Deluxe format, ready for use.
1. Follow steps 1 to 7 of the 265SKYECS WizzCom software instructions above.
2. Start the SkyeLynx Deluxe software
3. Set up an Instrument Profile for your logger, please see Chapter 5 of the SkyeLynx Deluxe manual
for details.
4. Click on the FILE menu and File Conversions
5. Click on the link Import data Files from WizzCom.This will bring up a window with a calendar.
6. Choose the logger’s DataFile identifier from the drop down box.
7. Using the calendar click on the start date of the data. Then choose the Ending Date tab and click on
the end date of your data. The software will convert all data between these dates. Click OK.
8. The software will give you a message to say that all existing data will be amended. Click Yes to
continue.
9. The software will inform you how many “dayfiles” have been successfully converted.
10. The file conversion is now complete. Click the Exit button to return to the main software.
11. The data is now stored in the C:\SKYEDATA folder on the PC and is ready to graph or summarise
in SkyeLynx Deluxe as required.
This manual suits for next models
1
Table of contents

