SkyLabs Cheshire Eyepiece User manual
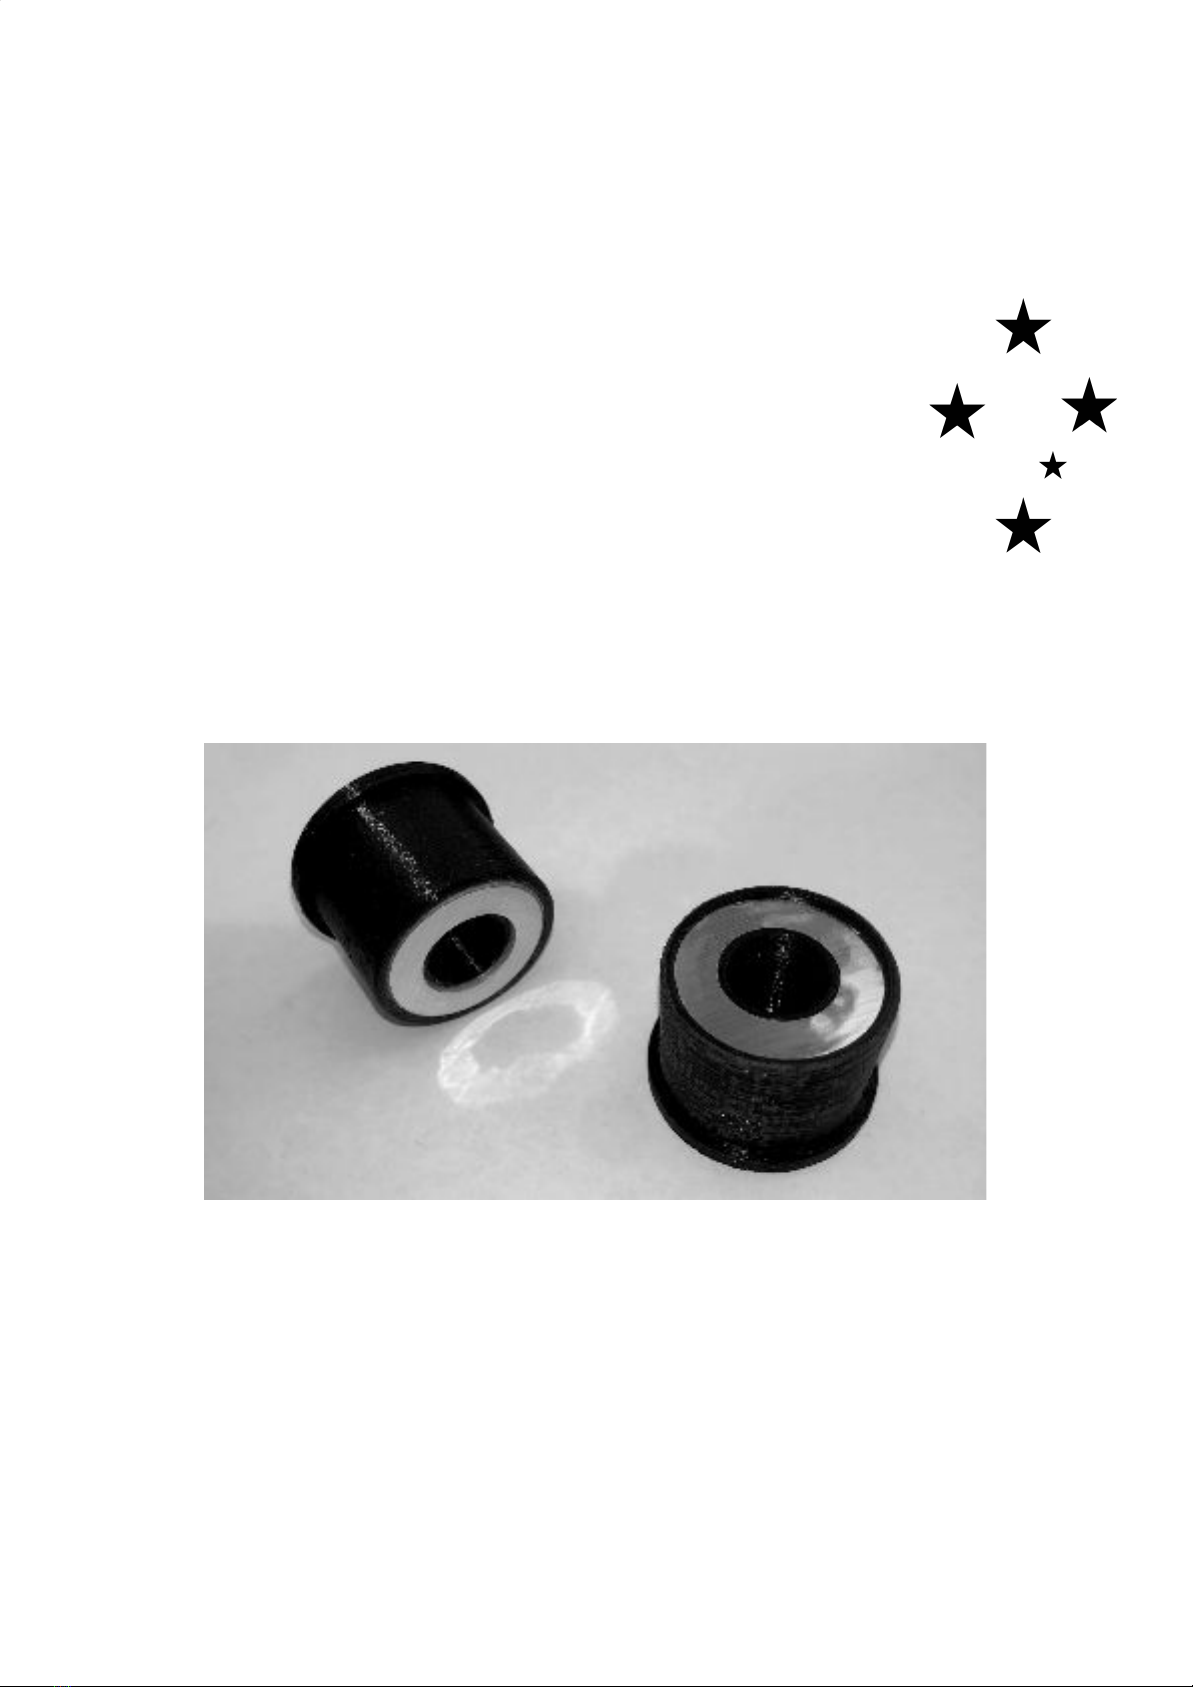
Skylabs Cheshire Eyepiece Quick Guide
Accurate Collimation tool for Newtonian Telescopes
The collimation (alignment) of the mirrors of the telescopes is extremely
important for visual observation. In the case of really fast telescopes (focal ratio
< 5) and astrophotography, the collimation becomes critical.
The Skylabs Cheshire Eyepiece helps align the optical axes of the main mirror
and the secondary mirror of a Newtonian telescope. Unfortunately, traditional
Cheshire eyepieces are quite subjective and collimation becomes a challenge
as they are not able to achieve the precision required for astrophotography and
relatively fast telescopes (focal ratio < 5).
The Skylabs Cheshire Eyepiece relies on a reflective spot perfectly centered in the main
mirror of the Newtonian telescope and a reflective circle at the edge of the Cheshire
eyepiece. The image of the circle is reflected several times by the mirrors of the telescope
providing an incredible objective and accurate telescope collimation.
Figure 1: Skylabs Cheshire Eyepiece
Single beam laser collimators are relatively affordable and easy to use. Unfortunately, they
can not help to correct the off-axis position of the secondary mirror or ensure the collimation
of the surfaces of both mirrors. While the laser collimator really helps to speed up the
process, in order to ensure the perfect collimation between the two mirrors, a Cheshire is
always required.
The mirror spotting template and center spots are also available for those mirrors without a
center spot. Select the right size of your spot and template. Request the small triangle for
1.25” Cheshire eyepiece or the big one for 2” Cheshire. Obviously, if you have a 2” focuser a
2” Cheshire eyepiece is highly recommended.
How to collimate your Newtonian telescope with Skylabs
Cheshire Eyepiece
Important note before you get started. If you don’t have a central spot in the main mirror
from your Newtonian telescope, follow these steps.
Collimate the mirrors
With time, this will become a quick and easy routine. If you are new in the telescope
collimation, we strongly suggest practicing this operation at home before getting into the
field. This way, you are going to spend more time observing and less time setting up the
telescope.
Important note: modern Newtonians have an offset on the secondary mirror. If you are also
using laser collimation, you will notice that the laser beam impacts in the middle of the short
axis of the secondary mirror but not in the middle of the long axis. When using a Cheshire,
you will also notice that the center spot is not located in the center of the shadow generated
by the secondary. Use the circle reflected by the Skylabs Cheshire Eyepiece as a reference.
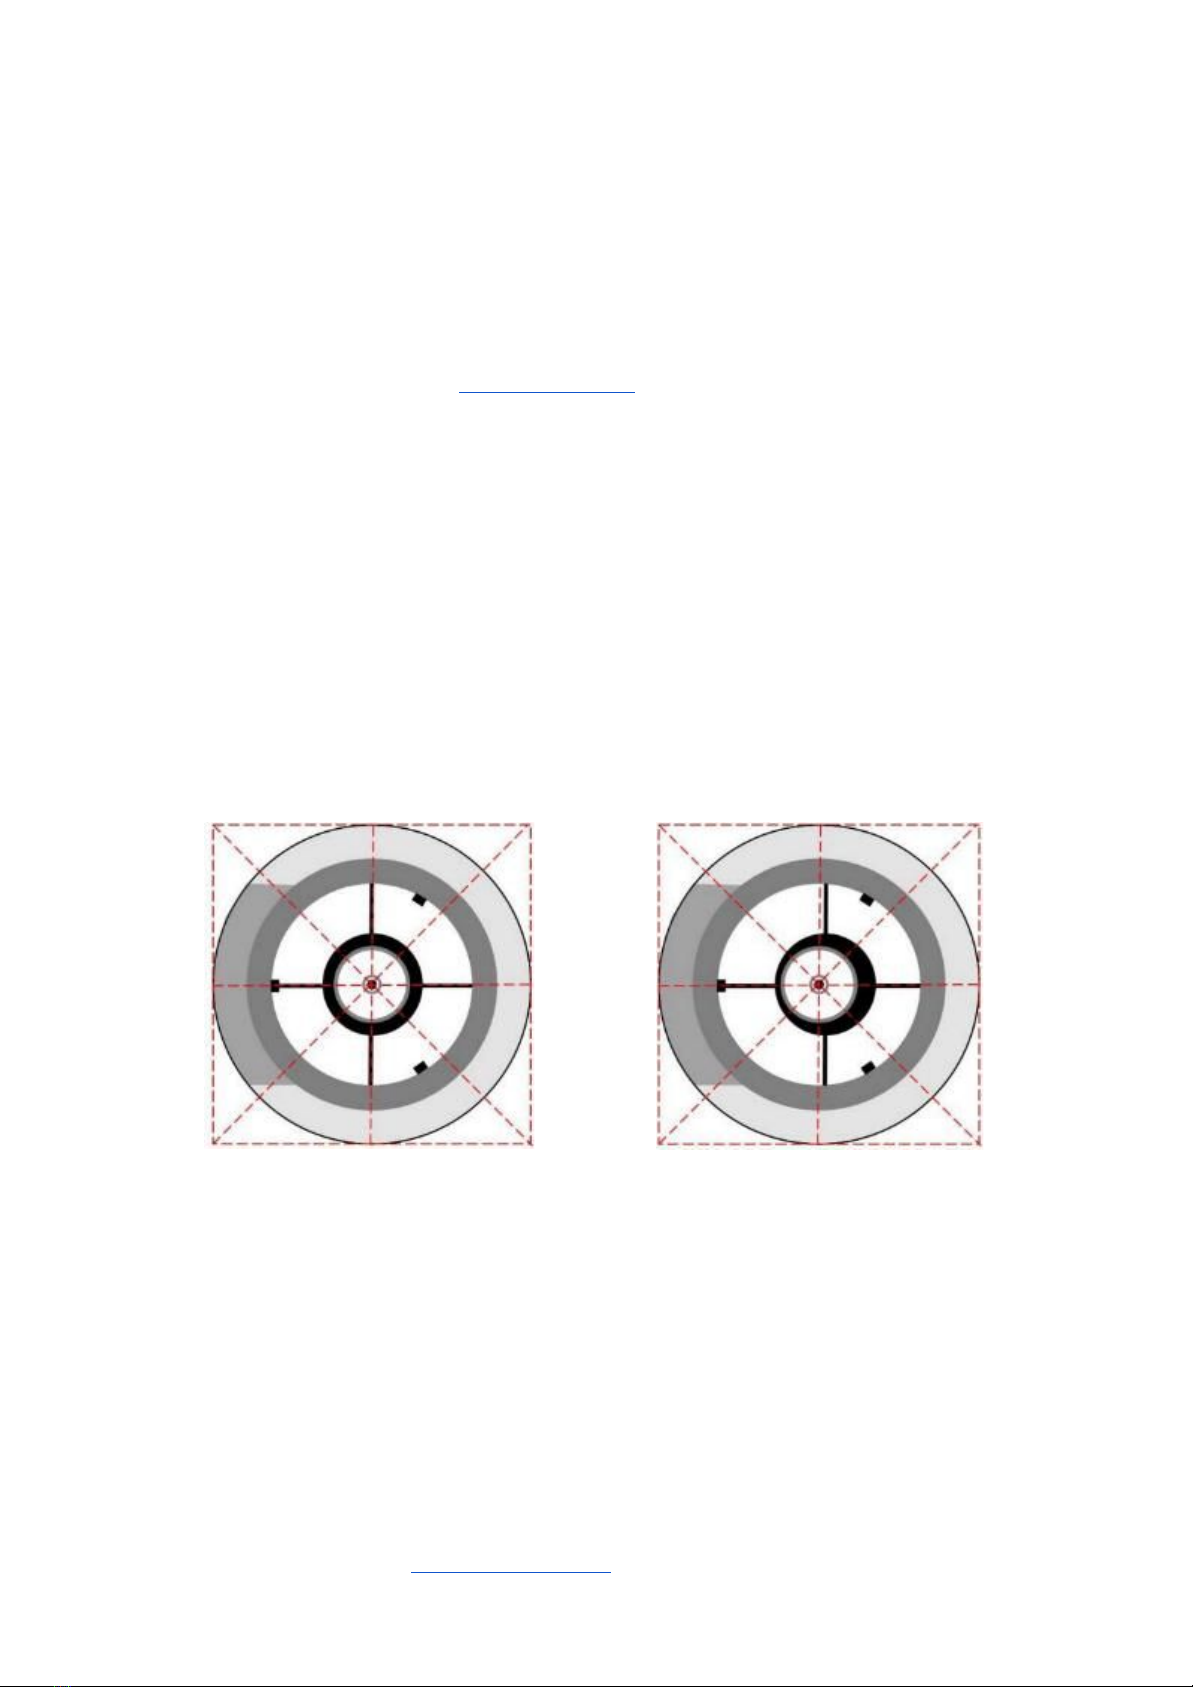
Slow scope collimation the classic
collimation pattern
Fast scope (f5 and above )
collimation pattern note the offset
Figure2: illustrations courtesy of Jason Khadder
Use a laser collimator for a quick and rough collimation
Before getting started, check if your laser collimator is actually collimated. Consider using
this method to review and fix the potential misscollimation of the laser. You can use a Barlow
lens to reduce potential collimation issues of the laser.
1. Introduce the laser collimator in your focuser without using the locking screws.
Visit http://skylabs.co.nz for more information
2
2. Use the collimating screws of the secondary mirror to point the laser beam to the
very center of the hole in the triangle center spot. You may use one or two screws at
the same time to achieve it.
3. Untighten the locking screws of the primary mirror.
4. Turn the primary mirror screws until the laser beam returns to the center of the laser
collimator.
5. It doesn’t need to be super accurate, because then you are going to use the Skylabs
Cheshire Eyepiece which is a way more accurate than the laser collimator.
Skylabs Cheshire Eyepiece
Use the Skylabs Cheshire Eyepiece in order to achieve very accurate collimation.
6. Introduce the Skylabs Cheshire Eyepiece in your focuser without using the locking
screws.
7. Point the telescope to a bright bulb or illuminate the main mirror using a flashlight.
This will make the reflective ring of the Skylabs Cheshire to reflect back and forth to
the eyepiece.
8. Untighten the locking screws of the primary mirror.
9. Turn the primary mirror screws until the triangle center spot sits in the middle of the
circle of the reflective ring of the Cheshire.
10. When tightening the locking screws the mirror might move a bit, which may require
another iteration but using the locking screws this time.
11. NOTE: If you are using high-end and strong collimation screws, you don’t need to
use the locking screws anymore.
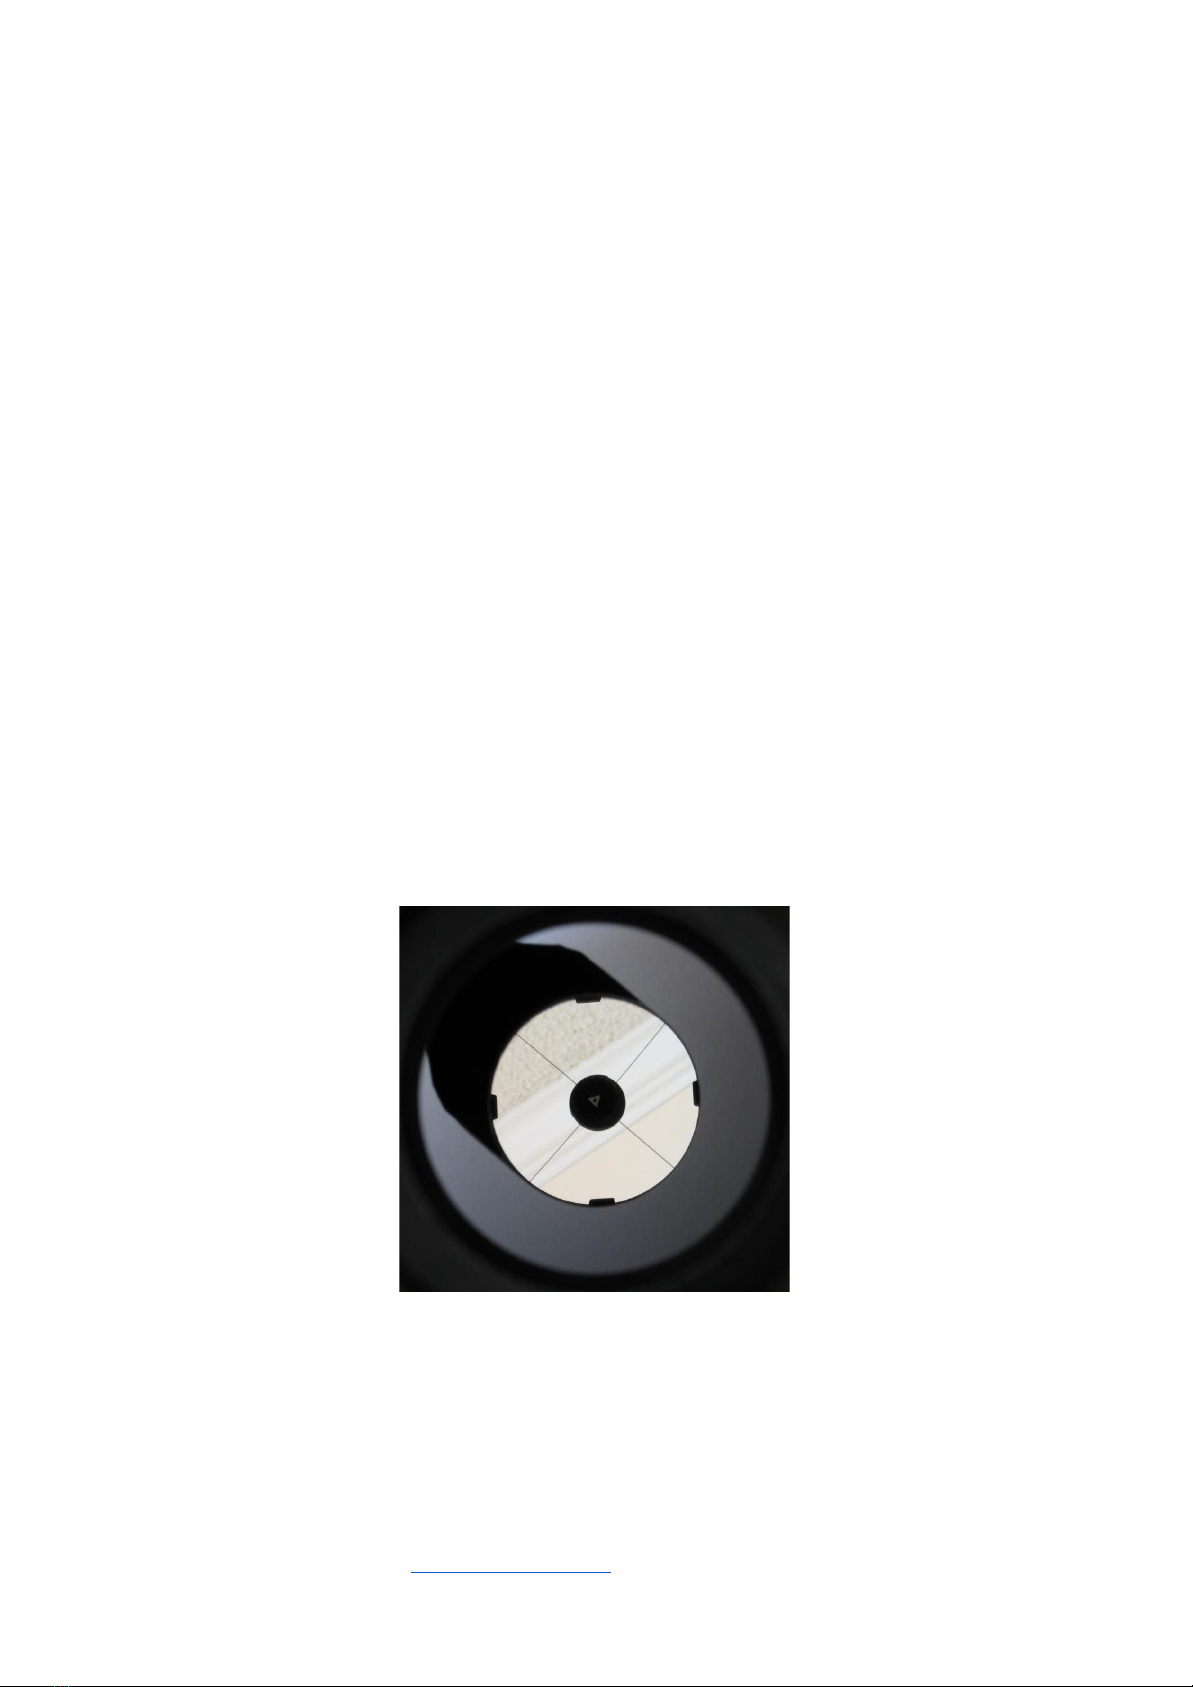
Figure 3: View of a perfect collimated Newtonian telescope.
Secondary Alignment (usually not required)
Before you start with the secondary alignment, be aware that usually, high-end Newtonian
telescopes do not require this operation. The secondary alignment does not need to be
absolutely perfect. The secondary alignment is only critical if your telescope has a relatively
Visit http://skylabs.co.nz for more information
3

small secondary mirror, which is usually the case of telescopes tuned or designed for strict
visual observation.
The objective of this exercise is to place the secondary mirror in order to intercept the light
cone coming from the main mirror by aligning it with the focuser.
In order to achieve that, follow these steps:
1. Introduce the Skylabs Cheshire Eyepiece in your focuser without using the locking
screws.
2. Introduce a grey or colored sheet underneath the secondary mirror. This will avoid
distractions from the main mirror.
3. Introduce a white sheet at the opposite side of the focuser, behind the secondary
mirror. This will create more contrast.
4. Untighten the locking screws of the secondary mirror.
5. The position of the secondary has three degrees of movement.
a. towards the walls of the tube. You can move this position by adjusting the
appropriate spider vanes thumb knobs. This is the less common adjustment.
b. along the tube axis (between the main mirror and the spider). You can move
this position by loosening or tightening the secondary holder center.
c. Tilt and rotate. You can adjust this position by loosening the secondary
mirror adjustment screws, rotate the secondary mirror, then finally adjust the
set-screws to re-align the focuser axis. This is the key movement to point the
secondary silhouette offset towards the primary mirror.
6. If your secondary is perfectly aligned, you should be able to see a circle form the
secondary mirror perfectly aligned and centered with the circular edge of the focuser
tube. If you can not see an image like in figure 3, iterate step 5 until you achieve it.
Visit http://skylabs.co.nz for more information
4
Table of contents


